Overclocking
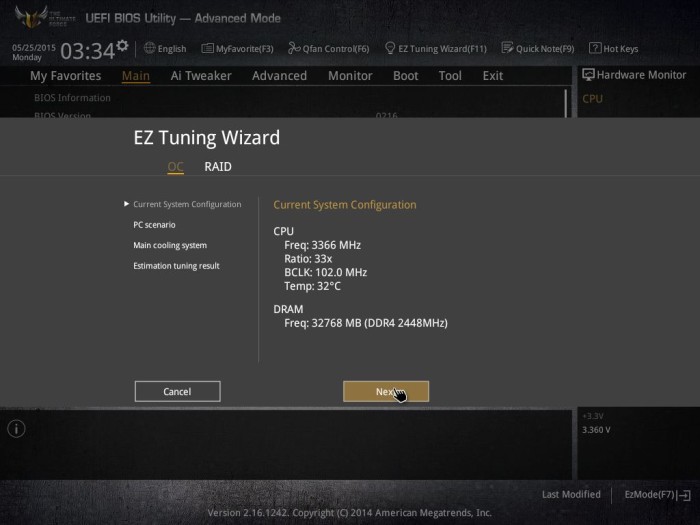
Lets start with Bios Overclocking specifically the “EZ Tuning WIzard (F11).
We hit F11 (The Ez Tuning Wizard) and were greeted with this screen so we hit “Next”.
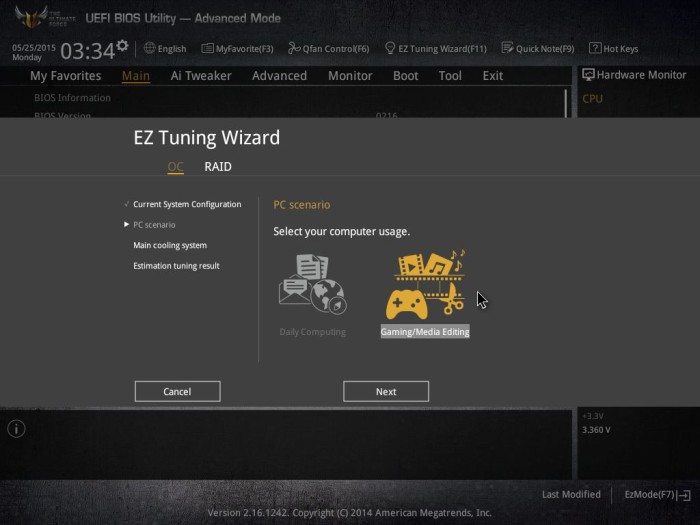
Since we mainly use the Test rig for high-end computing e chose Gaming / Media Encoding and hit “Next”.
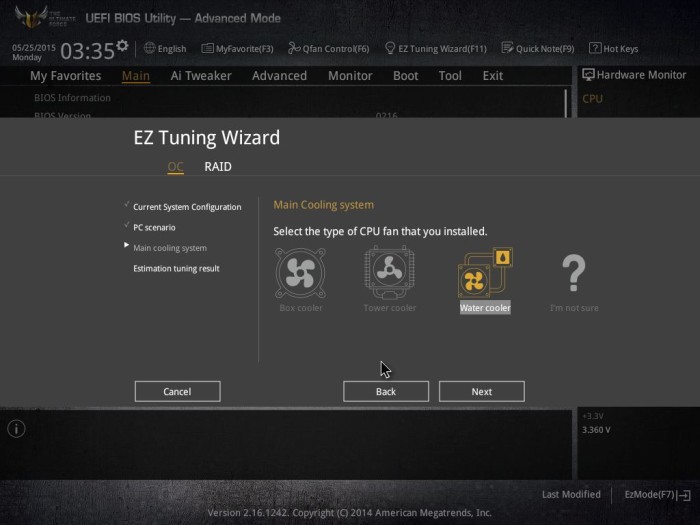
We are using the SilverStone TD02 dual radiator AIO water cooling solution we chose Water cooling and hit “Next”.
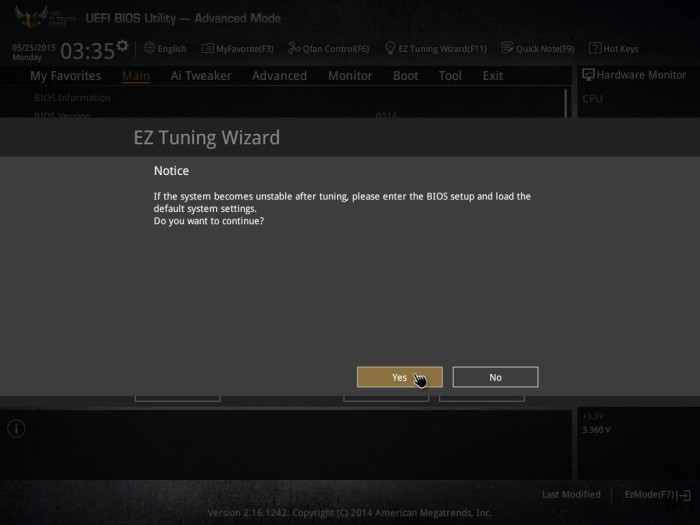
We got a warning screen saying if the system became unstable go into BIOS and choose the default system settings and it ask us if we wanted to continue so we hit yes. Keep in mind we already tuned the fans earlier so theoretically we should be primed for a killer OC.
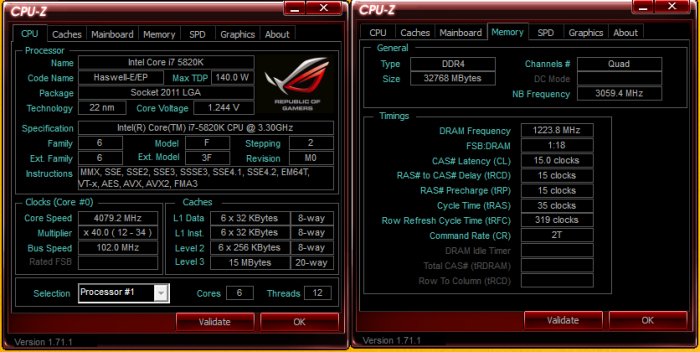
We got a fairly pathetic 4.079 GHz CO with a ram OC of 47 MHz. Our Grandmothers can OC better than that and frankly it didn’t even look like the system tried to tune itself. It looked like Asus just shoved the voltage up to 1.244V kicked the Bus to 102 MHz and tossed the Multiplier to 40. There was no tuning or testing, it didn’t try different frequencies. It merely set an over volted sub par safe OC and dropped us into the operating system. We’ve seen 4 way optimization and this wasn’t it.
We tried Ratio only tuning same sub-4.1 GHz OC, we tried Ratio and BCLK same sub-4.1GHz oc. We ran EZ Tune about 6 times with each setting Ratio or BCLK and got the same results so we went Old School and manually OC’d.
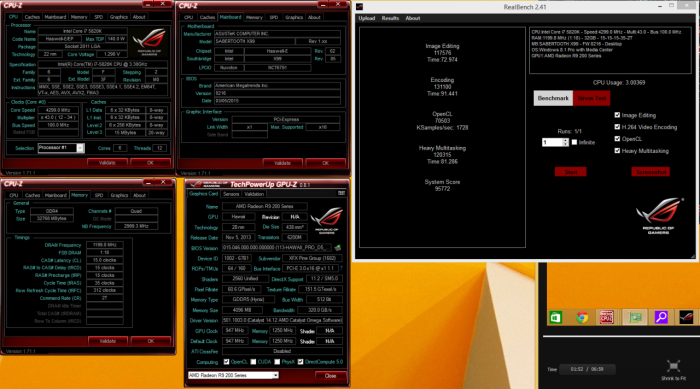
We upped the CPU voltage to 1.298v jumped the multiplier to 43, shot a little voltage to the System Helper and booted into a stable 4.3 GHz first shot.
Here’s a Video of one of the 4.3 GHz stability test runs using Asus Real Bench, We ran Real Bench 6 times at this OC and it was deemed stable so we went for higher.
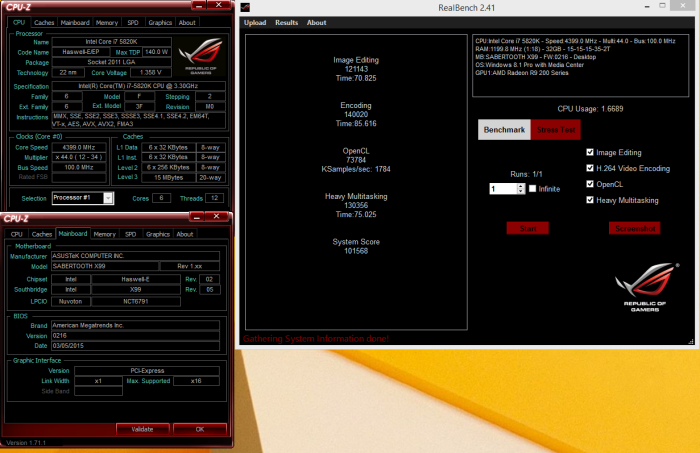
We upped the CPU voltage to 1.358v (that’s a little much we could have run it slimmer) kicked the Multiplier to 44, shot the system agent voltage to 1.27v and booted into a solid 4.4 GHz OC.
Here’s our video of the 4.4 GHz stable OC run, We ran Realbench 6 times, played some video games, ran SuperPi, ran Cinebench and nothing we could do would knock this OC down.
Unfortunately 4.4 GHz was as high as the Sabertooth would take our CPU. We gave it a good 6 hour try fiddling with voltages and tried the same settings (and higher) that we used on the Asus X99 Deluxe and we could boot into 4.5 GHz but got no real stability. We suspect with more time we could hit 4.5 but 6 hours trying when we hit 4.5 GHz on the X99 Deluxe and Asrock X99 Fatal1ty board in 10 minutes we decided the Asus TUF Sabertooth just wasn’t as wiling a overclocker. Possibly due to the ON Semiconductors’ NTMFD4C85N (4C85N) dual N-channel MOSFETs which aren’t in the same class Mosfet as the International Rectifiers’ IR3550 PowIRStage MOSFETs used on the Asus X99-Deluxe and Rampage V Extreme. We can only tell you we much prefer the PowIRStage MOSFETS by far. Having second tier MOSFETS like the X99 A is a big strike against the TUF Sabertooth. Sure it’s $70 bucks cheaper than some of the other top end boards but a lot of compromises have been made here for that $70 dollar savings.
 Bjorn3D.com Bjorn3d.com – Satisfying Your Daily Tech Cravings Since 1996
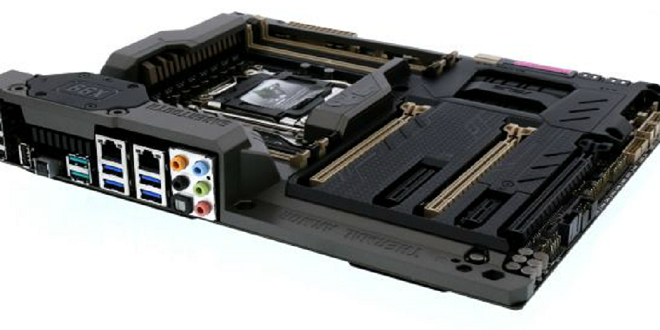




OK, you win if you live in the Sonoran desert you need dust covers. But if not, it is a gimmick. I have filters on my case for that purpose.
The Sabertooth is a board designed for extreme conditions not your average every day user. It’d dust covers and prevention measures will be of some help but limited help. It just happens to be about the only option for extreme conditions. I’ve worked on machines that came back out of the Gulf War(s) laptop and desktop and you work on them sitting on a tarp because sand and debris will be pouring out, you take them outside and hit them with filtered compressor air. There’s a place for the Sabertooth it might not be your house but it’s one of the favorites of harsh condition motherboards and does in fact outlast other unprotected boards. If your not in that environment then buy an alternative by all means, if you have dust, spider web or other conditions like not planning on blowing the dust out every 6 months then maybe the Sabertooth is for you.