The Cubitek XL-Tank case supports motherboards up to the XL-ATX form factor, and yet retains a small footprint.
Introduction
The Cubitek XL-Tank joins the ranks of the Rosewill Thor V2 and the Cooler Master HAF-X cases by offering support for the XL-ATX form factor. However, what really makes the case stands out is its relatively compact design of 230 (w) x 490 (h) x 525 (d) mm. Often cases that accommodate such a large motherboard will be slightly taller and deeper like the Cooler Master HAF-X or the Rosewill Thor v2. By comparison, the XL-Tank has the same width and depth as standard mid-tower ATX case and its height is only about 110 mm taller.
We were curious to see if the Cubitek XL-Tank would make a perfect case for those who want a case that can accommodate a wide range of motherboard form factors without sacrifice much space.
The case is shipped in a brown box with a tank image on the outside to emphasize its “Tank” branding. While it is not the most flashy looking box, the tank image does stands out if it is sitting on the top of a retail store shelve. On the outside, we some marketing information such as the bottom mounted PSU and the type and location of the cooling fan supported. In addition, we also get the physical dimensions of the case. This information is crucial when comes to a purchasing decision while browsing through retail shelves.
Opening up the case, we can see that the case is packaged in a very standard manner with two pieces of Styrofoam cutout holding the case in place so that it will not get damaged during shipping. The case has a plastic bag around it to give it additional protection against scratches. Since the case does not have windows on the side, there is no need to worry about potential cracks or breaks.
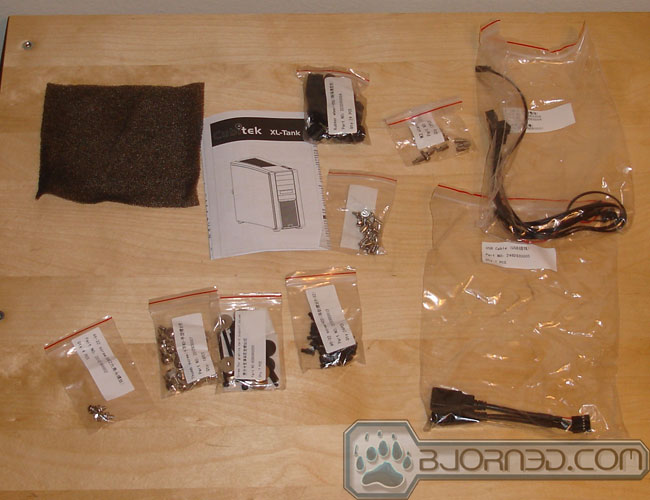
We get tons of accessories with the case. All of the screws are individually bagged with labels. In addition, Cubitek also includes an extension cable for the fans and a USB adapter that converts two USB 3.0 headers into USB 2.0 headers. We also get a page of manual and extra piece of dust filter that can be used to replace the one that is already installed on the front intake fan.
| Model Name | XL Tank |
| Model Number | CB-TKI-B410 |
| Drive Bay | External: 5.25” x 4 ( one 5.25” to 3.5” converter included ) Internal: 3.5” x 6 + 2.5” x 2 |
| Size | 230 x 490 x 525mm ( W, H, D) |
| Material | Anodized 5052 aluminum |
| M/B Type | XL-ATX, CEB, ATX, Micro-ATX, Mini-ITX |
| PCI slots | 8 |
| Front I/O | USB 3.0 x 2 / E-SATA / HD+AC-97 audio |
| PCI Space | Maximum Graphics Card length: 310mm |
| CPU Cooler Height | Maximum CPU Cooler height: 190mm |
| PSU Space | Maximum PSU length: 220mm |
| Fan | Front: 230mm fan x 1 Rear: 140mm fan x 1 Top: 140mm x 2 |
| Side Panel | Aluminum |
| Internal Finishing | Aluminum |
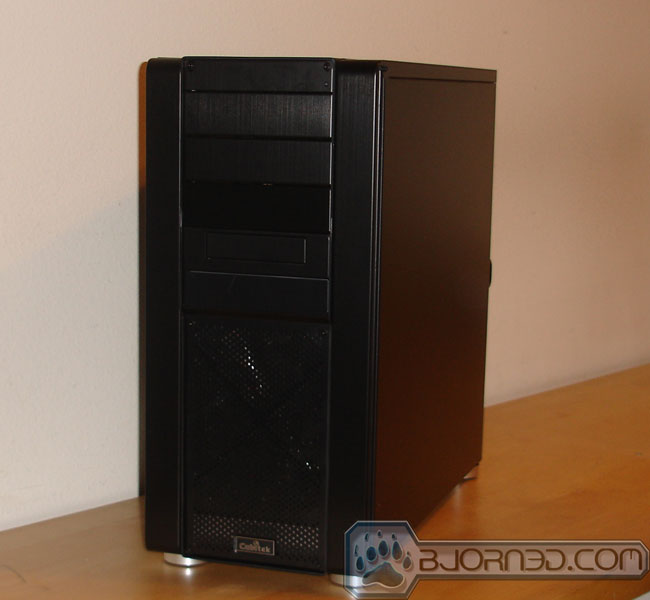
The XL-Tank’s Exterior
The XL-tank is a very simple looking case. After seeing so many flashy cases from Thermaltake and Cooler Master, it is a bit refreshing to see a rather simple case that can get the job done without going overboard. This case emphasizes functionality over aesthetics, though this case is by no means ugly.
The case is made with anodized aluminum which makes it extremely light at 8.3kg. However, the exterior does not have a protective coating, meaning it will be prone to scratching much more easily. On the other hand, the case will not capture dirt and fingerprints as easily.

The overall look for the case is boxy and ridged, much like the Tank branding implies. Cubitek does try to soften the edges slightly with the rounded front corner but the middle section above the 5.25’’ drive bay has a very sharp edge.
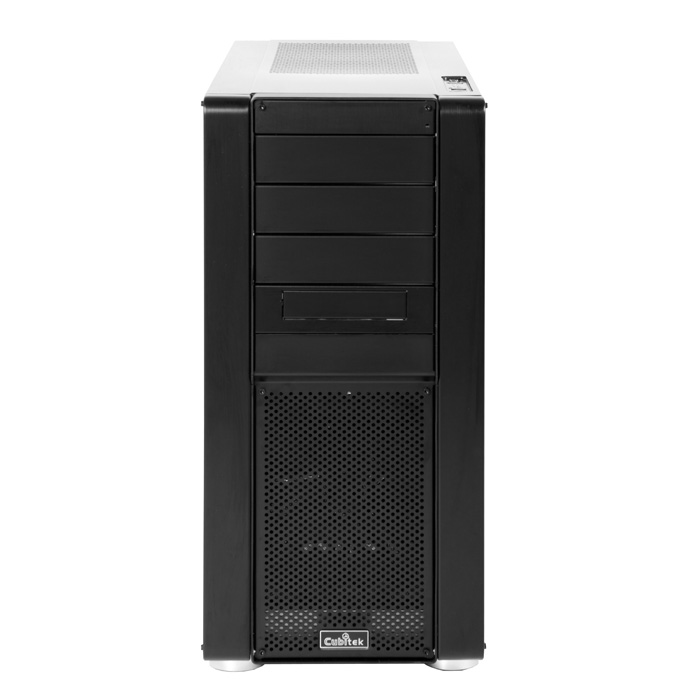
The case accommodates four 5.25’’ external drives. One of the 5.25’’ drives can be converted to accommodate a 3.5’’ external drive with the included (preinstalled) converters. In addition, six 3.5’’ drives (including the external drive) and two 2.5’’ drives can be installed.
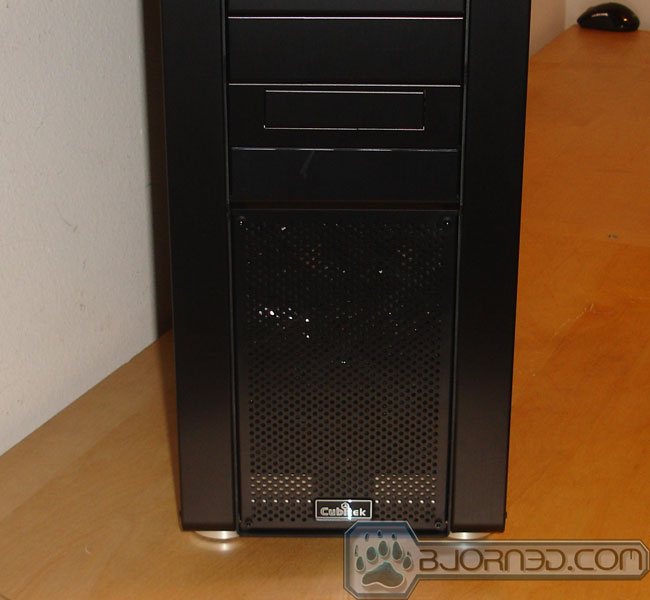
The bottom of the front has Cubitek’s logo located in a very unobtrusive location. Behind the fan grille is a 200mm fan to cool the drives.
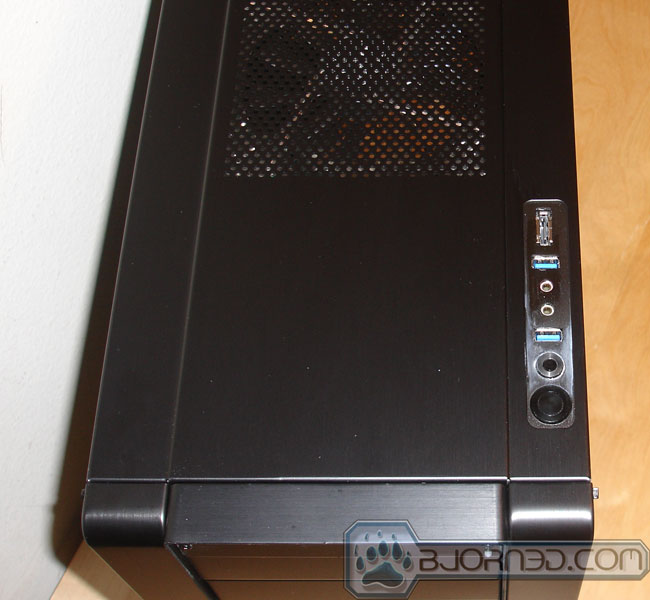
On the top, we can find the power on/off button, a reset button, two USB 3.0 ports, headphone and mic jack, and the eSATA port. Given to the size of the case, we do think it should’ve come with a few more extra USB ports.
We like the fact that Cubitek spaced the USB 3.0 ports farther apart so they can accommodate chubby flash drives. The two USB 3.0 ports can be converted to the USB 2.0 ports if the motherboard lacks USB 3.0 support. Unfortunately, Cubitek’s implementation of the USB 3.0 port is via a cable that routes to the back of the motherboard rather than using the internal headers. While this allows USB 3.0 support for motherboards that lack it, the feature also means that users will need to have a cable coming out of the case to hook to the back I/O ports.
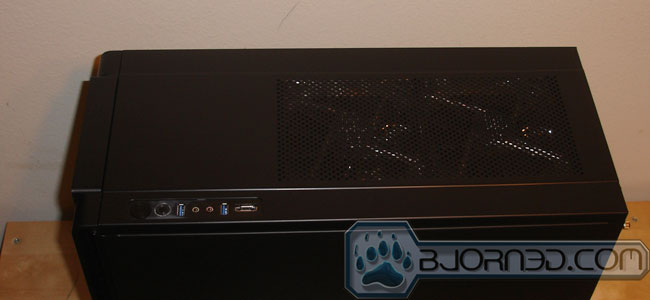
We also get to see two 140mm exhaust fan grill on the top of the case.

The back of the XL-Tank is pretty standard looking. Here we can see that the PSU is located on the bottom of the case. Cubitek uses a frame to provide a means of installation the power supply without the need to open up the case. Users can simply unscrew the frame, mount the PSU onto it, and slide the frame back into place, securing it with the screws. Above the PSU frame, we see eight expansion slots, two water cooling openings and a large 140mm exhaust fan. Above the expansion card slots is a mesh for ventilation of the expansion cards. Users should note that the rear corner of the case is sharp.

Flipping to either side of the chassis, there is nothing exciting to look at as the XL-tank did not feature a window to see the inside components. There are just two pieces of aluminum covering the sides. A large handle is attached to the side panel to provide a better grip when pulling the side panel off the case.
The XL-Tank’s Interior

The side panel slides off the case pretty easily and we can see that the inside is not the most elaborate we have seen in a case, but everything is located where we expect to see.
The interior of the case has plenty of space to work with. The case supports motherboard in a very wide array of form factors including XL-ATX, CEB, ATX, Micro-ATX, and Mini-ITX. The only thing that it is missing is the EATX form factor. While the XL-ATX is not yet a standard form factor, various motherboard vendors have produced boards with the dimensions, like the GIGABYTE GA-890FXA-UD7 and the EVGA X58 Classified 4-Way SLI. The large form factor is almost a requirement for people who wish to use three or four high-end graphic cards.
Users can install CPU heatsinks up to 190mm in height, and the ample amount of space inside the case should not pose much clearance issue for even the biggest heatsinks like the Noctua NH-D14.
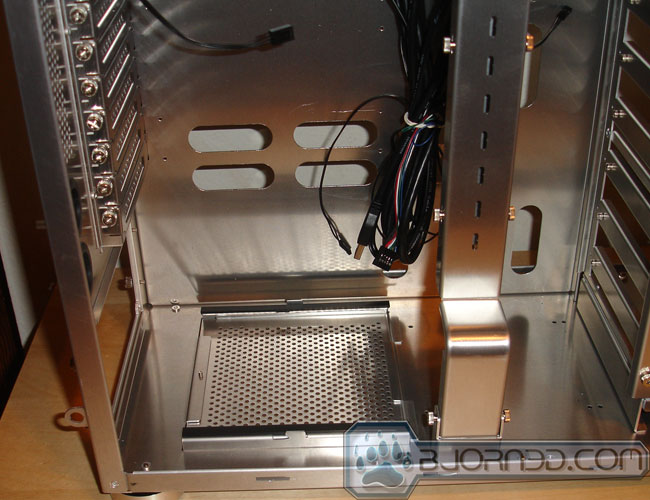
Starting with the bottom, we can see the PSU bay is lined with foam to allow a bit of protection against scratches. This also lifts the PSU up a little to allow cool air to enter the PSU to keep the internal components cool. The case supports power supplies up to 220mm in length, plenty for even the biggest PSU on the market. Cubitek provides a dust filter that users can place underneath the PSU to prevent dust getting into the case. The bottom of the PSU compartment can be opened to remove the filter for easy cleaning.

Moving up, we can see that the expansion slots are being secured with large thumbscrews. We liked the use of thumbscrews as opposed to the retention bar that is found on some cases. While thumbscrews can be somewhat inconvenient when comes to installation, they are more secure and have less clearance issues.
We can see the 140mm rear exhaust fan with a very short 3-pin cable. If users need a longer cable, an extension cable is provided. Above, we also see the two 140mm exhaust fans located on the top of the case that also use 3-pin power cables. Unless your motherboard has fan headers placed next to these fans, extensions will be necessary.
We can also see the VGA card holder used to secure the long VGA card. This piece of metal is very sharp, and we cut ourselves quite a few times on it. The holder is secured to the case via three screw,s and it is not the easiest to remove from the case since it is secured to the case quite tightly.
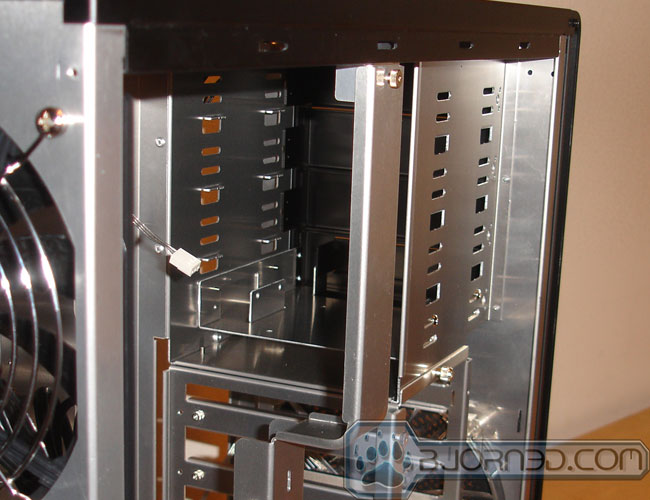
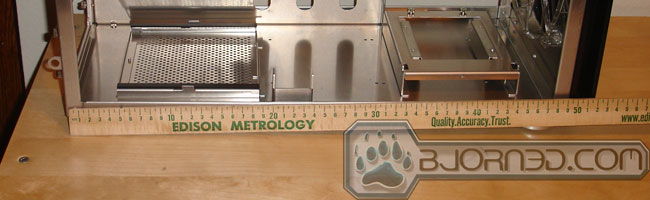
Moving onto the front, we can see the four 5.25’’ drive bay cages. There’s nothing special here, except that we can see the drives are being secured to the case with the screws. There does not appear to be any anti-vibration mechanism involved. Using screws can be somewhat inconvenient when comes to installation but they get the job done and sometimes can be more secure than a tool-less lock mechanism.
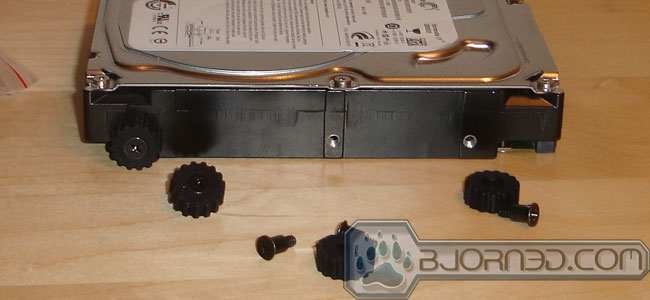
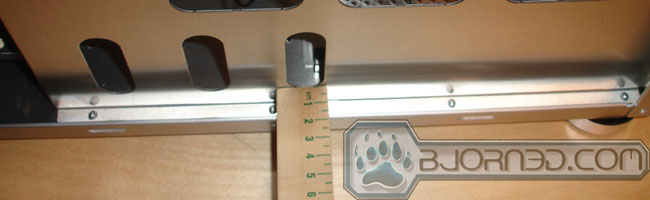
Below the 5.25’’ drive bays are the five bay 3.5’’ internal hard drive bays. The hard drives are installed with rubber spacers on all four corners and then the hard drives are slide to the rails of the drive bay. The spacers will then lock into the drive bay in the pre-defined position. We liked the fact that the rubber spacers are screwed to the hard drive and the rubber helps to reduce the noise. We have seen some manufacturers use similar mechanisms, but their spacers are not screwed onto the drive, which results in a slight vibration noise.
The case will support graphics cards up to 310mm, enough for even the longest cards on the market like the GTX 590 or the HD 6990. For more space, the entire hard drive cage assembly can be removed, to yield about 450mm of space. The ability to remove the drive bay is nice if users ever need more space for ever increasing graphics cards length. However, removing the cage will leave only one 3.5’’ drive bay and two 2.5’’ drive bays for storage.
Underneath the hard drive cage are two 2.5’’ bay for SSDs or smaller form factor HDD’s. We like the fact the case provides space for SSD’s but its location is hard to gain access to after everything else is installed.In fact, the underside of the 5.25’’ drive bay has a tiny little bit of space that is not being used and we actually think Cubitek could’ve utilized this space for 2.5’’ drives as opposed of hiding them all the way beneath the 3.5’’ drive bays.
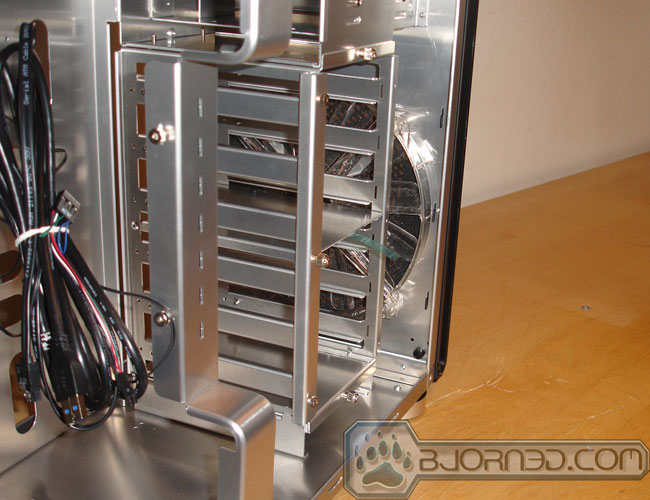
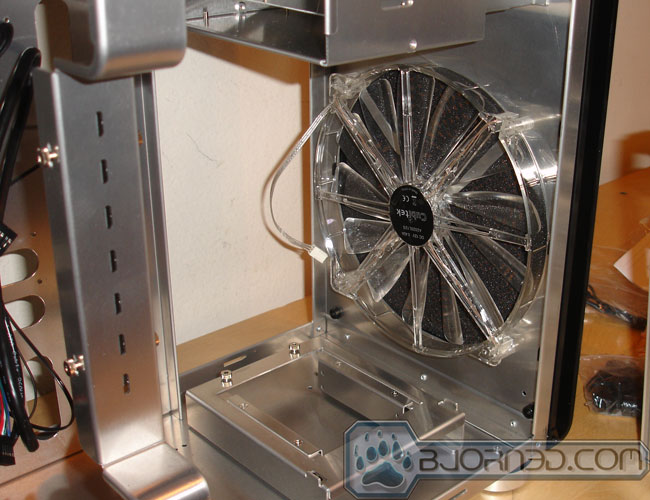
We see the clear 200mm intake fan sits just next to the hard drive cage to pull the cool air into the case. The fan is equipped with LEDs. Like other fans used on the case, the cable is very short which means users will need PWM extension cables. In a way, short cables mean easier management, but the pre-attached cable is way too short, and is impossible to connect to the motherboard on its own.
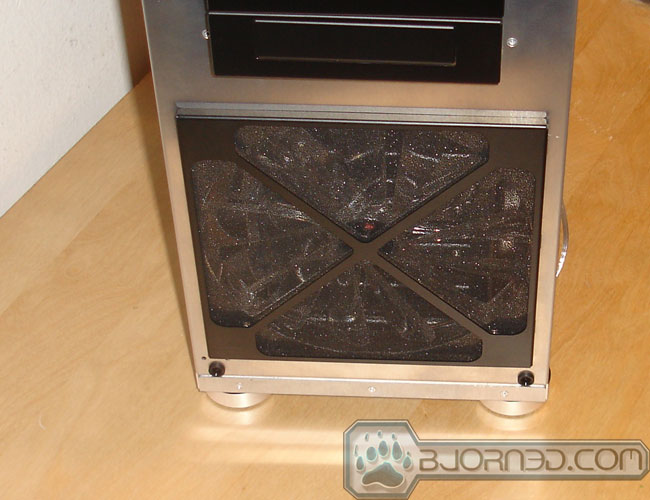
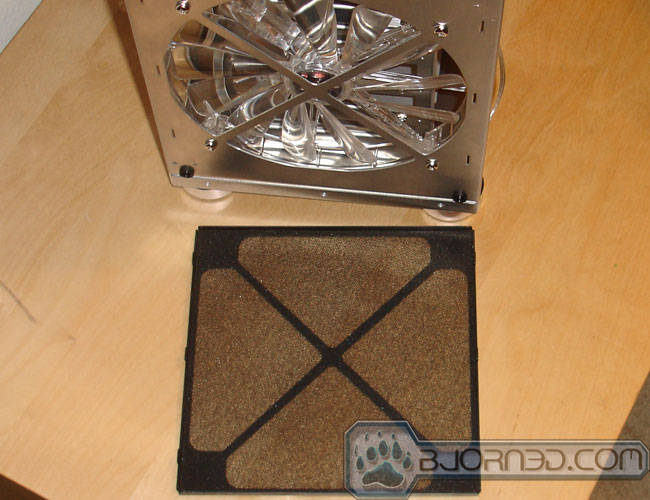
When we remove the front bezel, we can see the large dust filter covers the front 200mm fan. In order to remove it to clean, users must remove the front bezel, which is fairly simple to do.

Looking at the back of the case, we can see the motherboard tray features a very large opening underneath the CPU area for easy installation of CPU heatsink. We like the size of the opening because with many motherboards shifting the CPU socket closer to the front of the board, the opening on the case will allow us to really take advantage of not having to remove the board from the case when installing the heatsink.
There are plenty of openings as well on the motherboard tray for users to route the cables to the back of the motherboard. Unfortunately, these openings are a tad too small and they have some sharp edges which can cut or scratch the insulation on the cables. There is about 2cm of spacing underneath the motherboard tray for hiding cables.
Like what we have observed with the exterior, the interior of the case also has quite a few sharp edges like around the openings for the cable management and the hard drive cage. It is really unfortunate in our opinion that Cubitek did not take its time to smooth out these edges or add some sort of rubber padding around these openings.
Assembly

Overall, we did not encounter any major issue with the installation. While the motherboard tray is not removable, installing motherboard was quite easy with the Tank-XL due to the ample of space to work with. The motherboard stand-off was not preinstalled on the XL-Tank like the In-Win Buc and unfortunately, Cubitek did not label the motherboard tray so users must line-up the board to see where the stand-off should go.

Plenty of area near the CPU socket for even the largest heatsink. While we did not test with the Noctua NH-D14, looking at the motherboard clearance, we do not anticipate anyone having any issue.
There is also no problem with the video card clearance as our HD 6870’s 36cm length left us with plenty of extra space for longer cards. Also, we can see that there is enough spacing between the last expansion slot and the power supply for dual slot video card. While the spacing is very limited as the heatsink from the card will be sitting literally on top of the power supply, it is possible to install the second card nonetheless. We would not recommend putting an air-cooled card in this slot as the airflow may not be sufficient to keep it cool.
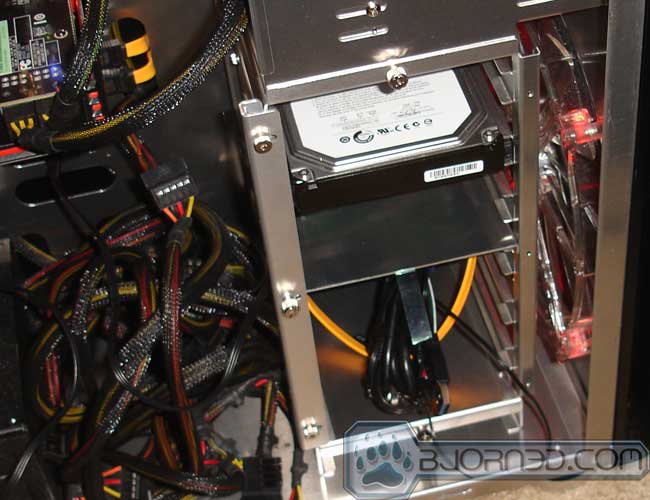
The power supply installation was easy without any hitch. As we can see cables are also very easy to manage due to the pre-cut openings to route the cable to the back of the board. We like the fact that Cubitek cuts little openings near the auxiliary 8-pin ATX power connector.
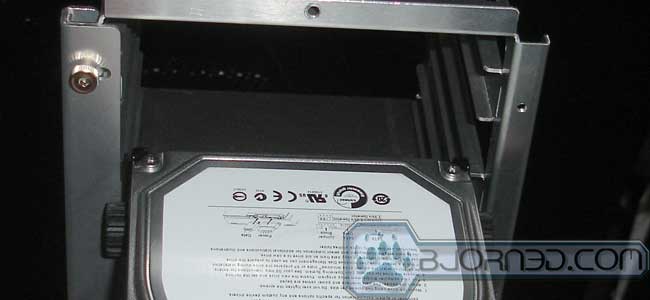
We did encounter small problems with the hard drive installation where our drive did not slide into the drive bay initially. Cubitek places a bar on the front of the hard drive bay to lock the drives into place. The metal bar is being held by three screws: one thumb screw in the middle and two hex screws on top and the bottom. Unfortunately, Cubitek did not provide the hex screw driver to loosen the two screws so we had to dig out our own tool to do so. We would’ve preferred Cubitek to use regular Phillips screws or thumb screws. After loosening up the screws and sliding the retention bar to the left, we were able to slide our hard drive into the drive bay.
Initially we thought the drive may not be secure enough due to the rubber rail that Cubitek uses. Luckily, the rubber rails work quite well and provide enough friction to secure the drive and dampen the noise while keeping it in place.
Sadly, the installing the 2.5’’ internal drive like the SSD would require the removing the 3.5’’ drive cage and the 2.5’’ retention bracket. This makes installation of the 2.5’’ drives a rather laborious task.
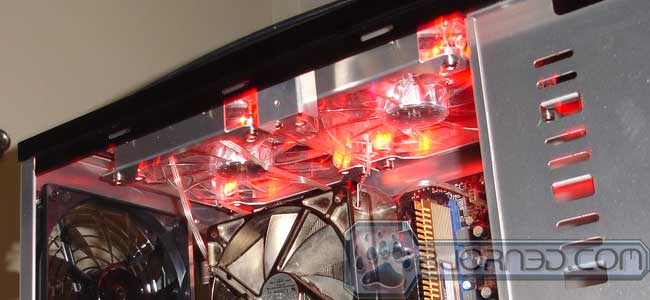
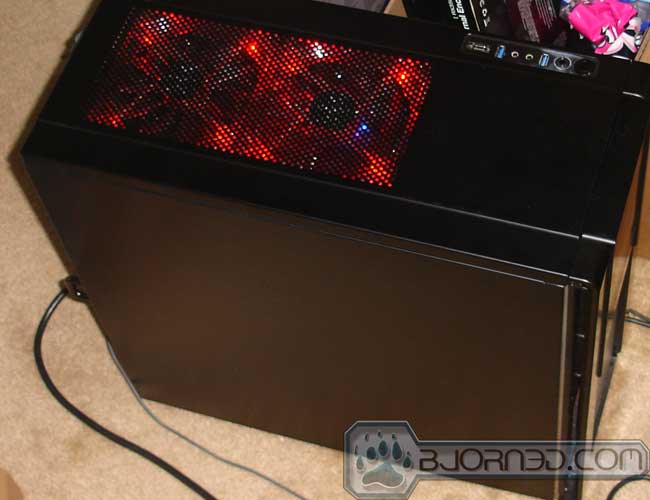
We can see that the front 200mm and the two top facing 140mm fans are emitting red LED lights. There is no way to alter or disable the LEDs on these fans.
temperature & noise
Testing System
- CPU: AMD APU A-3850
- Cooler: Thermalright SI-128
- Motherboard Sapphire A75 Pure Platinum
- RAM: 2x2GB Kingston DDR3 @ 1600 MHz
- Hard Drive: Seagate 7200.12
- Video: Asus HD 6870
- Cooler Master UCP 900W
-
IDLE Cubitek Open-air CPU 38 37 VREG 37 41 System 31 29 GPU 45 44
Idling, we can see that the case lowers the VREG temperature by 4ºC.
| LOAD | Cubitek | Open-air |
| CPU | 60 | 60 |
| VREG | 40 | 48 |
| System | 32 | 30 |
| GPU | 86 | 85 |
Under load, we can see that the VREG temperature is lowered by as much as 8ºC.
The position of the three exhaust fans work best at dissipate the heat around the CPU socket area. Since the case lacks a side panel fan blowing air directly to the GPU, we did see a rise in the GPU temperature.Users who plan to overclock their GPU’s should look for a case that has a side fan.
The noise-level for the case is not too terribly loud. However, due to the two 140mm upward facing exhaust fans, the fan noise is much more noticeable if the case is near the user. Idling, we can definitely hear the fan noise but under load, the noise is easily being drowned by the GPU or the CPU coolers.
CONCLUSION
The Cubitek XL-Tank has a very nice design. We actually liked its simplistic exterior that is not too ostentatious. The aluminum construction of the case is quite sturdy. Its ability to handle a wide range of motherboard form factors up to XL-ATX without being overly large is something that we liked. The interior has ample working space and pre-cut cable management opening is very well-placed.
Unfortunately, for a great looking case with a lot of features, it lacks a few critical points. For one, there are too many sharp edges both inside and outside of the case. A couple of sharp edges inside might be passable, but when there are so many that we cut ourselves doing simple tasks like cable management, it is clear the edges need to be redesigned.
The placement of the 2.5’’ drive is also not the most ideal. We would also prefer that Cubitek offer an onboard USB 3.0 header instead of forcing users to route the cable to the back of the motherboard.
Overall, the case has a lot potential but it failed on a few key points that otherwise making it a very nice case for those who value performance over the looks. This is our first encounter with the Cubitek all aluminum enthusiasts case and we think the company has a good concept that needs to be improved upon.
| OUR VERDICT: Cubitek XL-Tank | ||||||||||||||||||
|
||||||||||||||||||
| Summary: The Cubitek XL-Tank is a nice light-weight all aluminum case that supports wide range of motherboard form-factor and has ample amount of space to work with. Unfortunately, it has too many small overlooked details. However, we look forward to seeing how Cubitek can further develop this concept. |