Maximus XI Extreme BIOS
Anyone who has used ASUS BIOS for any recent boards over the past 5+ years is well versed in their UEFI as they have not changed it alto and this is a good thing. IT simply works, works well and has the right features in the right places. I also do like as some of the items for overclocking are spread around specific sections that you can apply a favorite marker to multiple settings you use common and then the “My favorites” section will be populated by those to make your own overclocking dashboard so to speak without navigating multiple sub-menus for a single setting.
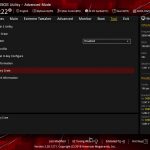
One area of definite interest is under the “tools” section labeled “ASUS Armoury Crate”. This uses Windows ACPI to push installation of the LAN driver and the ASUS updater software to the newly installed OS automatically. In my experience, it worked well and ensured I had a network to pull down any other important information instantly. However, ASUS auto-update tools are quite bloated feeling and I normally do not install that sort of stuff so I do wish you could adjust that option and select exactly what is pushed from this. The good news is you definitely can disable it if you feel it is not good for your installation.
Some have raised the concern of potential security risk as if something becomes infected and ends up in this section of the BIOS and pushes via ACPI can it potentially be harmful or malware? This has not been shown to be an issue yet and to be honest I really don’t know. UEFI firmware has become far more secure and the only way I could see this being a concern would be if you were to flash a questionable BIOS from a 3rd party and manage to force flash it thru. This item is ON by default as I feel it will be quite helpful to those trying to build out and get an OS going quickly as you will have instant network access.. Once complete you could always disable it from the BIOS to eliminate the popup asking about installing ASUS Armoury Crate.
There’s another very cool new feature which is the AI Overclocking section which we will look at now.
ASUS AI Overclocking
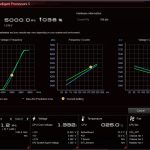
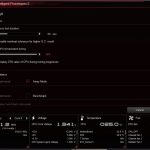
Here you can see the screens explaining the AI overclocking. This is something I have been very impressed with thus far. ASUS has built a technology which can learn based on the VID and based on stability and voltage need during testing along with measured thermals a rough idea of what your system is capable of. This is quite impressive as in my experience this is the closest we have gotten to a really good auto-overclock with really good results. Do keep in mind my 9900K is on the outer edge of BAD.. the one I test with takes far more voltage than most and I am working on getting a better chip for testing.
The AI Overclocking you see here can be accessed by pressing F11 while in the BIOS. Otherwise just change your CPU ratio to “AI Optimized” and save and exit BIOS. Run a stress test of your liking such as a few passes of Cinebench CPU test. At this point, it should get a pretty good idea of what your chip can do and its needs. then restart into BIOS and see where the expected results are at the bottom left-hand side. you can continue rebooting and running stress apps and the board will constantly keep training and learning your cooler and performance to ensure its running optimally. If you like where it’s at and want to stop training you can go into the AI setup and tell it to stop training. However, I do like it to continue training in case your cooler starts to act up and not cool as well it should help control the chip and lower the expected clocks to compensate for cooler shortcomings whereas a normal manual overclock will just continue to burn away regardless of the cooler performance.
Do note that while you may see photos of the BIOS in the wild from a very early version which has a SIL Quality notation which judged your chips expected OC quality based on VID. However this has been subsequently removed in the release BIOS version likely at the behest of Intel as the last thing you want is a bunch of enthusiasts buying/returning or trying to RMA just to get a higher number on a score… much like we saw with the ASIC quality measure in GPUs when that first came out in GPUz.
Now we will take a peek at the included software suite for the Maximus XI Extreme
AI Suite
Here is the ASUS AISuite as it has been known but now is more of a central hub to the overclocking and other standard software ASUS offers. I do like that they included the AI overclock in here as well. This means for those who are not as comfortable or adept at BIOS changes can get a similar result to the BIOS AI Overclocking which was right on par with what I saw from my manual tuning albeit slightly higher voltage. Also worth noting that the AI Overclock may set a High and low load speed and in my case the AI overclock knew my chip was crap so it set heavy load for all core to 4.9GHz which is still significant in the grand scheme of things but with a much more average chip 5.0GHz should be easily obtainable.
ASUS AURA
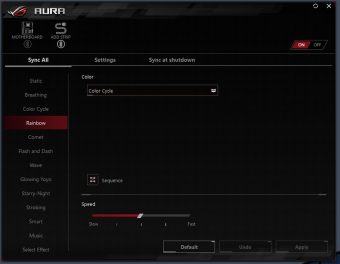
ASUS AURA is the ASUS RGB software and it works well for LED control and for syncing compatible devices. If you have applicable DIMMS you can even sync them with your onboard lighting patterns and even the addressable strips or 5050 style RGB strips you choose to put in your build should you want to go the RGB route.
ASUS Live Dash
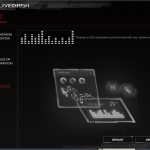
ASUS Livedash software allows you to change the information displayed during operation on the Live Dash display. It is interesting as they have several animated images or you can set it to cycle through a large list of monitoring. The only bummer is when you select the “Large Text” which I feel is the best look you cannot scroll through multiple options. The smaller text option works as intended but I am assuming the larger text option is limited due to the fact that it doesn’t show the name of what it is displaying. For the Live dash, you can also upload your own custom images but they must be black and white and keep in mind that due to the small size make sure its a stark black/white image otherwise grey tones will easily make it hard to tell what the image is. Example being I took our Bjorn3D watermark and converted it to B/W and when playing it on the live dash, it did not go well.
ASUS MEM TweakIt
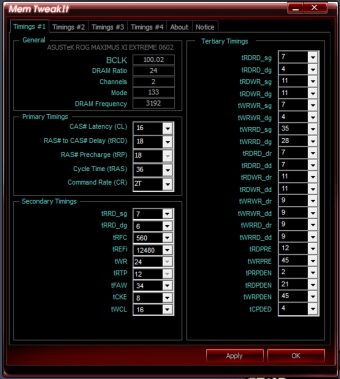
Mem TweakIt has been around awhile and once again not really anything aSUS needs to mess with as it simply works for those looking to really fine tune some advanced memory settings. Although I prefer to make these sorts of changes within the UEFI there are some that maybe cannot boot at the specific settings and when pushing the edge you may need a small tweak once in the OS.
ASUS RAMCACHE III
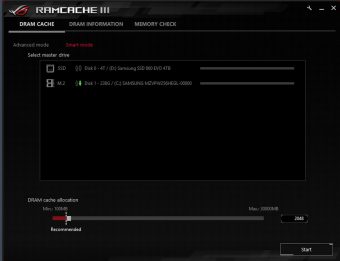
The ASUS RAM Cache implementation is pretty straightforward as it piggybacks from an open source RamDisk implementation which allows you to allocate spare ram to a super fast storage medium for things such as browser cache, and other repetitive storage needs and from my testing allocating it as a browser cache seems to be the best usage as it can make for a very very quick solution due to not pinging your physical storage any time the browser such as Chrome needs some cache data. Physical system RAM is much better at this.
 Bjorn3D.com Bjorn3d.com – Satisfying Your Daily Tech Cravings Since 1996
















I seem to be having a bit of a situation with this board and I thought you might be able to help. It would seem that somewhere I’m not sure if it’s in the Bios or if it’s on the board that for an m.2 slot there’s a switch between usb and pcie. Currently mine is at usb and I would like to change it pcie.
Thanks if you can help.
Also I was wondering if I upgrade the BIOS does it change all the settings back to default?
Normally I would save a BIOS profile before flashing and set it to defaults to relieve the variable which may cause a bad flash.
Also, there is no USB signal at all going to an M.2 slot, can you please further explain what you are referring to?