
BIOS


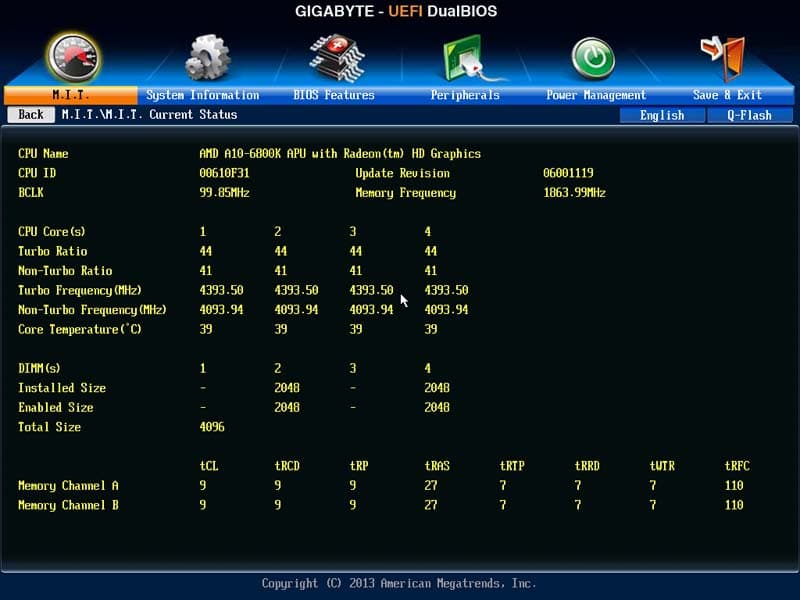
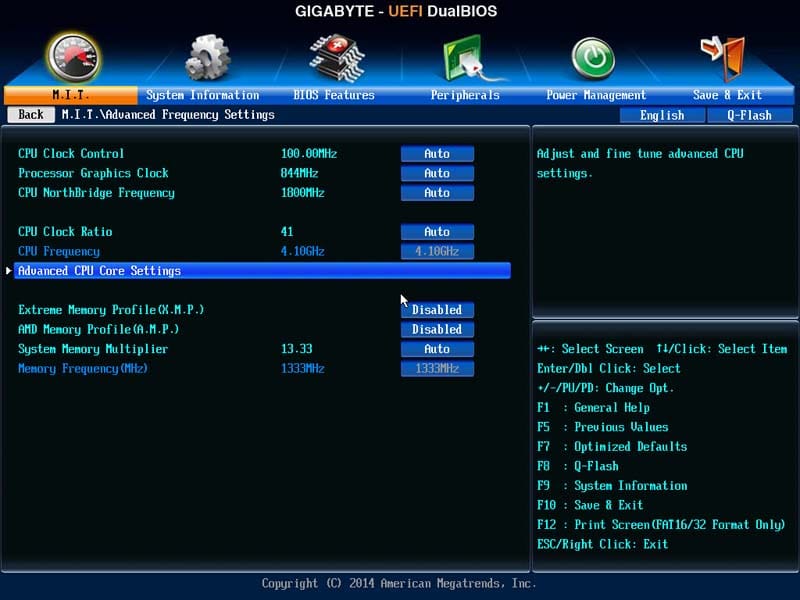

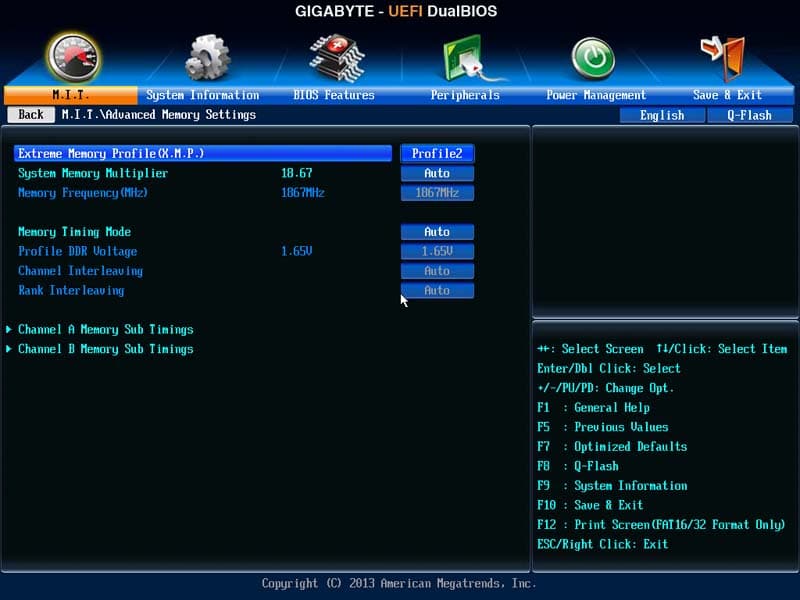

The BIOS on Gigabyte’s AMD line up has largely stayed the same visual as what we have seen with the first FM2 socket as well as all of the current generation FM2+ board. Here we do not get the Gigabyte’s 3D BIOS UI but more of a traditional look UI which makes navigating in the BIOS rather simple. It is a bit interesting that despite the similar UI on both the Gigabyte G1.Sniper A88X and the F2A88XN-WIFI, some of the options in the BIOS are worded differently and also placed differently in the BIOS. For example, the CPU base clock on the G1.Sniper A88X is called the BCLK/PCIe Clock Control while the F2A88XN-WIFI is called CPU Clock control. Experience users would not have issue figuring out these settings but we really would love to see uniform nomenclature not just among the same manufacturers but also across the industry. There are also some settings that is missing from the F2A88XN-WIFI that is found on the G1.Sniper. For example, on the G1.Sniper, we have Super IO Configuration and ATA Port Information these settings are absent with the current firmware on the F2A88XN-WIFI. It is very likely that future BIOS release will add some of these features. Luckily all of the important setting are here. As usual, Gigabyte places the overclocking tools as the first tab under M.I.T. for the enthusiasts who are looking to tweak the system to get the best performance. Here we can find all of the CPU frequency, memory setting, and the voltage settings available. To adjust these settings, you can use either the +/- or page up/page down on the keyboard or simply enter the value. The maximum value for the NB Block is 6000 MHz, for the graphics is 2000 MHz, and the CPU clock ratio is 79. The board also supports Intel X.M.P memory profile and AMD Memory profile where if you purchase one of these memories, you are simple able to use the preset values without messing with each individual timings.
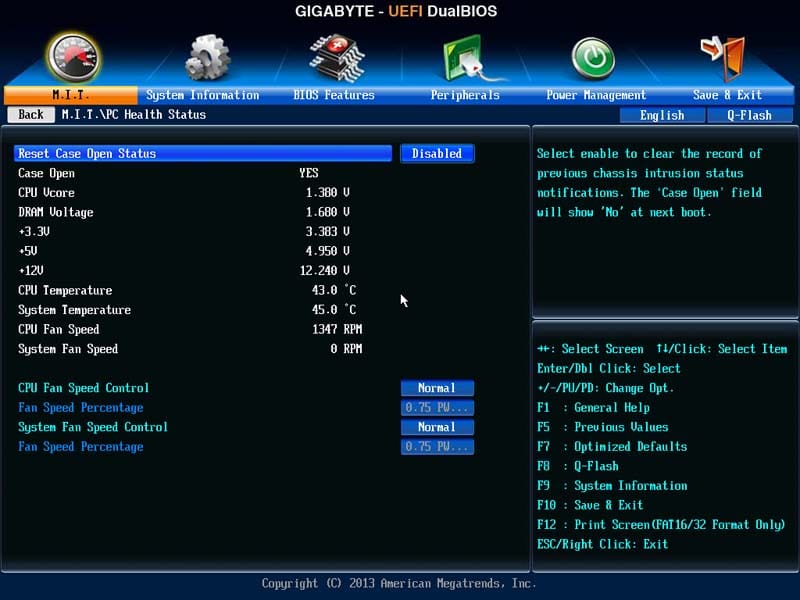
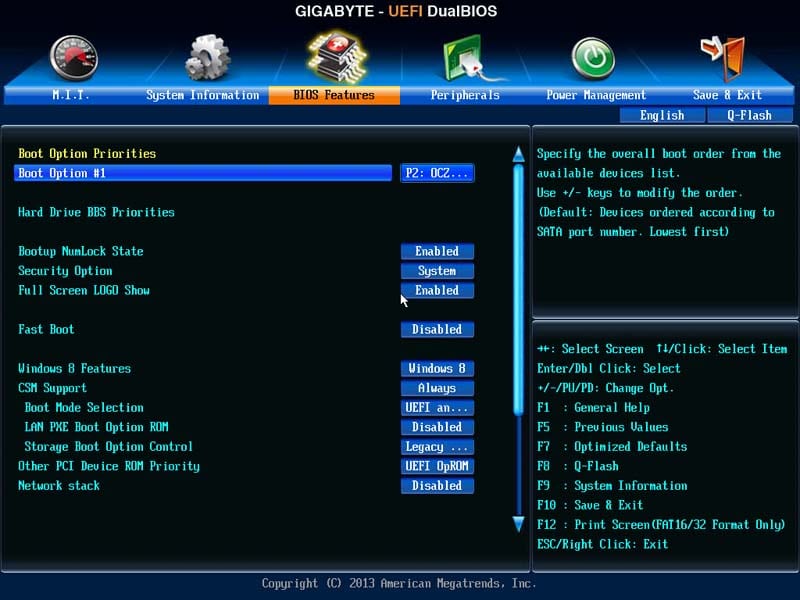
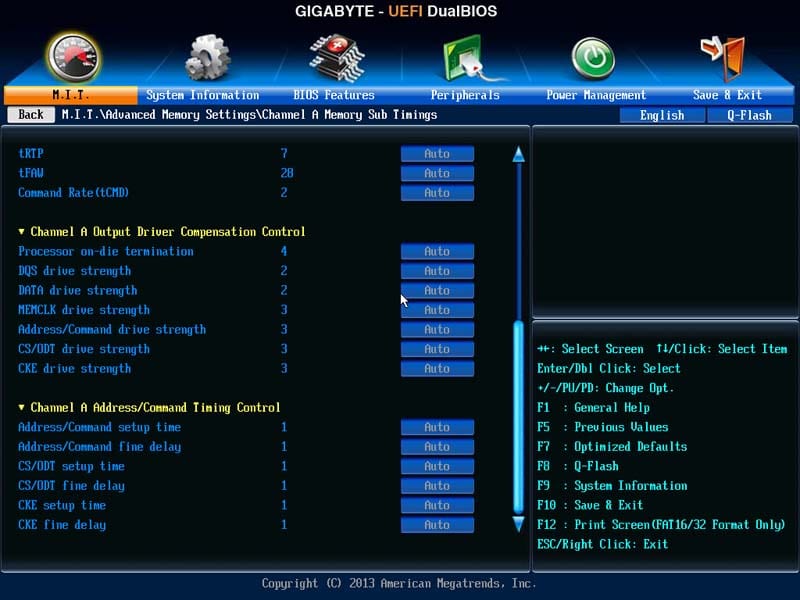
For those who wish to fine-tune the memory timings would be able to do so under the Advanced Memory Settings. The G1.Sniper A88X supports CPU Vcore, NB ore, DRAM voltage, Vcor loadline calibratoin and NBVID Loadline Calibration. The voltage adjustments feature two presets: Auto and Normal. Furthermore, you would be able to manually adjust the CPU voltage from 0.8V to 2.3V and NB voltages from 0.8V to 2.1V in increments of 0.00625V. The DRAM voltages adjustment ranges from 1.2 to 1.9V at 0.02v increments. Unlike the DRAM voltage, the CPU and NB voltages only support offset mode so you won’t be able to just enter a desired value. We would much prefer to have the option to simply enter a value instead of using the offset mode especially since the board does not display the current voltage on this page which made it even harder to know what value has been set (you can see it under PC Health Status). In addition, the board does not support repeated entry entry when you hold down the key which make it rather cumbersome if you are trying to increase the voltage much higher than the current value. Under Health Status is where we can find the system components’ temperature. Here is where we can also see the board’s fan control. The board only has one additional system fan headers in addition to the CPU fan header so we only get one fan speed control setting. Gigabyte lets you adjust the fan speed with a ratio of PWM to degree C or with the 3 presets (Silent, Normal, Full speed). When set to manual, it offers the ability to control the fan with fan speed ranges from 0.75 PWM/C to 2.5 PWM/C in increments of 0.25 PWM/C. To have even further control over the fan speed, you would have to rely on the Gigabyte’s Easy Tune software in Windows to create your own custom fan control curve. The BIOS Features is where users would go to adjust the boot options. Here we have the ability to configure the boot option.The board also features the ability o override the boot order during boot or in the BIOS so in the event you ever need to boot from other devices other than your primary OS drive, you would be able to use either one of the function for that. Here we also have the option to adjust the UEFI boot or Legacy boot mode for Windows.
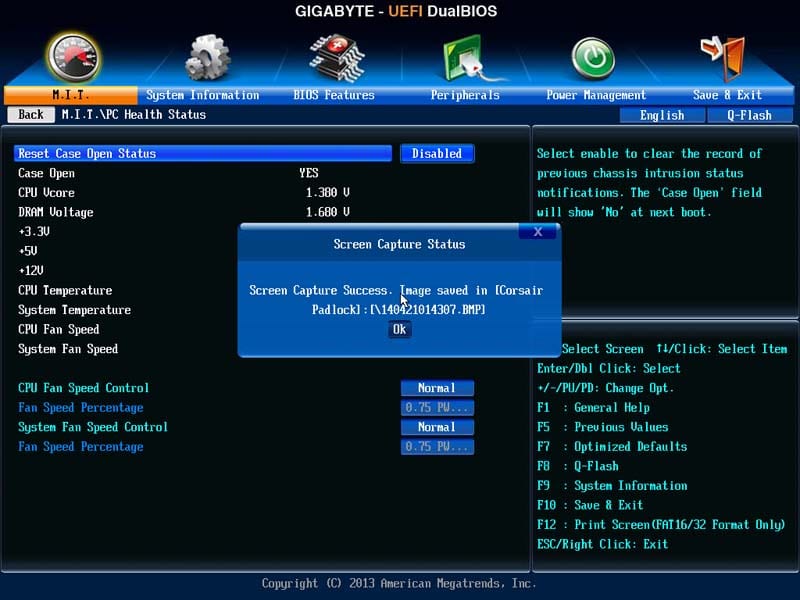
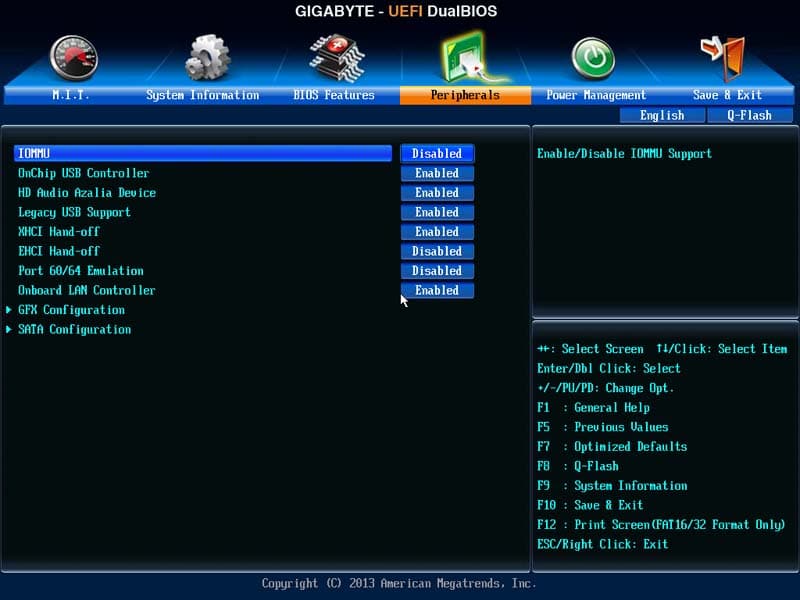
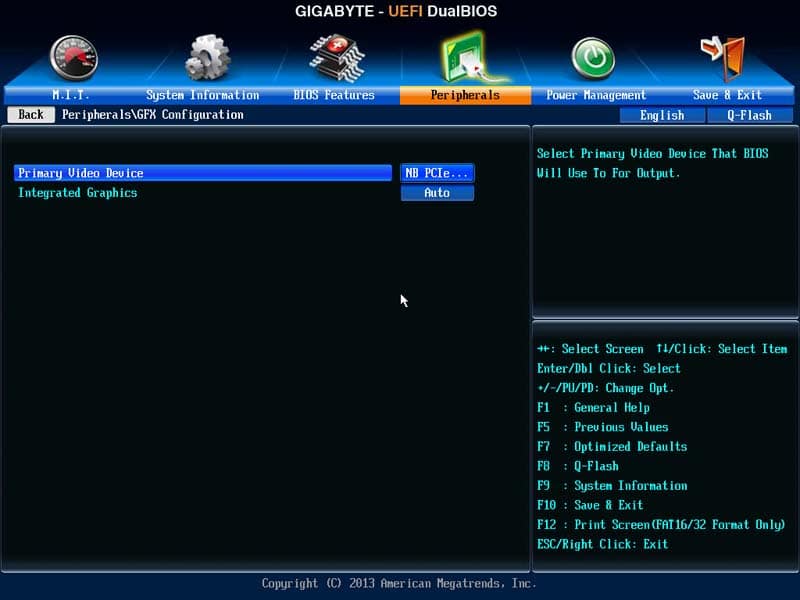
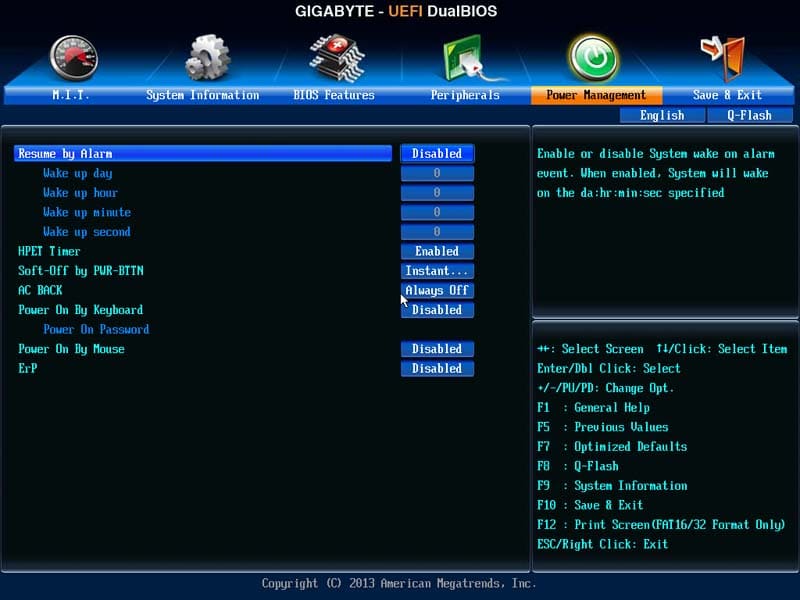
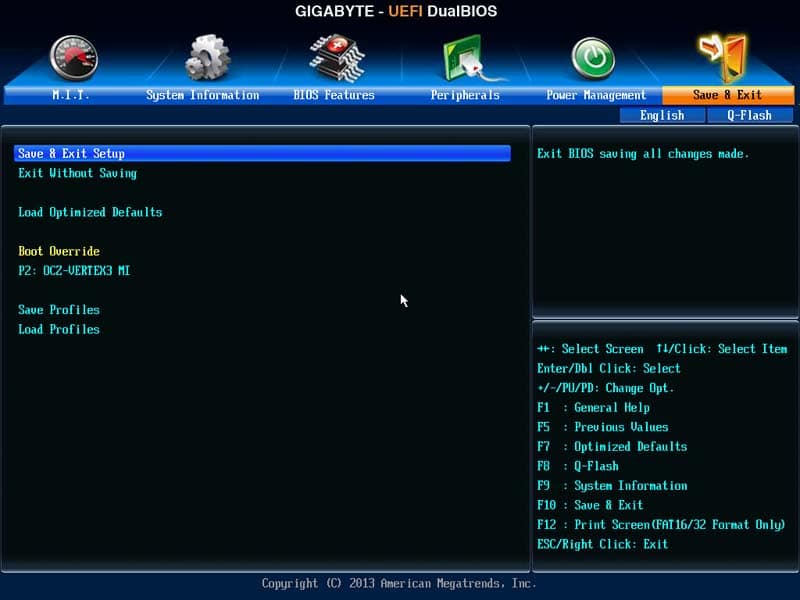
The Peripherals is where you would want to go to enable and disable various onboard controllers. Here is where we can also use to adjust the SATA configuration, USB ports, onboard LAN, HD audio, and the Super IO configuration. Also found in here is the option to enable the initial display from the integrated to the NB or the SB PCIe. In addtion, we can see the IOMMU support here. Power Management is pretty standard where we have the option to power the PC on with the by keyboard or mouse. Sadly, such feature only works with a PS/2 keyboard or mouse. We also have the option to enable soft-off with power button. Finally, Gigabyte’s BIOS features handy Q-Flash with the press of F8 where it will take you to a screen that allows you to flash the BIOS right inside the BIOS without the need of Windows installed. This is handy as you can just place the BIOS file on an USB drive and launch the application in the BIOS to proceed with the BIOS update. In addition, the support for the print screen is neat for those who need to share BIOS settings or for those who need to save settings as image before flashing the BIOS in the event that something went wrong and you had to reconfigure the system.
Overclocking
Overclocking with the AMD APU is easy if you got one of the K-series with unlocked multiplier. We were able attain the same result as our other A88X boards where we are able to get our A10-6800K to 4.5GHz in a matter of a few minutes by raising the multiplier and the CPU voltage. Getting higher clock speed probably would require more extreme cooling but we doubt most people with the board would resort to extreme overcooking
Benchmarks
A note before we look at the benchmark result. As the board is released before AMD releases the FM2+, aka Kaveri, you would probably need a BIOS update in order to get it to work with the Kaveri APU. Be warned though if you have an older BIOS, the Q-Flash BIOS update tool may not able to update the board to the latest BIOS without you first update it. We had to create a bootable USB flash drive in order to update the Q-Flash to the latest version and update our BIOS to the latest F4c revision. Luckily, you probably only need to this once as any subsequent BIOS release can be updated with the Q-Flash utility once it has been updated with Kaveri support. 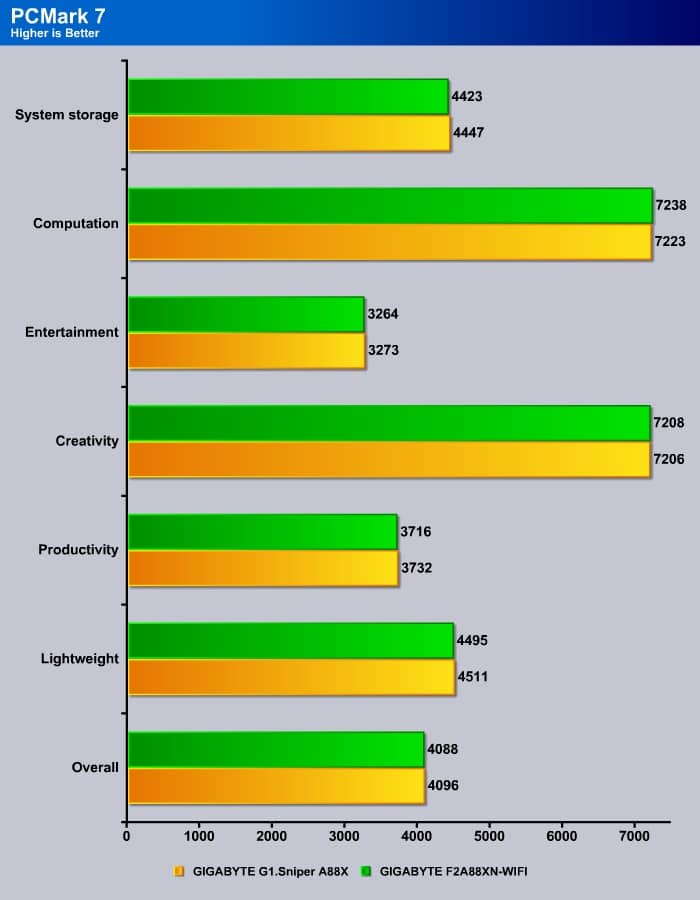 First off, the PCMark has the F2A88XN-WIFI to perform a tad faster than the G1.Sniper from Gigabyte. Notice that almost every single test, the F2A88XN-WIFI is few points higher except the Computation benchmark.
 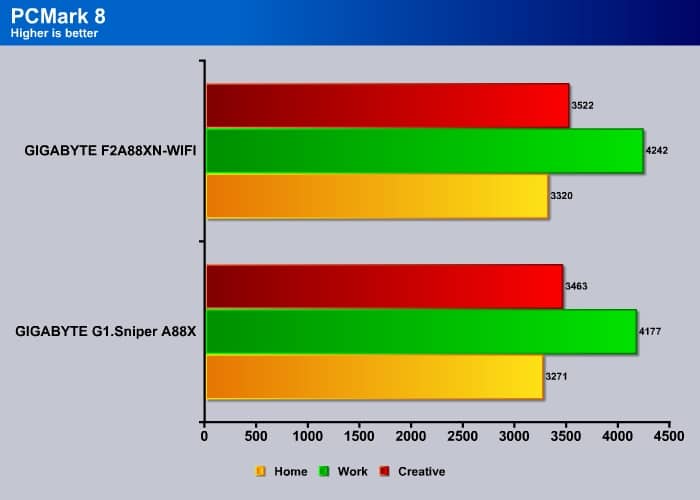 Moving to the latest PCMark suite and we observed the same result here as well.
 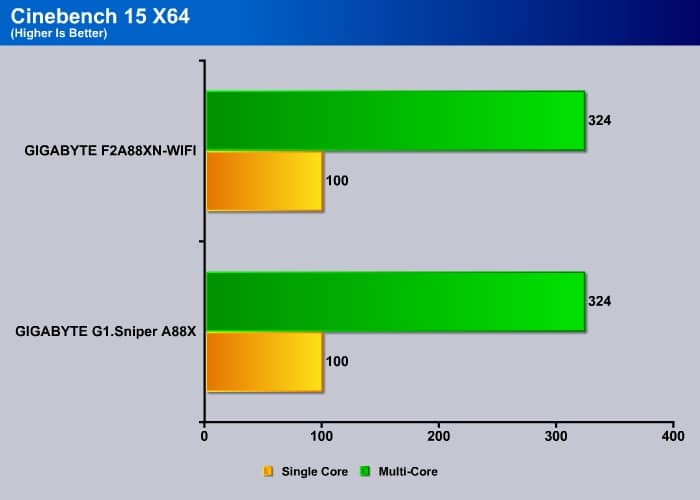 With Cinebench’s R15 CPU test, the two boards are essentially identical in both single core and multi-core tests.
  However, the GPU performance on the G1.Sniper is just a little bit faster.
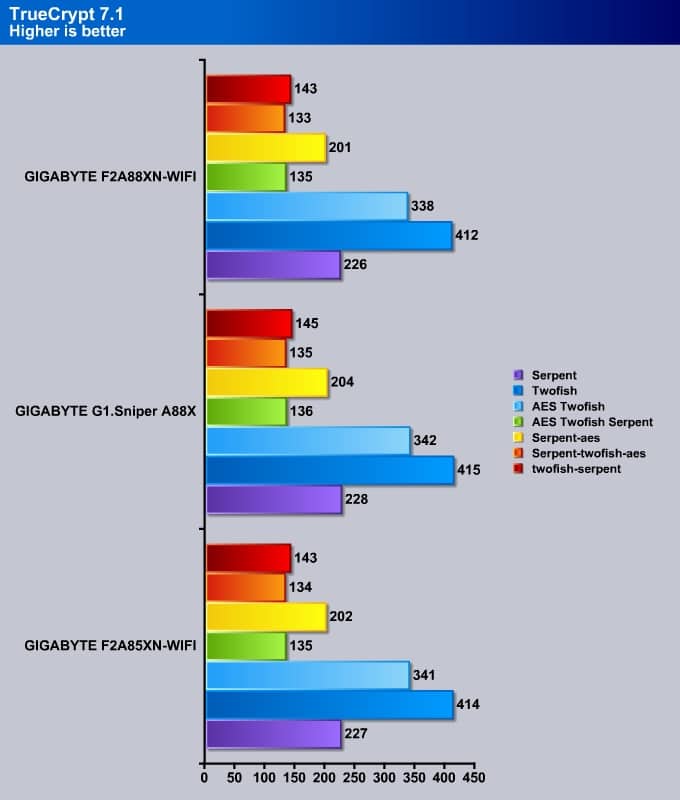 TrueCrypt is largely CPU bound task and here the G1.Sniper seems to be able to edge out the mini-ITX board by few extra points.
 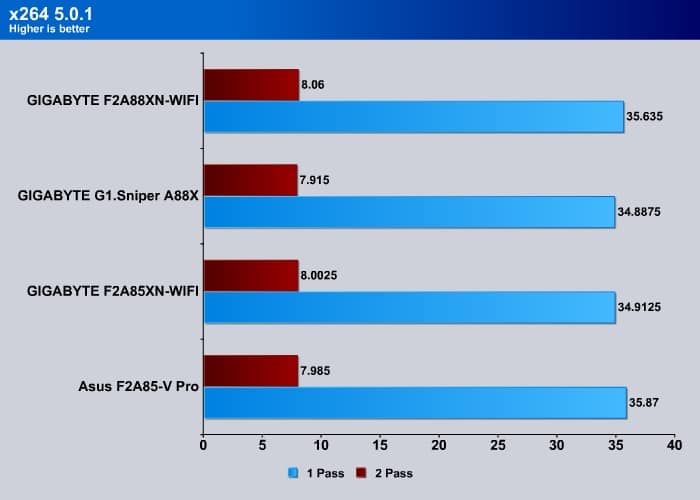 Transcoding is another task that is very CPU intensive task. Here, the G1.Sniper is just trailing behind the older F2A88XN-WIFI. Interestingly, we would expect higher CPU result we have seen with the G1.Sniper A88X to actually outperforms the F2A88XN-WIFI yet the result show the opposite.
  When comes to gaming with the integrated GPU, the G1.Sniper A88X scored a few points higher.
 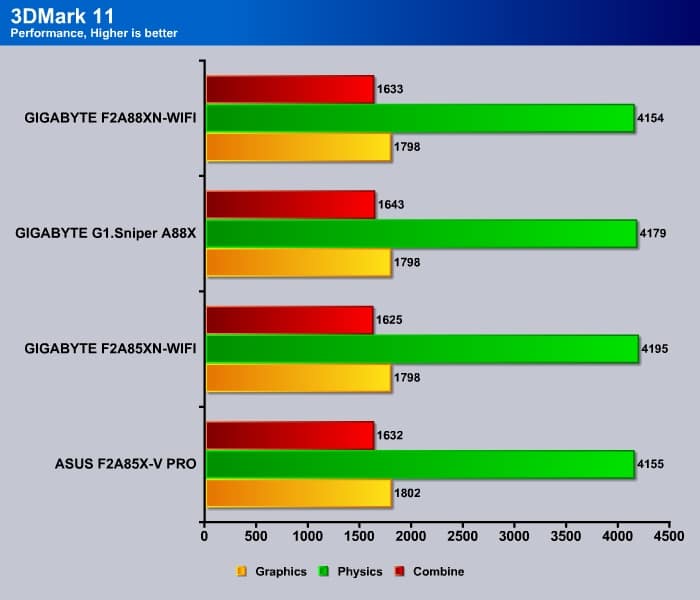 Looking at the result here and we can see the graphics score on the newer A88X is a tad slower but it is consistent across all oft he A88X chipset. The Physics performance on the G1.Sniper A88X is actually a tad higher than the mini-ITX board.
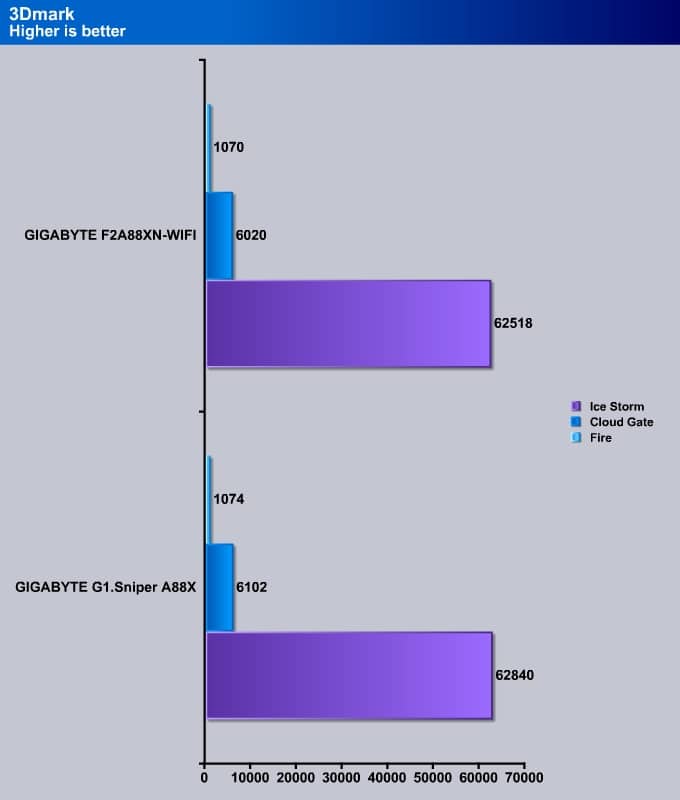 Here as we can see the G1. Sniper A88X trails behind the F2A88XN-WIFI in the Cloud Gate benchmark but comes ahead in the Ice Storm and Fire Strike benchmarks.
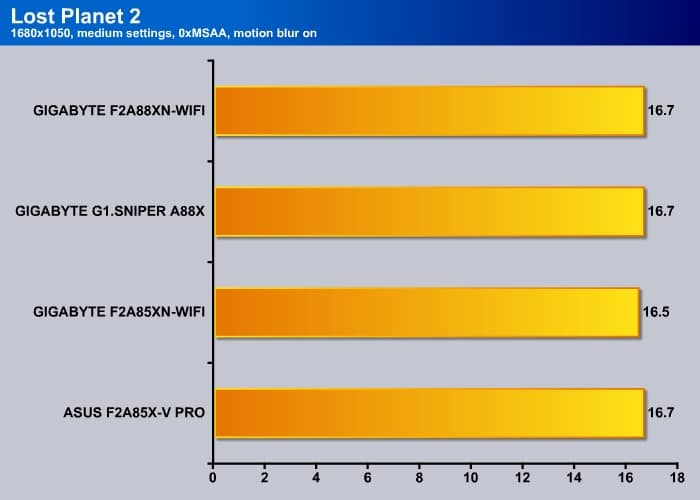
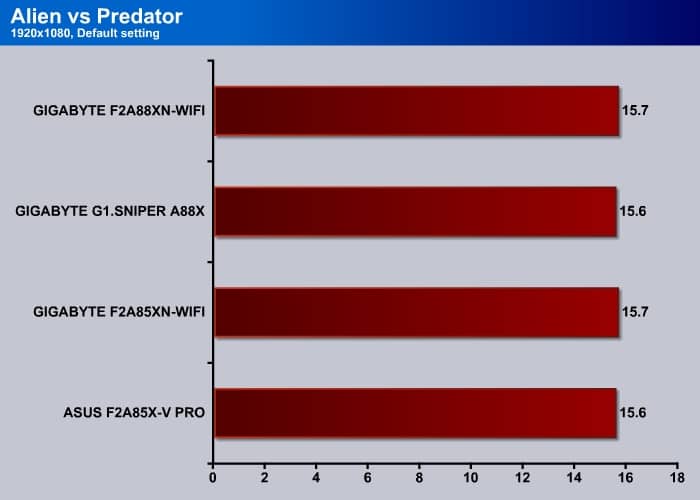
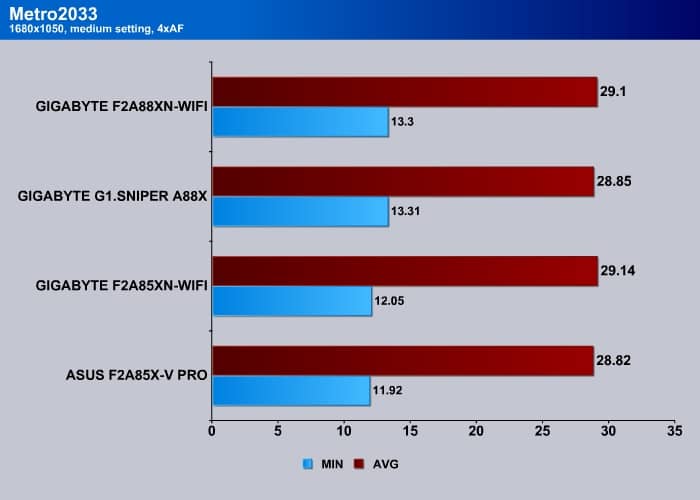 Gaming with the integrated GPU shows absolutely no different across the board which is expected.
Review Overview
Performance - 8.5
Value - 9.5
Quality - 9
Features - 9
Innovation - 8
8.8
Gigabyte F2A88X-WIFI
For mini-ITX FM2+ motherboard, the F2A88XN-WIFI is packed with plenty of features that includes four SATA ports, 802.11ac, dual BIOS, and dual HDMI port. We definitely recommend anyone who is looking to build a small form factor PC with AMD Kaveri APU.


You mention WIDI support but how do I go about actually enabling this feature?
the wireless adapter (Intel 7260) does support WiDi though to use WiDi, you would need also Intel CPU. AMD has their own Wireless Display where it is based on Miracast. If you are using Winodws 8.1, it should work. Though we have not yet test it.
http://community.amd.com/community/amd-blogs/amd/blog/2013/09/12/a-preview-of-amd-wireless-display-in-windows-81