Though it took a long time to gain any momentum, the Mini ITX form factor seems to be gaining popularity. This is in part due to the integration of various components such as memory controller, Northbridge, and GPU onto the CPU die. Today’s CPUs come with a decent GPU on-die that functions well if you simply need a small system that can handle basic workloads.
We had looked at a few mini ITX cases in the past like the Cubitek Mini ICE. Due to space constraints, mini ITX cases often do not leave much space for expansion. Lately, we have seen manufacturers are coming out with a slightly larger than average mini-ITX cases that aimed for enthusiasts who wish to have a small PC without sacrificing performance. The BitFenix Prodigy is the latest mini-ITX case from the company that offers a perfect marriage of portability and expansion. Retailing at $79, the BitFenix Prodigy may just be the best mini-ITX we have ever used.
| BitFenix Prodigy Specification | |
|
Material
|
Steel and Plastic
|
|
Dimension
|
250 (W) x 404 (H) x 359 (D) mm
|
|
Weight
|
|
|
5.25” Bay
|
1 removable
|
|
3.5” Bay
|
x 5 (3 + 2 modular)
|
|
2.5” Bay
|
2x 9 (5 + 2 + 1 +1 )
|
|
PCI Slot
|
2 (up to 340 mm in length)
|
|
M/B Type
|
Mini ITX
|
|
Front I/O
|
USB 3.0 x 2, HD Audio |
| Cooling |
Front: 120mm x 2 (120mm x 1included) or 140/180/200/230mm x 1(optional) Rear: 120mm x 1 (included) or 140mm x 1(optional) Top: 120mm x 2 (optional) |
|
PSU |
PS2 ATX (bottom, multi direction), PSU cage depth 180mm, max PSU depth 160mm |
| CPU Cooler | Max 175 mm height |
Off the bat we can see the Prodigy is not your typical mini-ITX case as it is able to accommodate whopping five 3.5”, the same as most typical mid-towers. Not only that, there is also room on the front, rear and even top. It is not typical we find a mini-ITX with this many space for fans.
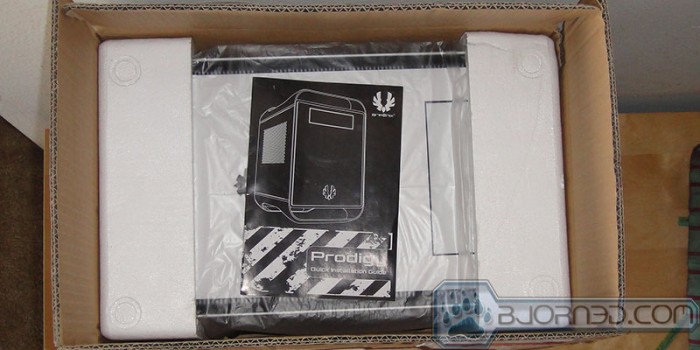
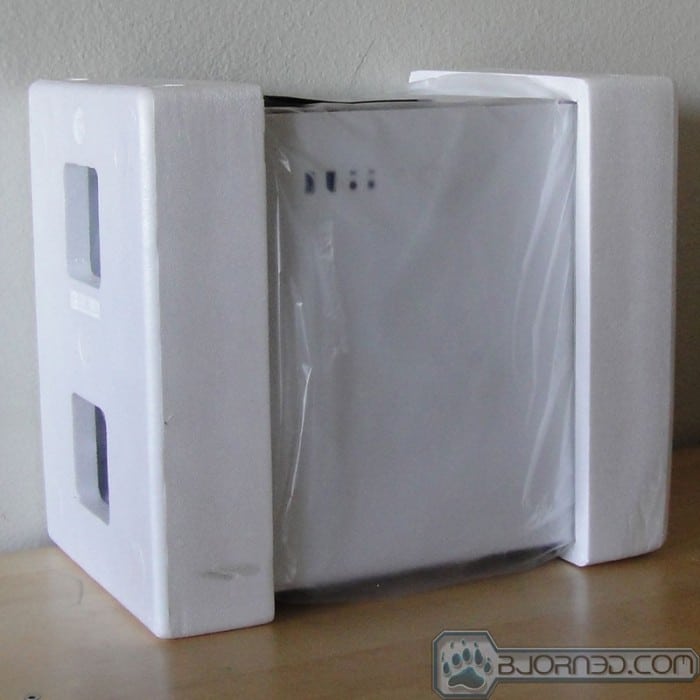
Like many cases, the Prodigy is packaged in the brown cardboard box where we have a diagram of the case with its unique features highlighted. Inside the box, we see two large pieces of styrofoam cutouts holding the case in place during shipping. The overall package of the Prodigy is not the most eye-catching, but do not be fooled by its bland brown box. The actual case turns out to be rather attractive.
Closer look at the BitFenix Prodigy
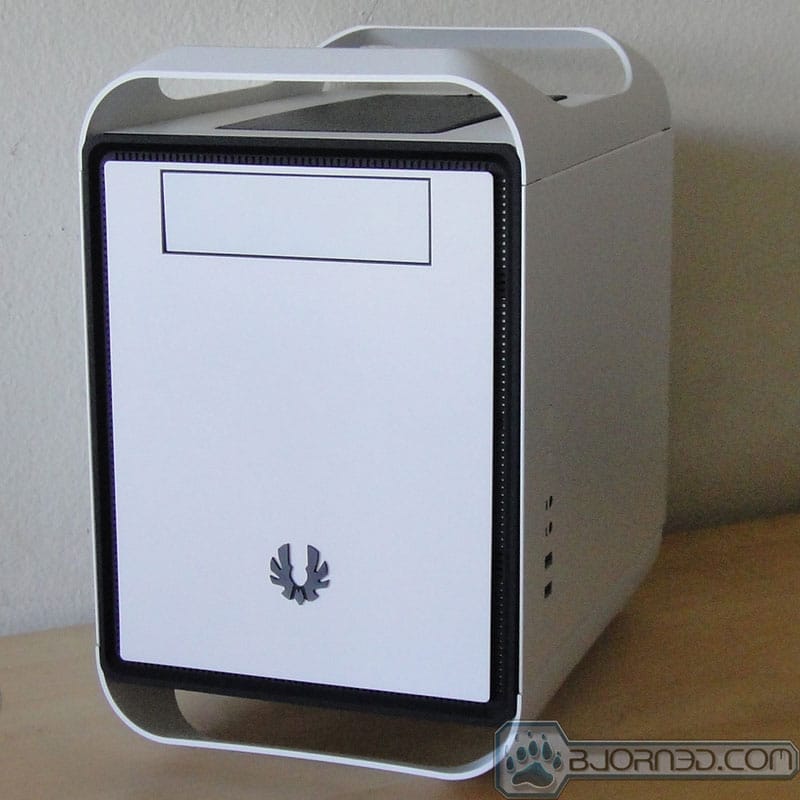
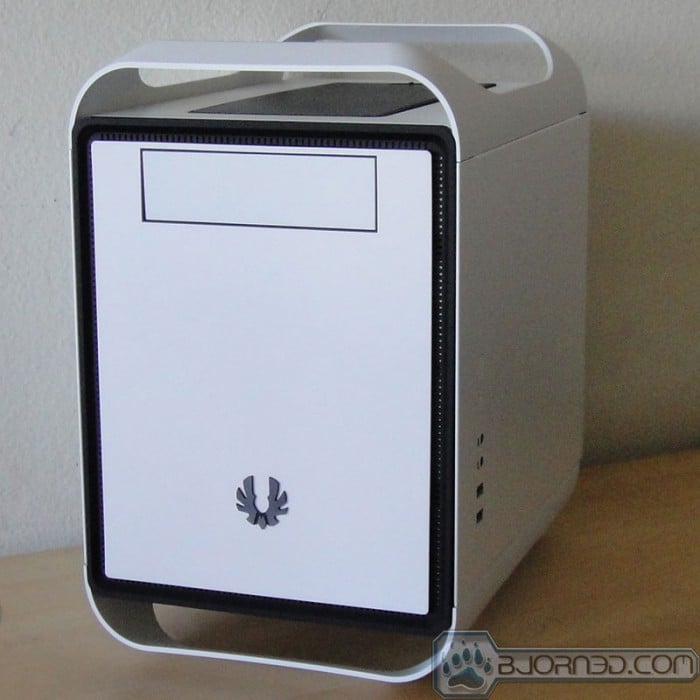
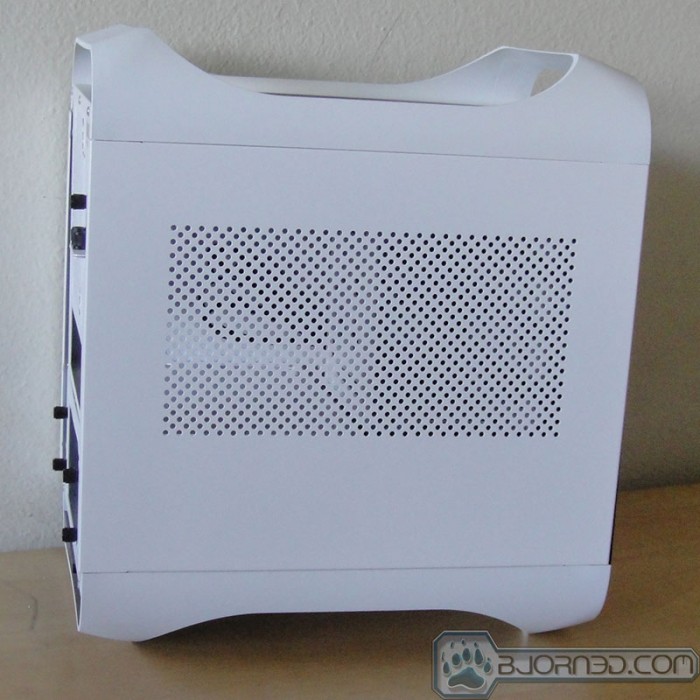
The BitFenix Prodigy comes in two different colors: black and white. We received the white for review. The Prodigy is constructed with steel and plastic. The top and the bottom of the case is made with plastic that acting as a handle (top) and a stand (bottom). The plastic lifts the case up so the metal body is not directly in contact with the hard surface, which should help with to reduce vibration noise. It also provides an area underneath the unit for cool air to flow through. The plastic that BitFenix uses feels a little soft but it seems to get the job done. When we lifted the case up, we can see the plastic flex a little bit but it was not stretched or deformed. While the plastic may feel a bit soft, the steel is absolutely high quality and very rigid. Steel makes the case slightly heavier than aluminum but it is much more durable and the Prodigy definitely feels sturdy for its small footprint.
The case is primarily all white with a little bit of black around the front bezel and the fan grill on top. The color is consistent through throughout the exterior of the case. If white is not your cup of tea you can also opt to purchase the black version which has the color reversed (ie white trim around the front bezel). The white coating that BitFenix uses on the steel is very smooth and even and its color matches the white plastic that is used on the front panel. Normally, we are not huge fans of white cases because they can get dirty very quickly. Also, sometimes if manufacturers are not careful with the color, white can appear to be light beige and look awful. For the Prodigy, we actually like the white variant. The color is matte rather than shinny so it won’t attract fingerprints. The overall design of the case is also elegant without going overboard. We actually think it will also be a nice looking unit to use as an HTPC in your living room.
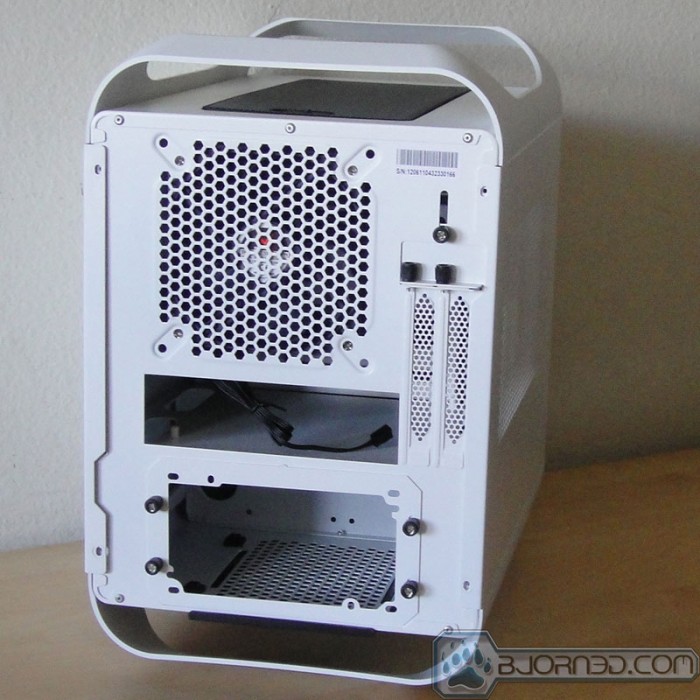
The front is a single piece of plastic with the 5.25” drive bay cover. There appears to be a rubberlike material covering the front surface. It gives it a nice feel as opposed to a cheap plastic. A metal BitFenix logo graces the front. It maybe hard to tell but all around the front are ventilation holes that allows cool air to enter the case. The rear of the case shows us that the Prodigy has the PSU located on the bottom center of the unit. The plastic feet lifts the case up to provide some space for cool air to enter to properly cool the PSU. Above the PSU is where we will place the motherboard and then a single 120mm exhaust fan sits above it. We also see two expansion slots held together by thumbscrews.
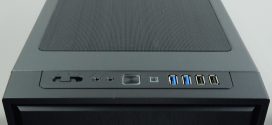
The left side of Prodigy features ventilation holes and the right side is where we find the power switch, reset button, a mic jack, a headphone jack, and two USB 3.0 ports.
At first glance, we can see that the Prodigy is slightly larger than the typical mini-ITX case. This is because the Prodigy actually features tons of expansion space inside which we will cover in just second. When we place the case next to the Mini ICE, we can see the physical size of the Prodigy is actually about the same as the Mini ICE if we strip off the plastic on the top and the bottom of the case. Both Mini ICE and Prodigy are designed for enthusiasts who want a small footprint system with tons of expansion slot and the ability to accommodate large GPU, so it would be interesting to see just how the two fare against each other.
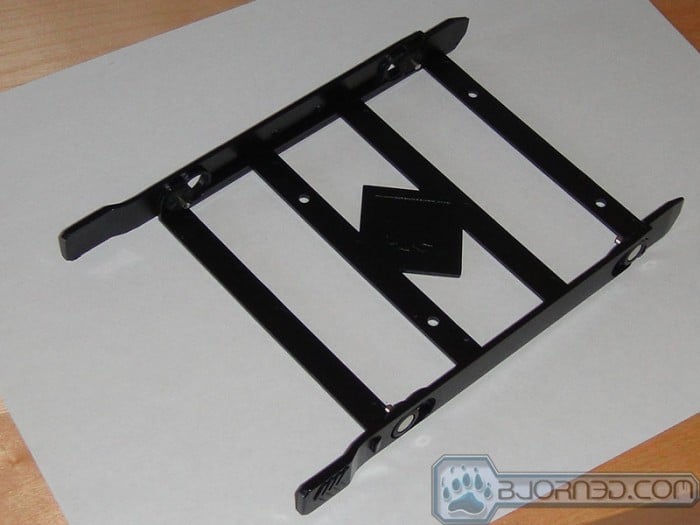
The Prodigy uses thumbscrews to hold the side panel to the case. Notice the unique design of the thumbscrew where a plastic body wraps around the metal screw. We found this to be a great design because it provides a better grip to the screw so that when we use our fingers to fasten the screw, it is much easier to handle and our finger do not hurt as much. A bag of screws is also included for installing the hard drive, motherboard, and other peripherals. The case uses plastic tray for hard drive. All you have to do is snap on the hard drive as the tray already has metal bolts pre-installed to match the hard drive screw holes. The tray will work with both 3.5” hard drive or 2.5” drive but you would have to screw the 2.5” drive to the tray with the included scrws.
Inside the Prodigy
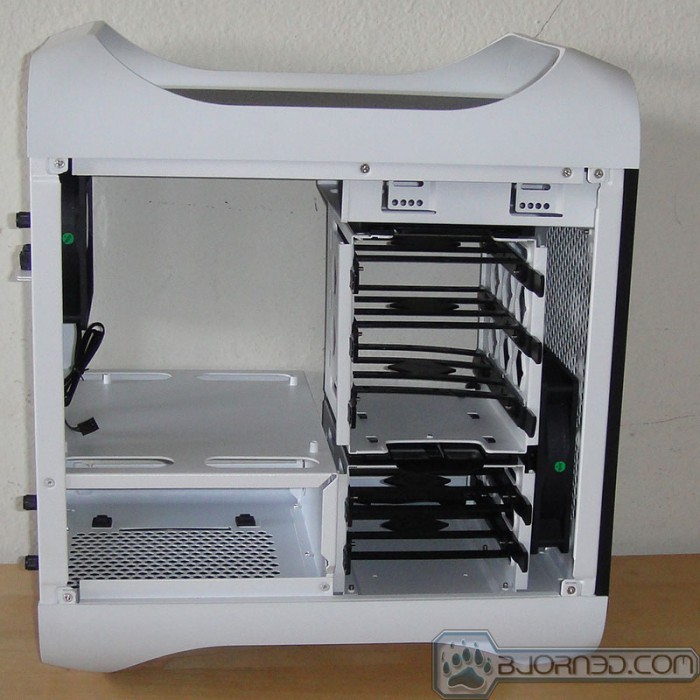
The interior of the Prodigy is rather roomy. We can see that the left side is where we will install the motherboard and the power supply and the right side is where the drives are located. Notice that the motherboard is installed horizontally as oppose to vertically that is commonly found on most cases.The Prodigy has the 120mm exhaust fan pre-installed and there is also the option to install fans on the top of the case for additional cooling. With the motherboard sitting horizontally, there are plenty of open space above for larger heatsink.
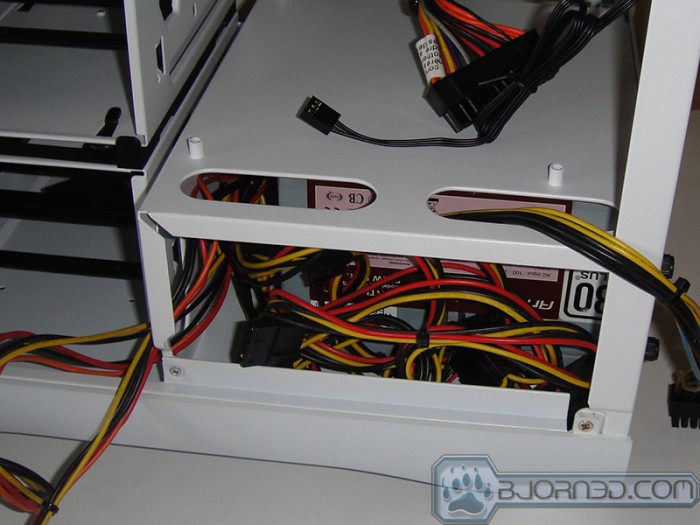
On both left and right side of the motherboard tray are openings to for cables to go through. Here is where the cables from the power supply (which sits underneath the motherboard) will go through to reach to the various components. The case will accommodate power supplies up to 160 mm in length which means most standard ATX size of 500-600 watts should not be an issue but if you want to use larger wattage unit, be sure to check it’s length. On either side of the power supply is a tiny space that can be used for cable management.
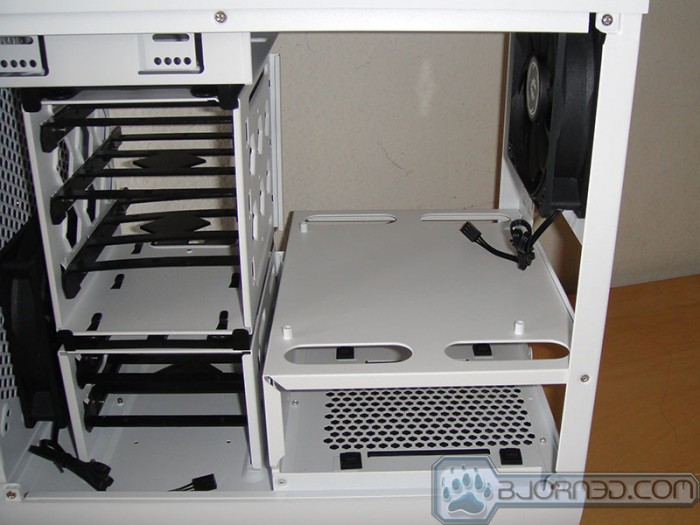
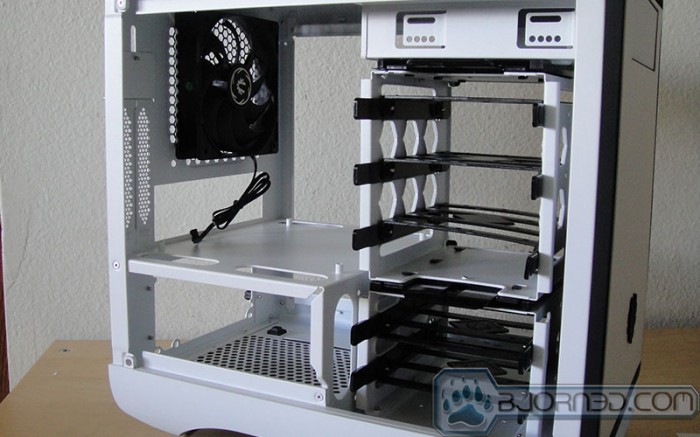
For storage, we can see that the case can fit five 3.5” drives. The drives are separated into two sections where three drives are inside a drive cage that is removable by simply pressing the tab that is locking the drive in its place. The two drives on the bottom are in their own cage which is also removable but would require a bit more work by unscrewing the screws underneath the case. As if that is not enough storage, there are two additional 2.5” drive bay located just between the PSU and the bottom 3.5” drive bay. Gaining access to these two bays takes a little bit work where it would require removing the bottom 3.5” drive bay. Additionally, since these drives are secured onto the PSU cage, if you already have the PSU installed, you would have to remove it in order to screw the drives onto the case. You can also screw another 2.5” drive on the floor of the case and two more can also be installed on the side panel. All together, the case can accommodate five 3.5” drives, or nine 2.5” drives, or any combination in between. This is pretty insane when considering just how small the case is. Putting things in perspective, many mid-tower cases do not even offer as much storage space as the Prodigy. It just goes to show you how impressive the case is.
A single 5.25” drive bay is located on the top of the the case. Its installation is pretty standard where you pop out the ODD bay blank and drive bay cover and you can slide in the optical drive.
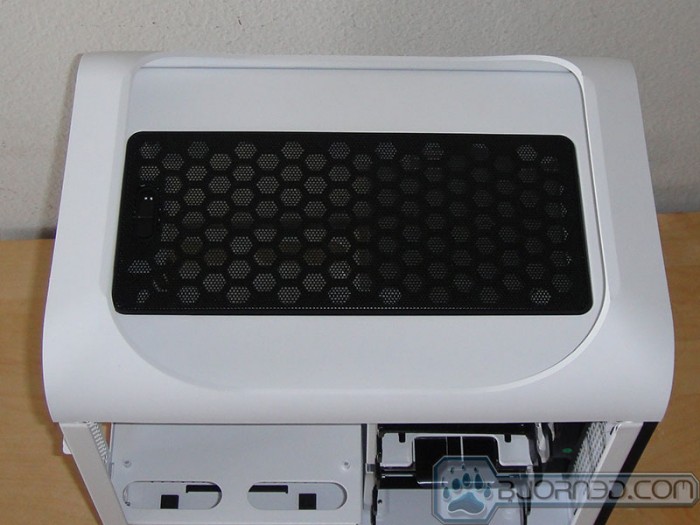
For cooling, we can see there is a single 120mm fan pre-installed on the front bottom of the case to draw cool air in. The fan can be replaced if you need more cooling as it can also accommodate 140mm, 180mm, 200mm, or 230mm fans. Additionally, another 120mm rear exhaust fan pushes hot air out. Underneath the top dust filter, the case can accommodate two more 120mm fans (not included).
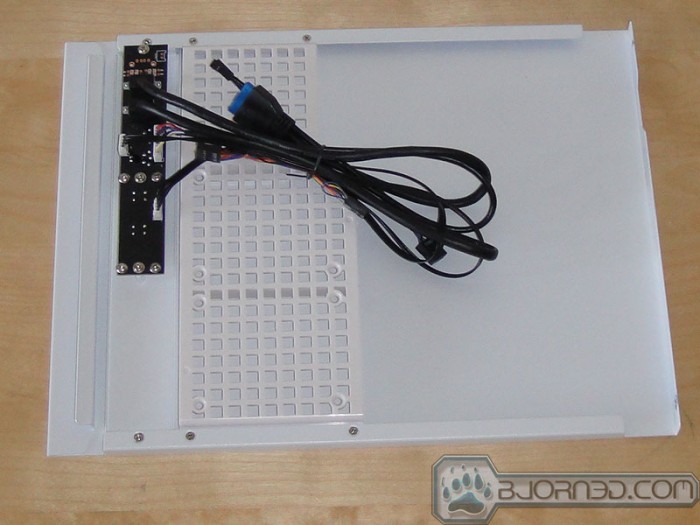
Removing the side panel and we can see the two additional 2.5” drive bay. In addition, we see that BitFenix attaches the front panel IO to one of the side panel. I am not too particularly thrilled with such design because it won’t let you detach the side panel without first unplug the cables. Luckily the cable that is included are pretty sturdy and it is wrapped in rubber for added strength. The cables are pretty long and should be able to reach the board’s header without much of an issue.
Installation
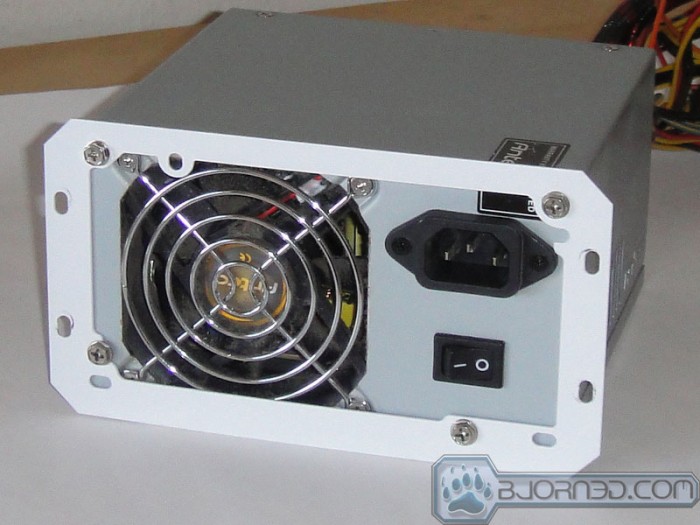
We start with the power supply installation, which it is very easy as you only have to screw the mounting bracket to the rear of the power supply and then insert the PSU into the case. We like the fact that the Prodigy leaves a little bit extra space on either side of the power supply for cable management. The pre-cut opening for the cable is also a nice touch as you only need to pass through the necessary cables. The fact that the PSU can easily be slid in and out of the case is also a nice touch because if you are using a modular PSU, you can slide it out of the case and connect a new cable and slide it back in.
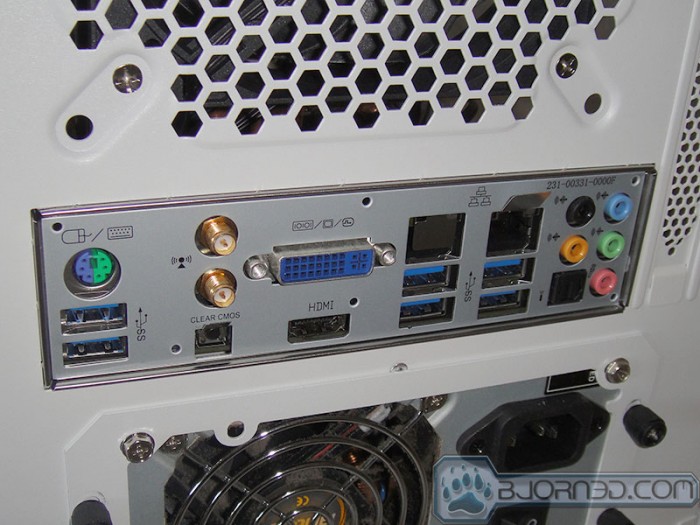
We had to push the rear IO plate pretty hard to snap it in place. Once it is snapped in, we noticed that there is a very small gap between the ports and the rear IO plate.
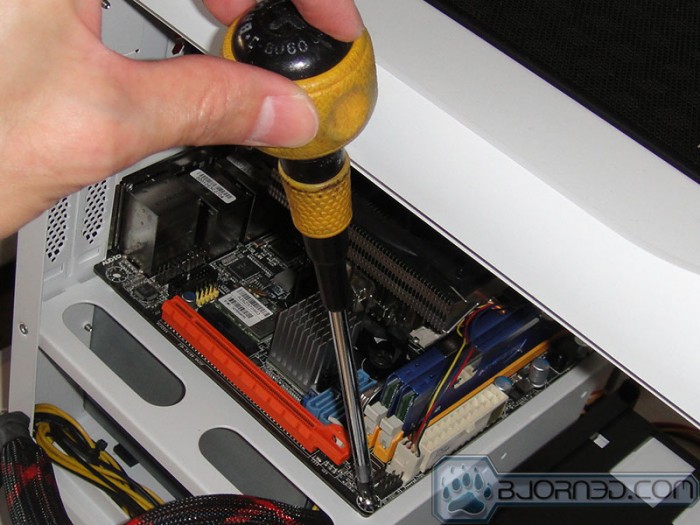
Despite its size, the interior of Prodigy is very roomy once we remove the 3.5” hard drive cage out of the case. Looking on the image above, you can see that it would not be possible to install the motherboard without removing the 3.5” hard drive cage when the heatsink is installed. Luckily BitFenix made it extremely easy to do so by simply pressing the plastic tab lock. BitFenix has preinstalled the motherboard stand-off already, a small gesture that is appreciated. Because the board is installed horizontally, we did encounter a small issue where our long screw driver is unable to line up with the screw. A small annoyance that can easily be fixed with a thumbscrew or shorter screw driver. As you can see, with the hard drive cage removed, it is very easy to gain access to the headers on the board even with our Scythe Shuriken cooler that is 12mm wide and 120mm tall. Also, there is plenty of room above the motherboard for taller heatsink if you choose to do so.
The hard drive installation is equally easy. For 3.5” drive, you snap on the drive tray as it already has a bolt preinstalled lining up with the drive’s screw holes. Then you just have to slide it into the drive cage. For 2.5” drives, they would require a bit more work where screws are involved. Unless you plan to install the 2.5” drive on different places than the 3.5” drive cage, the installation is not going to take more than a few minutes. If you install on the floor or the side of the PSU cage, then you would have to remove the 3.5” drive cage
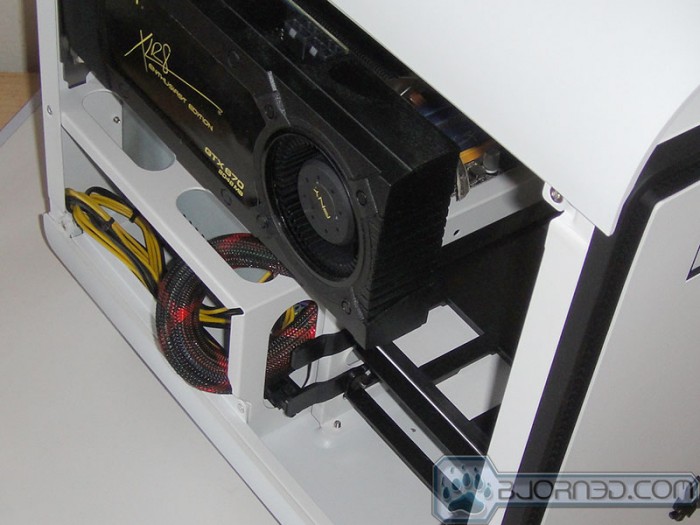
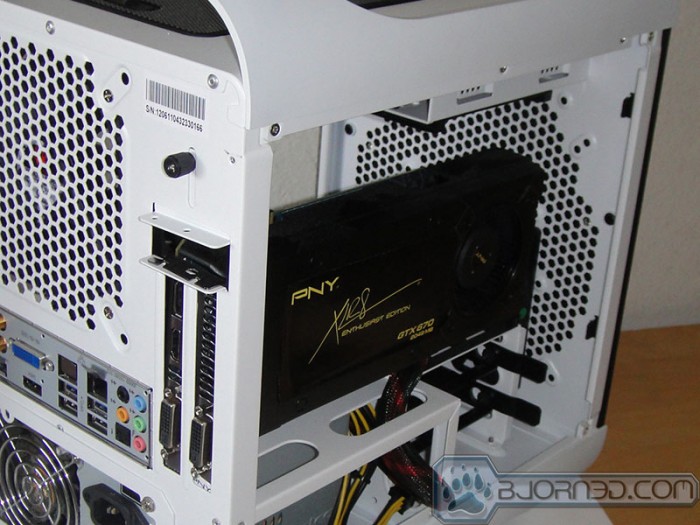
The image above shows you the case with the GTX 670 installed. Notice that there are still some space left for even longer GPU. In fact, If you remove the upper hard drive cage, you would have plenty of open area for not just long GPU but potentially add a water cooling reservoir. We did notice that the rear of the GPU comes very close to the hard drive cage. While we do not any clearance issue, there is potential that if your card has components protruding slightly farther out on its rear, it can come in contact with the drive cage.
We also did encounter small issue trying to align the expansion plate holder. While BitFenix probably wants to make it easier to secure the expansion card with the metal plate, we find it is a little bit hard to use to get the metal plate to align to the graphic card and the case’s screw holes. Furthermore, the metal plate itself is not secure enough so you would still need to use screw to secure the expansion card.
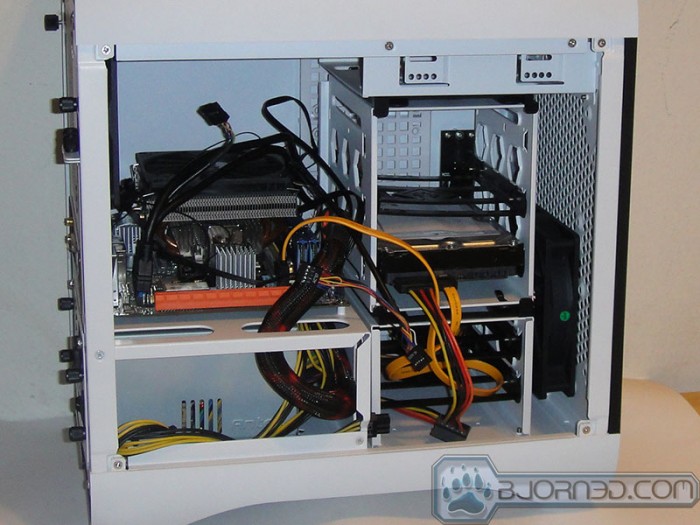
With the motherboard and one hard drive installed, we can see that there are still plenty of open area for larger heatsink. The front panel cable that Bitenix includes are completely shielded as oppose to loose wire so it helps with the cable management.
Testing
We started off by simply running our AMD A8-3850 with the integrated GPU since we envision that there many users out there who would be thinking of using the Mini ICE for HTPCs with an onboard GPU. Since our Zotac board only comes with a single fan header, we only tested with the rear exhaust fan active.
| Idle (ºC) | Load with Prime95 for 10 minutes(ºC) | Load with Prime95 and Furmark (ºC) | ||||
| CubitekMini ICE | BitFenix Prdigy | CubitekMini ICE | BitFenix Prdigy | CubitekMini ICE | BitFenix Prdigy | |
| Motherboard | 60 | 58 | 52 | 55 | 50 | 52 |
| CPU | 41 | 47 | 72 | 70 | 77 | 77 |
| Core | 17 | 22 | 66 | 64 | 68 | 69 |
| Aux | 38 | 42 | 42 | 41 | 40 | 39 |
| GPU Diode | 17 | 22 | 66 | 65 | 68 | 69 |
| HD | 38 | 35 | 37 | 38 | 38 | 40 |
Mini ITX cases may not always offer the best cooling performance because of the space constraint where it is impossible to install large heatsinks. The good news is that the Prodigy does have space if you plan to install larger heatsink. We paired the system with Shuriken cooler because that was the same cooler that we used with the Cubitek Mini ICE. Unfortunately, our motherboard only has one fan header so we only test the case with the rear exhaust fan enabled.
Looking at the number, we can see idle, the Prodigy’s CPU temperature is 6ºC higher than the Cubitek Mini ICE. However, under load, both cases yield the same result. Other than that, both cases have very similar cooling performance. The cooler we used has the fan sitting horizontally that pushes cool air into the metal fins. If you pair the system with a vertical cooler, you probably would see a better cooling performance as the hot air are able to be pull out of the case via the rear exhaust fan.
Let’s see how the system temperature fares with the HD 7770. Since we only have a 380W PSU that will fit into the case, we could not install a high-end video card like the GTX 580 to see how well the case is able to handle the heat produced. Thus, we opted for the HD 7770.
| Idle (ºC) | Load with Prime95 for 10 minutes | Load with Prime95 and Furmark (ºC) | ||||
| CubitekMini ICE | BitFenix Prdigy | CubitekMini ICE | BitFenix Prdigy | CubitekMini ICE | BitFenix Prdigy | |
| Motherboard | 60 | 61 | 57 | 61 | 48 | 59 |
| CPU | 41 | 44 | 75 | 68 | 76 | 69 |
| Core | 16 | 20 | 69 | 64 | 69 | 64 |
| Aux | 43 | 44 | 42 | 44 | 39 | 43 |
| GPU Diode | 35 | 35 | 35 | 35 | 75 | 70 |
| HD | 38 | 38 | 37 | 39 | 40 | 40 |
With a discrete card, we actually notice a 7ºC drop in the CPU temperature (5ºC core) under load. In addition, we also noticed a 5ºC drop in the GPU temperature as well when running Furmark. So despite with only a single exhaust fan, the Prodigy is actually much more efficient at conducting the heat out of the case.
Conclusion
This is our second mini-ITX gaming case (the Cubitek Mini ICE was the other) and we have to say, we are quite happy with what BitFenix has done here. The exterior of the case looks great. We are very impressed by the ingenious design of the case. The modular design of the Prodigy allows us to remove the hard drive cage makes it very easy to install components despite its small form factor. The case is also roomy for large CPU cooler, long GPU, and has plenty of storage space. Not to mention the cooling performance for the case is good considering we only have a single exhaust fan working when we test it.
Despite its small footprint, there are plenty of slots for storage, space for additional fan, and even room water-cooling reservoir if we remove the 3.5” drive cage. For a $70 mini-ITX case, the Prodigy may just be the best case for the buck if you are looking for a portable enclosure for LAN parties. In fact, we also would think it would be a great case for those who are building an HTPC with all of that storage space available. IT would also make a good small home build server as well.
We have seen mini ITX gaining systems are gaining popularity and we got to say if you are looking for a case for your next mini-ITX build, definitely consider the Prodigy from BitFenix.
| OUR VERDICT: BitFenix Prodigy Mini-ITX Case | ||||||||||||||||||
|
||||||||||||||||||
| Summary: The BitFenix Prodigy is an all-around great small form factor case that provides plenty of expansion for storage, cooling, and space for high-end hardware. The modular design also makes it one of the easiest cases to install despite its small size. It earns the Bjorn3D Golden Bear Award. |
 Bjorn3D.com Bjorn3d.com – Satisfying Your Daily Tech Cravings Since 1996
















Good looking? It’s like a fat man sat on a Apple Mac Pro! M-ITX was designed for SMALL form factor, this chassis is anything but – I’ve seen M-ATX Mid towers that take up less space.
beauty is always in the eyes of the beholder, isn’t it:). Yes, there are incredible small form factor PC out there. However, keep in mind that this case and a few other bigger mini-ITX cases are designed for those who need small PC but offers the support for high-end video cards, expansion slots, and storage.
ultimately, that is the beauty of PC, isn’t it, you get to pick whatever suits your own need.
You misspelled Prodigy as Prodity. just fyi