Overclocking
Overclocking a Nvidia GPU today is a bit different today than a few years ago when all you had to do was increasing the clockspeed and possibly the voltage. Today you have a core clock speed and then a boost clock speed as well as a power target which will stop you from overclocking too much. eVGA has a utility, eVGA Precision X16, that allows you not only to tinker with both the clock speed and voltage but also change the power target and the temperature target and also select which of them should be a priority. You can of course also use other overclocking utilities.
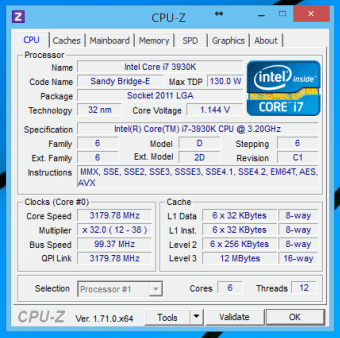
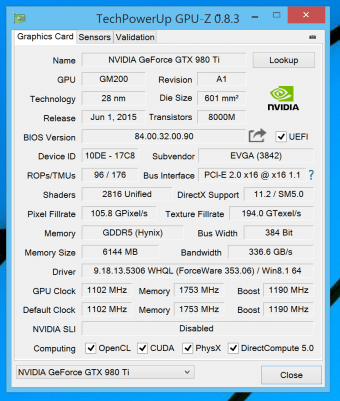
Here we see the base speeds on both CPU and GPU before we started to overclock.
We followed this methodology while overclocking.
- Set priority to power target
- Increase the clock speed slightly
- Test the overclock with 10-20 minutes of MSI Kombustor and then 3Dmark.
- If ok, keep increasing and test again.
- If not ok, slightly increase power target and voltage and keep trying and increasing until the machine no longer is stable.
- Next do the same with memory.
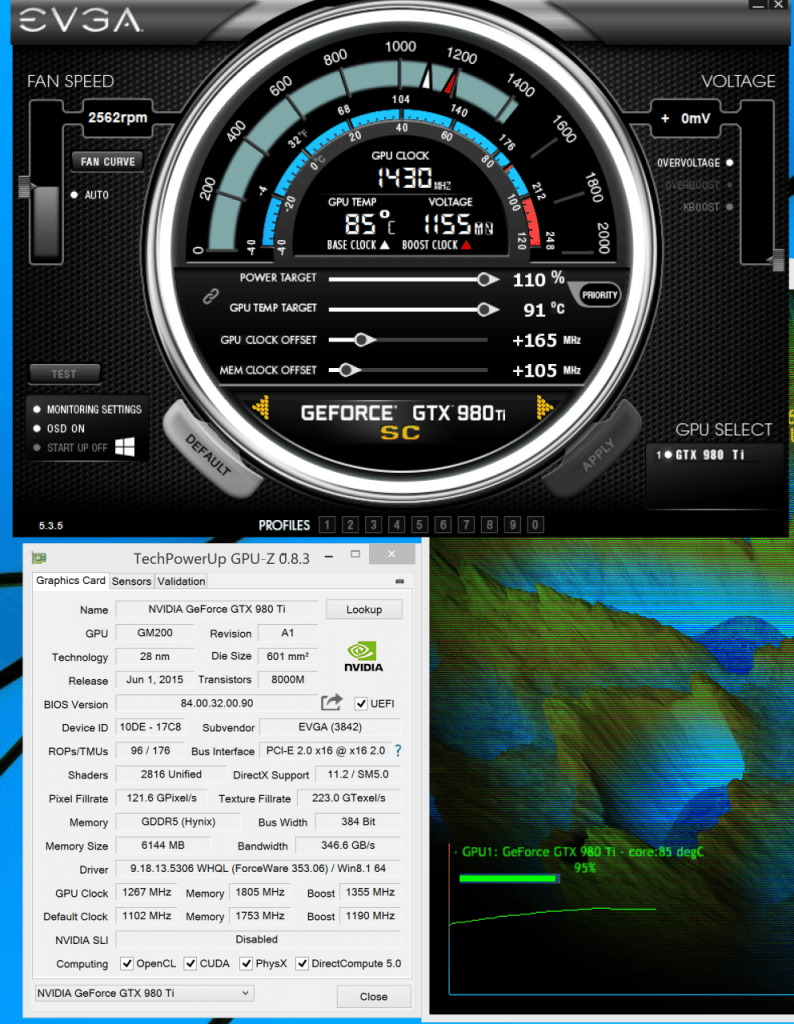
Those with good eyes will noticed that we in this image only have runt it for a few minutes. This was only done for the screenshot. Our proper stability tests were around for 30 minutes.
In the end we arrived at a max overclock of 1267 MHz (boost around 1430-1440 MHz) for the GPU and 7220 MHz for the memory. This represents a 15% increase in clock speed over the already overclocked GPU.
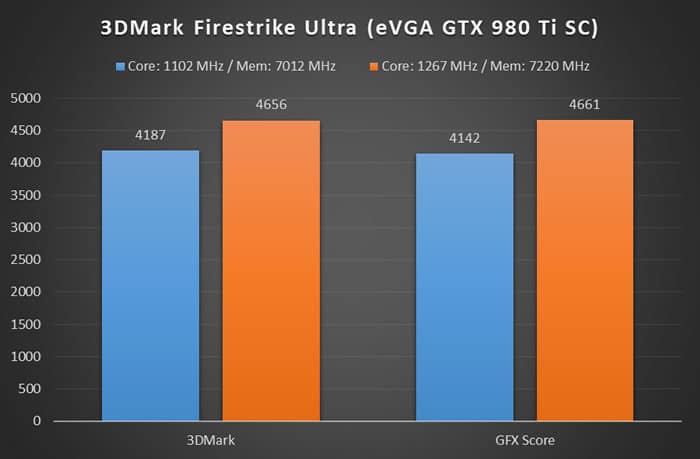
As we can see we directly see a 11-12% increase in performance in the demanding Ultra-test of 3DMark. When we compare to the Zotac AMP! Omega-edition card the eVGA card now gets almost 45% higher scores. Wow!
NOTE – as always any overclocking is done on your own responsibility as it can damage your card. Make sure to work slowly when overclocking and test each step so you can back down if needed.
 Bjorn3D.com Bjorn3d.com – Satisfying Your Daily Tech Cravings Since 1996


