Close Look at the TVS-682
Let’s take a closer look at our review model, the TVS-682. The TVS-682 comes with four Ethernet cables, a quick installation guide, a power cord, screws for M.2 and 2.5’’ drives, heatsinks for M.2 SSDs, and the RM-IR002 remote control.
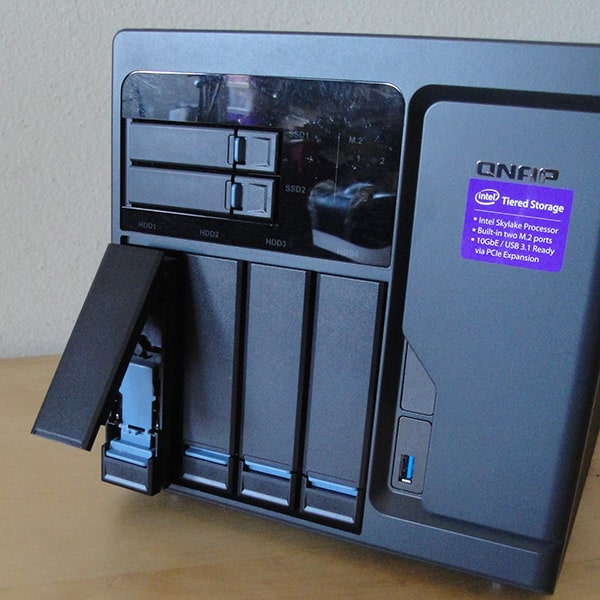
For a six bay NAS, the TVS-682 is surprisingly compact at 23.9 (H) x 224.9 (W) x 319.8 (D) mm. The unit weighs just 7.7 Kg without the drives. As expected, the chassis of the unit is metal, a trademark of QNAP’s high-end models that we loved.
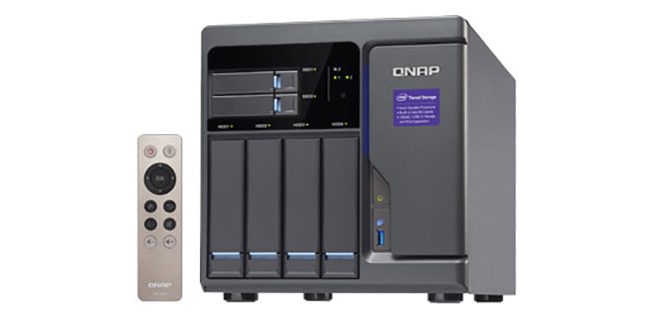
On the front, we have four 3.5’’ drive bays, above it is where we find two 2.5’’ drive bays, and to the left is where the power button and an USB 3.0 port with One Touch Copy. The front features LED indicator for the system and the hard drives status. One feature that is lacking with the unit is the on screen control that we sometimes find on the NAS devices of this price range. While it is convenient to be able to configure the NAS with the integrated button, we are not particularly concern that the fact the unit lacks such feature. Especially, since QNAP offer a wide range of options setting up the NAS that includes not just web interface, but also Windows/Mac App (Qfinder Pro), mobile app, Cloud, and pc-less Local Display where you just hook up a keyboard, mouse, and a display.
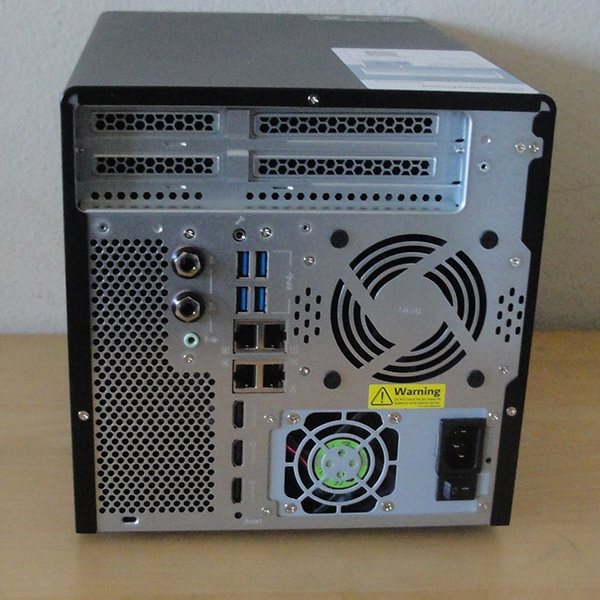
The rear of the unit is where we find four more USB 3.0 ports, four Gigabit Ethernet ports, three HDMI ports with two supporting HDMI 1.4a and one supports HDMI 2.0. Interesting, QNAP did not clearly mark which port is 1.4a and which one is 2.0 specification (FYI, the bottom port is the 2.0 specification). Also, we find two 6.3mm mic ports and one 3.5mm line out jack. The audio is handled via an add-on card and the unit also feature two built-in speakers where we can use use either the integrated speaker or the 3.5mm audio port but not both. Given to the size of the unit, we are not expect the integrated speaker to be particular powerful but it produces rather loud sound and quite clear audio.
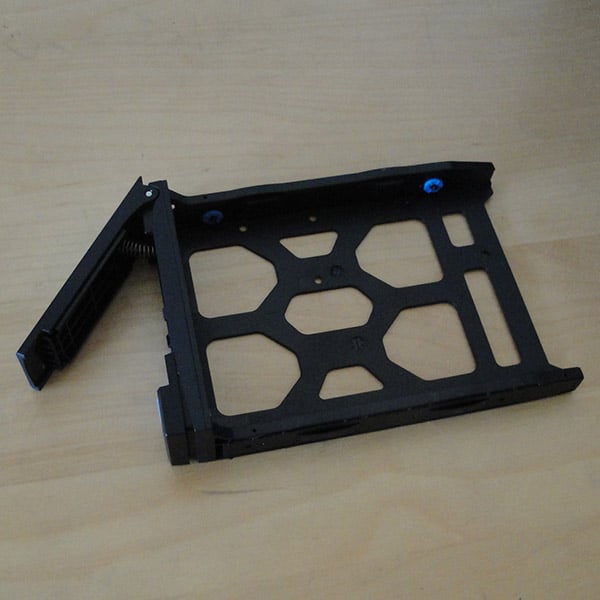
The tray on the TVS-682 is different from what we have seen from QNAP, as it features a new design. The newly redesigned tray is made with plastic instead of metal that we used to get from the TVS-x71. This is rather surprising to see since QNAP’s mid and high-end NAS have traditionally been using metal tray whereas the plastic trays are often found on the entry level models. Luckily, the plastic material used here is not flimsy at all. While it does flex slightly when we twist it, it is quite sturdy and has no issue maintain a good gripe onto the drive.
 A lot of thoughts have been put into the new tray design where it is now completely tool-less with integrated lock. A switch is now used to lock and unlock the drive without the need of a physical key so we can prevent any accidental removal. To eject the tray, we just have to switch the lock to the unlock position and press the eject button and tray spring out of the drive. This makes it super easy to hot-swap the drives. However, this also means that you no longer has the ability to use a removal key to protect the drive and anyone can just swap the drive with a push of a button. Not that the older key-based method offers much secure protection, but it does at least offers small piece of mind knowing that the drives are being locked inside the NAS where it would require a bit more effort to get it out of the NAS. Ultimately anyone who is using such high-end NAS should protecting the precious data via encryption and have a backup system remotely.
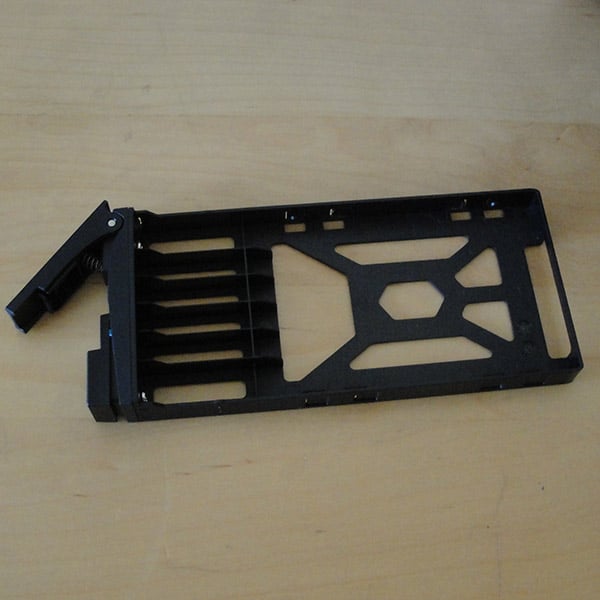
Despite the lack of the removable key, we do love the new design. The new drive tray uses retention bars so that installation of drives no longer need a screw-driver. We just have to peel off the retention bar on either side of the tray and then install the drive. Then re-insert the retention bar and we are ready to slide the drive into the NAS. Quite easy and efficient. Installing the 2.5” drive is slightly different as there is no retention bar but just as efficient where we just have to pop the drive into the drive tray.
While QNAP markets the TVS-682 as a six bay NAS. The unit actually has 8 storage space: two M.2 SATA, two 2.5’’ and four 3.5’’ drive. QNAP is not advertising the unit as 8 bay model as the M.2 is really designed for caching purpose or with the Qtier storage to maximize the performance and most likely shared the same bandwidth as the other ports. Given to the fact that the price per gigabyte for the SSD is still a few magnitude higher than the HDD, we are glad to see QNAP’s decision here. Clearly, the x82 really is aimed for content creators that demands the highest IO performance by pairing a flashed based storage with the mechanical drive.
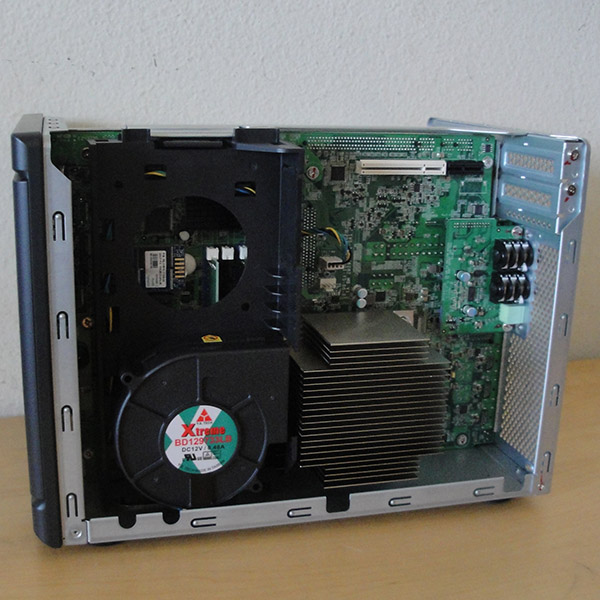
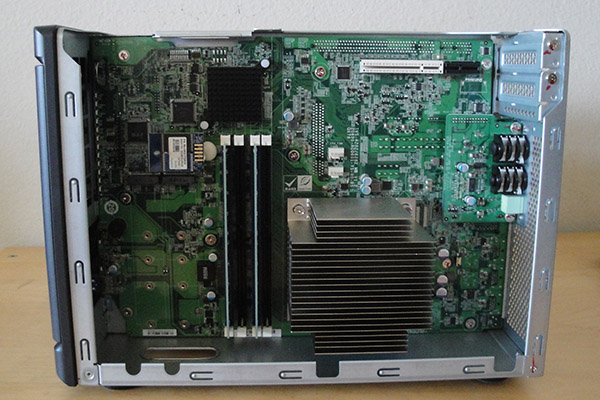
Inside, we see the NAS uses slightly different design than what we typically see on any computing device where instead of having the motherboard placed toward the edge, we have the motherboard located in the center of the NAS with components located on the either two sides. The right side is what QNAP called “the CPU zone” which houses the CPU, CPU cooler, RAM, two M.2 slots, and the x4 PCIe expansion slot. The left side is “the HDD and system zone” where we find the hard drive, power supply, additional cooling fan, and the x16 PCIE expansion slot. According to QNAP, this “multi-zone” design helps with the heat dissipation for quieter operation as the NAS will dynamically adjust the system fan and CPU fan. QNAP’s reason for such design is that as NAS is gaining more functionality, there will be greater number of apps and background tasks running, so by isolating the cooling of the CPU from the HDD, it can effectively increase the fan speed of each zones.
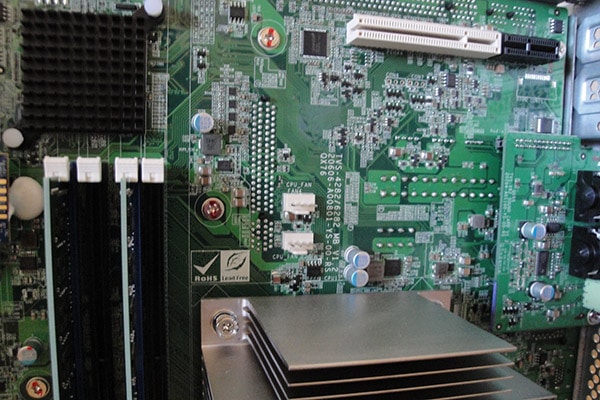
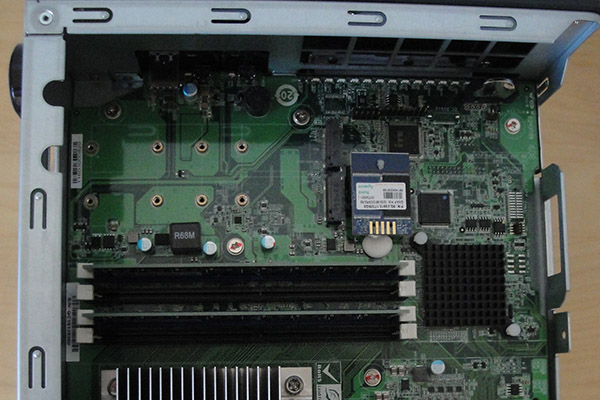
When we remove the CPU cooler, we can see NAS uses desktop DDR4 instead of SODIMM that we often find on the NAS devices. Two slots are populated already on our review model with two more available for adding more RAM. Next to the RAM is where we find the two M.2 slots that supports two SATA M.2 SSDs with 2242, 2260, 2280, and 22110 form factors. We can also see the add-on audio chip here as well.
The unit comes with two cooling fans: a 9 cm blower style CPU fan (model BD129733LB ) and a 8 cm rear exhaust fan. The fan is not directly attached to the CPU heatsink as we can see, so the fan is responsible not just cool the CPU but all other components in this zone. There is no intake fan, however, which we think maybe something that could help to bring additional cooling to the NAS. While the use of the energy efficient Skylake Core i3-6100 processor means that the unit does not run particularly hot, we notice that when we ran virtualization with the CPU hovering around 80%, the temperature for the CPU would reach up to 60ºC and the hard drive can reach to 48ºC. Granted, these are acceptable temperature but we do not mind seeing them a bit lower as there are apparently two more additional fan headers located on the board to allows us to put additional fans but the unit unfortunately has no space inside to fit any additional fan.

That the expansion slot’s placement has a rather unusual configuration where one slot is placed on either side of the PCB board. We have the x16 slot located on the CPU zone side and the x4 slot is located on the HDD and System zone. The unusual configuration allows users to actually use two dual slot cards without making the NAS overly tall.

We can see that the unit comes with an internal 250W power supply.
 Bjorn3D.com Bjorn3d.com – Satisfying Your Daily Tech Cravings Since 1996




Please discuss (or provide a link elsewhere) the use of antivirus products in conjunction with file attachments encountered by the qmail application you discuss in your article. Thanks.