Installation & Use

| Test Setup | |
| Case | Cooler Master Mastercase Maker 5t |
| CPU | Intel i7-6700K |
| Motherboard | ASUS Sabertooth Z170 MK1 |
| Ram | Mushkin Redline Ridgeback 16GB |
| CPU Cooler | Corsair H110i GTX |
| Storage Drives | Kingston V300 120GB SSD |
| GPU | Gigabyte Xtreme Gaming GTX 950 |
| PSU | SilverStone ST-1500 1500W |
Inside the Box
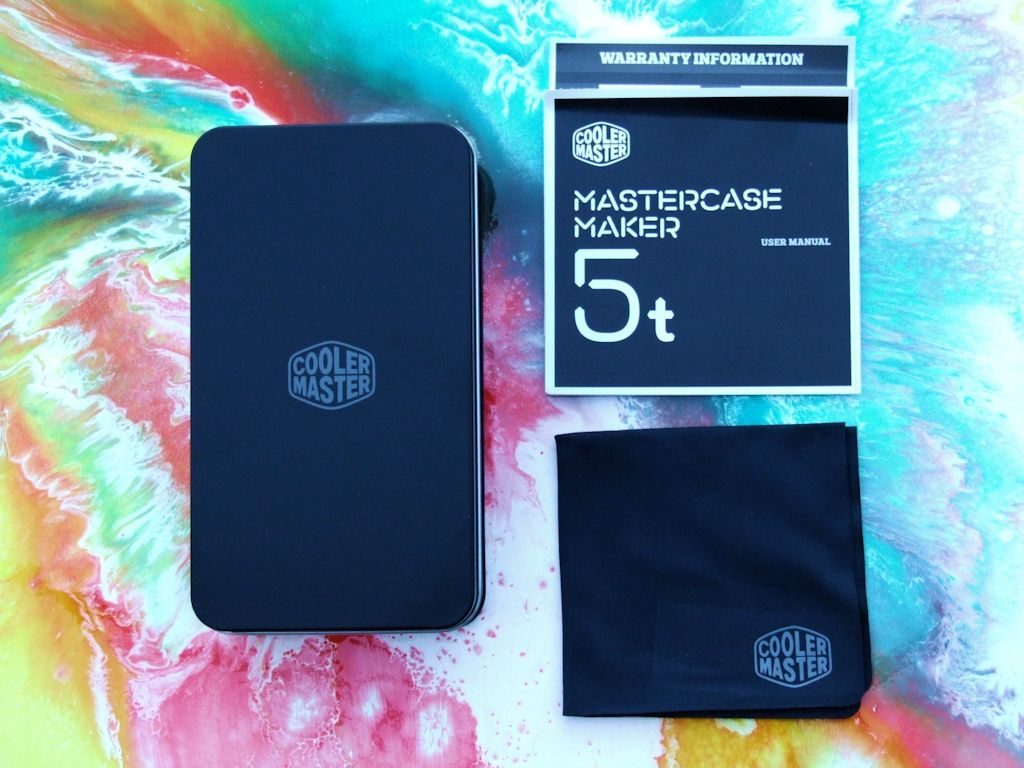 Upon opening your new MasterCase Maker 5t you will find a user manual and warranty information, a microfiber cloth for keeping your glass clean, and a surprise metal tin…What could it be?
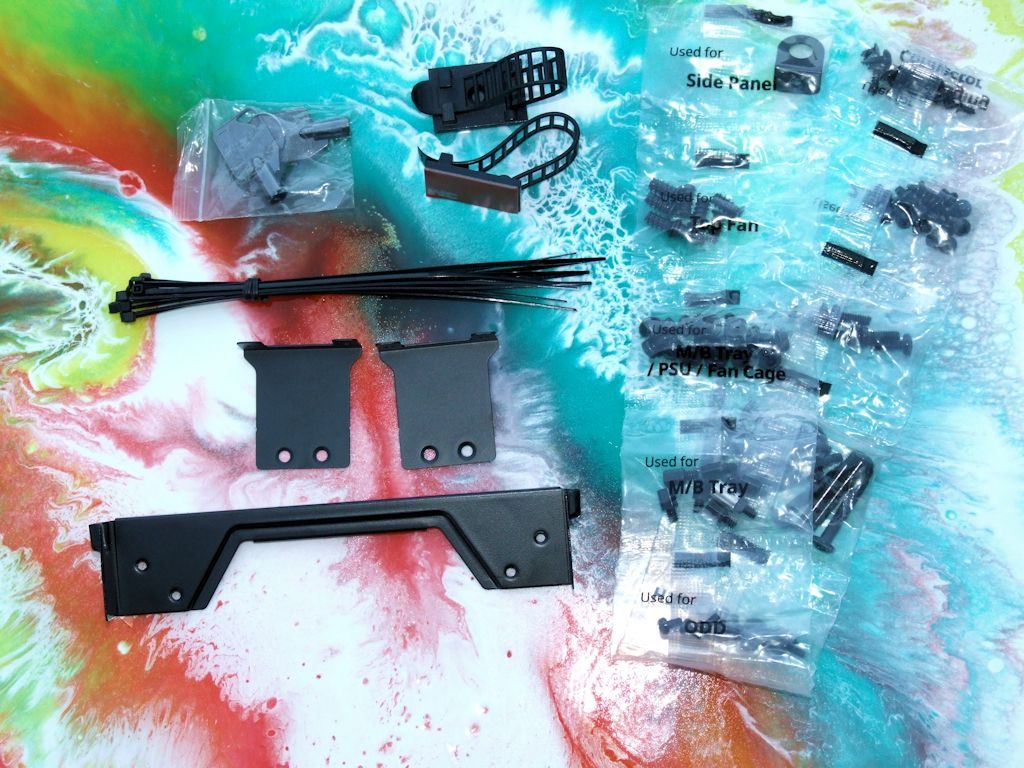
Inside the tin you will find:
- Keys for side panels
- Zip ties
- Additional mounting brackets
- 3M placeable wire / random stuff holders
- Individually packaged and labeled screws / hardware
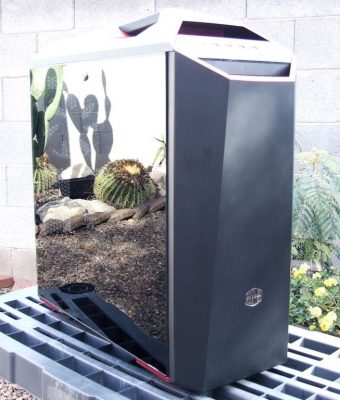
Build Walkthrough – Exterior
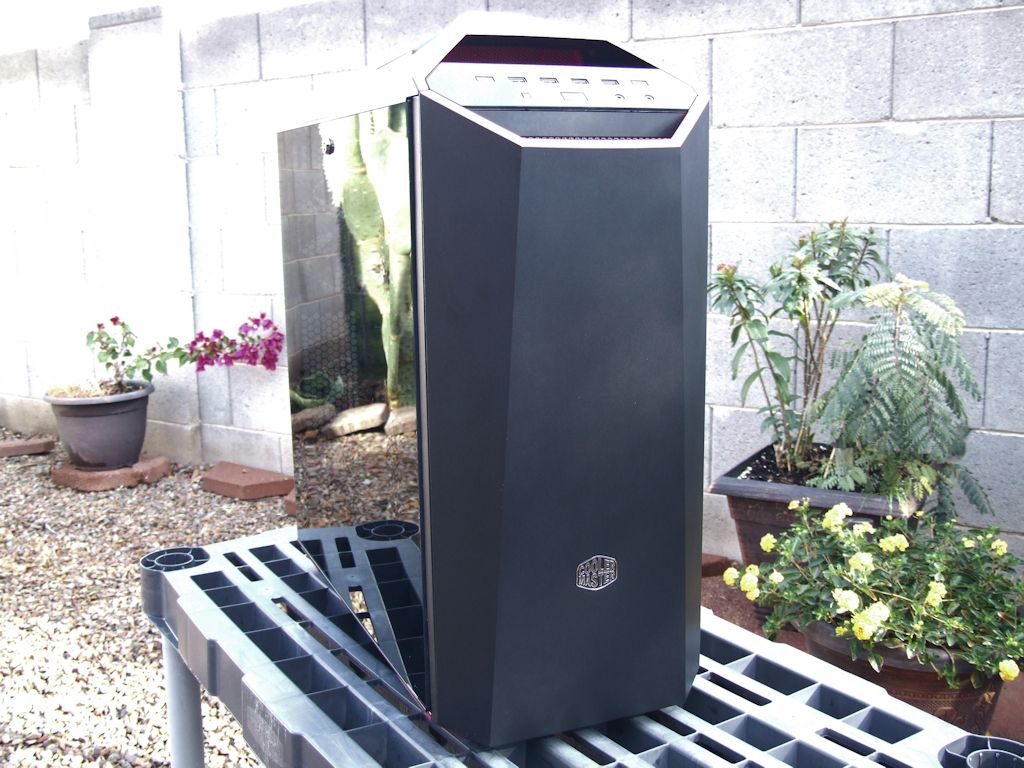
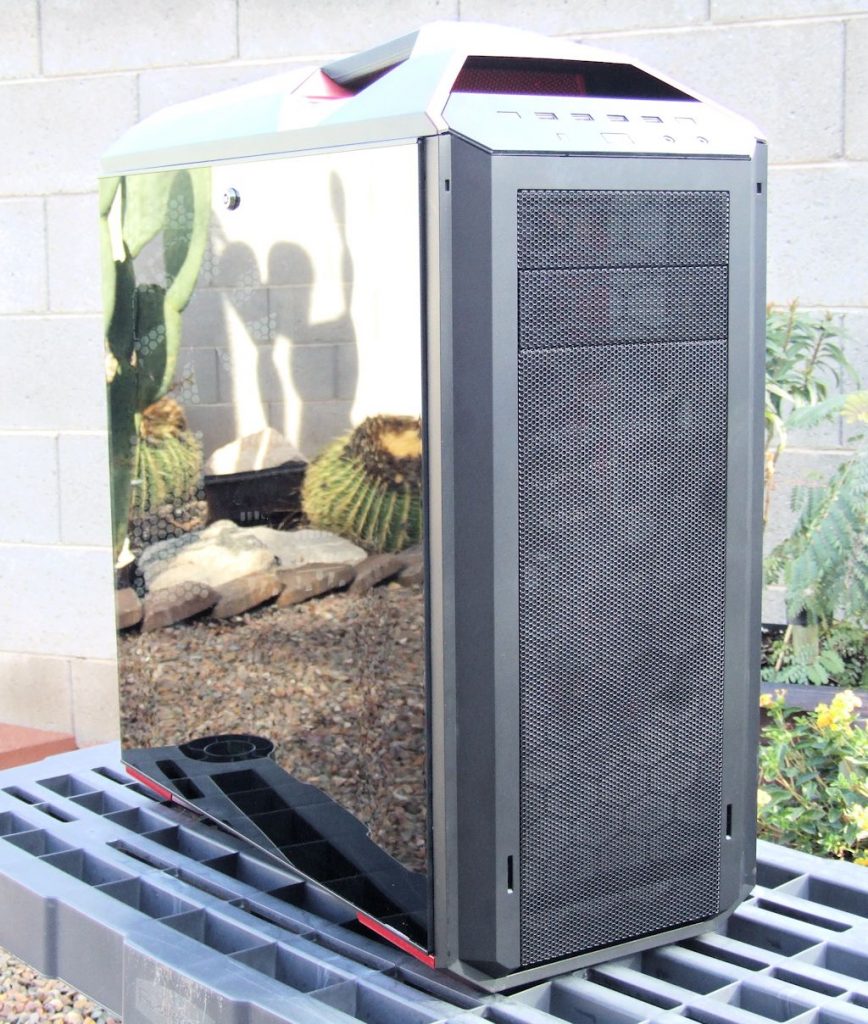
We really like the dual glass panels and were surprised the MasterCase 5t did not come with LED fans. We think the MasterCase 5t should come with LED fans stock to show off behind the glass. To offset the cost of this we think the second glass panel should be an ordering option. The panels go for around $50 and we would choose to have LED fans included over a second panel personally, and then maybe order a panel later, but that’s just us. Cooler Master most likely figures buyers of this tower will be adding their cooling fans of choice but for a case of this level we still say it should have LED fans included.
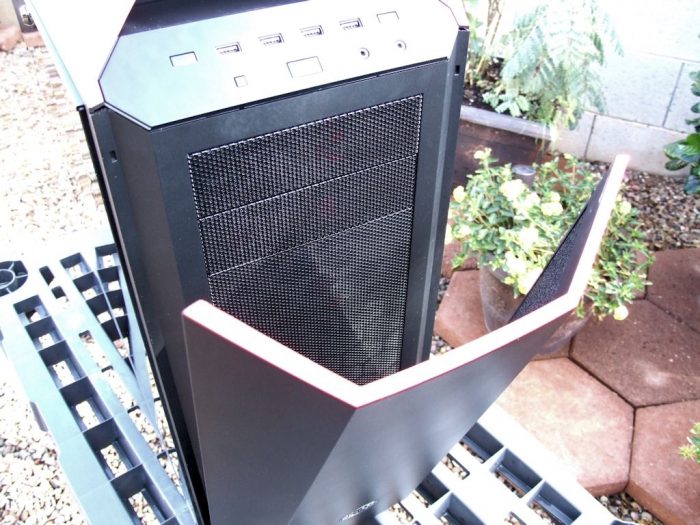
The front panel cover on the Maker 5t has a magnetic resistance that holds it firmly in place. To access any ODD or fan controller you may have installed simply tilt the cover forward. We have opted to go with no ODD or fan hub at this time. The Maker 5t does include additional mounting brackets for a fan hub. Lining the inside of the panel cover you will find a sound dampening material to keep things quite. We would like to see a translucent front panel cover as an option from Cooler Master to allow visibility up front. We were surprised it did not include this option to compliment the dual tempered glass side panels.
Users seeking absolute maximum airflow may opt to remove the front panel cover altogether. We enjoy the look of the MasterCase 5t with the panel cover on or off, both give a different vibe to the build. Removing the cover takes only a moment. Another bonus to having the cover removed is to allow visibility to any LED fans you may have installed up front in the case if that’s what you are into, which furthers our above case.
The handle on the MasterCase Maker 5t feels solid when used. It does not give or feel like it is buckling under the pressure of lifting the weight of the PC. We also found this little nook handy for placing small objects like flash drives we use often.
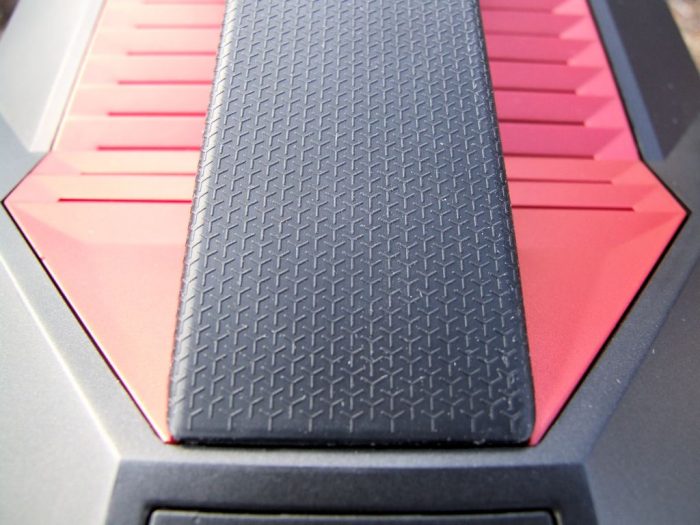
A softer rubber compound surrounds the grip of the handle and is easy on the hands. While the handle is soft, the material feels tough and gives the sense it will not tear or degrade too quickly.
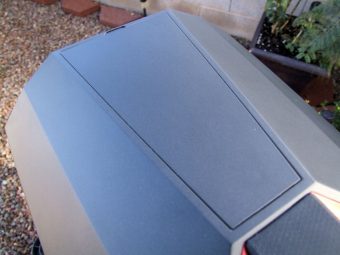
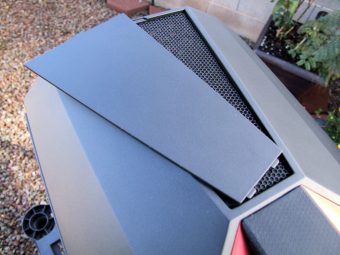
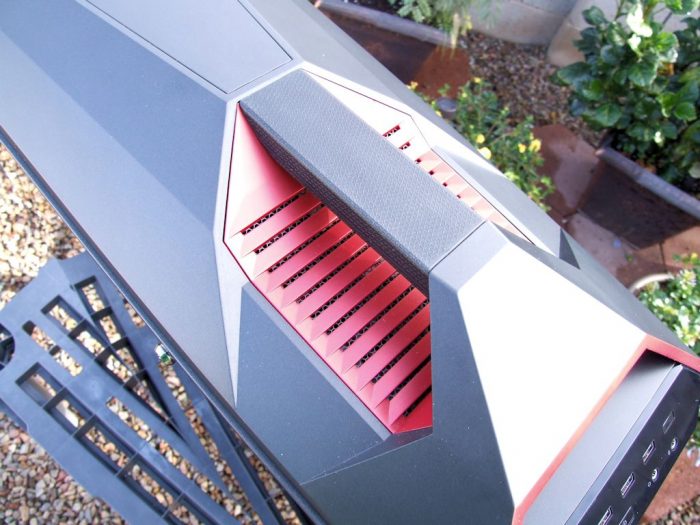
On the top rear of the Maker 5t we find the optional vent panel. Air can still vent out of the back of the top shroud with the optional vent panel installed for those who like the sleek look of it. We enjoy the look of the exposed mesh with increased airflow and choose to have the panel off.
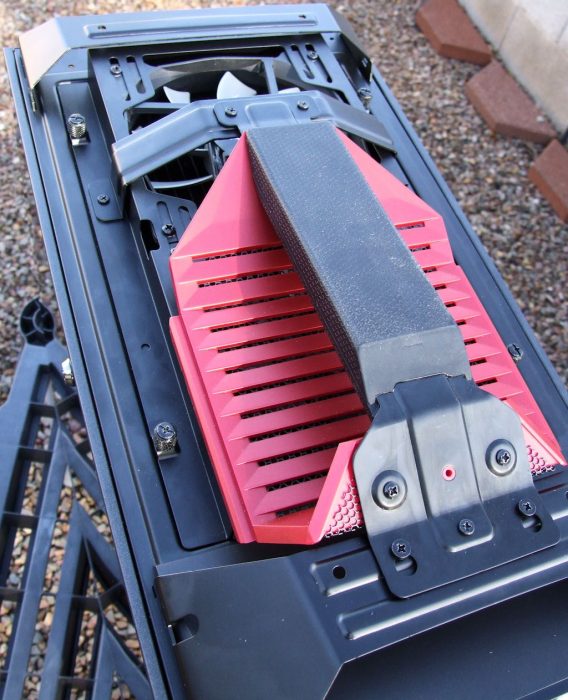
The top shroud is held on by magnetic resistance as well and is easily removed to reveal the mounting points for the handle. Three quick screws and the handle is free and we can access the top fan/radiator bracket.
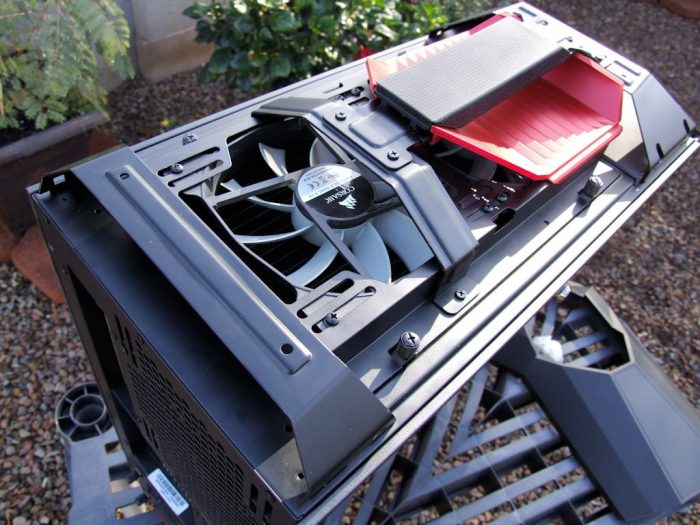
Another four screws and the top radiator bracket is free. The mounting points on the bracket are adjustable and give some wiggle room when building which is always welcomed. Being able to mount the rad and drop it in through the top makes installation much easier.
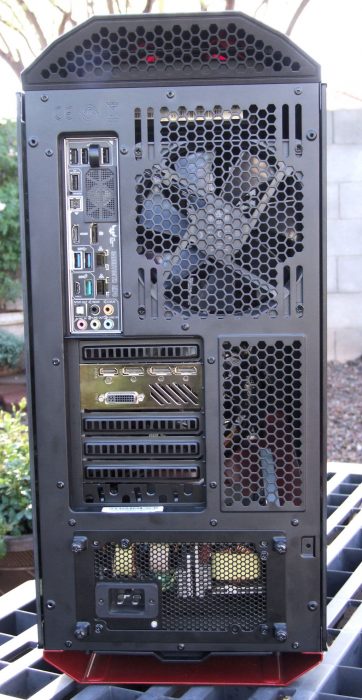
The back of the MasterCase 5t is pretty strait forward. From this angle you can get a look at the clearance under the case. Our PSU is able to get fresh air that isn’t effected thermally by the other hardware. The dust screen keeps things clean.

The back fan mounting points are adjustable also like most things on the Maker 5t. Whether you want to go with a 120mm or 140mm fan you are covered.

The detachable PSU mounting plate may be our favorite feature of the MasterCase 5t. Placing the PSU into a case can be a tricky ordeal and can often result in scratched hardware. Not in this case. The PSU slides right into the back on padded rails keeping things simple and safe. Initially the mounting plate did not fit our PSU. A small metal nub on a screw point ran into the ST-1500’s power plug shroud. A little work with a metal file and problem solved.
Build Walkthrough – Interior
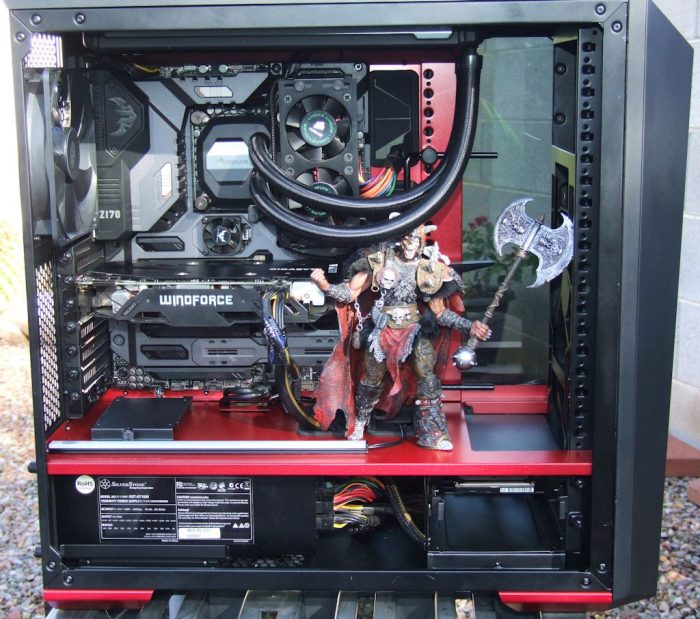
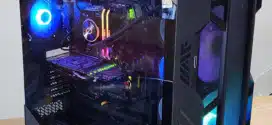
Building inside the Maker 5t was really a joy. With nearly every aspect of the case being modular or adjustable in some way, the design removes a lot of troubles of building. Something in your way? remove it. As the Maker 5t is geared to gaming builds and heavy gaming users we went with only the essentials for a gaming build. The Maker 5t is an excellent canvas to paint a masterpiece on.
Our ST-1500 PSU is a pretty monstrous size. If you are using a PSU of this size your bottom drive cage location loses it’s second mount point, there is no space to slide over. If you are running a large radiator in the front mount point with a PSU of this size you will have to mount your hard drive cage up top. Some users will run a few SSD’s in the other mount points and remove the hard drive cages altogether.

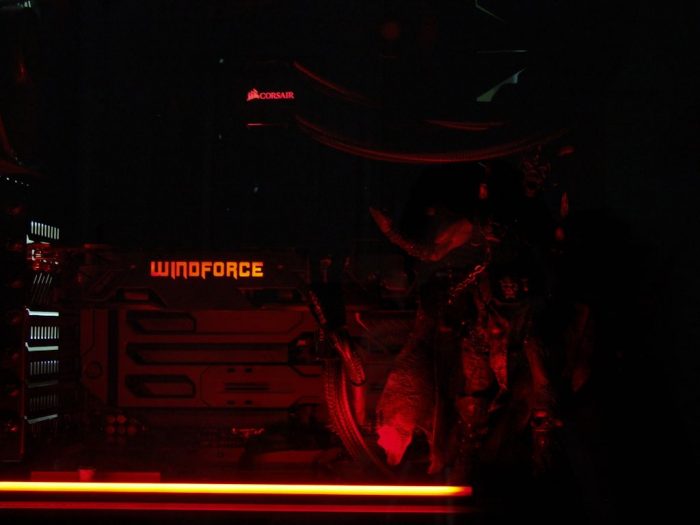
We are now going to address the elephant in the room. This case is red and includes a red LED strip. At this time we are not aware of any more color options to become available. Pretty much every hardware on the current market is RGB. If we pretend that all people like either Red, Blue, or Green, Cooler Master’s color choice effectively alienates 2/3 of it’s target market. If you like red it’s a beautiful metallic red and looks great. If you don’t like red you aren’t going to buy this case, it’s that simple. We hope to see color options in the future.
When wiring the case we found multiple ways to run nearly everything. The Maker 5t is well thought out and when we wanted to run a wire there was always a cutout in the right spot to keep things clean. Here we left one SSD bay mounted to show clearance. We also left the LED bar in stock position for easy viewing.
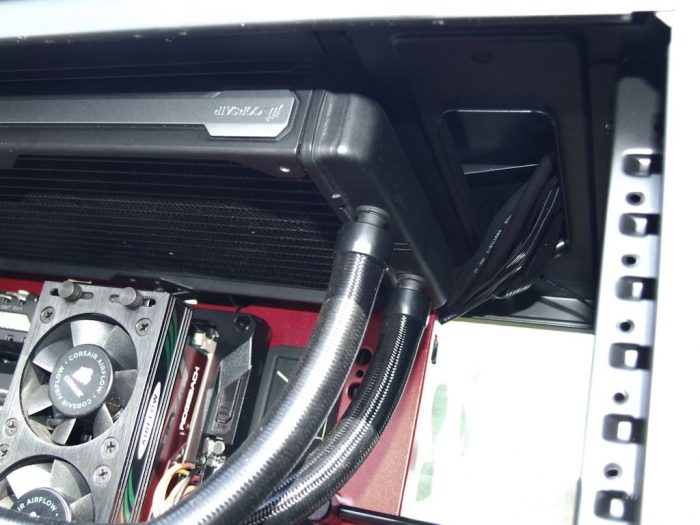
Our chosen CPU cooler the Corsair H110i GTX was larger than the Maker 5t’s size spec for a 280mm radiator. We were unable to mount the radiator to the bracket and drop it in through the top. We had to mount our fans to the bracket then mount the rad from the bottom. We did this for two reasons: 1. Because we simply wanted our rad up top. 2. To show that even though the cooler is larger than recommended spec it still fits into the case in the top mount position.
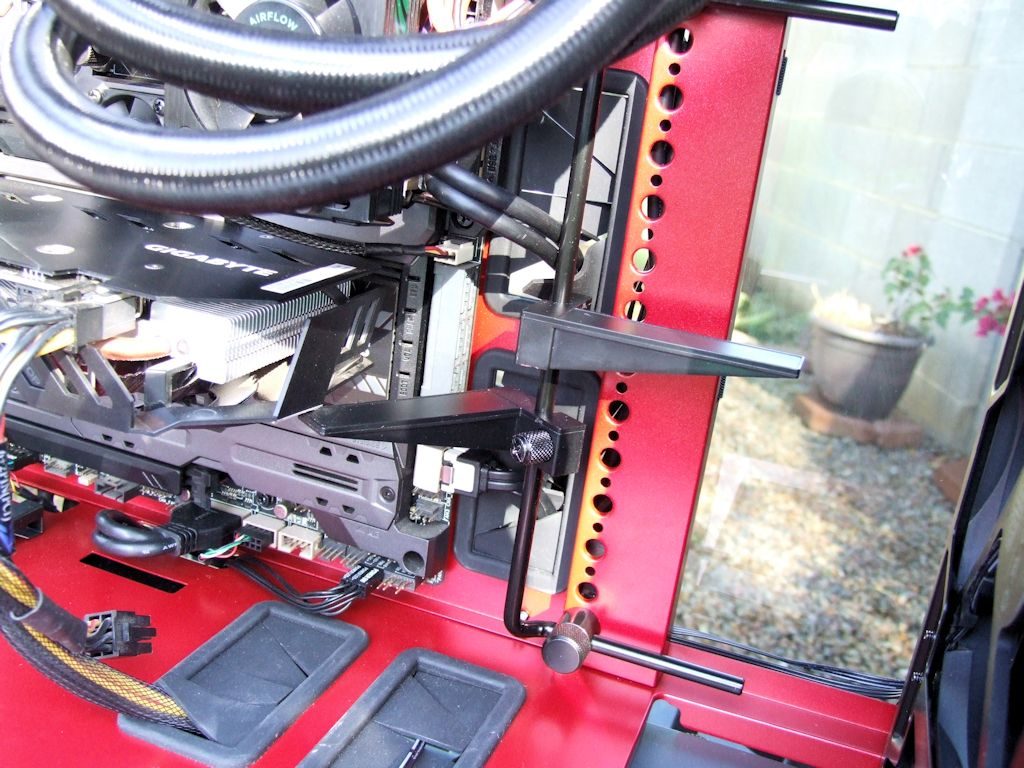
Above we see the MasterCase 5t’s GPU support in action. Believe it or not the Xtreme Gaming GTX 950 does experience the slightest bit of sag. As the MasterCase 5t is designed to hold some expensive GPU’s we were surprised the supports did not have some sort of soft material on them. As far as usage they work perfectly.
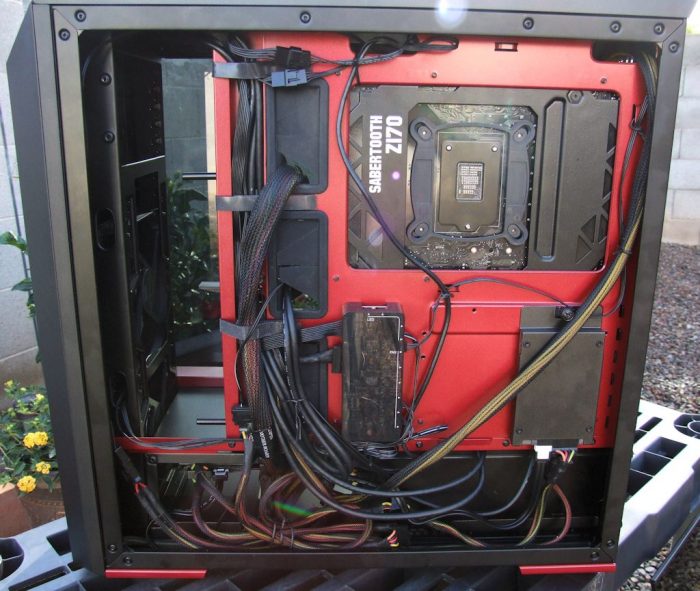
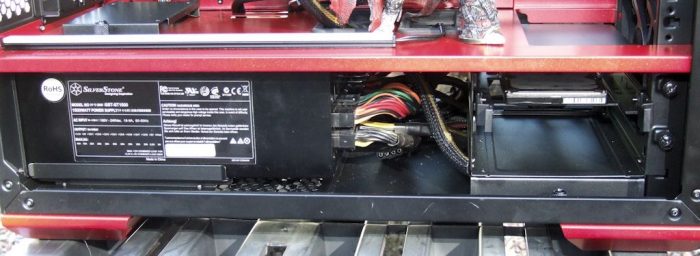
Around the back of the PC we were pleased to find there is enough room for everything. Our ST-1500 PSU has some super long cords. Even with those large cords the Maker 5t had enough space to run everything. When complete we didn’t have to force the back panel on or hassle with it. This is a rare occurrence as anyone who builds PC’s knows, sometimes you have to force the back panel on due to lack of case depth or space. Not the case with the MasterCase Maker 5t.
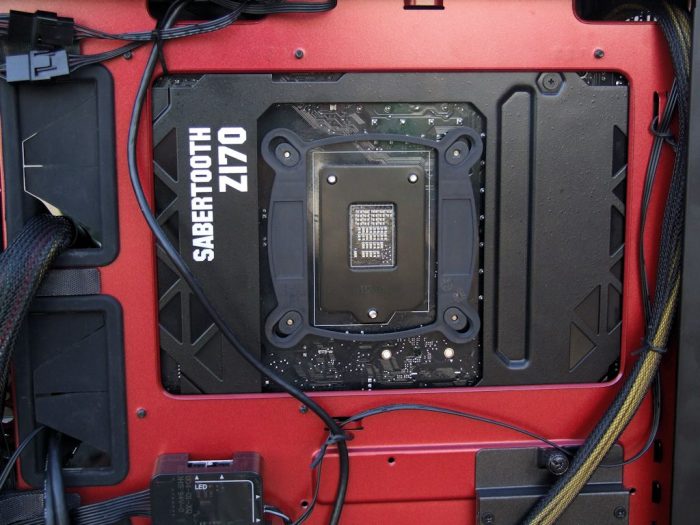
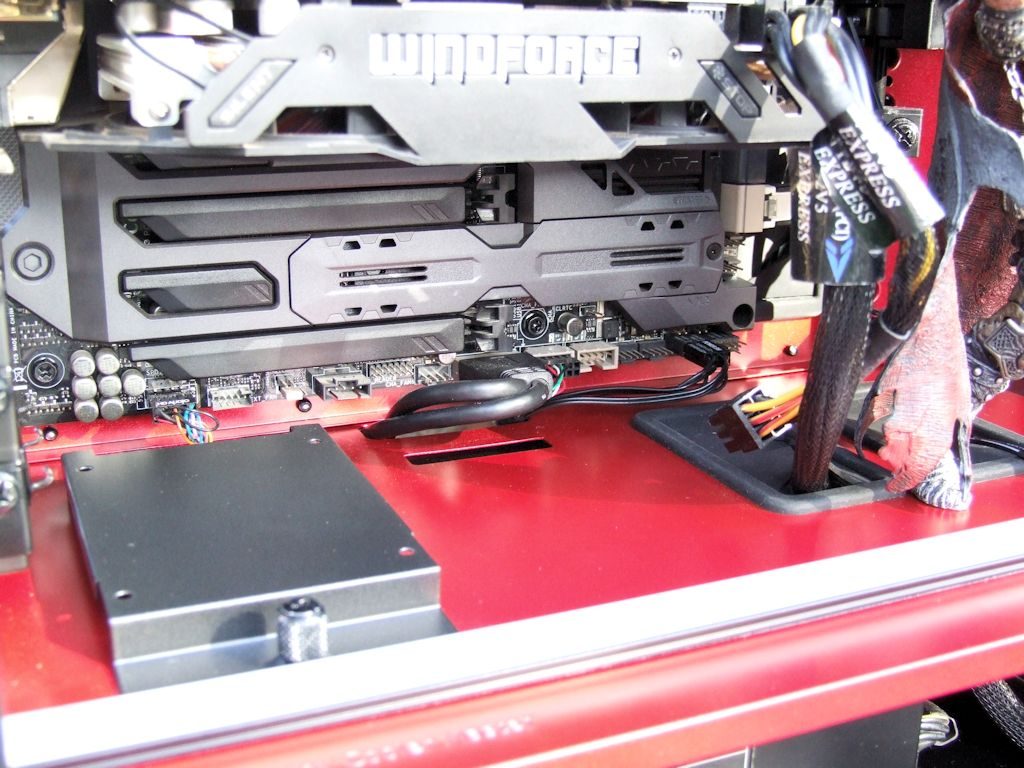
Zeroing in on the motherboard cutout area we can see the cutout out is large enough for future upgrades. If you need to install a new CPU cooler it can be done without having to remove the board from the case. A pretty common feature but definitely worth a mention.
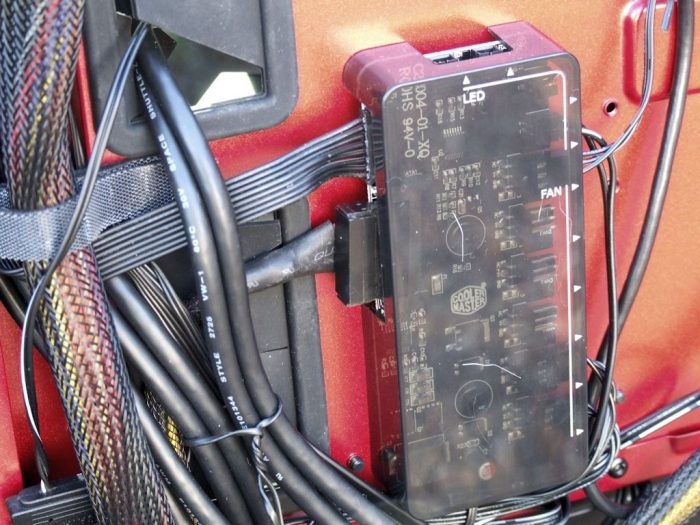
The fan/LED hub is a nice addition to the case. We were not fans of the placement/design however. As you can see above the SATA is way to close to the case forcing you to basically 90 degree angle the cord, which we did not enjoy. We did enjoy the headroom of being able to control six fans and four LED strips from the front panel with the push of a button, right out of the box.

And finally we focus on the two SSD mounting points around back. Just one hand screw and the drive cage is free. We chose to put our SSD here to keep the wiring cleaner in the front. No space issues or oddities to report here.