
Asus GPU Tweak 2
Asus has revamped its GPU Tweak Technology and now it’s GPU Tweak 2. Since it’s a major redesign we felt compelled to cover it.
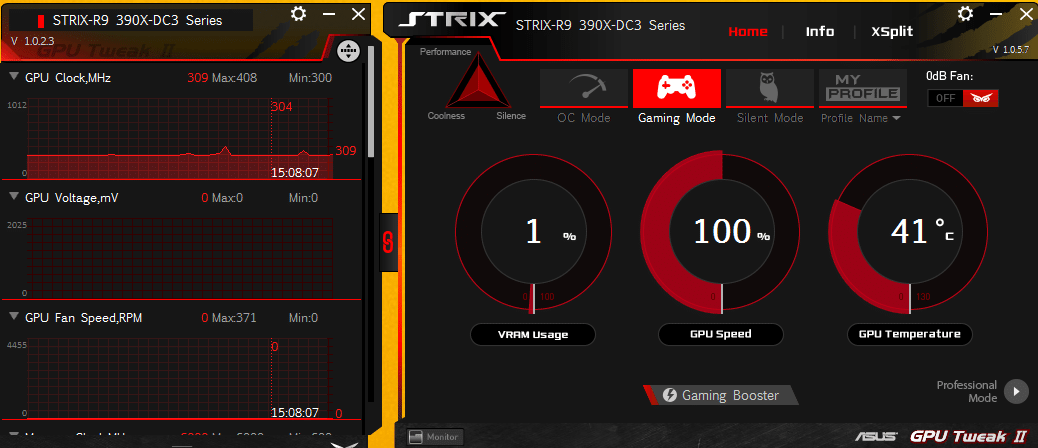
When you open GPU Tweak II it’s quickly apparent that things have changed a bit, you don’t jump right to the OCing screen you get an opening screen showing VRam usage, GPU Speed. and GPU Temp. Along the top you find OC Mode, Gaming Mode, Silent Mode, and My Profiles. Off to the left a monitoring screen.

Still on the Opening screen we clicked “OC Mode” and we got a mild OC from 1070MHz to 1090MHz. Since the stock speed of a Ref R9 390X is 1050MHz the Strix R9 390X Gaming 8G OC comes with a mild factory OC of 20MHz taking Ref 1050MHz to 1070MHz, Clicking OC Mode overclocks the already overclocked GPU from 1070MHz to 1090MHz or a total 40MHz OC from Reference design. Memory gets a whopping 5MHz (real) boost which translates to 20MHz effective making the aggregate memory speed 6020 effective. Not the kind of OC that’s going to give you an adrenaline rush but it’s fast easy and safe for beginners.
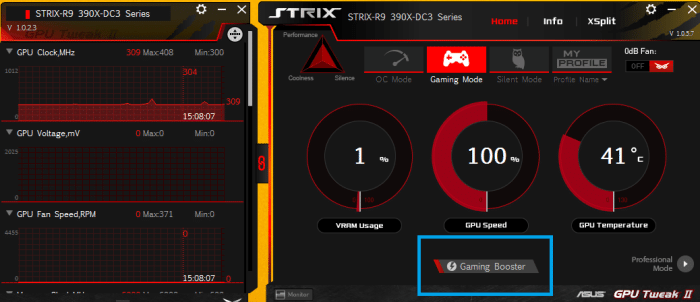
Our eyes wandered to Gaming Booster so we gave it a click.

We thought well there’s OC mode what does the Gaming Booster do? It sets a suggested best appearance, in our case stopped 8 Windows services it felt were un-needed, and defragged 79MB of memory. It also stops Windows Aero and frees up resources you won’t use during gaming.
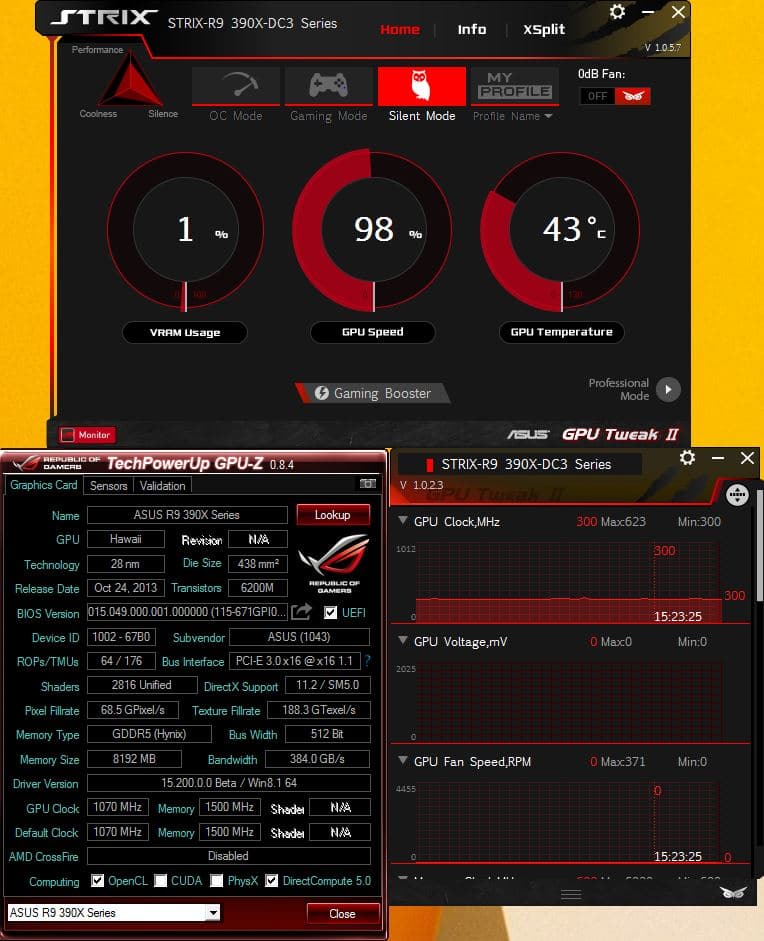
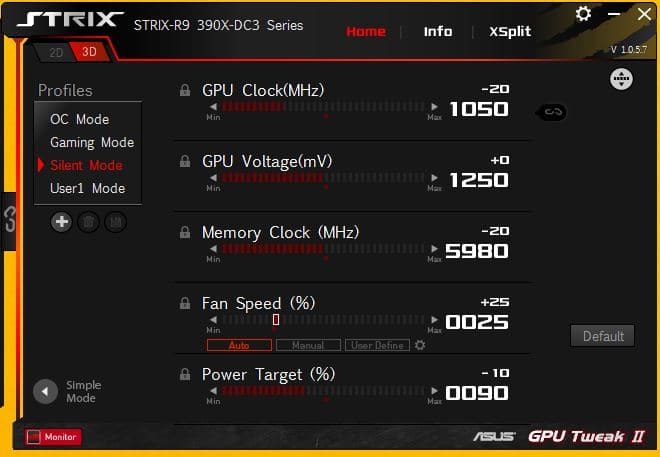
We fired up GPU-Z (external, GPU Tweak II has a version built-in) then clicked Silent Mode, we didn’t go to far into it but it shifted the GPU back to 1070MHz the factory overclocked speed and set the GPU to a top end usage of 98%, that’s not how much is being used ATM but the top end limit of the core is now 98% usage,
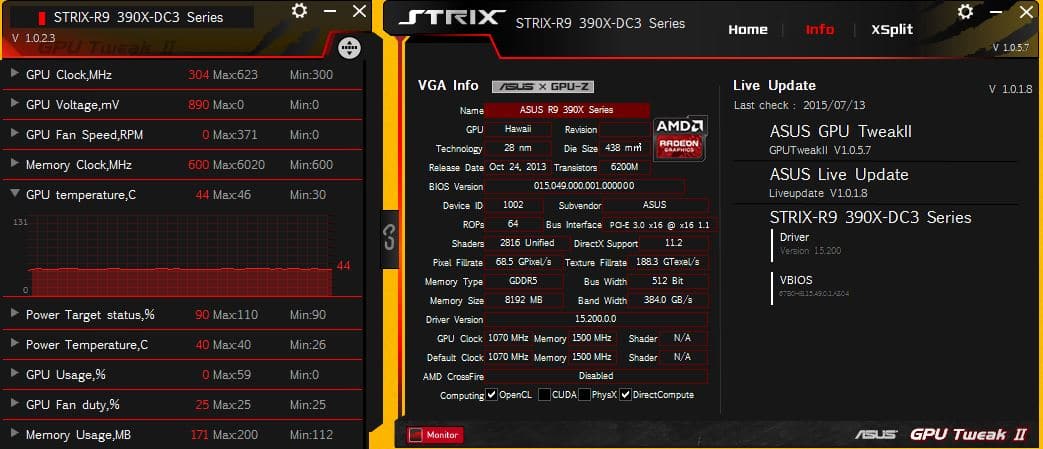
Click the info button on top and you get a GPU-Z version and GPU monitoring. On GPU Tweak (1) we got a monitoring screen with 3 items and had to scroll. On GPU Tweak II you can collapse the ones you don’t want and expand the ones you do want but Asus taught GPU Tweak a new trick.

You can drag the monitor utility until you can see every option on the monitoring window, un-dock it if you want and shove it to the side of the screen so you can run windowed tests and monitor every aspect of the GPU.
Go into the professional mode and you get to the manual OCing portion. In GPU Tweak 2 you get GPU Clock speed, GPU Voltage, Memory Clock, Fan Speed control, and power target. Well you know us we see a button we are probably going to click it. Now take it for what it’s worth this is a Phone App, but the phone app has mirrored our dBA meter, the phone was just handier and offers a screenshot.
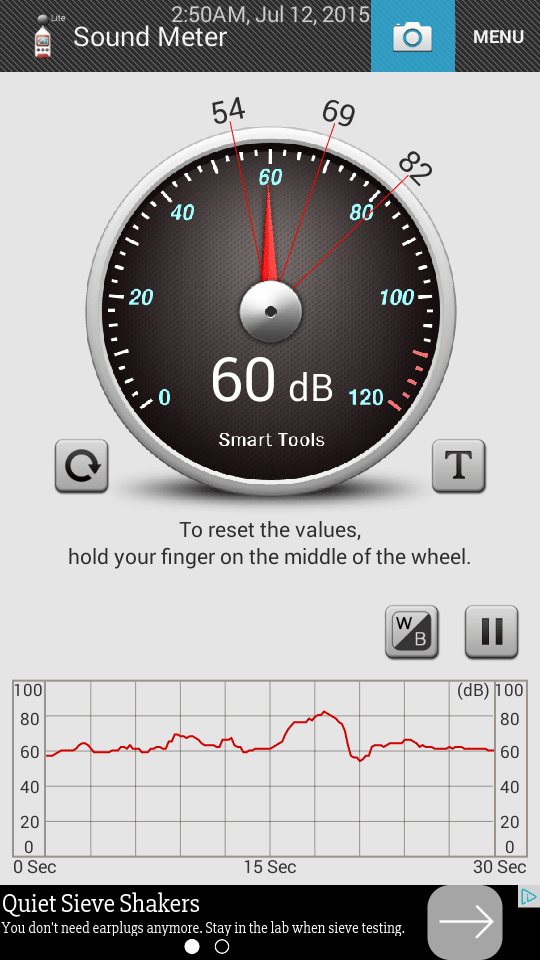
We were full on OCing in a quiet room with no ambient noise to speak of, we kicked the fans up to 100% standard procedure with us for OCing maxed out and our Phone App hit a whopping 82dBA and averaged 69dBA. We weren’t right on top the GPU we put the phone near our ear sitting in a desk chair about 3 foot from the GPU. Needless to say 100% fan was a little overbearing on noise but it was manually set and never got that loud during intensive game play. Yes at 2:50AM June 12th 2015 we were up testing the Strix 390X Gaming 8G OC we prefer to spend some quality time with our review GPU’s as opposed to slapping some tests on charts and rushing to publish. That quality time was just at 2:50AM, it did wake a dog sleeping next to the test rig but no car alarms went off.
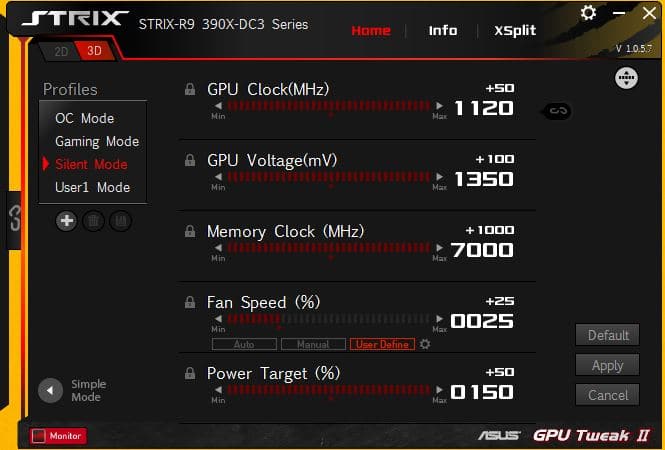
Here’s the don’t like portion of GPU Tweak 2 showing the maximum setting GPU Tweak 2 will allow. Maximum allowed OC on the Asus Strix R9 390X was 50MHz over the factory OC speed of 1070MHz so our OC maxed out at 1120MHz, GPU voltage was good enough, Memory clock exceeds what normal GDDR5 will do no problem there, we had fan speed control, and we could increase power target. AMD OverDrive will OC the card and you may go higher with OverDrive, Asus set the limit at 1120MHz on GPU Tweak 2 their OCing Utility so we left it at that.
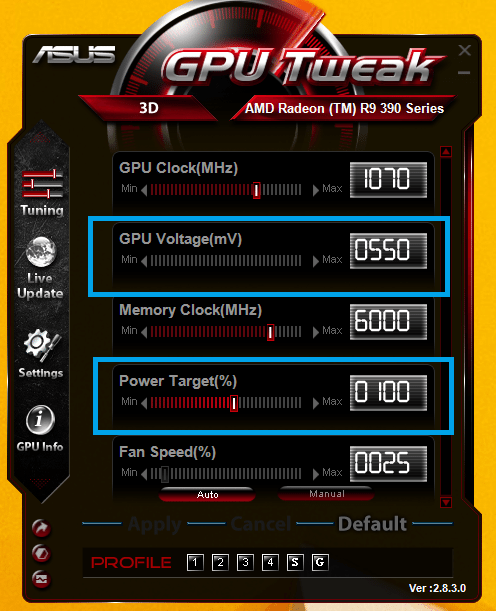
We went back to GPU Tweak 1 and the voltage setting is whited out but power target is enabled so we set power target to maximum and kicked the GPU to 1140MHz just 20 over what GPU Tweak 2 allowed and the screen just went black indicating not enough core voltage, We also broke out MSI Afterburner and again no voltage adjustments.


The Amazon link doesn’t lead to this card but the DU2 version. Can’t find this card selling anywhere?
Otherwise very nice review
Excellent review! Thank you.