Overview of the Sapphire HD 7950 Vapor-X


Click Images to Enlarge
The packaging of the HD 7950 Vapor-X is simple, quite clean and just looks good with a masked character just to give it a little attitude. A few key support icons are on the front edge but otherwise mostly clean and clear, I guess you could say a professional or sleek look.
The rear is another story entirely as it carries the same character but alongside this is a whole host of different data showing supported technologies and many of the awards won by previous product some even from us right here at Bjorn3D.
Inside the box we are greeted with the card in an anti-static bubble bag and a foam insert to keep the card from moving around during transport. This is all encased in a recyclable egg crate paper mesh enclosure which is a pretty cool and eco-friendly move compared to the plastic clamshell we see on some cards.
Lifting the egg crate card tray out we find the accessories so let us see what comes with it.

![]()


Click Images to Enlarge
Here is a list of all items included in the accessory pack:
-
Installation Disc
-
Dual 4 Pin PATA to 6 Pin PCI-E Power adapters
-
Single PATA to PCIe 6 pin power adapter
- DVI to VGA Adapter
- HDMI Cable
- Crossfire Bridge
The accessory package is more than enough to get the card hooked to pretty much any display and the HDMI cable was a nice touch to have it included. Some HDMI capable displays do not include a HDMI cable but do include a DVI, While they both are digital I just like the HDMI better due to the ease of connectivity.


Click Images to Enlarge
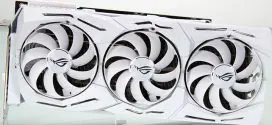
Here is the card: The cooler looks pretty sharp, both in style or appearance and simply it looks like a sharp object with all of the jagged angles. Some people like the smooth sleek looking cooler designs but for me the edgy kind of design like we see here is cool with me as it just makes the card look like something you don’t want to mess with.
The cooler is a dual slot design but the shroud does encroach slightly into the adjacent slot space but from what I can tell it’s not enough to really cause an issue but definitely check fitment before starting your system if you have another card sandwiched against it.

Click Images to Enlarge
The rear IO supports multiple connectivity options including:
- DVI-I
- DVI-D
- HDMI
- DisplayPort
This is enough connectivity to control a nice array of displays should the need for an Eyefinity setup arise.


Click Images to Enlarge
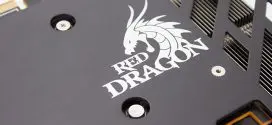
Here we see the card at most all angles including the rear of the PCB where many components can be seen. This card does not have a backplate so you will see the card in the nude when installed in your case.
Removing the cooler we get a look at what is under the hood and what makes it run. Running along the top PCB edge we see the stiffening bracket which helps make sure the PCB is nice and solid since the Vapor-X cooler focuses all of its mounting tension on the GPU itself and not on supporting PCB rigidity.
The VRM for the GPU and memory are both cooled by separate plate style coolers which use pushpin mounting mechanisms to seat the cooling plate and thermal pad to the components. Once removed you get a better look at the power delivery system along with the detail Sapphire went into to ensure adequate cooling such as the tiny cooling plate for the small VRM components at the top IO side edge.
Here also we see the cooler with the Vapor chamber large in the middle and raised GPU contact area to ensure maximum contact and thermal transfer.


Click Images to Enlarge
Here is the previously mentioned BIOS switch or button that controls which BIOS is enabled. When the boost BIOS is enabled the Sapphire logo will light up white whereas when the standard BIOS is enabled it will not be lit. Note that you must make the switch of BIOS before powering on your system otherwise the standard vBIOS will be loaded.
Here we can see the VRM components which are actually quite interesting as this card uses IOR Directfet units which offer excellent cooling properties along with very high power capability for excellent performance and efficiency potential. Also the grooved top on the chokes tells me they are made to run super cool as well which is something that is always good as cooler components simply run better.