Overview of the ASUS P8Z77-V Premium
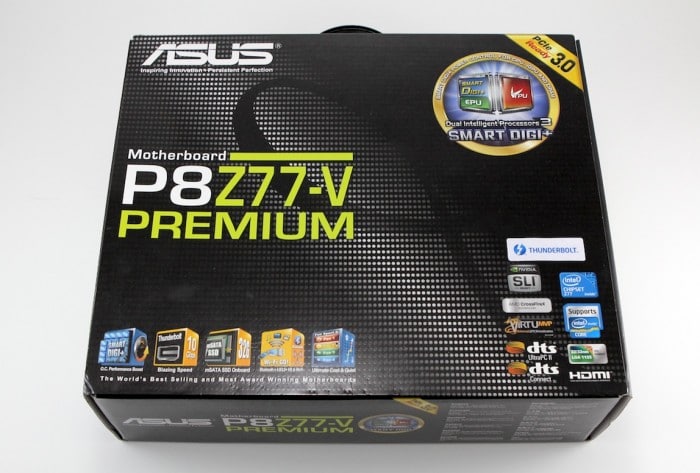
The packaging is standard fare from what we have seen for the other channel line boards which is not necessarily a bad thing but more of a note to the simplicity of packaging with only minor signage to denote the importance and capability of what is within. A Thunderbolt logo adorns the package but those who do not know the significance of this will understand once they open the flap and browse through the features. The box has a lot of information within the cover and on the rear of the box but it gives a brief intro and explanation to the included features and tech without going into too much detail or becoming overly technical for the regular user. We knew that the board had Thunderbolt, which is fast and awesome, so we wanted it. Also included is a 32GB mSATA SSD.
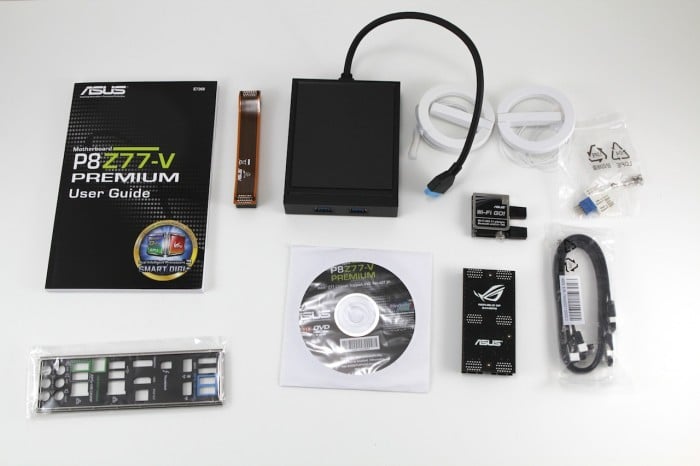
Here we get a look at the vast array of accessories that come in the box, as there are many.
Here is a list of all items included in the accessory pack:
-
IO Shield
-
SATA cables
-
USB 3.0 3.5″ front panel module
-
2 Way SLI Bridge
-
3 Way SLI Bridge
-
4 Way SLI Bridge
-
Users Manual
-
Driver/software disc
-
Wi-Fi GO! Antennae
-
Wi-Fi GO! module
-
Easy connect front panel connectors
The accessory package is stout and covers complete connectivity of the board and should have more than enough to fully utilize the board with the supplied connectivity.
Click Images to Enlarge
Here we take a look at the complete board, along with the installed Wi-Fi GO! module and antennae installed. The overall layout of the board is very similar to what we have seen on other ASUS offerings in that the component placement is well though out and optimized for excellent cable management and routing. The component connectors are mostly at the boards edge which helps keep cables from being strung across the board surface making for a much more tidy build. The Wi-Fi GO! module is just like the one we looked at on the P8Z77-V Deluxe in that it offers a multitude of convenience and functionality features such as DLNA media server or even an access point.
Click Images to Enlarge
Here we take a look at the Rear I/O portion and see what kind of connectivity is offered by the P8Z77-V Premium.
-
2x USB 2.0
-
2x eSATA
-
4x USB3.0
-
Thunderbolt Port
-
HDMI
-
Displayport
-
Dual Intel Gigabit LAN
-
BIOS Flashback Button
-
8 Channel audio
The Premium comes equipped with dual Intel NIC’s to ensure maximum reliability. Intel NIC’s have been long known to be very reliable and great performers by both gamers and enthusiasts users. Besides reliability and performance Intel NIC’s also do a lot of the heavy lifting when it comes to network traffic which means the CPU doesn’t work as hard since it is offloaded from the CPU to the NIC. Also, the fact that dual NIC’s means that even if one fails there is another so that downtime is kept to a minimum. Teaming is also available for those who wants to pair up both LAN ports for increased performance.
Click Images to Enlarge
At the center of the board there is a heatsink connected via heatpipe closely resembling the Northbridge cooler of previous generations. This houses something quite special: a PCI-E Gen 3 PLX chip used for multiplexing or multiplying available PCI-E lanes for the GPU slots. This allows for 4 card SLI or crossfire configurations at full X8 Gen 3 to all 4 cards which is a boatload of bandwidth. Gen 3 PCI-E is twice the theoretical bandwidth of the Gen 2 spec which in turns means that the x8 on the 4 slots will be closely comparable to x16 on Gen 2 which means that even on gen 3 capable cards the bottlenecking will be low (in single digit percentage wise) in most cases.
The lower edge of the board carries the connectivity for front panel and control switches. On the switch side of things there is the standard power and reset switches but also there are 2 toggle switches for EPU and TPU. EPU is all about power savings and how low can you go so to speak in terms of power efficiency for the board. TPU is basically an automatic overclock on the CPU to approximately 3.2-3.3GHz, and it will even give a bump to the iGPU as well if being used. Also on the bottom edge is the LCD post indicator which helps diagnose if there is ever an issue during bootup even though through all of our testing we did not see a reason to need it yet, but when overclocking im sure it will come in handy.
Click Images to Enlarge
The bottom right of the board was a real surprise, housing a mSATA port with a preinstalled 32GB mSATA SSD. To have a mSATA SSD right out of the gate was pretty awesome to see as that means that Intel Smart Response SSD caching is ready to run out of the box. The SSD is not tied to the SRT function and can easily be upgraded to any size you want and can be run as the system boot and even storage. If you were so inclined you could even run the board just with the mSATA SSD and no other drives attached (obviously, such a system would not be ideal for large amounts of data storage).
The 4 slots are all dual slot spaced to allow 4 dual slot cards to be installed or even two triple slot cards to be installed with a single slot of air space between them to ensure plenty of cooling airflow to the cards. there are also dual x1 slots to allow discreet audio or other controller cards to be installed if needed. The PLX chip seen here is a Gen 2 switch which allows plenty of lanes for all of the special features the board offers without having to sacrifice any onboard component function as all will have enough lanes to operate.
Click Images to Enlarge
The SATA interface carries the standard PCH ports (4 ports SATA 3Gbps and 2 ports 6Gbps); the white ports are 6Gbps capable. The three light blue ports are the 3Gbps ports and are split up so the third is next to the 24-pin EATX connector. The fourth of these light blue ports coming directly from the PCH is routed to the mSATA port which means the mSATA port is native and bootable like any other installed drive. The dark blue SATA ports are routed from the third party controller which also happens to be capable of the ASUS SSD Caching II feature. These ports do not have to be used for the SSD caching feature and can be run as standard ports for extra storage expansion as well.
Like all other Z77 boards, this one has four RAM slots for dual channel configurations up to 32GB. This board supports insane speeds if overclocked–in excess of 3000MHz, as long as you have a capable IMC and DIMMs. One really special feature of ASUS Z77 boards is the T Topology. This is a new trace layout design for the memory which is designed to be super efficient and provide serious improvements in memory performance. As of now the present memory design used by all manufacturers does the job but with memory quickly eclipsing 3GHz and at much higher densities, we think this technology will really show its stuff in future generations as speeds will only get faster and density is most assured to increase.
Click Images to Enlarge
The top end is where we find the VRM section which is fed by a 8-pin CPU ATX power connector. This is good as it gives more than enough amperage to feed a hungry CPU even when pushing the clock. The VRM is 20 Phase, which is a 16+4 design (16 Phase CPU and 4 Phase iGPU). This means that there is more than enough current capacity available to handle even the most extreme loads or overclocking conditions. The VRM is a DIGI+ design which as we have covered many times before are digitally controlled power circuits, allowing for amazing amounts of efficiency while also having excellent performance capability. Part of DIGI+ is the components selection which are all top notch and without question finely selected to ensure the best possible performance and compatibility and efficiency. The secret to DIGI+ system’s efficiency and thermal performance is in how it handles throttling. The MOSFETs actively throttle load back and forth between phases which keeps independent phases from being loaded consistently, which means the components stay cooler. Cooler components tend to run more efficient and also last longer. This feature can of course be disabled in the DIGI+ controls in the BIOS or AISuite II software.
Click Images to Enlarge
Here we see 4-way SLI fitment which is great as normally the mainstream chipsets do not have enough lanes to support this kind of load. However, with the help of the PLX chip it can be done with ease and dual slot ATI crossfire will work just the same. One really cool feature with the 4 slots double spaced is that 2 triple slot monster cards will fit and still have room to breathe as there is a single slot of space available between the cards even with the massive triple slot girth of the cooler. This allows for cooling airflow to get in between the cards and keep them nice and cool.
 Bjorn3D.com Bjorn3d.com – Satisfying Your Daily Tech Cravings Since 1996




Except you cant use all features of it at the same time. I’m using all sata ports and the performance is horrendous. Windows takes pauses every 10-15s and gaming is not possible due to microstuttering and the 10-15s pauses.
Maybe it’s your setup? I’m not using all the sata ports and not sure why I would. I have replaced the msata onboard with a 128 gig that has the os on it and boot to it. I have a 2 TB hard drive with 2 OCZ Vertex 128G SSD drives for caching and my setup is working great.
If there is onboard audio card…I will love P8Z77-V Prem more.