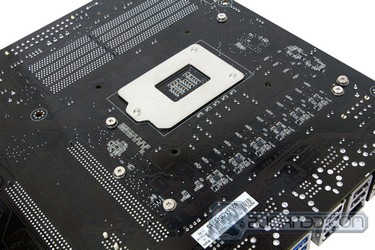
If you’re looking for a high-performance motherboard suited for work, and highly-threaded applications, the ASUS P8P67 WS Revolution motherboard might be a great option.
Introduction
ASUS has had some very successful workstation motherboards in the past. These motherboards provide features that are not normally seen on standard gaming or mainstream motherboards, and are server compatible for those looking into building cheaper server systems. ASUS Workstation motherboards are also famous for their multiple PCI-E slot support, allowing for extremely powerful systems with four Nvidia TESLA cards, or perhaps powerful server systems with multiple PCI-E SAS (Serial-Attached SCSI) RAID cards. Pairing up this motherboard with a powerful RAID card, a few server quality hard drives, and some other powerful hardware can produce an amazing server system that doesn’t need an expensive server motherboard.

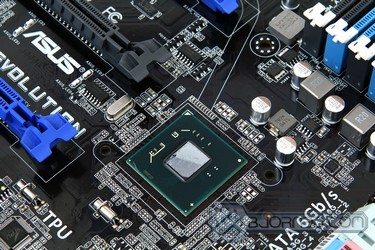
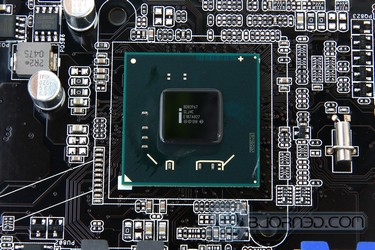
Today we have another great motherboard from ASUS: the P8P67 WS Revolution – B3 Revision. This motherboard is designed for the latest Intel Sandy Bridge microarchitecture, running on the LGA 1155 platform. It also sports a revised P67 Cougar Town chipset, to fix the problems that prompted the recall. For those that don’t know about the Cougar Town recall, Intel had a major setback with the Sandy Bridge launch due to a chipset defect that would degrade the SATA III ports over time. With the B3 stepping motherboards, the problem is eliminated and the user is guaranteed to receive a fully functional chipset.
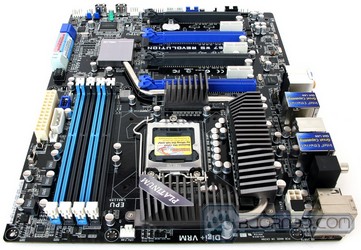
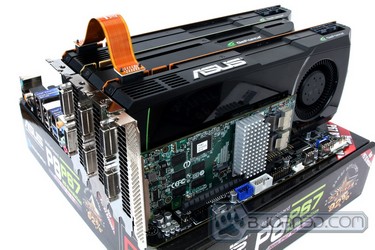
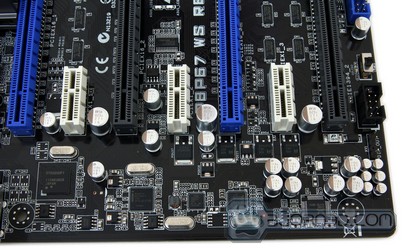
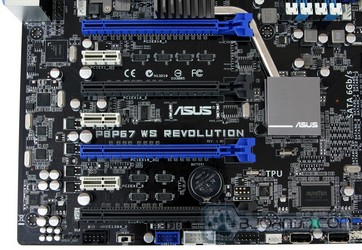
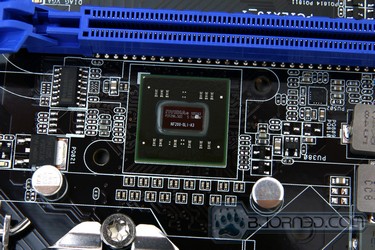
The P8P67 WS Revolution has some great features that only high-end P67 motherboards have. This includes the inclusion of the NF200 chip from NVIDIA, which provides users with high performance in graphics with 2-Way/3-Way SLI and Quad Quadro cards on demand. Though motherboards without the NF200 chip can do 2-way SLI, they cannot run 3-way SLI, and are limited by the PCI-E connectors they can use. ASUS managed to put up to 4 PCI-Express slots onto this ATX motherboard, which allows for support of even Quad-GPU CrossFireX for those looking into ATI/AMD solutions. One thing to note about this design is that while other motherboard manufacturers tried to accomplish this with their motherboards, they usually ended up going with an XL-ATX form factor (GIGABYTE X58A-UD9, G1.Assassin). With an XL-ATX motherboard, the user needs a special chassis, making it very inconvenient to build a system that will be fully compatible with what they need. Additionally, those parts can be extremely expensive, and may well exceed the budget for a user who is just trying to find the greatest deal for a 4 PCI-E motherboard solution. There are some mid-tower and several full-tower chassis that fit the P8P67 WS Revolution motherboard, and are compatible with 4 dual-slot video cards.
T
ASUS uses Dual Intel Gigabit LAN rather than the Realtek LAN solution that most motherboards have. With Dual Gigabit LAN, users can experience double the bandwidth of standard Gigabit LAN that Realtek supports. The Intel based solution is hardware-accelerated, providing lower CPU utilization for better performance in network based applications. The Intel Gigabit LAN setup offers more options for the user than Realtek, making customization of the network much easier.
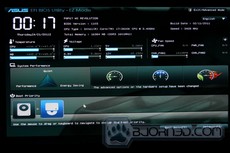
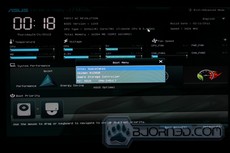
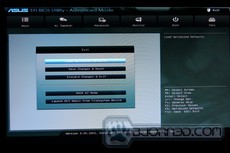
While the motherboard has all the latest features like USB 3.0 and SATA III, this motherboard in specific has four SATA 6Gb/s connectors with dual RAID support. Finally, one of the best features of ASUS P67 boards (including the P8P67 WS Revolution) is the EFI BIOS (EZ Mode). The EFI BIOS is a completely GUI-based BIOS with mouse support. By quick drag and drop actions, the user can easily set up their boot drive priority options and with a few clicks, can set up their whole system through nice drop down menu options. With the EFI BIOS, the user can also use hard drives over 2.2TB due to native support for hard drives larger than 2.2TB in 64-bit operating systems.
For the price of $259.99, the ASUS P8P67 WS Revolution motherboard might just be perfectly priced. Considering that this motherboard is full of features, has options that server systems will need, and specifications for high-end systems, the price of $259.99 is not too much for what you will be getting in this package.
Features & Specifications
Our analysis:
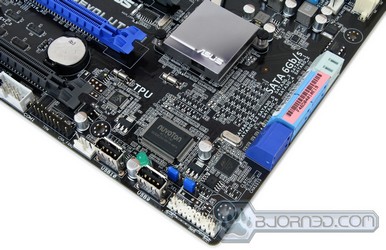
There are a few more features to the ASUS P8P67 WS Revolution that we would like to discuss. We really liked the addition of the USB 2.0 ports on the motherboard which are accessible from the inside of the PC. These USB 2.0 connectors, which are also called the Quick Gate ports, are nice features when the user wants to connect something to the PC via USB and keep it running all the time. While this is a nice feature, there could be another use for these ports. Some newer cases like the Thermaltake Level 10 GT, or the In-Win Dragon Rider come with prebuilt USB 3.0 cables inside the case that require the user to route the cables outside the system when they want to use those ports. The ports inside the chassis on the P8P67 WS Revolution motherboard could easily be used for this purpose, if they were USB 3.0. We would have been much more satisfied to see USB 3.0 ports placed instead of USB 2.0. Of course for most people this will not be a problem, because the people utilizing these features inside the PC will most likely be graphic designers, 3D modelers, and people working with CAD software. This function will provide a great way of hiding expensive products that they would not like to keep out on the table for easy steeling. So this feature is mainly for users working with Maya, Cinema 4D, XSI, Lightwave, 3DStudio Max, Solidworks, AutoCAD and other such applications.
The G.P. Diagnosis tool is an excellent add-on to the P8P67 WS Revolution motherboard. It helps especially when overclocking the systems or in the event of a hardware failure. The G.P. Diagnosis helps show error codes that can be looked up in the Motherboard’s Manual to understand where the problem is during booting. The G.P. Diagnosis also comes with power on/off and reset buttons, which are very useful for those using this motherboard on a testbench. The one con we observed about the G.P. Diagnosis is the poor placement of the pins on the motherboard. While it might not be such a bad placement for some, in other cases the PSU and other hardware get in the way of the pins, making it impossible to plug in the G.P. Diagnosis tool.
From ASUS’ Website:
_______________________________________________________________________
- Intel LGA1155 Platform / Intel® P67 Express Chipset/Nvidia NF200
- Ultimate Graphics Power with 3-Way/2-Way Geforce SLI™ and Quad Quadro cards on demand
- Platinum Level 92% Power Efficiency
- Intel® Ethernet technology-Built in dual Intel Lan
- EFI BIOS (EZ Mode) – Flexible & Easy BIOS Interface
- Quad SATA 6Gb/s with dual RAID Support – Double Access, Double Convenience
_______________________________________________________________________
Workstation Engine Essential in Your Professional Studio
The ASUS Workstation Series is the ideal foundation for a powerful PC. It delivers awesome power, dependable performance and unparallel multiple I/O scalability for the most demanding tasks and future upgrades. The ASUS Workstation Series intelligently reduces operation noise and dissipates heat through advanced and environmentally friendly methods to accommodate user needs. ASUS Workstation Series motherboards also bring you ultimate reliability and quality through our 24×24 initiative,which means 24 hours non-stop operation and a 24-month life cycle supply guarantee. Don´t change yourself for a computer. Instead, let ASUS Workstation Series improves the quality of your work and life.
ASUS Workstation Exclusive Features
Ultimate Graphics Power with 3-Way/2-Way Geforce SLI™ and Quad Quadro cards on demand
The Best Graphic Performance you Ever have
Designed for true power users, the P8P67 WS Revolution uses a built-in NF200 controller that enhances bandwidth availability between the board and the four graphics card expansion slots. This is ideal for NVIDIA GeForce SLI™ and AMD CrossFireX™, as the new motherboard can easily handle 2-Way SLI in dual PCI Express X16, while 3-Way SLI works in dual PCI Express X8 and one X16 link. This translates into a 26.4% performance increase compared to regular P67 motherboards with similar SLI configurations, as measured by 3DMark06. For CrossFireX, the P8P67 WS Revolution supports up to quad GPUs builds in PCI Express X8 links, unlike standard motherboards, which lack the bandwidth to do so.
True to its workstation design, the motherboard empowers commercial users with up to four NVIDIA Quadro GPUs at once. These graphics accelerators focus on professional uses, including computer-aided design (CAD), computer-aided engineering (CAE), digital content creation (DCC) and geographic information systems (GIS). Having up to four Quadro GPUs on one board provides the flexibility and resources needed to run various professional applications.
Platinum-level 92% power efficiency

To further help achieve its 92% power efficiency, the P8P67 WS Revolution uses a 2oz copper inner layer board design. In addition, it includes ASUS’ exclusive DIGI+ VRM. The high power efficiency is maintained to help users reduce their ultimate energy expenditure as well as peerless stability and reliability.

Built in Dual Intel® Gigabit LAN
Commercial users who wish to enhance their network reliability and throughput should look forward to the new P8P67 WS Revolution. It offers dual hardware-accelerated Intel Gigabit LAN ports that lower CPU utilization by up to 71% , reduced packet loss and better support for diverse operating systems. Featuring teaming and fault-tolerance functions, these two augmented LAN ports provide double the bandwidth and network redundancy of standard Gigabit LAN.
Heart-touching design-Quick Gate
Quick Gate is a vertical USB connector on the motherboard, allowing you to install USB devices directly with no messy cables. This stops important data storage devices from breaking off unexpectedly. P8P67 WS Revolution with this unique design provides a convenient and safe way to install data and applications on your PC.
Easy to Find System Error with G.P. Diagnosis Card
Bundled with the P8P67 WS Revolution, the G.P. Diagnosis card double checks the system by effortlessly and quickly providing precise info every time you switch on your PC.
CPU, Chipset and Graphics features
LGA1155 socket for Intel® Second Generation Core™ i7/ Core™ i5/ Core™ i3 Processors
This motherboard supports the latest Intel® second generation Core™ i7/Core™ i5/Core™ i3 processors in the LGA1155 package, with memory and PCI Express controllers integrated to support 2-channel (4 DIMM) DDR3 memory and 16 PCI Express 2.0 lanes. This provides great graphics performance. Intel® second generation Core™ i7/Core™ i5/Core™ i3 processors are among the most powerful and energy efficient CPUs in the world.
Intel® P67 Express Chipset
The Intel® P67 Express Chipset is the latest single-chipset design to support new socket 1155 Intel® second generation Core™ i7/Core™ i5/Core™ i3 processors. It provides improved performance by utilizing serial point-to-point links, allowing increased bandwidth and stability. Additionally, the P67 provides 2 SATA 6Gb/s and 4 SATA 3Gb/s ports for faster data retrieval at double the bandwidth of current bus systems.
Quad-GPU SLI and Quad-GPU CrossFireX Support!
Flexible Multi-GPU solutions, Your Weapon of Choice!
P8P67 Deluxe brings multi-GPU configurations through both SLI™ and CrossFireX. This motherboard features the powerful Intel® P67 platform, optimizing PCIe allocation in multiple GPU setups. Expect a brand new gaming sensation like you’ve never experienced before!
ASUS Digital Power Design
DIGI+ VRM
Herald the Arrival of a New Digital Power Design Era
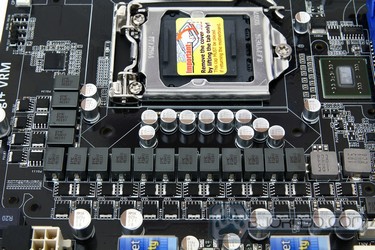
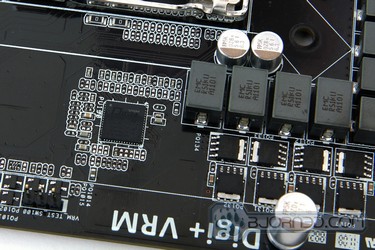
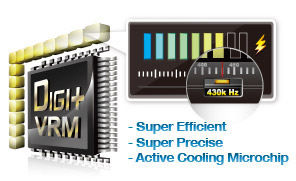
The new ASUS DIGI+ VRM design upgrades motherboard power delivery to a digital standard. The 16+2 digital architecture delivers twice the precision power, intelligently adjusting PWM voltage and frequency modulation with minimal power loss through BIOS tuning and exclusive user interface to increase over-clocking range while performance reaches its full potential. It also adjusts frequencies dynamically, cutting radiation interference by half to enhance system stability through enabling spread spectrum. The DIGI+ VRM digital power design empowers users with superior flexibility and perfect precision to ensure optimized performance. extreme system stability, and greater power efficiency.
ASUS Exclusive Features
EFI BIOS (EZ Mode)
Flexible & Easy BIOS Interface
The new ASUS EFI BIOS is an Extensible Firmware Interface that complies with uEFI architecture, offering a user-friendly interface that goes beyond traditional keyboard-only BIOS controls to enable more flexible and convenient mouse input. Users can easily navigate the new EFI BIOS with the same smoothness as their operating system. The exclusive EZ Mode displays frequently-accessed setup info, while the Advanced Mode is for experienced performance enthusiasts that demand far more intricate system settings.
ASUS EFI BIOS natively supports hard drives larger than 2.2TB in 64-bit, with full storage space utilization, helping deliver far more exciting computing than traditional BIOS versions!
- EZ Mode – easy to learn, use, and manage
- Advanced Mode – for experienced performance enthusiasts that demand intricate system settings

One-stop Access to Innovative ASUS Features
With its user-friendly interface, ASUS AI Suite II consolidates all exclusive ASUS features into one simple-to-use package. It allows users to supervise overclocking, energy management, fan speed, voltage and sensor readings, even interact with mobile devices via Bluetooth. This all-in-one software offers diverse and easy to use functions, with no need to switch back and forth between different utilities.
TPU
The Ultimate Turbo Processor
Unleash your performance with ASUS’ simple onboard switch or AI Suite II utility. The TPU chip offers precise voltage control and advanced monitoring through Auto Tuning and TurboV functions. Auto Tuning offers a user friendly way to automatically optimize the system for fast, yet stable clock speeds, while TurboV enables unlimited freedom to adjust CPU frequencies and ratios for optimized performance in diverse situations.
EPU
Energy Efficiency All Around
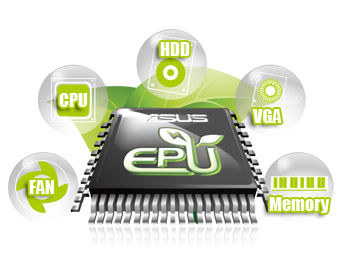
Tap into the world’s first real-time PC power saving chip through a simple onboard switch or AI Suite II utility. Get total system-wide energy optimization by automatically detecting current PC loadings and intelligently moderating power consumption. This also reduces fan noise and extends component longevity!
Latest Transfer Technology
Extra SATA 6Gb/s Supports
Extra Ports, Extra Speed and Accessibility
The Intel® P67 Express chipset natively supports the next-generation Serial ATA (SATA) interface, delivering up to 6Gb/s data transfer. ASUS provides extra SATA 6Gb/s ports with enhanced scalability, faster data retrieval, and double the bandwidth of current bus systems.
ASUS Crystal Sound
DTS
DTS Surround Sensation UltraPC
DTS Surround Sensation UltraPC delivers exceptional 5.1 surround experience through the most common PC audio setups – your existing stereo speakers or headphones. In addition to virtual surround, “Bass enhancement” provides stronger low frequency bass sound, and “Voice clarification” provides clear human dialogue even with loud background sound. With these technologies, you may experience a better home-theater audio with ease.
RoHS
GreenASUS and ErP Ready
The motherboard is European Union´s Energy-related Products (ErP) ready, and ErP requires products to meet certain energy efficiency requirements in regards to energy consumptions. This is in line with ASUS vision of creating environment-friendly and energy-efficient products through product design and innovation to reduce carbon footprint of the product and thus mitigate environmental impacts.
Speficiations
| CPU | Intel® Socket 1155 for Intel® 2nd Generation Core™ i7 Processor/Core™ i5 Processor/Core™ i3 Processor/ LGA1155 socket for Intel® next generation server processor Support Intel® 32nm CPU Supports Intel® Turbo Boost Technology 2.0 * Refer to www.asus.com for Intel CPU support list |
| Chipset | Intel® P67(B3) Express Chipset ; Nvidia NF200*1 |
| Memory | 4 x DIMM, Max. 32 GB, DDR3 2133(O.C.)*/1866(O.C.)/1600/1333/1066 Non-ECC,Un-buffered Memory Dual Channel memory architecture * Due to CPU behavior, DDR3 2200/2000/1800 MHz memory module will run at DDR3 2133/1866/1600 MHz frequency as default. * Please refer to www.asus.com or user manual for Memory QVL. |
| Expansion Slots | 2 x PCIe 2.0 x16 (@ x16 or x8) 2 x PCIe 2.0 x16 (@ x8) 3 x PCIe 2.0 x1 (@ x1) |
| VGA | CUDA support: Up to 4 NVIDIA Tesla GPUs |
| Multi-GPU Support | Supports NVIDIA® Geforce 3-Way/2-Way SLI™ techonology Supports ATI® CrossFireX™ technology, up to Quad CrossFireX™ |
| Storage | Intel® P67(B3) Express Chipset 2 xSATA 6.0 Gb/s ports (gray) 4 xSATA 3.0 Gb/s ports (blue) Intel® Rapid Storage Technology Support RAID 0,1,5,10 Marvell® 9128 PCIe SATA6Gb/s controller 2 xSATA Gb/s ports(navy blue) Support SATA RAID 0 and 1 |
| LAN | 1 x Intel® 82574L GbE LAN 1 x Intel® 82579 Gigabit LAN- Dual interconnect between the Integrated LAN controller and Physical Layer (PHY) – Support teaming function |
| Audio | ALC889 8-Channel High Definition Audio CODEC – Multi-Streaming – Jack-Sensing – Front Panel Jack-Retasking – Optical/Coxial S/PDIF out ports at back I/O – ASUS Noise-Filer |
| IEEE 1394 | VIA VT6315N controller supports 2 x 1394a port(s) |
| USB | NEC USB 3.0 controller – 2 x USB 3.0/2.0 ports (Blue, at back panel) Intel® P67(B3) Express Chipset – 14 x USB 2.0/1.1 ports (6 ports at mid-board, 8 ports at back panel) |
| ASUS Unique Features | – ASUS Digi+ VRM Utility ASUS Exclusive Features – MemOK! – AI Suite II – ASUS EFI BIOS EZ Mode featuring friendly graphics user interface ASUS Quiet Thermal Solution – ASUS Fanless Design: Heat-pipe solution – ASUS Fan Xpert ASUS EZ DIY – ASUS Q-Shield – ASUS Q-Connector – ASUS CrashFree BIOS 3 – ASUS EZ Flash 2 ASUS Q-Design – ASUS Q-LED (CPU, DRAM, VGA, Boot Device LED) – ASUS Q-Slot – ASUS Q-DIMM |
| ASUS Workstation Special Features | 4 PCIe x 16 slots G.P. Diagnosis Card bundled Quick Gate:2 vertical USB 2.0 on board ASUS SASsaby series Cards support ASUS WS Diag. LED ASUS WS Heartbeat |
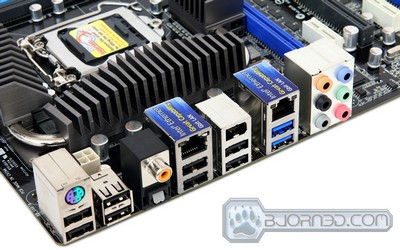
| Back Panel I/O Ports | 1 x PS/2 Keyboard/Mouse Combo port 1 x IEEE 1394a 2 x LAN(RJ45) port(s) 2 x USB 3.0/2.0 8 x USB 2.0/1.1 1 x S/PDIF Out (Optical and Coxial) 8 -Channel Audio I/O |
| Internal I/O Connectors | 2 x USB 2.0/1.1 connector(s) support additional 4 USB ports 1 x MemOK! Button 1 x TPM connector 1 x CPU Fan connector(s) with PWM control 3 x Chassis Fan connector(s) with Q-fan control 1 x Power Fan connector(s) 1 x S/PDIF Out connector 24-pin ATX Power connector 8-pin ATX +12V Power connector 1 x COM port connector 4-pin EZ_PLUG Power connector AAFP connector 2 x USB 2.0/1.1 vertical ports 20-pinfront panel connector |
| BIOS | 32 Mb Flash ROM , EFI AMI BIOS, PnP, DMI2.0, WfM2.0, SM BIOS 2.6, ACPI 2.0a, Multi-language BIOS, ASUS EZ Flash 2, ASUS CrashFree BIOS 3 |
| Manageability | WfM 2.0,DMI 2.0,WOL by PME,WOR by PME,PXE |
| O/S Compatibility | Win7 32/64 bit,Vista 32/64 bit and WinXP 32/64bit |
| Form Factor | ATX Form Factor 12 inch x 9.6 inch ( 30.5 cm x 24.5 cm ) |
Software Overview
AI Suite II
After installing the software components, a quick restart is needed. Then, on the taskbar, there is a little icon that will launch the AI SUITE II. By default, it will display a strip of icons for different functions. The software interface has a very fresh and easy to use GUI. One bug we noticed, which will get fixed in the future versions of AI Suite II was a weird black box with gray arrows on our 2nd monitor. Once AI Suite II is clicked on in the taskbar, this black box disappears and never appears again.
Clicking on each icon will display more options.
Probe II is the system monitoring tool ASUS provides. The software lets users monitor the voltage, temperature, fan speed of the board. Users can set a threshold for the safe value. The user can also set up alerts along with the threshold settings.
Right inside the AI Suite II, users can adjust the load-line calibration and the CPU current in the DIGI+ VRM menu. These options are also available in the BIOS. These options can help with overclocking the CPU to faster frequencies.
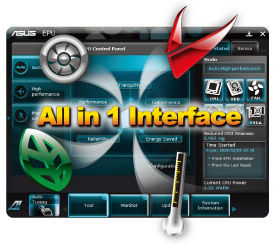
The EPU is an energy efficient tool. The tool provides different modes that users can pick depending on their usage need. Unfortunately the full functionality of the EPU will only work when the system is running under stock settings. With the EPU, the user can conserve electricity by lowering the performance of the system during idle or low load states.
Fan Xpert offers a GUI interface for those who want to fine-tune the fan speed and the system temperature. In addition to the CPU fan, there is one additional 4-pin chassis fan header. In addition to the CPU fan, one of the three pin fan headers and all the four pin fan headers can be monitored with the Fan Xpert. Some people may wish to have more fan control. The user can easily set up fan speed profiles depending on what they will be doing and to set a threshold for the fan speed if the user is very sensitive to fan noise.
The software also provides a very nice visual display of the system voltage and temperature log, allowing users to monitor the various components.
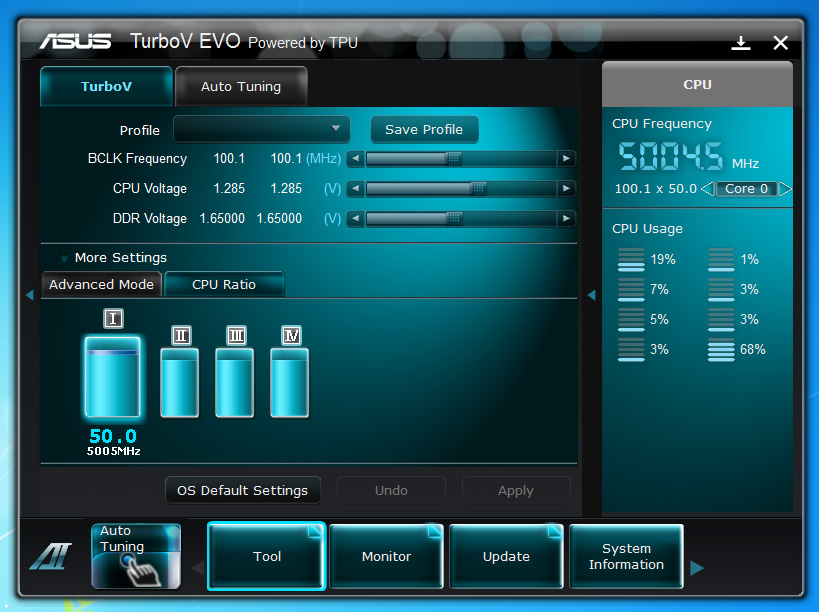
The TurboV EVO tool allows manual or automatic overclocking of the processor. Users can use it to adjust the BCLK frequency, CPU voltage, IMC voltage, and DRAM Bus voltage right from Windows. While the new BIOS offers a very easy to navigate interface, it is still nice to be able to overclock inside Windows. Users can choose between the manual or opt for the auto tuning to find the most stable overclocking result.
Here we have a closer look at the manual overclocking for the P8P67 WS Revolution motherboard. We can clearly see the BCLK Frequency, CPU Voltage and DDR Voltage, which are the three major settings that will help with overclocking the Sandy Bridge processors. The CPU Ratio tab provides the user with Multiplier customization. In this case we have raised the Multiplier from stock 34x to 50x, gaining roughly 1600MHz on each core.
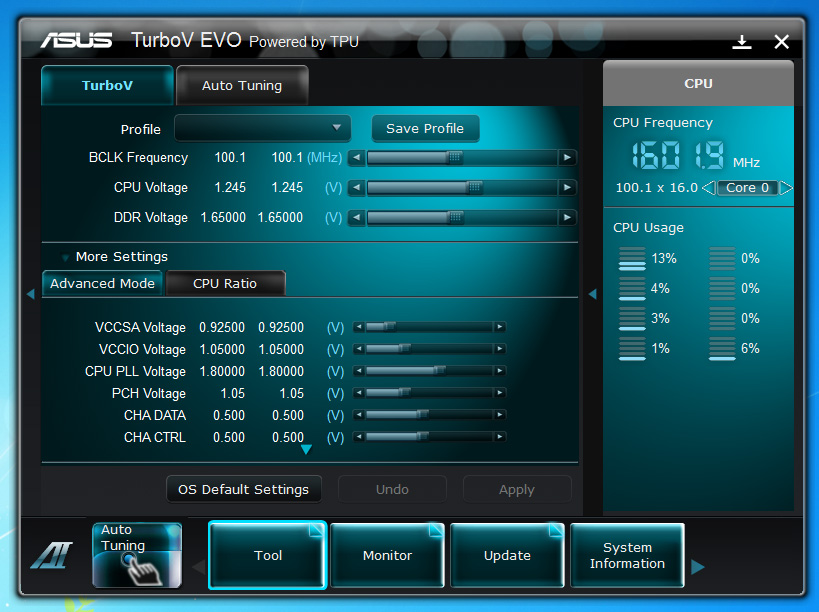
This picture has additional information about the Advanced Mode section of the TurboV EVO Tab. This section gives the user more voltage customization, however we have not noticed much stability or overclocking gains from messing with the following voltages. These could come handy for those who want to also alter other hardware in their PCs.
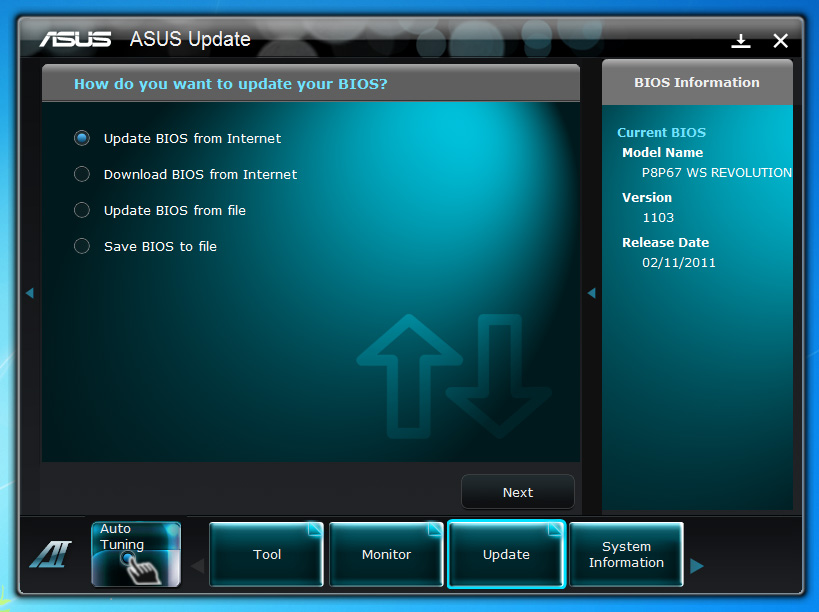
This section of the AI Suite II allows the user to update the BIOS for the P8P67 WS Revolution motherboard. This section also provides additional booting options for the PC, where the user can set their own boot logo when the system is turned on.
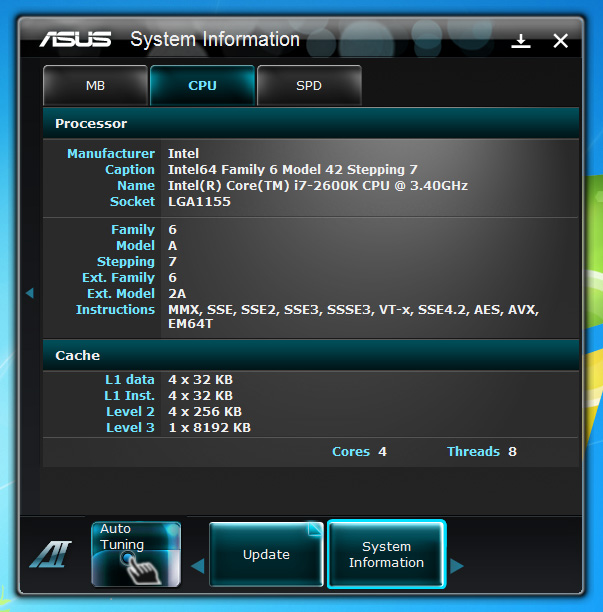
Finally, the System Information tab in the AI Suite provides the user with such information as CPU-Z in the Motherboard, CPU and Memory tabs. These sections will give lots of information about the current hardware the user is running.
Overview of the P8P67 WS Revolution
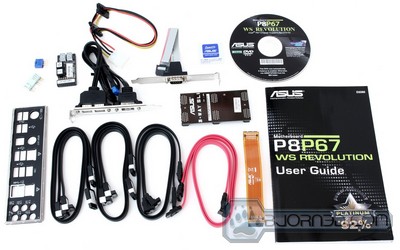
- 1x 2-port USB 2.0 module and 1-port eSata module
- 4x Serial ATA 6.0 Gb/s signal cables
- 2x Serial ATA 3.0 Gb/s power cables
- 4x Serial ATA 3.0 Gb/s cables
- 1x ASUS Q-Shield (I/O Shield)
- 1x ASUS 2-in-1 Q-Connector Kit
- 1x G.P. Dignosis Card
- 1x ASUS SLI bridge connector
- 1x ASUS 3-Way SLi bridge card
- ASUS motherboard support DVD
- User Guide
A Closer Look
1 x IEEE 1394a
2 x LAN(RJ45) port(s)
2 x USB 3.0/2.0
8 x USB 2.0/1.1
1 x S/PDIF Out (Optical and Coaxial)
8 -Channel Audio I/O
BIOS
EZ Mode
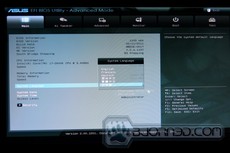
By default, when users enter the board’s BIOS, they will see the EZ Mode. The EZ mode shows very basic information about the system. The page is very much like the “Standard CMOS” page on the old text-based BIOS. Here you get to select the boot device priority, power saving mode, and the language.
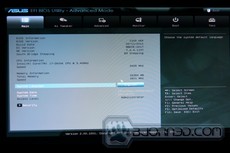
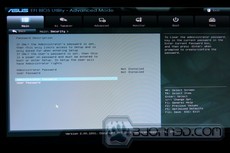
Clicking on “Exit/Advanced Mode” in the upper right hand corner will bring up more options for advanced users. This is also where users can find overclocking tools. To navigate in the advanced mode, users can click on a tab on the top to display the settings below. Alternatively, users can use the keyboard to navigate through the BIOS. To go back to the previous page, click the back button or use the ESC key like the older BIOS. Navigating around the BIOS can be done with the keyboard’s arrow keys or the mouse.
The overall layout on the new EFI BIOS is pretty nice and clean. When a given setting’s selection is limited, ASUS provides a drop down menu for users to choose an option. Clicking on an option will bring up the menu, where users can just choose the desired setting. However, not every single field can be adjusted with a click of a mouse. For many advanced overclocking settings, there is a huge range of adjustments, so ASUS still requires the use of the keyboard’s -/+ keys for incremental adjustment. Alternatively, users can manually enter a value like the older BIOS. Something we found to be very useful is the “F2: Previous Values” feature, which will return settings to the previously entered value.
Main
Ai Tweaker
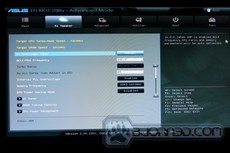
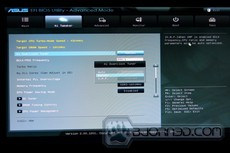
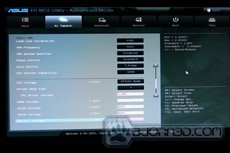
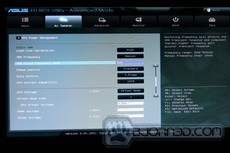
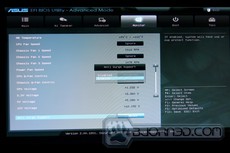
AI Tweaker is where overclockers will spend most of the time. ASUS offers a very extensive list of settings for overclockers. Intel has changed how users overclock their system, and as a result, there are less adjusments needed when overclocking the CPU. This makes the BIOS less cluttered with strange names. We feel that even a beginner overclocker can use this tool to overclock without much of an issue.
ASUS’s OC Tuner will automatically detect the most stable overclocking setting available for the system. After enabling the option, the system will take a minute or so to achieve a decent overclocking result. When we tried it, we were able to overclock our Core i5 2600K to 4.3 GHz in a matter of seconds. This was however a limitation in our memory and by switching out the memory modules, we were able to archive a whooping 4.6 GHz. This is a very nice and handy tool to have.
Turning the AI OC Tuner to Manual mode will let users adjust the BCLK/PEG frequency from 80 MHz to 300MHz. Since Intel locked the BCLK on the Sandy Bridge processor, it is highly recommended for overclockers to adjust the multiplier rather than the BCLK. However, ASUS boards do allow a bit adjustment to the BCLK speed. The reason why adjusting the BCLK might not lead to higher overclocks is because on the P67 chipset, the BCLK controls the PCI-E slots in addition to the CPU and memory, so cards that don’t like changes in frequency can make the overclock unstable.
ASUS allows users to adjust the Turbo ratio for each core either independently, or all together. This allows users to overclock each core separately, giving greater versatility.
The manual and press information we received from ASUS states that the board will support memory up to 2133MHz, but with the latest BIOS, the board actually supports DDR3 up to 2400MHz.
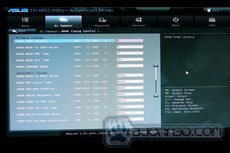
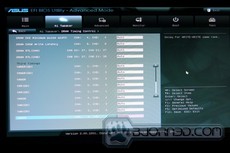
In the DRAM Timing panel, users can adjust their memory timings. ASUS groups the timings into three categories: primary, secondary, and third. The higher the level means more the advanced the setting, and for most people, primary and secondary timing adjustments are more than enough to achieve a good result.
| Memory Adjustments | |
| Primary Timing | |
| CAS | Auto, 3-15 |
| RAS to CAS | Auto, 4-15 |
| RAS Pre Time | Auto, 4-15 |
| RAS ACT Time |
Auto, 4-40 |
| DRAM Command Mode | Auto, 1-3 |
| Secondary Timing | |
| RAS to RAS Delay | Auto, 4-15 |
| REF Cycle Time | Auto, 48-511 |
| Refresh Interval | Auto, 3120-9999 |
| WRITE Recovery Time | Auto, 5-16 |
| READ to PRE Time | Auto, 4-15 |
| Four ACT WIN Time | Auto, 16-63 |
| WRITE to READ Delay | Auto, 4-8 |
| CKE Minimum pulse width | Auto, 3-15 |
| CAS Write Latency | Auto, 5-15 |
| RTL | Auto, 16-63 |
| Third Timings | |
| tWDR (DD) | Auto, 1-6 |
| tRWDR (DD) | Auto, 1-6 |
| tRWSR | Auto, 1-6 |
| tRR (DD) | Auto, 1-6 |
| tTTSR | Auto, 1-7 |
| tWW (DD) | Auto, 1-6 |
| tWW (DR) | Auto, 1-6 |
| tWWSR | Auto, 4-6 |
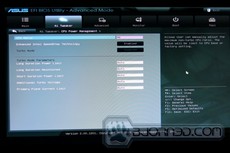
CPU Power Management offers fine-tuning of the processor’s Turbo power, adding stability and better overclocking.
| CPU Power Management | |
| Long Duration Power Limit | Auto, 1-255 |
| Long Duration Maintained | Auto, 1-32 |
| Short Duration Power Limit | Auto, 4-255 |
| Additional Turbo Voltage |
Auto, 0.004-1.000 in 0.004v increments |
| Primary Plane Current Limit | Auto, 0.125-1023.875 in 0.125 increments |
| DIGI VRM Adjustments | |
| Load Line Calibration | Auto, Regular, Medium, High, Ultra High, Extreme |
| VRM Frequency | Auto, Manual |
| VRM Spread Spectrum | Auto, 300KHz-500KHz in 10 kHz increments |
| Phase Control |
Auto, Optimized, Extreme, Manual |
| Manual Phase Control | Ultra Fast, Fast, Medium, and Regular |
| Duty Control | T. Probe, Extreme |
| CPU Current Capability | 100%-140% |
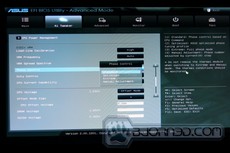
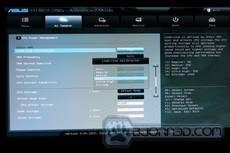
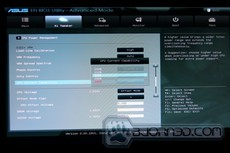
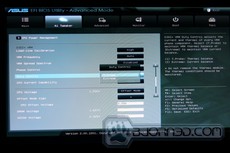
Adjusting the DIGI+ VRM will provide different amount of response time and current to the Digital power phase for the motherboard. It often will increase overclocking stability and potential.
- Load Line Calibration: provides higher voltage to the CPU for better overclocking
- VRM Spread Spectrum: will affect the VRM transient response and component thermal. Higher frequency gets quicker transient response.
- Phase control: faster phase control will have a faster response.
- Duty Control: adjusts the current and thermal for the every VRM phase. The T probe will maintain a thermal balance while the Extreme will maintain the VRM current balance.
- CPU current capability: a higher value will bring a wider total power range and extend the overclocking frequency range.
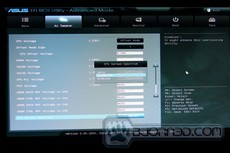
The last set of adjustments for overclocking is the voltage adjustments. Below is the list of ranges allowed on the board. As mentioned earlier, since Sandy Bridge overclocking is different, less settings are needed, so we perform fewer voltage adjustments. In addition, the memory controller is built into the processor, so we do not need to perform many voltage adjustments to get a stable system.
| Voltage Adjustments | |
| CPU VOLTAGE | Manual, Offset |
| CPU Manual Voltage | Auto, 0.800V – 1.990V in 0.05V |
| DRAM Voltage | Auto, 1.20V – 2.20V in 0.00625V increments |
| VCCSA Voltage | Auto, 0.8000V – 1.7000V in 0.00625V increments |
| VCCIO Voltage |
Auto, 0.8000V – 1.7000V in 0.00625V increments |
| CPU PLL Voltage | Auto, 1.2000V-2.2000 in 0.00625V increments |
| PCH Voltage | Auto, 0.8000V – 1.7000V in 0.00625V increments |
| DRAM DATA REF Voltage | Auto, 0.3950x – 0.6300x in 0.0050x increments |
| DRAM CTRL REF Voltage | Auto, 0.3950x – 0.6300x in 0.0050x increments |
| CPU Spread Spectrum | Auto, Enable, Disable |
Advanced
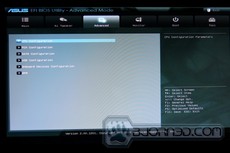
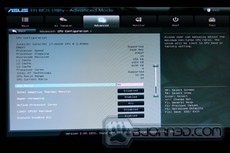
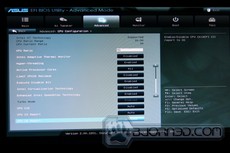
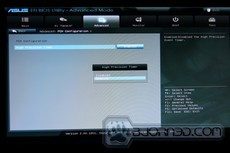
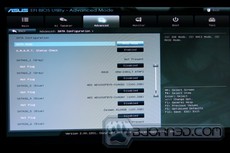
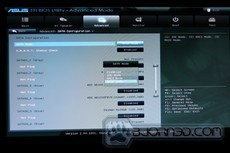
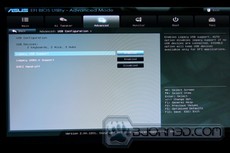
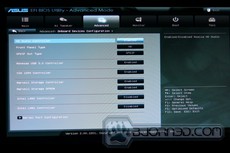
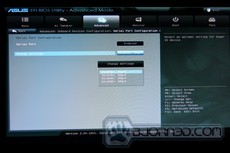
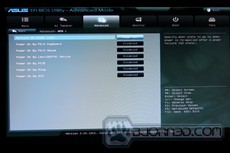
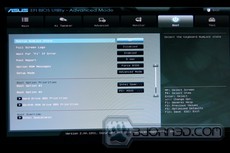
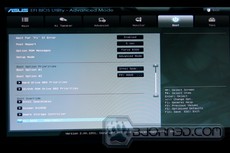
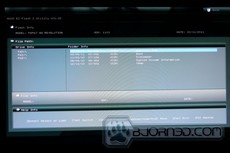
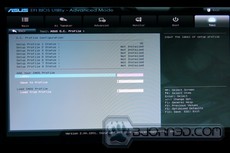
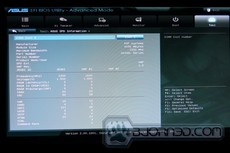
The Advanced menu is where users get to adjust the different components on the motherboard. The CPU Configuration is where users can adjust the number of active cores, virtualizations, thermal throttling, and power management of the processor. The SATA Configuration needs no introduction. We liked that ASUS set AHCI as the default setting, and let the user choose for which hard drive to enable “Hot Plug”. The Onboard Devices Configuration Menu is where users can adjust the various devices such as FireWire, HD Audio, eSATA, and Network for the board. It may be hard to recognize, but APM stands for Advanced Power Management, which allows users to adjust the power on setting.
Monitor, Boot, Tool & Exit
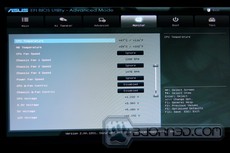
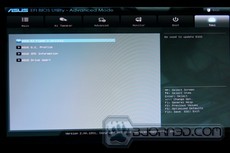
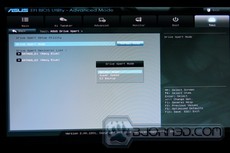
The system monitor menu shows the various vital statistics of the hardware. The Boot Menu is where the boot devices can be selected and configured. In the Tools menu, users will find ASUS Drive Xpert, which allows users to adjust the two SATA ports on the board as regular SATA, RAID 0/1. The EZ flash utility is a very nice feature that allows users to flash the BIOS without needing a floppy drive or any additional software. Users must simply copy the latest BIOS onto a USB flash drive and select EZ Flash in the BIOS, where they can choose the BIOS file to flash. In the tools section, this is also where users can save OC Profiles. Finally in the last section, the user can go back to the EZ Mode if needed.
Overclocking
Overclocking on the ASUS P8P67 WS Revolution motherboard was very fun. This motherboard has been very easy to overclock, especially with its OC Tuner function in the BIOS, or the Auto Tune option in AI Suite II. With Manual control, we went ahead and overclocked the processor as far as we could, and we were able to reach 100% stable frequency of 5.1GHz with 51x Multiplier and 100.1 BCLK. We could have slightly adjusted the BCLK, however, this can make the system less stable with certain hardware.
It seems the voltages reported by CPU-Z are not quite on part with what we had it set up as. The voltages were around 1.3-1.32V during these tests.
Temperatures
The temperatures were recorded with CoreTemp while running LinX for a few hours during stability tests and double checking the results with OCCT for 20 minutes right after LinX finished its stress test. The processor was fully overclocked. The results were recorded carefully. After the results were recorded, we waited for 30 minutes before taking Idle temperature measurements. The results were as follows:
| Motherboard | Temperature (Idle / Load) |
|---|---|
| ASUS P8P67 WS Revolution B3 Rev | 39C/ 40C |
| ASUS P8P67 Pro |
37C / 38C |
| ASUS P8P67 Deluxe |
38C / 39C |
| GIGABYTE P67A-UD4 B3 |
38C / 40C |
| GIGABYTE P67A-UD7 B3 |
41C / 43C |
The ASUS P8P67 WS Revolution motherboard ran a bit warm compared to previous ASUS boards like the ASUS P8P67 Pro and Deluxe. On the other hand it still ran cooler than the GIGABYTE P67A-UD7, which is GIGABYTE’s top of the line P67 motherboard. Considering that the P8P67 WS Revolution is extremely similar to the UD7 performance-wise, and that it has some better features that we talked about on the previous pages, the motherboard still ran cooler. This will really only come down to the components that each manufacturer uses and their cooling solution.
Power Consumption
The power consumption was tested while running LinX for a few minutes at stock settings. The results were recorded carefully with a Kill-A-Watt power consumption measuring tool at the wall. After the results were recorded, we waited for yet another few minutes minutes before taking Idle power consumption measurements.
| Motherboard | Power Consumption (Idle / Load) |
|---|---|
| ASUS P8P67 WS Revolution B3 Rev | 236W / 354W |
| GIGABYTE P67A-UD4-B3 |
239W / 345W |
| GIGABYTE P67A-UD7-B3 |
245W / 355W |
One very nice feature of ASUS motherboards is high efficiency in power consumption. We can clearly see that even with same hardware, the P8P67 WS Revolution motherboard is still 9W lower in power consumption than the P67A-UD7-B3 motherboard. While the UD4-B3 is close to the P8P67 WS Revolution, the UD4 is a mainstream motherboard and does not utilize the NF200 chip along with other high end features.
Testing & Methodology
(Water Cooling setup provided by AcousticPC.com)
We’ve expanded our testing suite considerably for the P67 chipset, and will continue to use the same methods for most of the motherboards and CPU’s we test. In the interests of thoroughness and accurate results, we run each test at least three times, and some tests more than that. We average the total of all the tests from each benchmark then report the average here.
The OS we use is Windows 7 Pro 64bit with all patches and updates applied. We also use the latest drivers available for the motherboard and any devices attached to the computer. We do not disable background tasks or tweak the OS or system in any way. We turn off drive indexing and daily defragging. We also turn off Prefetch and Superfetch. This is not an attempt to produce bigger benchmark numbers. Drive indexing and defragging can interfere with testing and produce confusing numbers. If a test were to be run while a drive was being indexed or defragged, and then the same test was later run when these processes were off, the two results would be contradictory and erroneous. As we cannot control when defragging and indexing occur precisely enough to guarantee that they won’t interfere with testing, we opt to disable the features entirely.
Prefetch tries to predict what users will load the next time they boot the machine by caching the relevant files and storing them for later use. We want to learn how the program runs without any of the files being cached, and we disable it so that each test run we do not have to clear pre-fetch to get accurate numbers. Lastly we disable Superfetch. Superfetch loads often-used programs into the memory. It is one of the reasons that Windows occupies so much memory. Vista fills the memory in an attempt to predict what users will load. Having one test run with files cached, and another test run with the files un-cached would result in inaccurate numbers. Again, since we can’t control its timings so precisely, it we turn it off. Because these four features can potentially interfere with benchmarking, and and are out of our control, we disable them. We do not disable anything else.
Test Rig
| Test Rig | |
| Case | Silverstone Temjin TJ10 |
| CPU |
Intel Core i7 2600K @ 4.8 GHz |
| Motherboard |
Intel DP67BG LGA 1155 Motherboard GIGABYTE P67A-UD4 GIGABYTE P67A-UD7 ASUS P8P67 WS Revolution Motherboard |
| Ram |
Patriot Gamer 2 16GB (4x4GB) DDR3-12800 1600MHz 9-9-9-24 Memory |
| CPU Cooler |
Heatblocker Rev 3.0 LGA 1156 CPU Waterblock Thermochill 240 Radiator |
| Hard Drives |
4x Seagate Cheetah 600GB 10K 6Gb/s Hard Drives 2x Western Digital RE3 1TB 7200RPM 3Gb/s Hard Drives |
| SSD | 1x Zalman SSD0128N1 128GB SandForce SSD |
| Optical | ASUS DVD-Burner |
| GPU |
2x ASUS ENGTX580 Voltage Tweak Video Cards |
| Case Fans |
1x Quiet Zalman Shark’s Fin ZM-SF3 120mm Fan – Top 1x Silverstone 120mm fan – Front 1x Quiet Zalman ZM-F3 FDB 120mm Fan – Hard Drive Compartment |
| Additional Cards |
LSI 3ware SATA + SAS 9750-8i 6Gb/s RAID Card |
| PSU |
Sapphire PURE 1250W Modular Power Supply |
| Mouse | Razer Mamba |
| Keyboard | Logitech G15 |
Test Suite
We will use the following applications to test the performance of the Motherboard. Benchmarks
| Benchmarks |
|---|
| PcMark Vantage |
| SiSoft Sandra 2011 |
| Cinebench R10 |
| Cinebench R11.5 |
| 3DMark 11 |
| 3DMark Vantage |
| Unigine Heaven Benchmark |
| Crysis Warhead |
| Just Cause 2 |
Sisoft Sandra 2011b
“SiSoftware Sandra (the System Analyzer, Diagnostic and Reporting Assistant) is an information & diagnostic utility. It should provide most of the information (including undocumented) you need to know about your hardware, software and other devices whether hardware or software. It works along the lines of other Windows utilities, however it tries to go beyond them and show you more of what’s really going on. Giving the user the ability to draw comparisons at both a high and low-level. You can get information about the CPU, chipset, video adapter, ports, printers, sound card, memory, network, Windows internals, AGP, PCI, PCI-X, PCIe (PCI Express), database, USB, USB2, 1394/Firewire, etc.”

Performance in CPU intensive applications does show a bit of improvement on the ASUS P8P67 WS Revolution motherboard over GIGABYTE’s top P67 models, but with the slight differences, we doubt users would notice a huge performance difference in most applications.
PCMark Vantage
PCMark Vantage is the latest system benchmark tool from Futuremark. The benchmark consists of tests such as application launches, file searches, web browsing, video playback, photo editing, and gaming.
PCMark Vantage showed a slight performance increase in overall tests on the WS Revolution board while we were running an overclocked system, but it seems that the ASUS board fell a bit behind under stock settings. Once again these numbers are so slightly apart that most users will never notice a performance difference between each motherboard.
Cinebench R10 and R11.5

“CINEBENCH is a real-world test suite that assesses your computer’s performance capabilities. MAXON CINEBENCH is based on MAXON’s award-winning animation software, CINEMA 4D, which is used extensively by studios and production houses worldwide for 3D content creation. MAXON software has been used in blockbuster movies such as Spider-Man, Star Wars, The Chronicles of Narnia and many more. MAXON CINEBENCH runs several tests on your computer to measure the performance of the main processor and the graphics card under real world circumstances. The benchmark application makes use of up to 16 CPUs or CPU cores and is available for Windows (32-bit and 64-Bit) and Macintosh (PPC and Intel-based). The resulting values among different operating systems are 100% comparable and therefore very useful with regard to purchasing decision-making. It can also be used as a marketing tool for hardware vendors or simply to compare hardware among colleagues or friends.”


Here comes the interesting part. Just as we saw a performance decrease in Cinebench R10 on the WS Revolution motherboard, we noticed the same performance decrease in Cinebench R11.5. It seems that in order to achieve the same performance as the GIGABYTE P67A motherboards did at 4.8GHz, we had to overclock the CPU to 4.9GHz. We are not quite sure why this motherboard fell behind in Multi-Threaded 3D rendering applications.
3DMark Vantage
For complete information on 3DMark Vantage Please follow this Link:
www.futuremark.com/benchmarks/3dmarkvantage/features/
The newest video benchmark from the gang at Futuremark. This utility is still a synthetic benchmark, but one that more closely reflects real world gaming performance. While it is not a perfect replacement for actual game benchmarks, it has its uses. We tested our cards at the ‘Performance’ setting.

3DMark 11

Crysis warhead
Crysis Warhead is the much anticipated standalone expansion to Crysis, featuring an updated CryENGINE™ 2 with better optimization. It was one of the most anticipated titles of 2008.
We ran Warhead using gamer’s setting at resolution of 1280×1024 and DirectX 10. We tested both no AA an 2x AA.
When benchmarking video games at lower settings to make sure there are no video card bottlenecks during our testing, we can see a nice jump in gaming performance from stock to overclocked settings. The performance difference between each motherboard on the other hand is not much different.
Just Cause 2

Unigine Heaven 2.1
Unigine Heaven is a benchmark program based on Unigine Corp’s latest engine, Unigine. The engine features DirectX 11, Hardware tessellation, DirectCompute, and Shader Model 5.0. All of these new technologies combined with the ability to run each card through the same exact test means this benchmark should be in our arsenal for a long time.

Unigine Heaven is a benchmark that gives us consistent results all the time. We can re-bench each motherboard several times and we will get exactly the same results as our previous tests have shown. Because of consistent results in each run, having different scores in these tests just shows how nicely some motherboards scale in graphics performance. In this case, the ASUS P8P67 WS Revolution showed a big jump over the GIGABYTE motherboards in stock settings, but visually, the performance was exactly the same.
Conclusion
While the ASUS P8P67 WS Revolution motherboard has some very nice features, a great motherboard layout, excellent PCI-Express spacing for up to four Multi-GPU configuration, EFI BIOS with EZ Mode and the powerful AI Suite II software to maintain and control all aspects of the system, there were a few drawbacks that need to be mentioned. While the P8P67 WS Revolution motherboard was designed for 3D/CAD users in mind, or perhaps for people using the system as a small server, the Quick Gate USB 2.0 ports on the motherboard should have been USB 3.0 using the Renesas USB3.0 controller. At the moment these ports serve a great purpose for users that want to keep devices in the system that they don’t want others to have access to; however, these ports could have been slightly better utilized: users with front panel USB 3.0 connectors could plug in their USB 3.0 cables straight inside the chassis instead of having to loop back at the rear of their chassis.
Another small issue that we encountered during our testing was that the G.P. Diagnosis card did not fit completely. The G.P. Dignosis card helps users with debugging boot errors and also provides the user with a power on/off and reset switch. Unfortunately, for us, the placement was not in the best place, because our power supply and other components would get in the way. It would have been nice if ASUS could have included a cable or some sort of attachment that would allow the user to place the G.P. Diagnosis card somewhere else in the system, perhaps attach it to one of the extra motherboard holes that are reserved for Extended ATX motherboards. As far as we know though this is not the main feature of the P8P67 WS Revolution motherboard, so it is not that big of a deal.

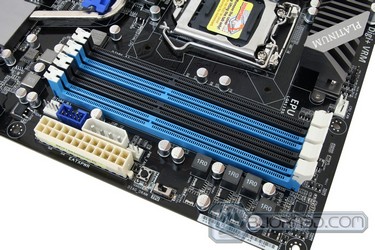
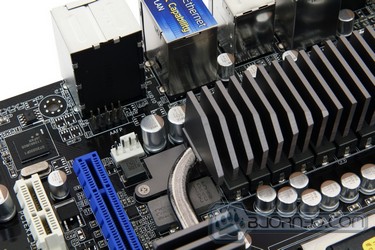
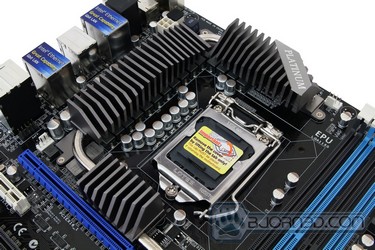
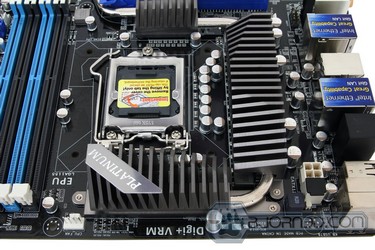
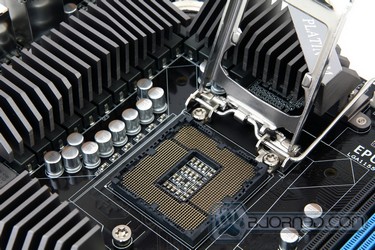
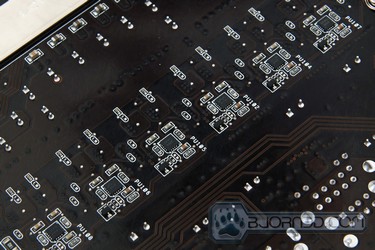
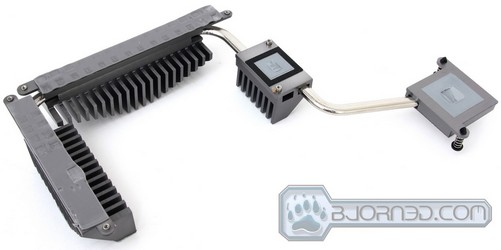
Finally, some of the main points that we enjoyed on the ASUS P8P67 WS Revolution motherboard were the Dual Intel Gigabit LAN support, four SATA III ports for double RAID support, PWM fan headers, 2/3-way SLI or 4-way CrossFireX support on a standard ATX motherboard, and excellent component spacing around the CPU socket. With good spacing for the components, we were able to easily install our HeatKiller water block without damaging components. Unfortunately, GIGABYTE motherboards have this problem, so we would recommend ASUS motherboards for those looking into doing high-end cooling or perhaps using large water blocks for their CPUs. The VRM design was also very nice, however the cooling was not perfect as we have shown on the Closer Look page of this review.
The price tag of $259.99 at Newegg.com is not too bad considering what the motherboard comes with feature wise. It definitely has aspects that only high-end motherboards would have in the $300 range, and even server based features. However, those not looking to use four PCI-Express slots all at once, or if the Intel based LAN is not a necessity, we would recommend looking at the the ASUS P8P67 Pro motherboard. That motherboard does not come with the NF200 chipset, but should have just as good performance in most non-3D based applications.
| OUR VERDICT: ASUS P8P67 WS Revolution Motherboard | ||||||||||||||||||
|
||||||||||||||||||
| Summary: Overall, the ASUS P8P67 WS Revolution motherboard has so many nice features, and great motherboard design especially on the PCI-Express slots and other components, that it has earned its way into our main system. We would definitely recommend this motherboard to anyone and it became my personal choice if anybody needs a very powerful, feature full motherboard. Despite a few smaller issues, the ASUS P8P67 WS Revolution motherboard still deserves a 9 out of 10 points and the Bjorn3D Golden Bear Award. |
 Bjorn3D.com Bjorn3d.com – Satisfying Your Daily Tech Cravings Since 1996

