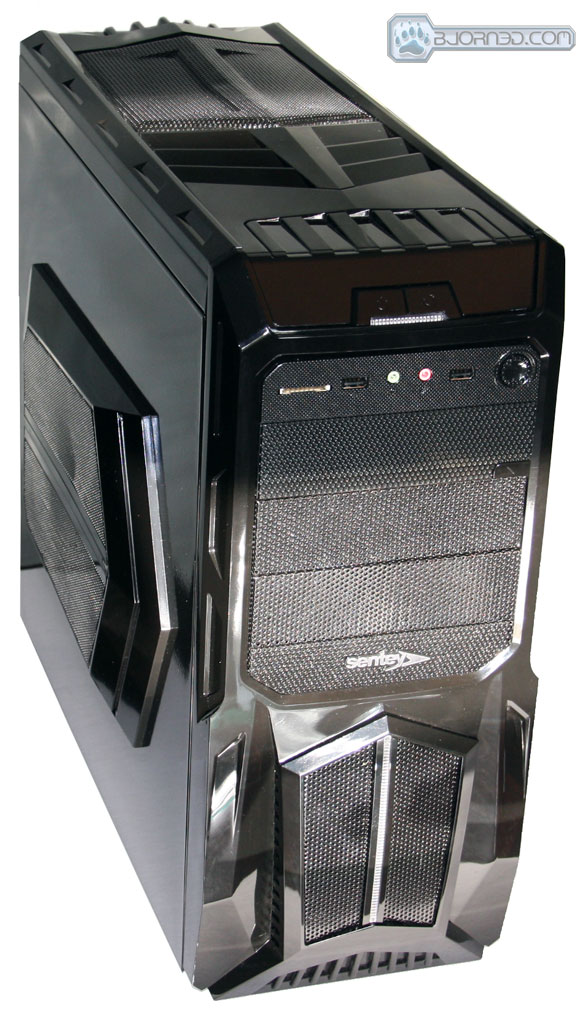
The Sentey Optimus GS-6000 is not only a highly stylized mid-tower solution, but an efficient cooler at an incredible price point.
Introduction
Sentey provides no less then six different series of cases, all of which have a unique look and an affordable price point. The Extreme Edition Series boasts of key designs such as a completely tool less design for ease of installation and assembly; furthermore, it couldn’t be called Extreme unless it provided an adequate airflow for the gamers and overclockers out there. Triple 120mm fans address this issue as well as a huge 180mm lateral fan for even more aggressive cooling. The Sentey Optimus GS-6000 is a mid-tower case and is currently selling between $50 and $60. The case has a lot of curves to it with high gloss black on the plastics and metals with the inside done in flat black.
Features & Specifications
The Optimus is designed to be dismantled without tools, including the internal bays for hard drive installation, optical drives, and PCI expansion cards. There is also support for water cooling via dual holes in the rear of the case in addition to a lower ventilation system with filters.
|
Sentey Optimus GS-6000 Specifications |
|
|
Form Factor: |
ATX Mid Tower (Black) |
| Material: | SECC 0.7mm |
| Front Material: | Plastic |
| Dimensions: |
Front (H x W) 425mm x 190mm Lateral (H x L) 425mm x 450mm |
|
Motherboard Compatible: |
ATX, Micro-ATX |
|
Expansions: |
External 5.25″ Drive Bays (x3) Internal 3.5″ Drive Bays (x4) Expansion PCI (x7) |
|
Top Ports: |
USB (x2) Audio & Mic Card Reader (MMC/SD) Fan Control |
|
Cooling Systems: |
Lateral (Side) 180mm blue led w/fan control Front 120mm blue led w/fan control Top 120mm blue led Back 120mm |
| Net Weight | 4.9Kg (10.8lbs) |
| Gross Weight | 5.8Kg (12.8lbs) |
| Warranty | 1 Year |
Pictures & Impressions
Click on images for larger size.
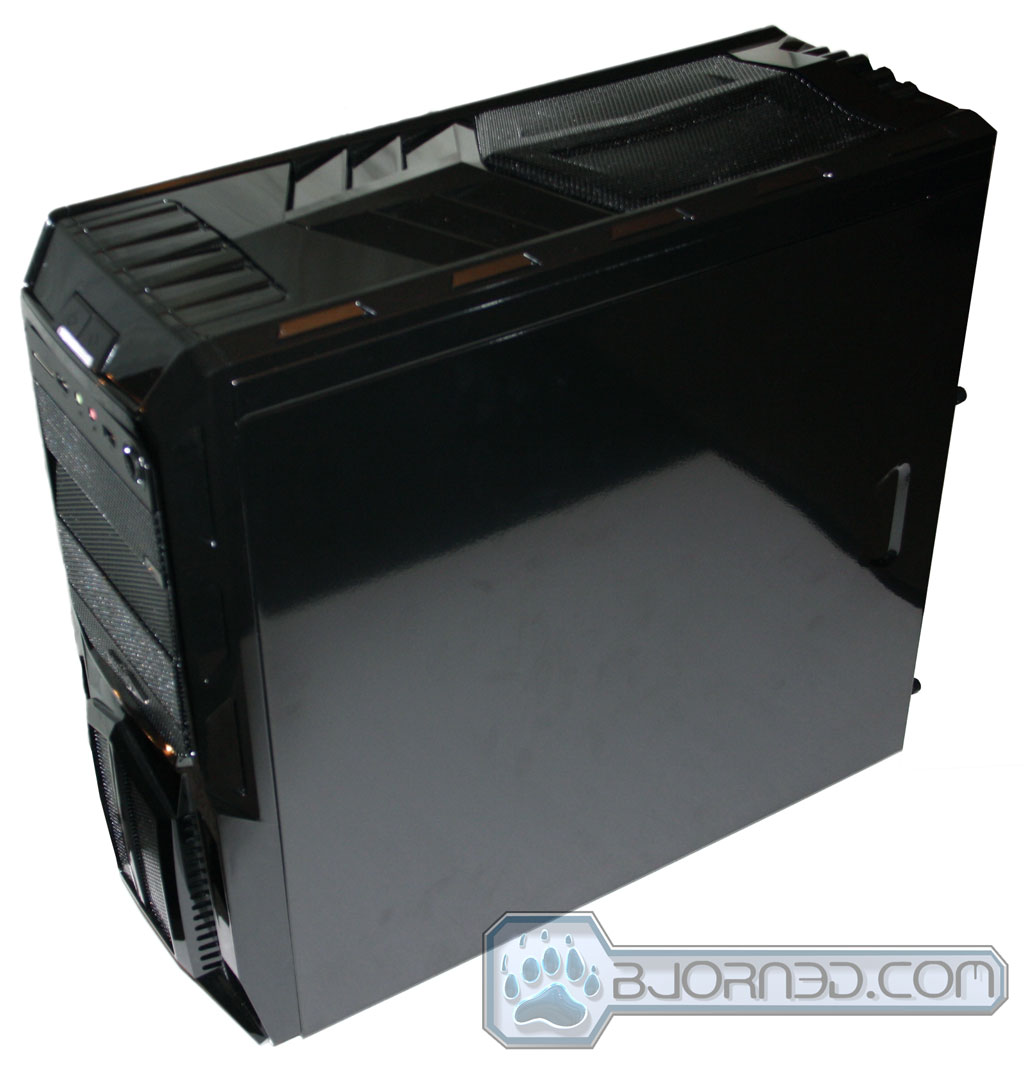
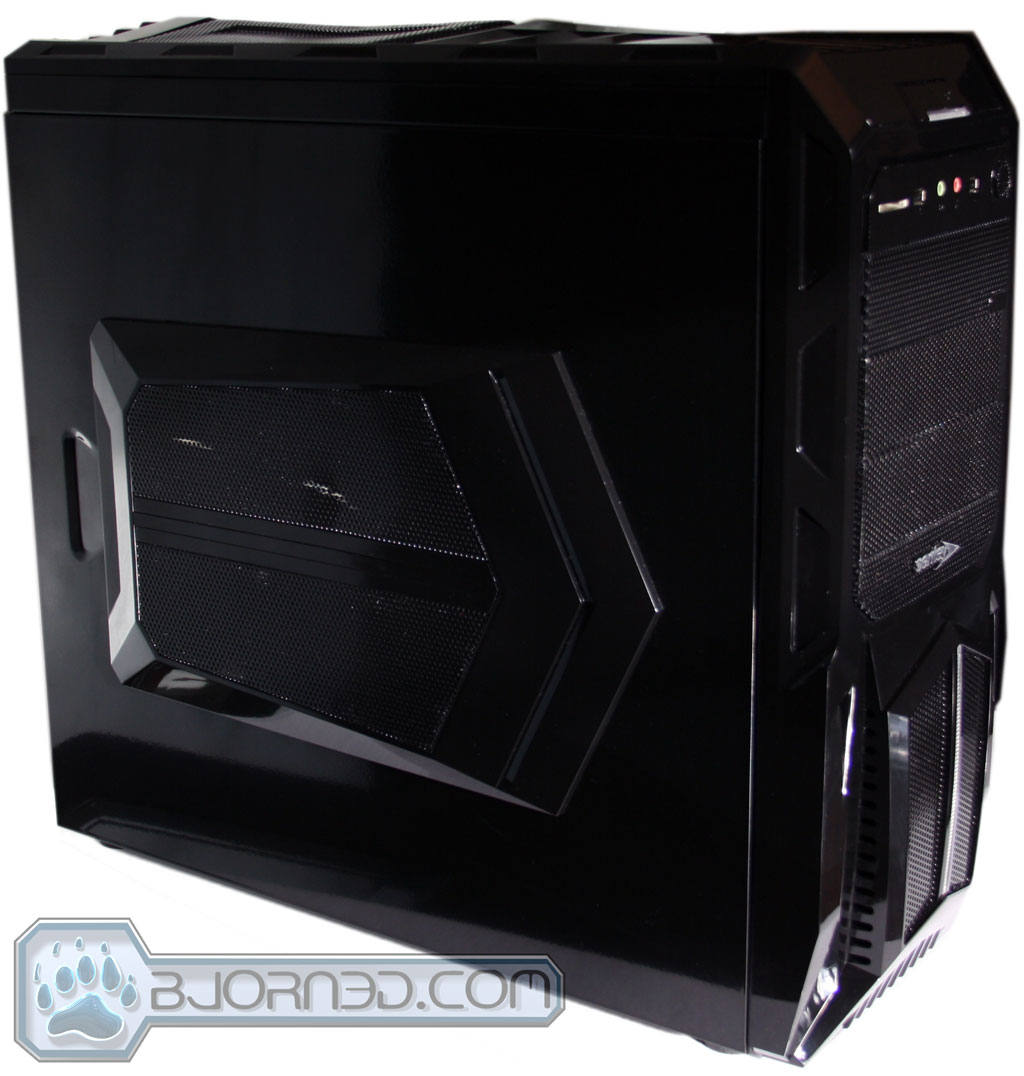
Here are the lateral views of the Optimus, with a gigantic aperture for the 180mm fan to take full advantage. The side panels were stiff and well made; however, the painting seemed to have a high gloss-like coating making the case side panels very shiny. The venting for the large fan is made of a fine aluminum mesh and extra care must be taken not to bump it for the mesh may be easily deformed. Other than that, the case itself is pretty rugged.
Click on images for larger size.
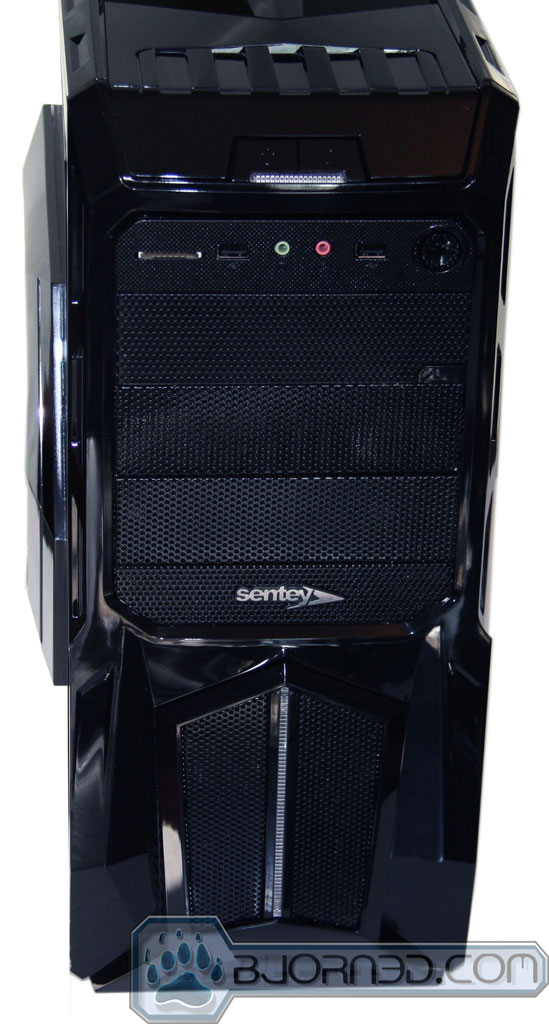
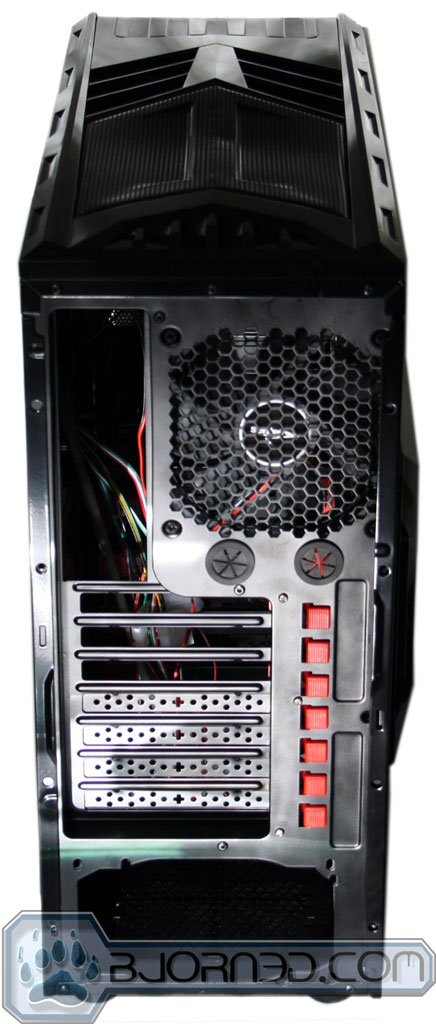
This case has aesthetics more akin to a modern jet fighter plane, with all the highly reflective plastic moldings on the front and swooping fan grills on the top and side. A more detailed look at the front reveals a lot of metal meshing with filter-like material built right in. On the top bay there is an MMC / SD card reader, two USB ports, microphone and headphone jacks, and a fan controller. Immediately below the port bay is a secret hinged door for a concealed optical drive. On the rear of the case are the tool less entry card expansion slots indicated by the red plastic tabs. There is even special holes provided in the back if for watercooling users.
Click on image for larger size.
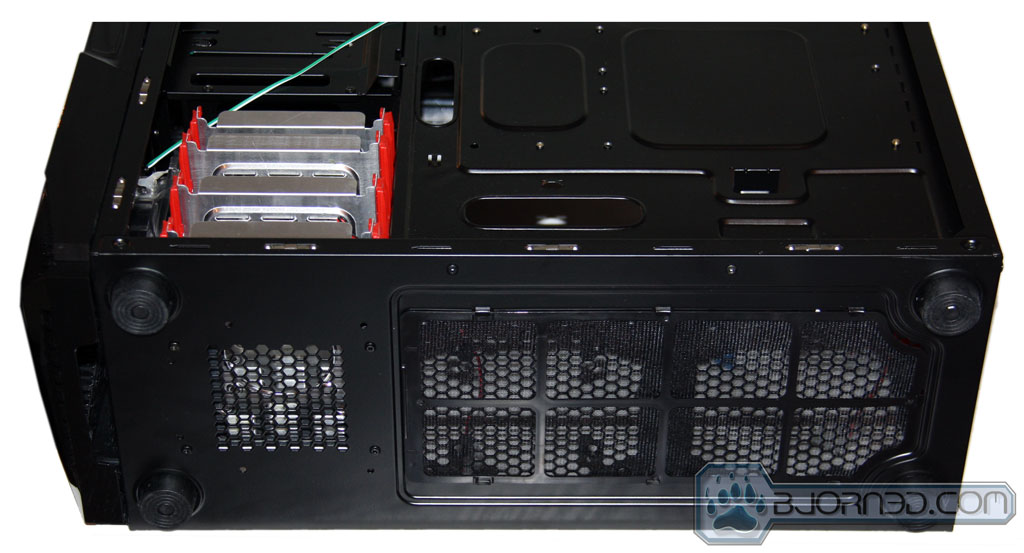
Special attention was given to the bottom: a dedicated airflow duct for the bottom-mounted power supply and heavy duty air filters to support positive air pressure. Sentey did a great job with the filter, and it is very easy to clean. There is also ample room behind the motherboard for all the necessary power wires. The feet of the case provided ample sturdiness and were made from a rubber type material.
Click on images for larger size.
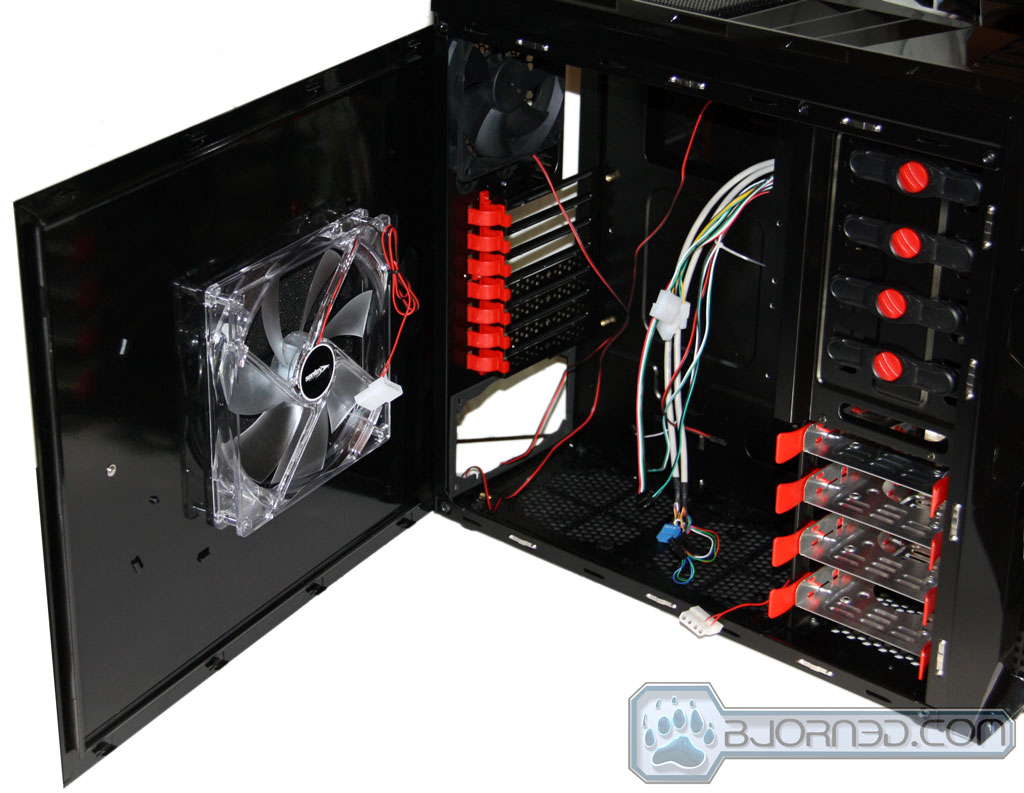
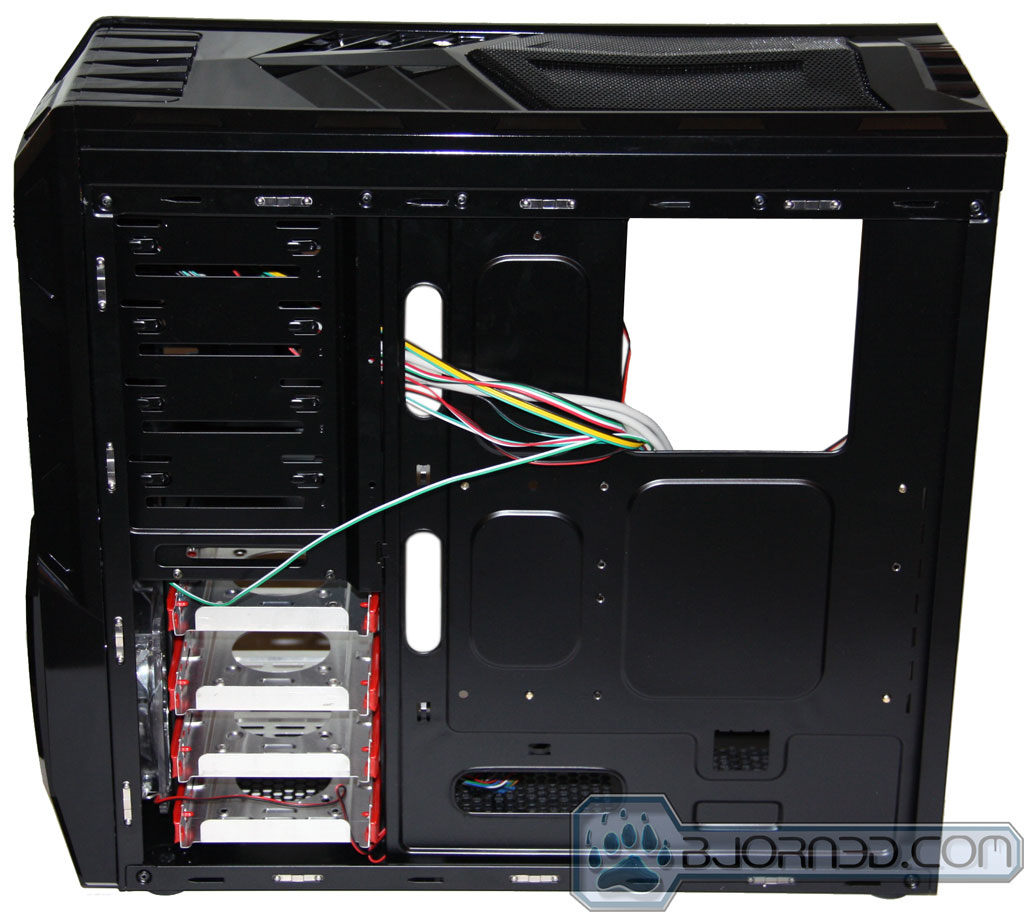
The prominent 180mm fan is securely mounted via the side panel with wire management addressed nicely. All of the red plastic parts are quick release hooks for installation of hard drives, optical drives, and expansion cards. All of the internal edging of the case proved to be smooth and burr free providing a pain free installation experience. For a mid-tower, this case has more than plenty enough room.
Click on image for larger size.
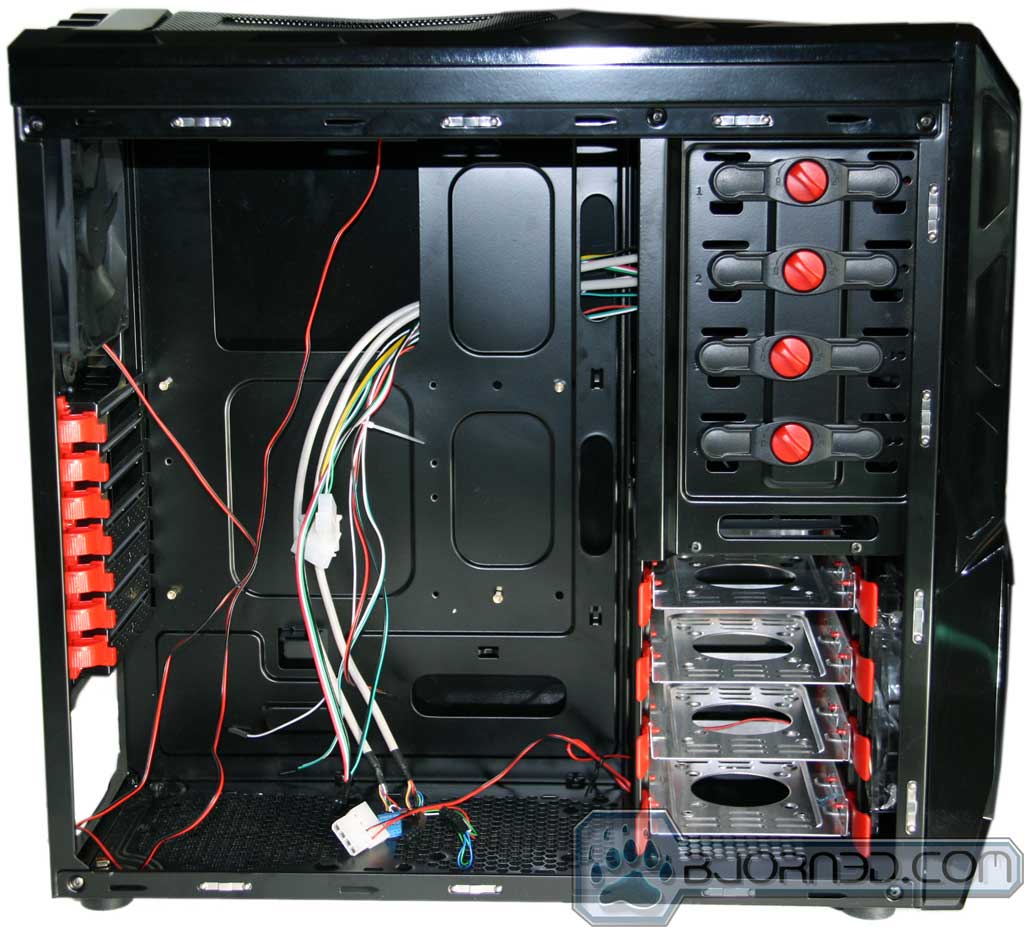
Behind the motherboard is where all the wire management is happening in this case, with access holes even toward the bottom to route power. The case also has holes for mounting backplates to CPU coolers without having to remove the motherboard. The oval holes toward the center are nicely beveled at the edges to prevent any fraying of the wires. Overall the back of this case was designed with a lot of flexibility in mind.
Assembly & Installation
Click images for larger picture.
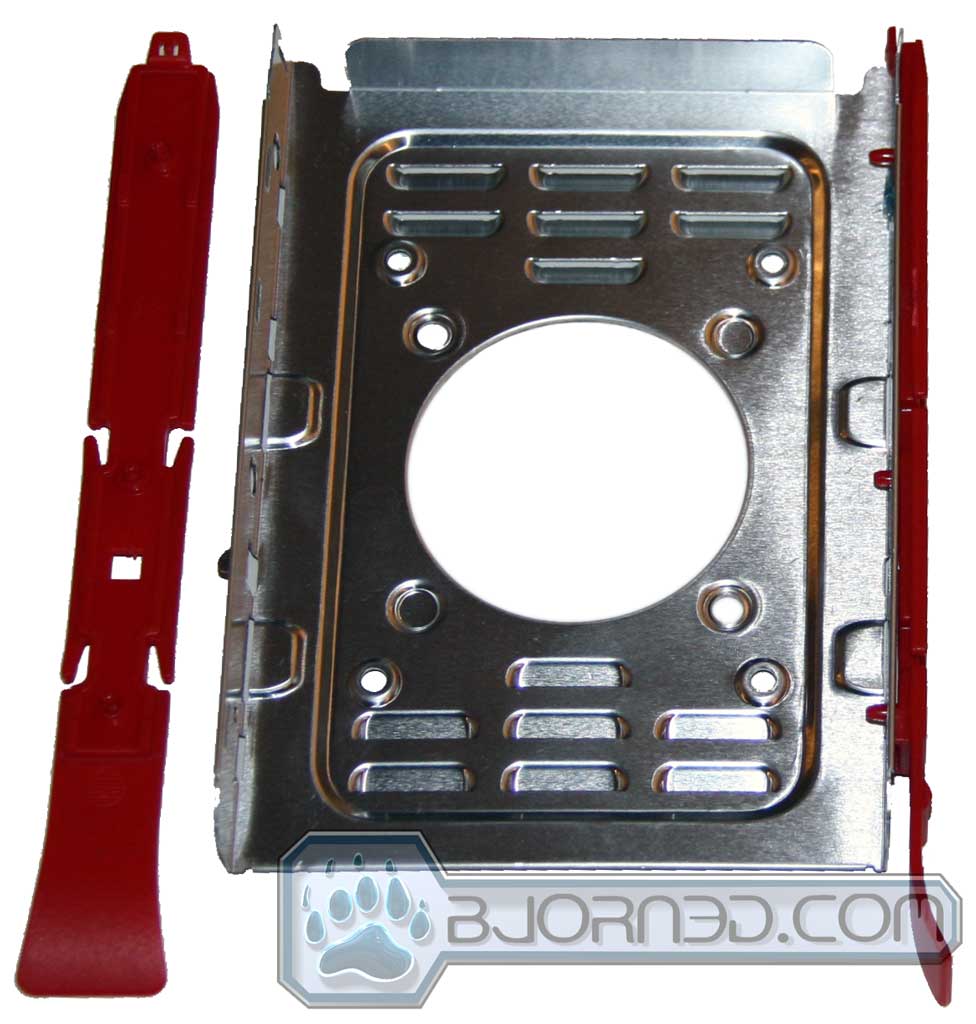
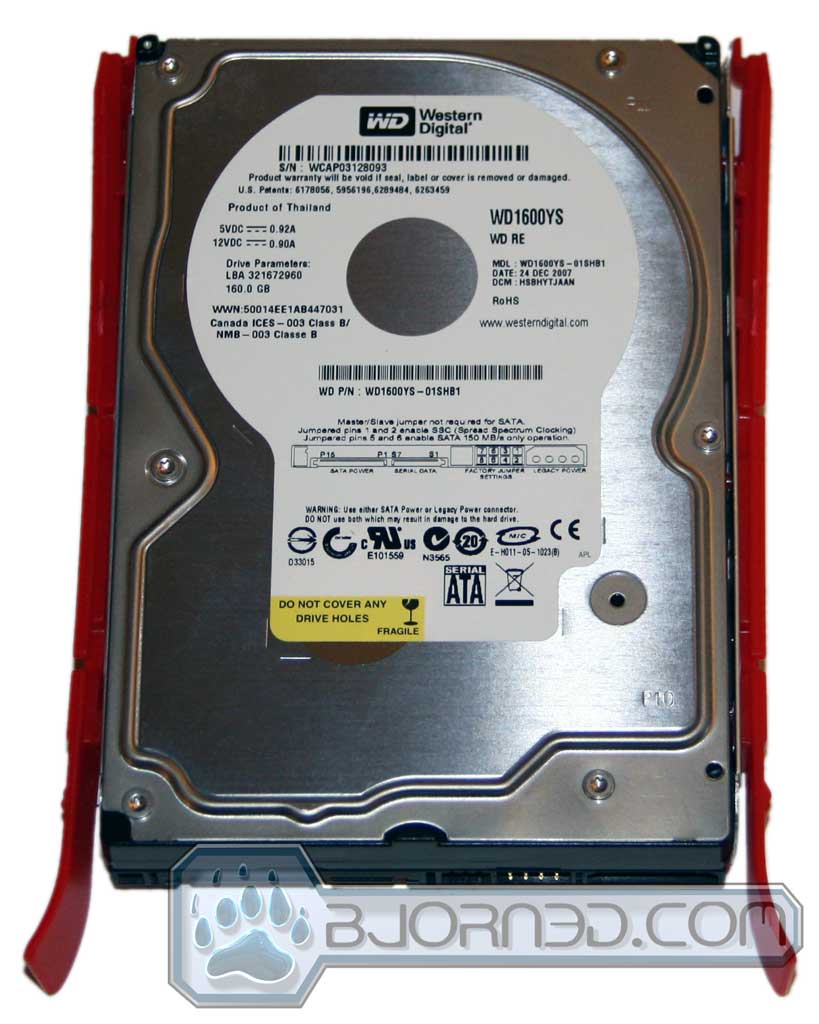
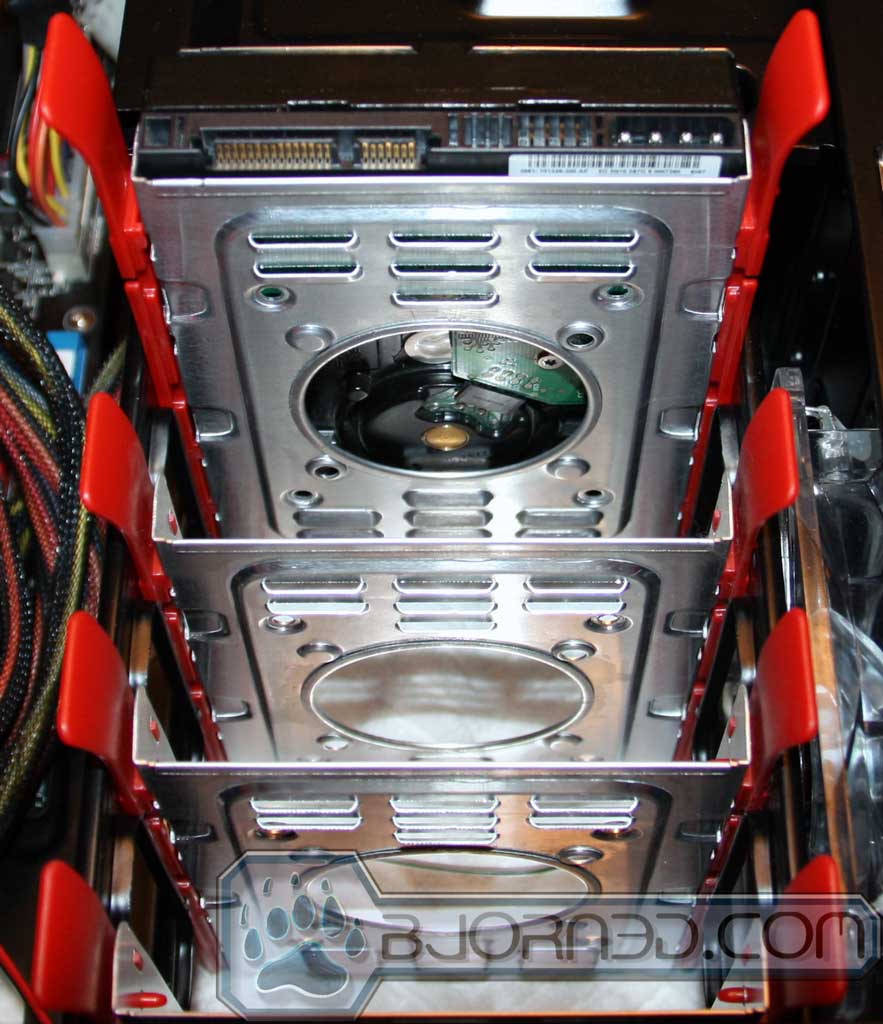
Hard drive installation was as easy and simple as placing the drive in a metal tray, bracketing the sides with the supplied plastic rails, and sliding the entire assembly into the case. The metal looks sharp but it is thick enough that there shouldn’t be any issues. One issue that may be of concern is that there was no discernable way to install a solid state drive; however, with some clever screw placement it may still be possible. Out of all of the cases we worked with, this solution was definitely the easiest and speedy way to go about it.
Click image for larger picture.
The case has very elegant and easy tool less design that holds the drives firmly in place. The red plastics have two little pins that align up with the hard drives screw holes on each side, sandwiching the metal bracket in between. The assembly then slides into the metal grooves inside the case, clicking and locking into place when seated.
Click image for larger picture.
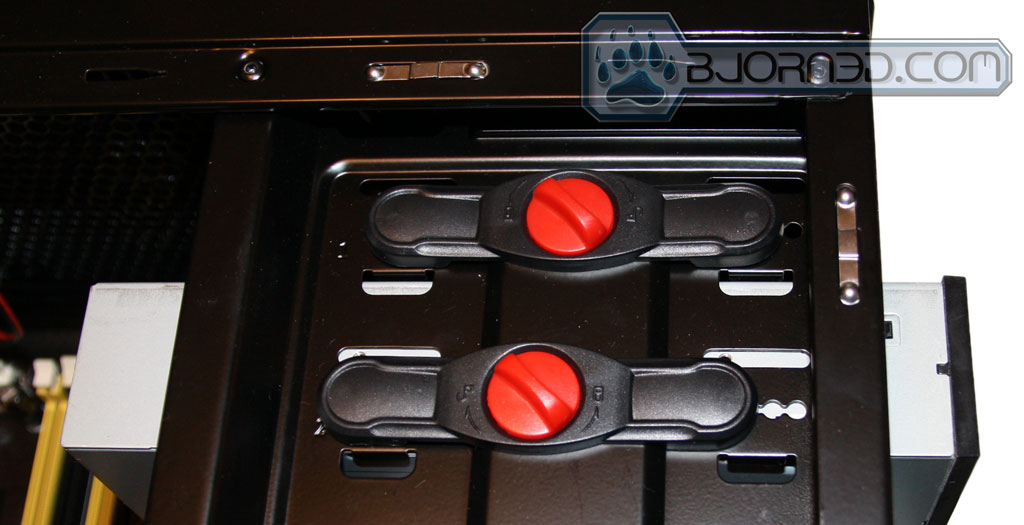
The optical drives are just as easy to install. The front shroud snaps off, the drive slides into the bay of choice, and a small black plastic bracket locks it in place with the red swivel knob. These are designed very similar to the hard drive brackets, in which they also have two small pins that are inserted into the optical drives screw holes. Furthermore, there are adjustments for making the optical drive flush with black mesh covering on the front. As a side note, users wanting to try out the “stealth bay” should have a shorter optical drive. As shown in the picture above the drive used was a little too long so it had to be relocated to the next bay down.
Click image for larger picture.
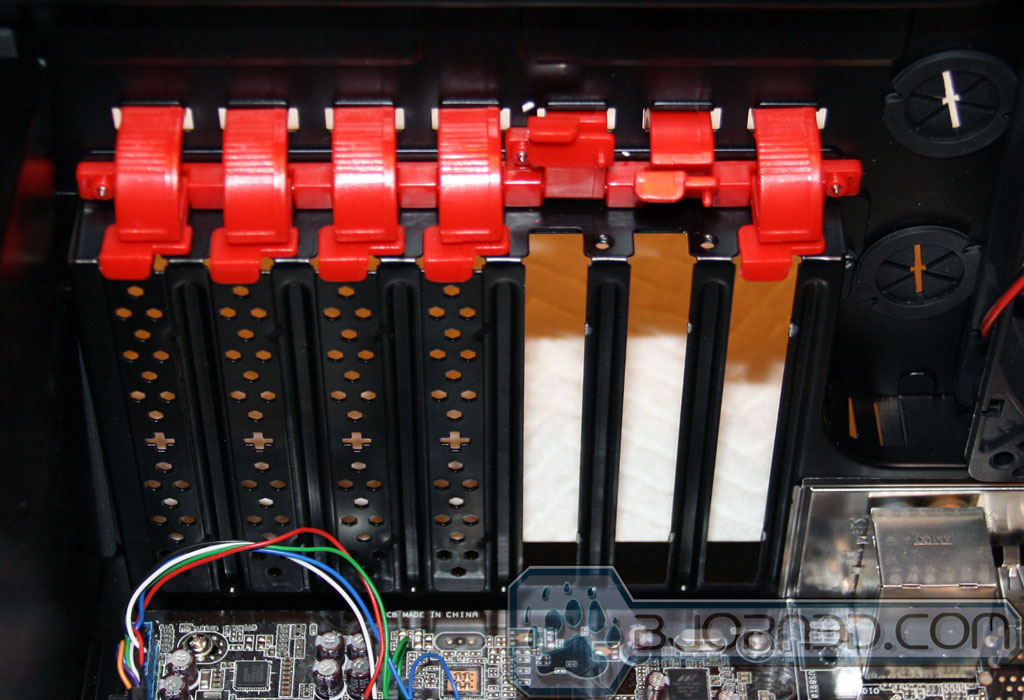
The unique PCI card locking clamps use just the the right amount of pressure and work effectively. It is also a nice touch to see the inside of the case painted in a flat black. Overall installation was a breeze and this case was one not only an easy one to work with and recommended for a first time builder, but because of all the tool less procedures, a pleasure to work with.
Testing & Results
The test rig of choice is a mid-range system that tends to run quite on the warm side in it’s old case. The system is run completely at stock speeds (3200 MHz).
|
Test Rig Specifications |
|
|
Motherboard: |
ASUS M2N-E |
|
Processor: |
AMD Athlon 64 X2 6400+ |
|
RAM: |
6 GB Dual Channel |
|
Video: |
Sonic Platinum GTX 460 |
| HDD: |
Western Digital 160 @ 7200 rpm |
| Optical: |
ASUS CD/DVD-RW |
|
Power Supply: |
Thermaltake TR2-430 |
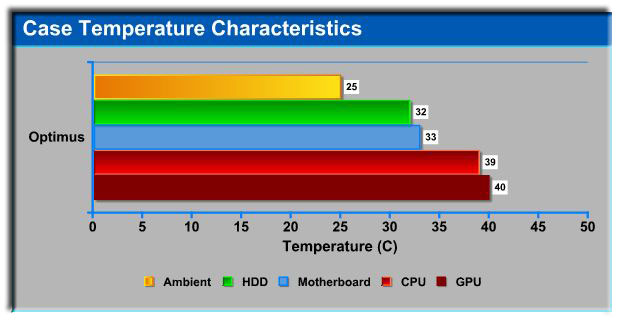
Testing software of choice is HWMonitor by CPUID. This utility polls all of the temperature sensors, fans, and any other auxiliary sensors such as those found on graphics card. The system was left running for four hours in a room with a room temperature of approximately 21 degrees Celsius. Please note that this is not the ambient temperature that is displayed below, which is the temperature inside of the case.
The most prevalent feature of the Optimus is it’s fantastic cooling system. It dropped the ambient temperature inside the case by 9 degrees Celsius, in contrast to the old case which had the same number of fans, but in a slightly different size configuration. The Optimus’ fans themselves were quiet to the point that only air flowing itself was audible. There is a controller on the front panel to turn two of the fans down even quieter if needed (the side and the top ones are default; however, the ability to choose which two fans to hook up to the controller is available). Core temperatures on the CPU also dropped 5 degrees Celsius (on stock cooling heat sink). These are excellent temperatures for this type of setup.
Conclusion
The Optimus performed well due to the large triple 120mm fans and the massive 180mm lateral fan. They can move a lot of air very efficiently and quietly. For a case that is in a budget price range of $50-$60, that’s a value not often seen. As far as the quality of the case goes it was solid with no flex. However, the high gloss paint job may look attractive, but it shows fingerprints, dirt, and grime very easily. Features provided the standard fare of inputs on the front panel (plus a card reader and fan adjustment) but lacked some newer features such as USB 3.0, and a dedicated slot for a solid-state drive. Aesthetically speaking, the blue LED’s and special meshing gave it lots of curves to give it a unique look and stand out.
| Sentey Optimus GS-6000 Mid-Tower Case | ||||||||||||||||||
Summary: The Sentey Optimus GS-6000 is not only a highly stylized mid-tower solution, but an efficient cooler at an incredible price point, earning the Bjorn3D Seal of Approval. |
||||||||||||||||||
 Bjorn3D.com Bjorn3d.com – Satisfying Your Daily Tech Cravings Since 1996
