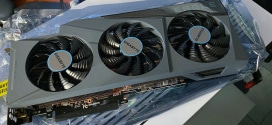
A simple but effective guide on flashing your video card’s BIOS. this is for both manufacturers Nvidia and ATI.
Flashing the BIOS of your video card
Everything in our computer has some form of a BIOS/Firmware. We as overclockers been modifying the video card’s BIOS or using other modified BIOS’ for years now. It is not only us overclockers flashing our video card’s BIOS, this day and age just about everyone has, had to, or will need to flash the BIOS of their video card. I have been tweaking the video cards BIOS for years now. I have been using other manufacturer’s BIOS’, and then flash my video cards BIOS to get more overclockability.
No matter what I was doing or what I was going to do to my video card BIOS, I always made a back up of the original BIOS from the video card itself before I made any attempt on modifying or flashing my video card with another video card BIOS. Another area I make sure that I don’t do is flash the video card with in the Window’s GUI. I flash the video card(s) BIOS inside of DOS mode, and yes you can still load into a Windows 98/ME DOS mode on today’s current hardware. This guide is all about how to do that, and also recover from a bad video card flashing.
Unlike motherboards when you have a failed flash this normally renders that motherboard dead, or bricked. Video cards we can recover if we used the wrong BIOS, if we had a power failure, to having catastrophic computer failure during the flashing process. On today’s computers, anything can happen to us during our most vulnerable time. One of these ways is somewhat unorthodox; this way is called “Blind Flashing” or what I like to call “A Wing and a Prayer Flashing”, because we have no idea if the flash took hold until we reboot the computer. What makes this type of flashing more nerve racking we do not know when to reboot the computer, because we cannot see anything hence why it is called “Blind Flashing.”
Bjorn3D.com, Does not assume for any responsibility for your actions when regarding flashing your video card.
Things We Will Need
First things first, before any BIOS flashing takes place. We will be needing some items to ensure this flashing goes smooth as possible. I like to use a USB flash drive that is formatted to a FAT 32 file system, and a Windows 98 DOS boot disk. You can use just a USB flash drive, but that USB flash drive has to be able to boot into DOS mode, I found it easier just to use a boot-able CD/DVD, and use a USB flash drive, then it is trying to make a USB flash drive DOS boot-able. A floppy drive (Ribbon type) hooked up and ready to go for just in case if all else fails. It is not required, but I seriously recommend a back up video card. It does not matter what manufacturer or if it’s a PCI-E or PCI. By having this “Back Up” video card will relieve us having to use the ancient floppy drive.
Recommended Items
I will be using this step for this guide, as it is faster, easier ,and more reliable
- A DOS boot-able CD/DVD disk (You can get the images HERE or you can look HERE)
- A CD/DVD drive (yes you can use a burner). No, you cannot use a Blue Ray drive and boot into DOS, been there tried that.
- A USB flash drive. This drive has to be formatted with a FAT 16/32 file system, otherwise DOS will not recognize it. A good idea is to keep this flash drive below 8 Gig’s.
- Nvlfash or ATI Flash (depends on your card you are flashing, I will do both manufacturers of video cards)
- Lastly, you will need your BIOS/Firmware you are upgrading too.
What you can use as well
- A boot-able USB flash drive. (guide can be located HERE)
- Nvlfash or ATI Flash
- Lastly, you will need your BIOS/Firmware you are upgrading to.
Not recommended but you can use this method
- A Boot-able CD/DVD disk with flashing utility and upgraded BIOS burnt to it, or two CD/DVD disks one for booting into DOS, the other with flashing utility and BIOS. This is not Recommended because you cannot back up the VGA’s BIOS.
- Nvlfash or ATI Flash +BIOS burnt on the boot able CD/DVD disk, or on a separate CD/DVD disk
Absolute Worst Case Scenario
- A boot-able 3.5″ Floppy disk (you can acquire here)
- A second Floppy disk with either Nvlfash or ATI Flash (VGA Specific) + have BIOS file you are upgrading to.
- An auto-exec file on a third boot-able floppy disk with either Nvflash/ATI Flash + BIOS file you are recovering to, (Blind Flashing) I truly do not recommend Blind flashing, as it is considered wing and a prayer flashing. It is best just to make sure you have a second VGA card that is of different manufacturer from the original VGA card you are flashing. Yes them 10+ year old PCI VGA cards work perfectly. So if you are flashing an Nvidia VGA card and it fails, it is best to have an ATI VGA installed in the Secondary PCI-E or in a PCI port. Nvidia VGA cards are a bit more complicated to flash compared to ATI VGA cards.
- A boot-able USB flash drive with auto-exec file and flashing utilities and original BIOS. (guide can be located HERE)
ATI Flashing
Flashing ATI cards is fairly simple. In fact my years of flashing and modifying BIOS’ ATI is far easier to flash. I will be using the “Recommended way of flashing” from the previous page. You will see why I recommend this way.
Make sure your flashing utility + BIOS is on the FAT 16/32 formatted USB flash drive, and also you have a working copy of a DOS CD/DVD boot-able disk. Do a couple of dry runs with your boot-able CD/DVD disk to make sure it is working properly prior to flashing.
WARNING: ALWAYS BACK UP YOUR ORIGINAL BIOS. Just in case things go south, as they do sometimes, we can recover with a BIOS that works.
Like always I or Bjorn3d.com is not responsible for your actions regarding flashing the VGA BIOS. Do this at your own risk.
The codes or commands I will be using are:
Backing up the BIOS:
<Drive letter>: -s 0 backup.rom
C:atiflash -s 0 backup.rom
Since I am using a USB flash drive and it is on a FAT 16/32 file system and my HDD’s are using a NTFS file system DOS only recognizes the USB flash drive as a HDD. Pretty simple isn’t it. The -s switch is telling Atiflash to save the BIOS to our HDD (USB flash drive). The 0 is what video card we are flashing. If you are using multiple video cards, and you want to flash or back up each one, you just change the 0 to the next corresponding VGA card. i.e.I have 2 5870’s one is in PCI-E 1, the second is in my second PCI-E port, the first video card uses the 0, the second uses a 1 switch. Same thing applies to X2 type of cards.
This is how I got there.
NOTE: Make sure your USB flash drive was plugged in prior to booting into DOS. Also that your DOS CD/DVD disc is in the CD/DVD drive.
Any time you are flashing a VGA card, make sure you uninstall all drivers and overclocking utilities prior to flashing.

My DOS boot-able DVD disk.

As always once I boot off the CD/DVD DOS boot-able disk I am greeted with what do I wish to do. Choose start computer with CD/DVD ROM support. Choice #1 hit enter. (Reminder You cannot use a Blue Ray drive, DOS does not recognize this type of drive)

Then we will see an A: prompt. Oops, I must have turned on the floppy support in the BIOS of my motherboard, it should read C:.

If you got an A: prompt, type in C: then hit enter. For those with a C: prompt, skip to next step.

Now make sure your USB flash drive was plugged in prior to booting into DOS. If not you will have to turn off computer then insert the USB flash drive, then reboot computer. Type in DIR then hit enter.

You should see what is on the USB flash drive, or C: I made two separate folders on my C: drive. You will have your files on the root directory of the USB flash drive. If you don’t see the flashing utility and your BIOS on the root directory, either A) the USB flash drive is not plugged in the computer, turn off computer reset USB flash drive, or B) you are not using a FAT 16/32 file system on the flash drive. Remove DOS CD/DVD disk from drive, remove the USB drive, allow Windows to boot on the computer then format the USB flash drive to a FAT 16/32 file system. Re-copy the flashing utility and the BIOS you are flashing too.

Since I put two folders on my USB flash drive, I need to enter the appropriate folder.

Me listing the directory of the folder I just went into.

Since I already flashed my BIOS a long time ago when I got this video card, I will be backing up this BIOS and flashing my video card with this BIOS. Basically go through the motions.

Now it is time to back up the BIOS, in the C:ATIprompt I type in atiflash -s 0 backup1.rom (always put a .rom in the name otherwise you did not properly back up the BIOS). I already did this once before, it does not hurt to have multiple backups of your BIOS.

All done, quick, painless, and easy as pie.

Type in DIR to make sure we have the back up BIOS.

Yep there it is, Backup1.rom is listed.
Flashing the BIOS
I am going to go through the motions of flashing the VGA BIOS, I will be using one of my “Back-ups” to perform this procedure. Remember to use the actual file name of the BIOS you’re using to upgrade to. Tip: Manufacturer’s like to go a tad bit overboard on the naming of their BIOS’, for instance: 123456789iuyt.101 rename this file to something a lot easier like upgrade.101. Use 8 or less characters on the BIOS’ name, DO NOT CHANGE the file extension (in this case it is a .101 file type.), JUST CHANGE THE NAME ONLY, LEAVER B…
This time we are going to flash your video card. Type in DIR into the command prompt. This will re-list all of the contents of the USB flash drive. I will be using Backup.rom to re-flash my video card with.

The command for flashing the ATI 5870 BIOS is: atiflash -f -p 0 backup.rom (you will be using a different name). I always do a force flash on my video cards, whether it is the same BIOS, modded BIOS of the same one, or a completely different BIOS.

This is what will happen after you once flashed the ATI video card’s BIOS. Upon reboot, you should see your computer booting up.

If you see this screen after a few minutes upon rebooting your computer, YOU USED THE WRONG BIOS for your video card and you bricked the BIOS flashing. Hopefully you were smart enough (as I said to do from the get go) you saved a copy of your original BIOS. In this case, go to the “Recovery From A Bad Flashing” portion of this article to figure out how to recover from a bad flash.
Nvidia Flashing
Flashing an Nvidia VGA card is almost identical as flashing an ATI video card. We just use a different program and of coarse different commands. Unlike ATI video card flashing I am not 100% on how to switch from one video card to flashing multiple video cards on the fly. ATI uses a switch 0,1,2,3,4,….. for each video card installed into the computer. Nvidia does not use this switch from the get go. I always just flashed one card at a time when dealing with Nvidia video cards. Why these cards a tad bit more complicated when flashing. Especially when recovering from a bad flash (this will be covered in the next page on how to recover)
WARNING: ALWAYS BACK UP YOUR ORIGINAL BIOS. Just in case things go south, as they do sometimes, we can recover with a BIOS that works.
Like always I or Bjorn3d.com is not responsible for your actions regarding Flashing the VGA BIOS. Do this at your own risk.
The codes or commands I will be using are:
Backing up the BIOS:
<Drive letter>:nvflash -b backup.rom
C:nvflash -b backup.rom
Since I am using a USB flash drive and it is on a FAT 16/32 file system and my HDDs are using a NTFS file system DOS only recognizes the USB flash drive as a HDD. Pretty simple isn’t it. The -b switch is telling Nvflash to save the BIOS to our HDD (USB flash drive).
This is how I got there.
NOTE: Make sure your USB flash drive was plugged in prior to booting into DOS. Also that your DOS CD/DVD disc is in the CD/DVD drive and is set too boot first.

Once you have booted with the CD/DVD drive you will be asked what do you wish to do. Select #1 option or just press enter. This will allow us to boot with CD/DVD ROM support.

If you were like me and left the floppy drive turned on in the BIOS of our motherboard, we will see the A: prompt.

Just type in C: then enter

Type in DIR, to list what is on the USB flash drive. If you see a bunch of stuff that you are unfamiliar with, you did not plug in the USB flash drive, or you did not format your USB flash drive with a FAT16/32 file system. Reboot, ensure USB flash drive is plugged in and also make sure the USB drive is using a FAT 16/32 file system. If you did do everything right, and you can see your flashing utility and BIOS file you will be flashing to, continue on.

I better make sure I am in the right folder or directory before I continue on. Boy I am being slow today

Oops, held onto the enter button too long this time. Oh I remember what I need to do, I need to type in DIR. Since I am just going through the motions in this guide, you should also see your BIOS file in here as well.

Before anyone does anything, MAKE SURE YOU BACK UP YOUR BIOS.

The command you will be using is nvflash -b backup.rom. make sure you put a .rom at the end of your name of the backed up BIOS. Otherwise you DID NOT SAVE the BIOS properly, press enter.

This is what you should see. If not try again from Step 1 on this page.

After you backed up your BIOS, type in DIR at the prompt.

Re-verify that your BIOS is indeed saved and it has the .rom at the end of it. If not repeat from Step 1 again.

Since you can never have too many backup BIOS’, I decided too make another BIOS named Bjorn3d.rom
Flashing Nvidia video cards

Again similar to ATI VGA flashing, I always force flash my Nvidia cards as well. I will be using the command nvflash -4 -5 -6 bjorn3d.rom. Another command you can use is, nvflash -p -u -f bjorn3d.rom. Again your BIOS will be renamed to something different.

But unlike Atiflash, Nvflash requires your permission to continue, hit y then enter.

Nvflashing updating the BIOS of your video card.

This is what you should have after you updated the BIOS of your video card. Turn off computer and turn it back on and make sure you can see your posting process.
If you see this screen after a few minutes upon rebooting your computer, YOU USED THE WRONG BIOS for your video card and you bricked the BIOS flashing. Hopefully you were smart enough (as I said to do from the get go) you saved a copy of your original BIOS. In this case, go to the next page of this article to figure out how to “Recovering From A Bad Flash.”
Recovering From A Bad Flash
This portion is all about how to recover from a bad flash experience, this happens to all of us at one point or another. There are two ways you can recover from a bad flashing. One of these ways is called blind flashing, the other way is to use another video card and then re-flash your card back with the original BIOS you saved prior to flashing your card with the new BIOS. If you were one of the types that did not save your BIOS prior to flashing your VGA card then you will have to find the exact model of BIOS your video card used, prior to recovering from a bad flash. If you were smart enough to save your original BIOS from your card and want to recover with that BIOS then proceed ahead.
I personally like using another video card to re-flash my primary video card back with the original BIOS, that I saved prior to flashing. For ATI cards, we can use another ATI card or a Nvidia video card (PCI/PCI-E), but we have to keep the video card we are going to recover in the primary PCI-E port.
Turn off your computer, unhook the monitor from the primary video card, while leaving the primary video card all hooked up (power cables) you need to insert a secondary video card into an available PCI/PCI-E port. Then hook up all power cables and monitor cable to this video card. Get your boot-able DOS CD/DVD disk ready and your USB flash drive, hook up the FAT 16/32 USB flash drive into the computer (in case you were in a bit of rage because of a bad flashed happened and you tossed it). Power up the computer, insert the boot-able CD/DVD disk into the drive. May have to pause the posting screen by hitting the pause break on your keyboard, or enter the BIOS by hitting the Delete button works too. Allow the computer to boot from the CD/DVD disk. Then proceed to re-flash your video card with the backup BIOS you made prior to flashing.
Nvidia video cards fallow this same procedure, but with one exception. That exception is we can’t use another Nvidia video card. We have to use another different manufacturer video card ie. ATI. I do not know the switch command to designate what video card gets flashed when using Nvidia cards. You will do exactly the same steps as we did with the ATI video card, power down computer, unhook monitor, place a non Nvidia card in a available PCI/PCI-E port, while leaving the main video card in its primary port and hooked up to power, hook up monitor to backup video card, power up computer. Enter DOS and re-flash your video card with the original BIOS you backed up with. Reboot computer when it is needed.
Blind Flashing occurs when we do not have a back up video card at all. Our Chief Review editor did an excellent job on how to perform this job HERE. Nvidia card users fallow his steps exactly. ATI users all we need to do is in the auto-exec file you will need to create is instead of using C:nvflash -4 -5 -6 bjorn3d.rom (your BIOS be named different) you will use this command line C:atiflash -f -p 0 backup.rom in the auto-exec file.
Conclusions
As we can see, flashing a video cards BIOS is a fairly simple task. It is not much different from flashing our motherboards. But in the case of video cards if we/you do happen to have a failed flash we can quickly recover from this vs if we failed a motherboard flashing.
I can not stress this enough, when ever you are planning on flashing any video card, MAKE A BACK UP COPY of the ORIGINAL BIOS!!!!!!! I don’t care if your brother’s mother in law sisters step pappy has never failed a flash before, and the “manufacturer” you bought the video card from, says ” It is 100% in fallible and guaranteed to work. You make a back up copy of the BIOS first. You would be amazed at the amount of people who failed a video card flash and did not take that extra few minutes too back up their BIOS prior too flashing, and now they are frantically looking for a BIOS for their video card. I got a simple saying, “If in doubt knock it out.” If you want four copies of the original BIOS from your video card. Then by god, Knock it out, and get four copies of the original BIOS. Just as long as you Backed up the Original BIOS.


Many thanks, your tutorial has helped me with flashing 5770 bios to 5750 GPU 🙂
Thanks a lott !!!
Thanks, how should I flash Q965 built-in VGA Intel(R) GMA 3000? Kindly help me.
Link to DOS image doesn’t work, plus the 98 DOS doesnt seem to be able to put on a DVD?
Could do a search for: win98boot
Maybe you can help. I made the back up file. I downloaded the latest from Tom’s Hardware. It was a .rom file and the back up was only a file. Not a .rom. I have 3 cards. Sapphire R9 270x OC 4Gig. I used ATIflash. It sees both cards. I didn’t do anything to the main card. I backed up the 2nd card. Loaded the .rom file. Updated it. Rebooted. It won’t boot up. I did the same thing to the 3rd card and it won’t boot up either. I remove that card and it boots up with just the main card in. So a back up seems useless if it won’t even boot up with the card installed. What have I done?