Have you ever wanted to install Linux, just to see what its like without actually setting up a dual boot? Or maybe you’d just like to try Folding@Home from a Linux install. Read on as we show you how to set up a Virtual PC from within Windows.
VIRTUAL PC – WHAT IT IS
Virtual PC has been around for some time now, with the latest version being Virtual PC 2007. While the term virtual machine thrown around a bit, it’s important to make the distinction: Virtual PC creates a virtual machine on your computer, but Virtual PC is the software created by Microsoft to perform that task. Some will be surprised to hear that Virtual PC is free, the full download is available from Microsoft’s website.
There are a few issues to note when preparing to Install Virtual PC:
First, ensure that you have the correct version of Windows installed. According to the download page over at www.microsoft.com, Virtual PC will run on Vista Business/Enterprise/Ultimate, Windows Server 2003 Standard Edition, Windows XP Professional, or Windows XP Tablet PC Edition. They make no mention of any of the Home editions of Windows.
Second, you must take into consideration the hardware requirements, the RAM and disk space needs for both the host operating system and the system you run in Virtual PC must be added together to determine your total system requirements. Don’t worry however, as you can get Linux installs that take up very little space and require little overhead.
Lastly, don’t worry too much about processor speed. According to the requirements listed by Microsoft, Virtual PC 2007 will run on AMD Athlon/Duron or Intel Celeron/Pentium II processors. Essentially, if your processor can handle XP or Vista, you’re good to go with the CPU requirement.
VIRTUALBOX – THE COMPETITION
VirtualBox is Sun Microsystem’s answer to VirtualPC. Their version is also free and unlike Virtual PC 2007, it is published under the GNU General Public License. For those of you that don’t know, this means that not only do you get the program for free, but the source code is available as well, just like Linux. This is handy because the general public can alter the source code to offer improvements or fix bugs for their specific application.
VIRTUAL MACHINE – WHY BOTHER?
Some of you are already asking, I’m sure, why you would need to install a virtual machine. The answers are many and varied but I can think of a few very good ones. I, for example, found Virtual PC when taking a class at the local college. For our class we needed to install Linux just to get some experience with it. The college I attend however, does not have PC’s dedicated for any one class and installing a dual-boot or single-boot Linux setup was out of the question. Our instructor led us instead to Microsoft’s website to download Virtual PC and we had Linux up and running in about an hour, and then were able to simply delete the Linux install and uninstall Virtual PC when it was time to leave.
Another reason that many people install Linux in a virtual machine is to run a program called Folding@Home. This software, for those of you that have not heard about it yet, is a project started at Stanford University to research protein folding and the way that it relates to different diseases such as Parkinson’s, Alzheimer’s, cancer, and many others. The way it works is simple, you download a “work unit” from Stanford’s servers and your PC uses it’s idle cycles (time the CPU is sitting idle) to compute and simulate the protein folding. Once the work unit is finished, it sends the results back to Stanford for analysis, more info can be found here. If you’re interested in folding for the Bjorn3D.com team, use the team number 41608 when you set up your client. The reason that people like to use Linux to do the work is one of speed. The Linux client, for some time, was much faster than the Windows client. With the GPU client that has been released, that has largely been overcome because Linux does not have a GPU client yet. However, the list of supported GPU’s is still fairly short and if you do not have one on the list, you’re stuck with the CPU client, which runs faster in Linux.
Finally, for people like me, it allows you another way to tinker with your PC. The great thing, perhaps the greatest thing, about Virtual PC is that you can tinker all you want, and you’re not going to permanently alter your computer. This is especially nice because every Operating System around requires its own HDD partition, Virtual PC simply creates a folder on your hard drive instead of an actual partition, but the virtual machine sees it as a partition.
VIRTUAL MACHINE – INSTALLATION
Installing Virtual PC, or VirtualBox for that matter is simple. The first step, of course, is to go get it, click here for the Virtual PC 2007 download page or here for the VirtualBox site. Once you’ve got it downloaded simply run the file, choose a destination location and off you go! It’s a fast, simple installation.
Today we will guide you through the VirtualBox installation. The reasons for choosing Sun’s solution over Microsoft’s is simple, it works. I tried Virtual PC 2007 first, and there are other guides out there with command line parameters to add to your Linux install to make it work. I tried their solutions which just raised other problems, then I tried VirtualBox. It installed correctly, the first time, with little to no specialized knowledge of Linux. Read on to see just how easy Sun has made it…
VIRTUALBOX – INSTALLATION
Installing VirtualBox is simple. The first step, of course, is to go get it, click here for the download page. Once you’ve got it downloaded simply run the file, choose a destination location and off you go! It’s a fast, simple installation.
Once you’ve got that taken care of you’re presented with this screen:
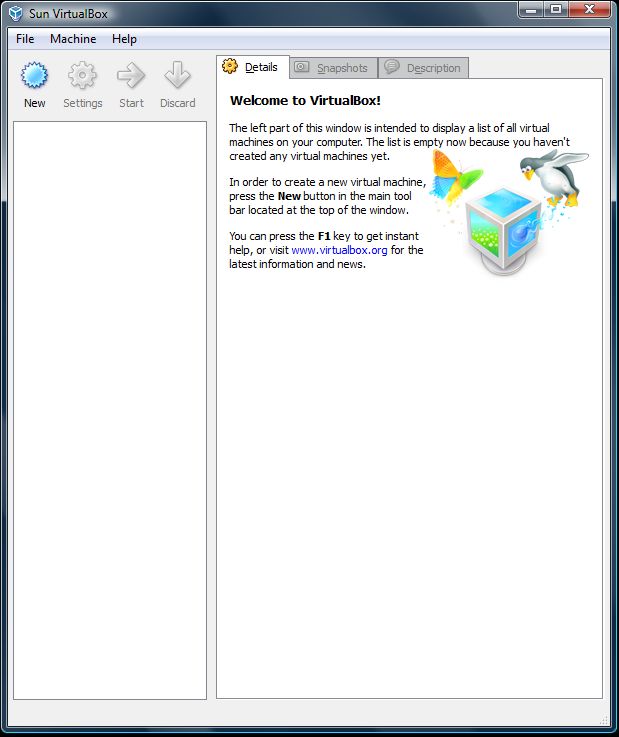
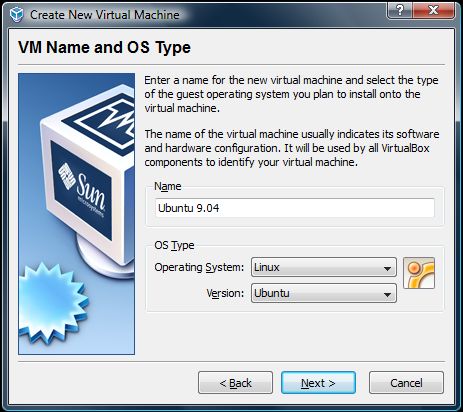
From here the process is fairly straightforward, at least to get started. Click on the “New” button, represented by the blue gear. This will bring up the “Create New Virtual Machine” Wizard. When that wizard starts you are presented first with a brief welcome page, simply click next and it will take you to the Virtual Machine (VM) and Operating System (OS) Type screen. For this article we will be working with Ubuntu 9.04, which is Ubuntu’s latest release. It’s free and you can get it here. They offer Desktop, Server, and Netbook editions.
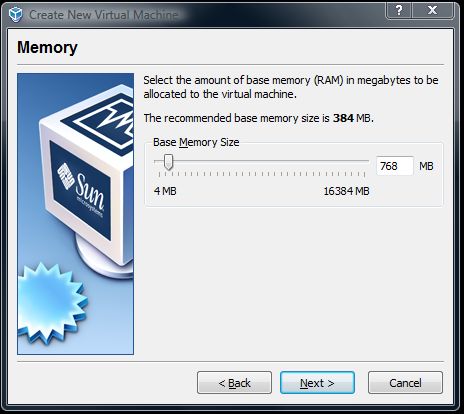
On the next screen you need to set the amount of RAM that will be available to your Guest Operating System (Linux). Check to see how much memory your Host Operating System (Windows) uses, do a little math and figure out how much you can get away with using. If you’re going to be running a lot of programs, or F@H for instance, make sure you allocate AT LEAST 512MB of RAM. I prefer a little headroom, so I’ll set mine at 768MB.
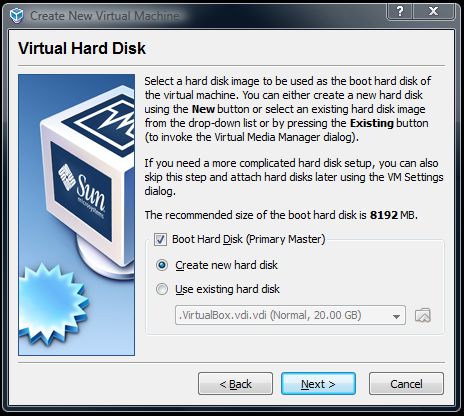
Next comes the HDD setup. This is the great thing about Virtual Machines, rather than partition your drive and destroy data, it will create a file the size of your Virtual Hard Disk and simply write to and from that “drive.” On the next screen, select “Create new hard disk” and make sure you check the “Primary Master” box then click next.
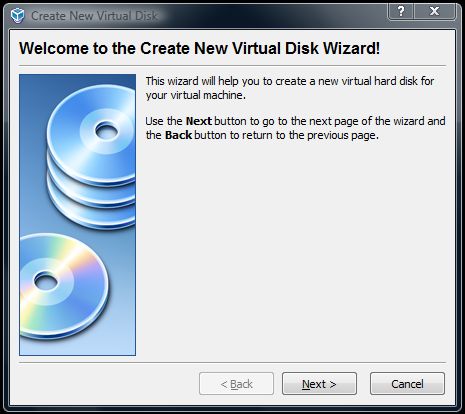
The next screen is just an intro to the next wizard, the “Create New Virtual Disk” wizard. Click next.
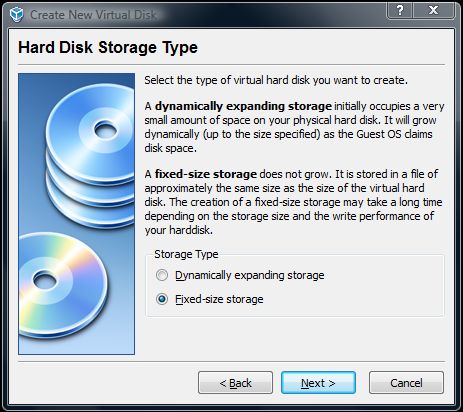
Here you have a choice. Fixed-size is just that, and they do a pretty good job of explaining it. The “dynamically expanding storage” is an interesting feature, you can set a disk to the size you need just for the install and as your Guest OS grows the file that it creates as the Virtual Drive will grow with it (up to a certain size, which you set). For this tutorial we’ll stick with the Fixed-size storage, adding as few variable as possible into the mix.
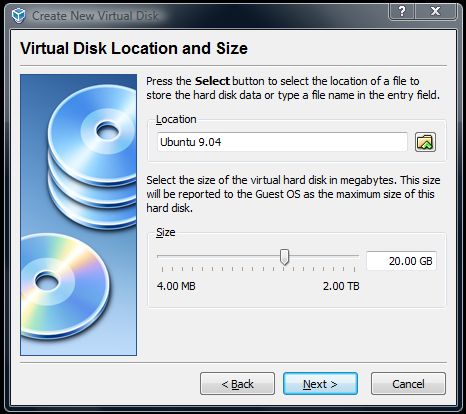
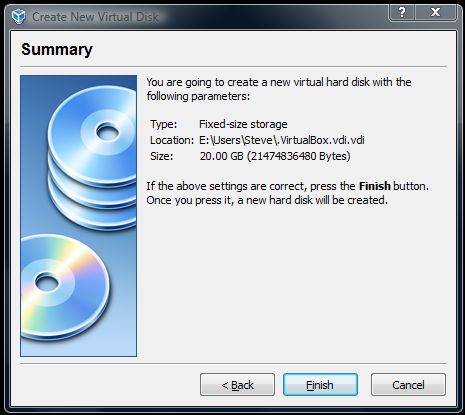
Next you set a location for your Virtual Drive on your physical disk. Just click the browse button and away you go. You can set it on an external HDD, USB thumb drive, or in my case a 900GB partition. After that set the size of your Virtual Disk (20GB is more than big enough for a Ubuntu install) and click next.
Check over your options on the summary page one last time, click finish and you’re all done with the disk setup. After you click finish the program will setup the file which could take a while, depending on the size that you set your Virtual Drive to. It will format the file so that your Guest OS will see it as an actual HDD partition.
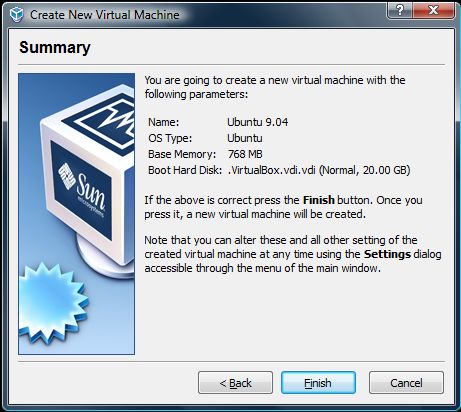
Once VirtualBox is done setting everything up you’re presented with a summary page. Review everything one more time, click finish.
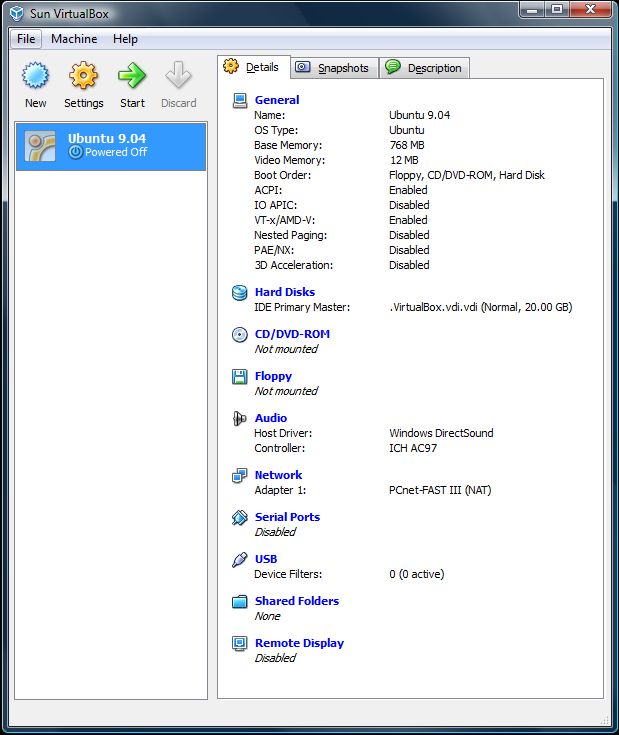
Now that the wizard is all finished, you’re presented with the overview below. Let’s cover a few things and then get started with the installation. You have the option now to set the amount of video memory your Guest OS will use, up to 128MB. Your CD/DVD-ROM can be mounted for use by the OS, or you can create a virtual drive so that it can use .iso files as CD/DVD disks. Don’t worry about the network settings, it is configured to use your Host network and pass it through to the Guest OS so your internet will work on the first boot. Set some shared folders if you like, to allow you to pass files between your Host and Guest OS’s.
Now click the green start arrow and let’s get to installing!
UBUNTU – INSTALLATION
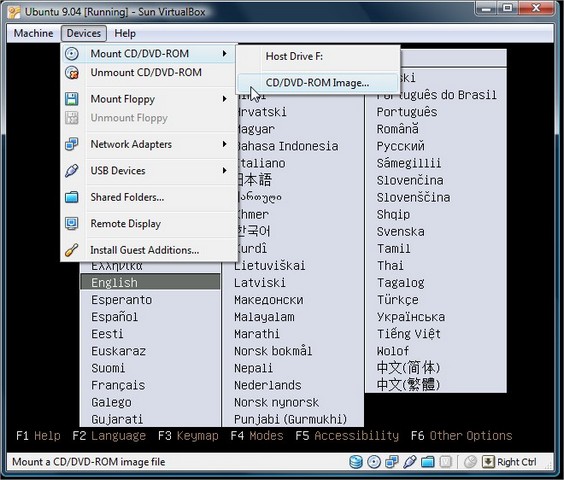
After you click start you’re presented with another wizard. This one is convenient because unlike modifying a BIOS it’s quite straightforward. For our purposes select “CD/DVD-ROM Device” and then either “Host Drive” and the path to your physical optical drive, or “Image File”. Click next.

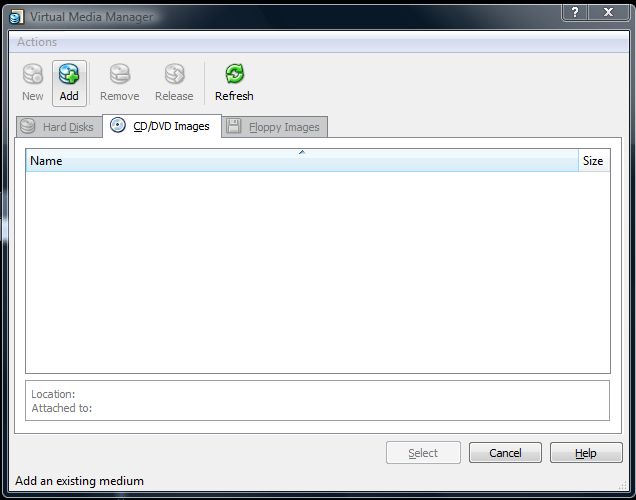
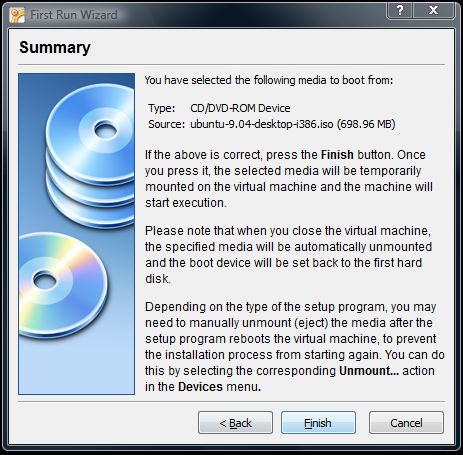
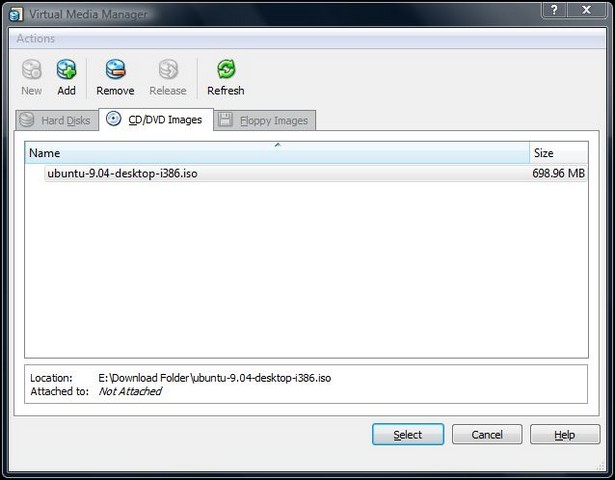
If you chose to install from an image file, as I did, you’re presented with the Images screen, simply click add, browse to your image file and it will populate in the box, click select at the bottom of the screen to boot from that image.
And we get another summary page, with a little advice about unmounting the image as well. After you click finish VirtualBox will start your Guest machine, you will see it go through a short boot process and then you start the installation, for real this time.
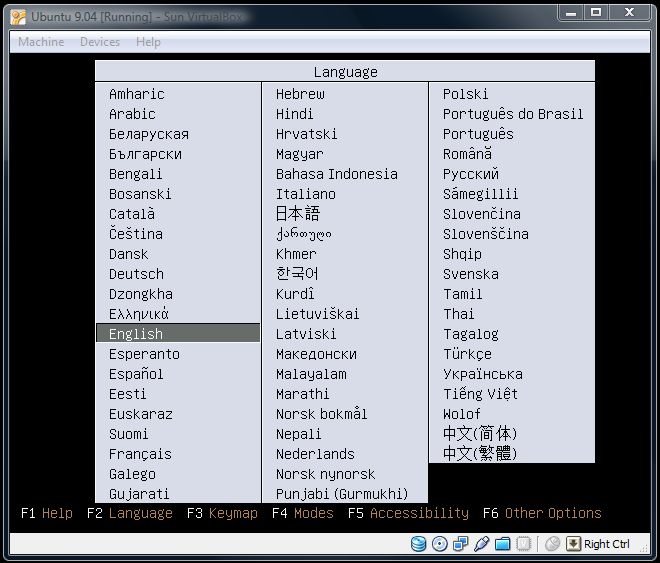
After a successful boot you are presented with a plethora of languages to choose from, I think I’ll stick with English.
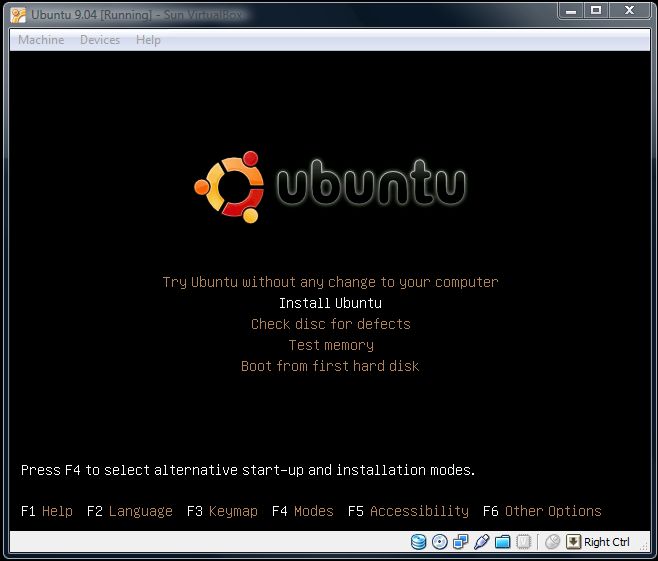
Here is where Virtual PC and VirtualBox part ways. Up until this point the install is fairly similar. If we were using virtual PC, we’d have to press F4 and select “Safe Graphics Mode” and then press F6 to add command line parameters. Then we’d select “Try Ubuntu…” boot into the Live CD environment and then click install Ubuntu. We’d then have to reset the box, add command-line parameters to the GRUB loader, and then cross our fingers and hope that it works.
With VirtualBox however, skip all the other stuff and just click “Install Ubuntu.” Really, is it hard to see why we went with VirtualBox instead?
UBUNTU – INSTALLATION CONT.
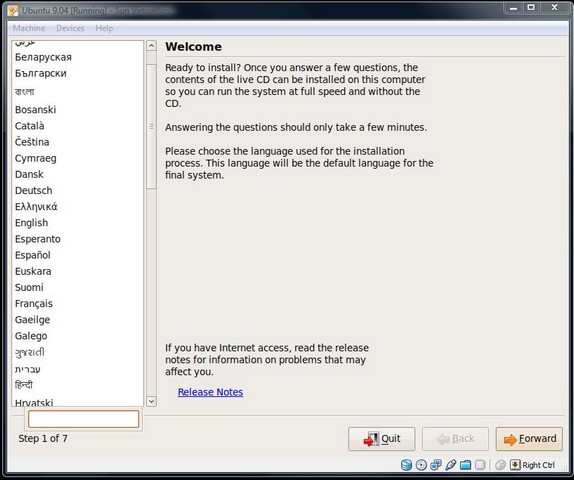
Okay, now for the GUI version of the installer. Things have changed a lot in the ten years since I last tried Linux. This process from this point forward is completely GUI driven, meaning Graphical User Interface for those of you that are new to this. What that means is that you don’t have to memorize a lot of command line functions and parameters, as it’s all a mouse-click away.
First comes the language select, again, just in case you decided after the initial boot-up that you’d rather speak Swahili.
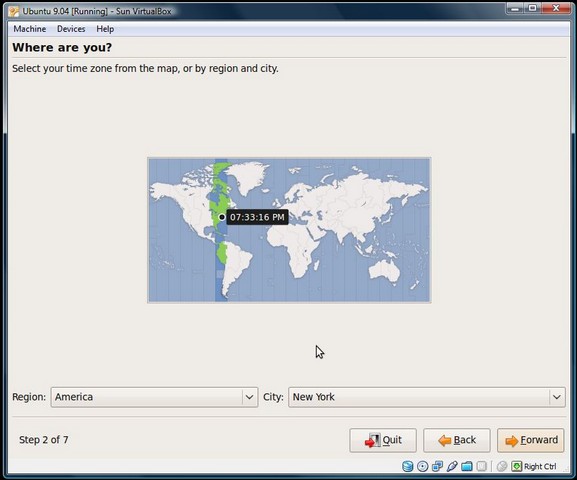
Pick a time zone, any time zone! My clock was off pretty significantly here, you can adjust it later.
You can choose any keyboard imaginable. I prefer the one that matches my keyboard, but it’s up to you.

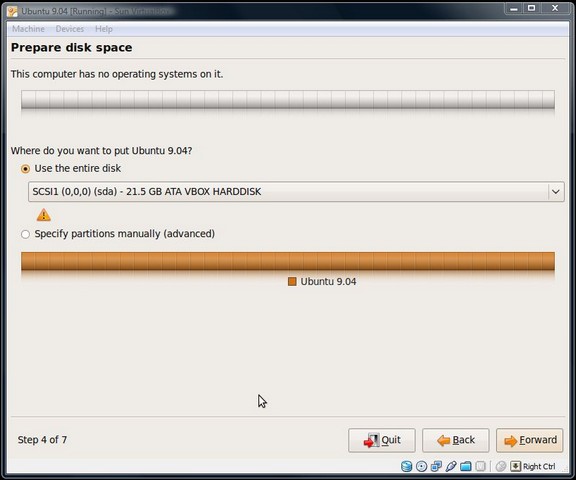
Remember that Virtual Disk you set up earlier? I promised the Guest OS would see it as a real HDD, didn’t I? Now you can even partition it further, should you choose to. I prefer one big one for Virtual Machines, for simplicity’s sake.
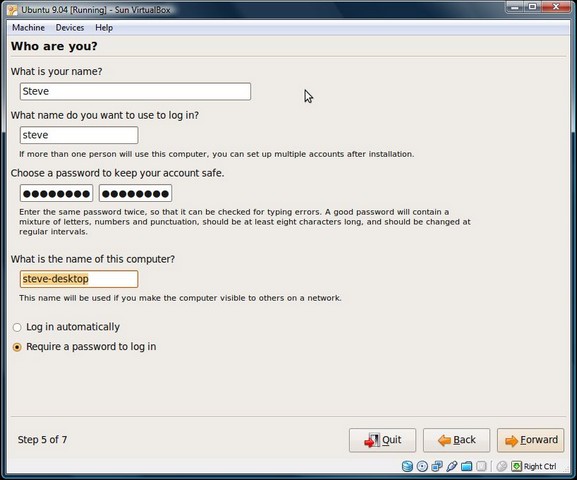
Now you need to set up a user-account. Always require a password to log in, it’s a good habit to have.
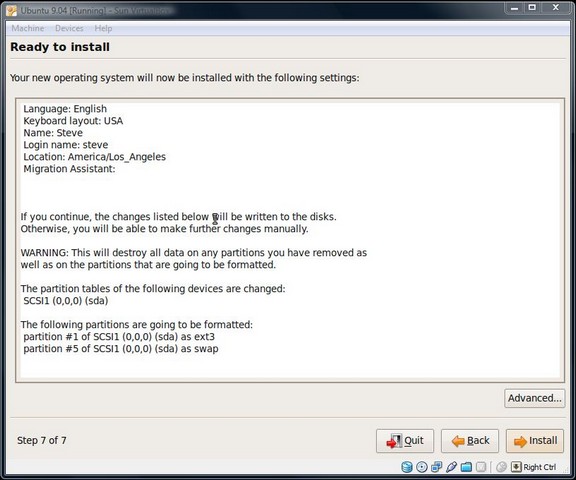
Yes, I noticed too that the install procedure goes from Step 5 to Step 7. I don’t know where step 6 is, maybe it’s only in the server edition? I don’t know, but we seem to have done okay without it. Review your install settings, just in case. Notice that even with one partition set up, it gives us ext3 and swap. This is a Linux thing, not a VirtualBox thing. Click Install to proceed and it will run through the formatting and installation procedure as if it were a stand-alone install. Then it will ask you to reboot.
UBUNTU – FINISHING UP
Okay, remember when I mentioned unmounting the image? This is why, upon rebooting it will just load the CD image again and again wanting you to reinstall the program and you’ll probably be wondering what happened. I clicked “Unmount CD/DVD-ROM” and rebooted again, that didn’t work so…
…I clicked “Mount CD/DVD-ROM,” clicked on CD/DVD-ROM Image and removed the image from the list. When I rebooted again it still didn’t work, so I told the Virtual Machine to shut down and close, then restarted it and it went right into the GRUB loader, booting immediately into our fresh Linux install. Now you know…
And on that note, we’re at the login screen. Simply login and you’ve got a new, fully functional version of Linux without the hassle or drama of partitioning/formatting/multi-booting your home system.

THE VIRTUAL MACHINE – FINAL THOUGHTS
There are a few things you need to keep in mind. First of all, while your Guest OS will be fully functional, it does require system resources beyond that of most programs. Consider this, you’re running an entire operating system within an operating system.
I’d like to make it clear that Virtual PC is a good program, but it was not designed with Linux in mind. Hence the little idiosyncracies when trying to Install Ubuntu. If you’d like to install a different version of Windows in a virtual machine, it’ll work quite well. For virtual Linux machines however, I simply have to recommend Sun’s VirtualBox due to its out of the box functionality.
Linux has become much more straightforward over the last few years, drawing a bigger user-base than it’s ever had. That said, it is still a relatively small community. Most of your questions about Linux can be answered somewhere on the Web. Like many of you reading this guide, I am fairly new to Linux. I’ve dabbled in it from time to time, but never gotten deeply involved in it. That is changing however, any questions you have on the subject can be directed to our forums where I and our members will do the best we can to answer them. That said, if you’re a Linux expert, come join us and share your experience!