Thermaltake Brings us a more cheaper variant of the Spedo chassis. But just because it cost less does not mean it doesn’t perform. Lets take a look at the Spedo chassis by Thermaltake.
INTRODUCTION
Since the introduction of the Spedo Advanced chassis by Thermaltake a few months ago, some of us were were wondering if Thermaltake would put together a cheaper variant of that chassis. Now don’t get me wrong the original Spedo chassis is a great chassis but for some of us users we just want the most simple chassis we can find.
Well Thermaltake came up with an answer. The Spedo. Nothing else added to the name. This chassis still retains quite a bit from the advanced Spedo, like the movable HDD bays, the simple tool less 5.25 drive bays and the tool less PCI expansion locks. In my book the simpler the manufacturer keep it the better it performs. Somethings are meant to be kept simple.
About Thermaltake
The brand personality of Unique, Aggressive, Vivid, and Stylish makes Thermaltake an expert in creating Exciting things and Fascinating environment for gamers and enthusiasts, also Keep them Constantly High physically and mentally. Excellent technical expertise and integration ability, plus dare to experiment on the new possibilities give Thermaltake the source of authority in the market. Moreover, Thermaltake get close to consumers and observe lead users’ behavior and requirement, to design aesthetic and high quality products which will greatly improve system performance and bring the user to the up most potential. With innovative design and unique style, Thermaltake products spread rapidly among the enthusiasts in DIY market and soon become the number one choice for PC DIY enthusiast worldwide.
* DIY (Do It Yourself) – People creating or assembling things by themselves for originality and individuality, receive satisfaction of accomplishment in return.
Thermaltake further set up online forums, product blogs and reseller clubs to assure consumer and reseller opinions and expectations towards the products can be clearly and freely expressed. At the same time, taking advantage of the well-trusted market survey websites to study and understand consumer demands, and raise brand awareness with professional product reviewer endorsement; ultimately, Thermaltake brand image can be strengthened and clearly communicated to the consumers.
Moreover, Thermaltake will maintain the constant devotion to global green activities, and expand the spirit of earth protection with actions in developing highly efficient cooling and energy saving technologies for the decrease of heat production; and give our part in preventing global warming for a better living environment for the next generation.
Key 3 Spirit” is a new concept developed by Thermaltake that directly communicates to consumers, and aims at marketing the “
Quality, Performance, Reliability, of Thermaltake products. With that in mind, consumers can feel the Excitement and Fascination which will Keep them Constantly High both physically and mentally
PACKAGING

To start things off we are going to be looking the side of the box first. The color of the box is black, and on this side of the box we have the name of the chassis “Spedo” centered in white lettering. And some general information written below this in different languages. I will say that this box is a lot bigger then the pictures portray it to be.

Specifications of the Spedo chassis are listed on the back side of the box.

The opposite side of the box from the first picture. Here we see the 2 types of Spedo chassis Thermaltake has. The normal Spedo (this review) and the Advanced Spedo (located HERE )

Then finally we get to the front side of the box. The picture here shows the Advanced Spedo chassis. This review is based on their stripped down version of the Spedo.

Opening the box, we see that Thermaltake used a cloth like covering over the chassis itself. The side inserts which hold the chassis in the box securly is not stryofoam. In fact, Thermaltake used a regular foam.

The chassis out of its box.

I removed both of the foam inserts that Thermaltake used.
EXTERIOR
Now I could have given you a picture of this chassis once I removed the cloth like covering. But I wanted to put that in the exterior portion of the review.

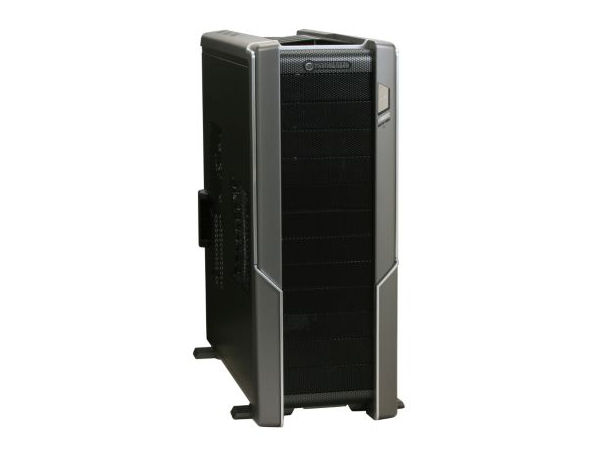
What the Spedo chassis looks like once I removed the cloth like covering Thermaltake used.

The left side view. Towards the back of the panel you will notice that we can place 2 120mm fans here (or if you have them 2 140 mm fans)

The front, Now this chassis cannot house 12 5 1/4 drives. The only places we can put 5 1/4 drives in this chassis, is the upper 4 bays, and the bottom 3 bays. The center 5 bays is where the HDD bays are and where the front fan is located. I will cover this a little better on the interior portion of the review.

The right side of the Spedo chassis. Now, if you look towards the back end of the chassis about where the CPU will be, you will see a rather strange place for a vent. And behind this vent it appears there’s a place for a fan.

Yes, that’s right Thermaltake included 8 PCI expansion ports here. Good thinking. Also the PSU gets mounted on the bottom of the chassis.

Up towards the top of the chassis, we see 2 very large holes with rubber grommets. These are used for those with external water cooling units. Also we can use 2 120mm fans at the rear of this chassis.
|
|
|
|
|
|
|
|
|
|
|
|


These images are here just for your viewing pleasure.
INTERIOR

In this image, if you look towards the front (fuzzy part, stupid camera wouldnt focus on where I wanted) we see that each side panal hinges from the front of the chassis. Not the standard slide back and pull out (removing the side panal) or the align the little tabs in the holes, hold your breath count to 30, cross your eyes while at the same time cross your toes then slide the panal forward in hopes it got locked into place right. This will make removal and putting the side panels on/off really easy and less of a head ache.

The back end of the HDD bays.

While we still on the right hand side of the chassis (looking from the front to rear). I should point out, remember that odd vent on the right side panal? well on the motherboard tray Thermaltake place a fan on the try itself to help give the back side of the motherboard airflow to help aide in keeping it cooler, another good idea.

Closer view of this motherboard fan mount. You can use a 120mm fan here.

the left side panal uses a lock to hold the that panal on.

Interior shot of the rubber grommets, for those who use an external water cooling.

1 of 3 fans Thermaltake included in this chassis. even though these dont look like they push air, these bad boys move air and are very quiet doing so.

better shot of the 2 fans

The toolless PCI expansion hold downs.

The PSU will get mounted on the bottom of the chassis. Thermaltake made sure that the PSU will draw its air from the out side, and made sure there was a filter to help keep large particles from entering the PSU.

Right in front of the PSU if you want, you can place a 120mm fan here.

Upper 4 5 1/4 drive bays, asyou see Thermaltake used a foam filter on each one of the covers.

This little unique fan holder. Is for those once a fan is placed on this, enables us to move the fan up or down , twist it etc. to better give us that extra airflow we may need on our computer components.

The box with all of our extras, ie. screws, motherboard stand offs, 1 set of HDD bay adapters, yes those can be removed to be place in the 5 1/4 bays.

the bottom three 5 1/4 bays.

The fan holder, to move it up down or twist it, you need to lift up on the little tab this will allow us to move it about.

The HDD holders, all is need to remove these is to press on the greyish part and it will pop open the other part of the hold allowing us to remove the HDD holder itself.

Little better shot of me tring to get the HDD holder out. It was being a tad stubborn at first.

The other side popped open. then all we need to do is, gently grab the holder and slide out.

Like so.

You can use up to 6 HDD’s on this chassis. Thermaltake gave the Spedo an ability to remove the HDD cage itself. Each cage houses 3 HDD’s giving us a total of 2 cages. this is the Locking lever for the upper HDD cage.

The locking lever for the bottom HDD cage.

Unlock these and swing em out, eables us to remove that corresponding HDD cage. Upper cage unlocked.

Lower cage Unlocked

I removed the lower cage first.

what it looks like once you remov both HDD cages. We get a glimpse of the front 140mm fan Thermaltake used.

looking from the back of the chassis to the front. with out the HDD cages.

a better shot of the front inside of the chassis. notice the black bar, this is used to help hold the HDD cages in place.

Inside of the white box you will see 2 plastic adpater thingy’s. These are used to place 1 HDD cage into a 5 1/4 bay’s. Oops I put it in backwards.

Ahh, thats better. Now things are fitting better.

better shot of the HDD cage fully in place.

The 5 1/4 toolles holders work on the same principle as the HDD holders do. push on the greyish button and out pops the other end.

And bingo. now we can put a dvd drive in here with ease.

Look up towards the upper fan placement. We can use either a 120mm, 140mm, or even a 230mm fan here.
INSTALLATION
Before I continue I should mention that I removed the front bezel on the Spedo chassis prior to this step. I forgot to get a picture of it while I was removing it. The removal of the front bezel was quite easy. All I needed to do was grab the bottom portion of the front bazel and gently pull out wards on the bottom and it came off.

Now the upper part of the Spedo chassis, again was really easy to remove. Yes, this will have to be removed in order for you to place a fan up top of the chassis. You will see 2 tabs that will need to be pushed in on the front of the upper bezel.

Here’s me pushing on the little tabs, after you do this just gently lift upwards on the front of the bezel then remove it completly from the main chassis itself.

This is what the Spedo chassis looks like naked. The front bezel cover did not have the power/reset buttons connected to it so made this task very easy when removing that peice. Also the upper bezel did not have the front IO connectors attached to it.

I put a 230mm fan up top of the chassis. This is me tightening the screws down.

Finalizing the installation of the upper 230mm fan.

Just a picture of the top part of the chassis showing that a 230 mm fan can fit up here easily.

I put a 120mm fan on the motherboard tray.

I put the motherboard in the chassis. As we will notice it does have enough room to accommodate a large motherboard.

If you look through the blades of this fan, we can make out my retention plate of the CPU cooler.

HDD installation, was really simple. The HDD holders had these little swing out locks, you will swing these out then put your HDD in the holder then swing them back into place to lock the HDD in place.

Better image of the swing out locks.

The swing out locks, locked into place onto the HDD.

Now there are 2 holes you can use to secure the HDD to the holder.

What it looks like once the HDD is in the holder and in the Spedo chassis from the back side.

Final installation of all components. Not overly cramped, but this chassis could be a tad bit longer IMO.

What the Spedo looks like being used. Oh pretty.
CONCLUSION
The Thermaltake Spedo chassis, was well thought out and well designed. This chassis will also provide more then enough air flow to keep your computer components cool throughout the year. From tear down to assembly I didn’t have any problems working with this chassis, it was easy quick and downright fun to work on this chassis. By adding an extra PCI expansion port on the chassis it will give some users who use a multi GPU configuration, that also happen to have a PCI-E video card slot at the bottom of their board, the ability to use a dual slot cooler on that video card and still provide some form of air flow.
As always I need to add a couple things I feel that could be improved upon. The first one, I feel Thermaltake can add some length to this great chassis. This will give us a lot more room to maneuver around our long video cards.(from the 19 inches in total length interior, increase that too 24 inches total interior). Then finally the bottom of the motherboard area. Granted Thermaltake did add an extra PCI expansion port, on top of that I would like to see about an extra 1/2 or so added to that area as this will give us users who use multi GPU’s that little bit extra space we may need for our GPU coolers or to help aide in giving us more air flow.
We’re trying a new rating system for you, our readers, to better understand on how we rate the products we review. The cumulative addition of the numbers represented here aren’t reflective of the final score.
- Performance 10
- Value 10
- Quality 10
- Warranty 9
- Features 8
- Innovation 9
Pros:
+Extremely easy to install computer components into.
+Stylish Design.
+Swing out feet to add more stability to the chassis.
+Tool less design.
+8th PCI expansion slot.
Cons:
–Needs to be a tad bit longer in length.
–Add 1/2 inch right below the 8th PCI expasion slot or below the motherboard tray.
Final score of 9.0 out of 10 and receives the Bjorn3D Golden Bear Award


