For quiet and stylish gaming Thermaltake give exactly what your looking for. The V9 Case delivers great cooling with good looks to take to LAN parties. Its Fanntastic!
Introduction
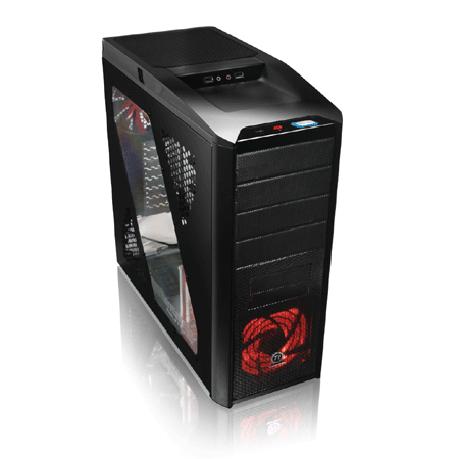
Some people like simple mid tower cases that are freakishly boring and get stuffed inside a desk. Others like over the top full tower gaming cases with all the bells and whistles. Then, you have guys like me who are in the middle. We like modern good looking gaming mid towers that give exceptional cooling. Something you can take to a LAN party and people aren’t like “Holy $%17”, but are more like “Hey man, that’s a nice PC you got there”. Today, Thermaltake kindly dropped off at my doorstep the V9 Marvelous Gaming Case. It has four 5 1/4″ bays, seven 3.5″ bays, two 120mm fans, a 230mm fan on the top, and a place to put a slim 80mm fan behind the CPU socket on the motherboard tray. It even has two holes predrilled and ready for external water cooling, as well as slits and an air filter for your power supply’s fan.
Included with these features are a window, ventilation holes, dust filters for the front fan and bays, and, of course, your standard USB/Audio ports on top. Sounds like quite the snazzy case, eh? Let’s go on and take a look at it.
![]()
About The Company, Thermaltake
The Company
We live in a world where most things seem to move at the speed of light. At Thermaltake, we feel the same way and that is exactly how Thermaltake conducts itself to deliver innovative, reliable and customer-centric solutions to the worldwide market.
Since the beginning of Thermaltake in 1999, it has been at the forefront of creating new and exciting products at a time where most computer users were provided little to no choices for components that may seem irrelevant, but in reality crucial to the performance of a PC.
Thermaltake Server Series solutions, with years of thermal experience and industry leadership, sets its goal on reforming total thermal management in server segment by formulating the perfect mixture of versatility, efficiency and thermal management with each respective server product category: Rackmount Chassis, Server Fixed & Redundant Power Supply and Server CPU Cooling Management Solutions.
With its comprehensive line of products available, it enables Thermaltake’s core customers to enjoy a one-stop-shop experience, reduce product design-in evaluation period and most important of all, flawless integration process. Each of Thermaltake’s strengths enables its customer to focus on their core business while taking advantage of the skills and efficiency of a single thermal management solution partner.
Values & Principles
– While still a relatively young company, established in 1999, Thermaltake is built on unwavering will and dedication to address issues and innovate at the same time for computer enthusiasts and corporate users worldwide .
– With strong support of Research & Development team standing behind the brand, Thermaltake is committed to never-follow but always-lead.
– In past decades, the industrial and technological advancements in different fields have shaped the world we live in today and have also made a big impact on the environment. Thermaltake takes great measures to ensure the product that we produce relieve these impacts by being first to act on 80 PLUS® specification for computer power supply that greatly reduces the amount of electricity that a computer consumes.
– Always striving to be the best, we continuously benchmark our performance against the very best internally and externally.
– Customers are our greatest asset and Thermaltake does not take that for granted. That is why Thermaltake is the industry leading in customer service and customer support with around-the-clock automated product return service.
The Works
|
Mid Tower |
|
|
0.8 mm SECC |
|
|
Plastic |
|
|
Black |
|
|
Transparent Window |
|
|
12″ x 9.6″ (ATX) |
|
|
N/A |
|
4
|
|
2 |
|
5 |
|
7 |
|
|
USB 2.0 x 2 |
|
– Front (intake) : |
|
|
Yes |
|
No |
|
Standard ATX PSII |
|
No |
|
18.19 x 8.19 x 19.10 in 462.0 x 208.0 x 485.0 mm |
|
13.87 lb
6.29 kg |
|
3 Years |
The Features
Metal grilled front panel
Top 23cm silent fan Built-in
Bottom-placed PSU design for better and easier installation
MB tray fan hole pre-drilled for better MB ventilation
Tool-free installation for 5.25”, 3.5” and PCI devices
|
Appearance
|
|||||||||||||||||||||||||||||||||||||
|
|||||||||||||||||||||||||||||||||||||
|
|
|||||||||||||||||||||||||||||||||||||
|
Ventilation
|
|||||||||||||||||||||||||||||||||||||
|
|||||||||||||||||||||||||||||||||||||
|
Structure (Internal)
|
|||||||||||||||||||||||||||||||||||||
|
|||||||||||||||||||||||||||||||||||||
|
Structure (External)
|
|||||||||||||||||||||||||||||||||||||
|
|||||||||||||||||||||||||||||||||||||
|
Air Flow
|
|||||||||||||||||||||||||||||||||||||
 |
|||||||||||||||||||||||||||||||||||||


Opening Her Up
Honestly, I haven’t picked up a new case for years. I almost forgot how pretty a new case could be. And when I got home to see the package at the foot of the stairs I got real excited. The first thing I did was grab my phone, box cutter, and started taking pics. Despite Thermaltake putting the case in a heavy duty box I was surprised to see that the box had almost no damage at all. Usually you can tell when the UPS guy is being a meany ’cause you’ll have damaged corners, scratches, and what not on the outside. My box only had a few scratches on it and that’s it. Even if he did kick it around, Thermaltake packaged it for rough transpo, so no worries there.
The first thing you notice on the box is that they have pictures of the case and Multilanguage specifications on the outside. They also were nice enough to include the features this case has so you, as the customer, can get a detailed description on what exactly you’re purchasing. Lets take a look at what I’m talking about here.
 |
 |

Let’s Open Her Up
 |
 |
Upon opening the box you can see how well it was packaged. I’m glad to see companies package their products well because shipping these days isn’t all that great. With shipping costs on a heavy item such as a case I would hate to RMA an item because it was damaged during transport. The side window and other glossy plastic parts were covered with plastic, as well as having a plastic bag around the case itself. Those are pretty standard though and expected.
 |
 |
Here we have the top and the front. Upon first sight it looks pretty impressive. I personally love the massive fan on top for some reason. It screams, “I’m gonna keep your CPU cool!” You can see from the front that it has four optical bays and two floppy bays. Some people think to just get rid of the floppy bays, but I say that’s not a good idea. You still have things like fan controllers to put there or if you’re like me, you put a modded cathode switch there. You can see on top the normal audio ports and USB ports. I’m quite disappointed to see that Thermaltake didn’t include an eSATA port for such a new case. eSATA is becoming the norm for speedy external drives and not seeing one on this case was kind of a turn off. Then, I just looked at the massive fan again and was happy.
 |
 |
On the rear you can see your single 120mm fan, pre-drilled holes for water cooling, and the slot for your bottom mounted power supply. Having the pre-drilled holes for external water cooling was a smart move because here lately, more and more people are turning to more exotic types of cooling such as water. I will be using these holes as well, so I was pretty happy to see that. On the right picture you can see the bottom of the case. They put holes for the power supply cooling and supplied a filter as well. Another smart move from Thermaltake because keeping dust out of your important components is a must.
 |
 |
For this pic we have the right side of the case. You can see the ventilation holes for both the mobo tray fan and hard drive cage. I’m not so sure what to think about the cage ventilation yet. I like the added cooling idea but I also like to hide a lot of cables in that area. I think the mobo tray fan behind the CPU is a great idea. I don’t know how many times I’ve felt around back there and it’s really hot. Also pictured here is the bundle they include with the case. You’ve got your standoffs, screws, instruction manual, warranty information, and an information page about Key 3 Spirit. Not much of a bundle, but it gets the job done.
I think it’s time to put a rig together. Shall we?
Putting The Beast Together
| “Univac” | |
| Processor | Intel Core 2 Duo E8400 @ 3.8GHz |
| CPU Cooling | Zalman 9700CNPS |
| Motherboard | XFX 780i SLI |
| Memory | 2x2GB G.Skill Black Pi DDR2 800 @ 1013MHz |
| Drive(s) | Maxtor 500GB / WD 160GB |
| Graphics | SLI 9800GTX+ |
| Power Supply | Thermaltake Toughpower 1000watt |
| Display | Samsung 24″ 2433bw |
My first impression was that this is going to be awesome. New cool case, sweet PC to test it with, giant top fan, should be a breeze. Well, I ran into a few snags that I will discuss in this section. I am by all means a neat freak and my PC has to be very clean. That means cable management. Even though this case has some nice features to get cables out of the way and out of sight I feel Thermaltake could have made some improvements. Let’s take a look at what I’m talking about.

Here we have an inside shot of the case. On the right you can see there aren’t any holes to put power supply cables through on the motherboard tray. So, you have to work around the hard drive cage. As I mentioned before, that’s where I like to stuff a lot of cables because usually it’s hidden. Also, there isn’t much room between the back side panel and the motherboard tray, also, another place I like to stuff cables. I’m pretty sure I’m not the only one that does this either. Thermaltake could also have put some sort of hole to route the rear fan cable through. Enough with the bad, ya? Some good things are the screwless drive mounts. I think these might be the best ones I have dealt with. They were really simple to figure out and took about two seconds to put a drive in. No hard drive slides, optical drive slides, or any mess like that. Simply insert your drive to match the holes, insert tooless mechanism, and twist the center piece. Done! I’m easily amused and thought these were fun to play with. The length of the cables coming from the top of the case was very nice. It was very easy for me to route these cables to the proper places on my motherboard without any real hassle. They also left room between the back panel and the PSU area to leave cables. Let’s just say I put a lot of cables there. Here’s a shot of everything installed.

I did the very best I could to utilize the case’s features and hide my cables. I have a few more ideas in my head but they require some modding and I wanted to show a fresh install with no extra modding. I personlly don’t think it looks very good. On the bright side, everything is very roomy. There is enough room for two large cards so you can fit the latest graphics cards with room to spare. It easily fit my Toughpower 1000 watt PSU. I highly recommend an 8-pin extension if your motherboard has the hole on the top like mine. I thought Thermaltake left a very long cable for such situations, but as you can tell, mine is stretched and couldn’t be routed the way I wanted it to be.
Cooling
I would have to say this case does quite well for cooling. The massive fan on top helps a lot with this, of course. As of right now I am using all air cooling, and the stock cooling on the video cards. For testing I turned my friend’s AC off. Why you ask? Simply because with his AC on it’s about 63°F in his room and I thought that was a little chilly to be properly testing the case. After letting his room warm up to about 71°F I began stressing each component. The 230mm fan on top did an excellent job at keeping my CPU cooled, coupled with the 120mm rear exhaust. Compared to my previous case, a Raidmax Scorpio with seven 80mm fans, this case kept my system about 10 degrees lower than the Raidmax. It’s also a lot quieter too. The loudest fan in my system right now would have to be the Zalman since I run it 100% 24/7. I’m very pleased with how efficient the cooling is. The 120mm fan in the front seems to be just enough to keep my drives cool enough, as well as keeping enough airflow inside my case.
Conclusion
Overall, I am pleased with the Thermaltake V9 Marvelous Gaming Case as a companion to my Intel rig. It keeps everything nice and cool and is pretty attractive sitting on my desk too. What this case lacks in cable management or looks it balances out with a nice price. You can’t complain about having a decent gaming case that stands up to the others for such a low price. For being a case that’s aimed for mainstream users, I think it fits perfectly into its category. It isn’t too flashy, too over the top, or packed too much with features that requires a hefty price. It can fit all modern video cards as well as the bigger more powerful power supplies and even has enough room to spare for some water cooling.
The case is kind of flimsy but it is also extremely light. I think there’s a balancing point between the two because it isn’t too flimsy and feels right. So, with that in mind it would be a nice case to have your LAN PC in because it won’t be a lugger like some more expensive steel cases. Even though the bundle with the case is a little on the sparse side. Thermaltake provided enough screws and standoffs to go around and I even have a few left over. So even with it’s nagging points I think this case is very nice for it’s price.
We are trying out a new addition to our scoring system to provide additional feedback beyond a flat score. Please note that the final score isn’t an aggregate average of the new rating system.
- Performance 8
- Value 8.5
- Quality 7.5
- Features 7
- Innovation 7
Pros
+ Great cooling compared to cheaper cases
+ Has enough room to fit the latest video cards and power supply’s
+ Has pre-drilled holes for external water cooling
+ Toolless design for drives works decently
+ Bottom mounted power supply
Cons
– Inside is not black
– Lacking cable management options
– Kind of flimsy
Delivering a decent combination between price and features Thermaltake’s V9 Marvelous Gaming Case receives a 7 (Good) out of 10.


