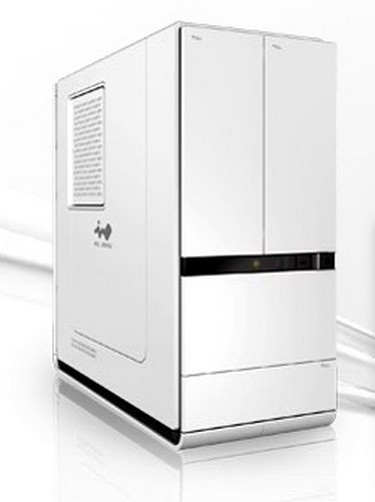
The Matrix is both stylish and functional. And you wont be ashamed either to have this sitting next to your HDTV.
INTRODUCTION
In Win has been around for as long as I can remember. Back in 2000, when I had just gotten out of the military, I bought one of their full tower server cases. I ended up having it for a few years, but after those few good years, my good old case started falling apart. So when I went looking for a new computer case it seemed like In Win had fallen off the face of the earth. I looked and looked for their products but I never could find any. Well, here it is, eight years later and In Win finds me. So, I am going to show you one of their newest additions, the Matrix computer case.
About IN-WIN
IN-WIN Development Inc., an ISO 9001 manufacturer of professional computer chassis, power supplies and digital storage devices, is the leading provider of enclosure solutions to system integrators worldwide. Founded in 1986, IN-WIN provides high quality chassis that conform to all safety regulations, as well as unsurpassed customer service.
|
1985
|
Company founded as IN WIN Development Inc., focus on chassis selling and marketing.
|
|
1987
|
Established chassis assembly facility.
|
|
1992
|
Established Taoyuan factory in Taiwan.
|
|
1994
|
Established in house painting department and facilities
|
|
1995
|
Established stamping and tooling department to enhance the ability of technician and product quality control on yield rate. |
|
1997
|
Established facility automation on progressive stamping equipments.
Executed TQM (Total Quality Management) system. |
|
1998
|
ISO 9002 certified
Established facility automation on robot stamping equipments. |
|
1999
|
ISO 9001 certified
Established USA branch to explore the US market. Established New CHANGHEIN factory in Taoyuan, Taiwan. |
|
2000
|
Established UK branch to explore European market.
Established Japan office. Established Power Supply Group for Power Supply development and manufacture. |
|
2001
|
Re-build and enlarged Taoyuan factory to become the Headquarter.
Implementation of ERP system. ISO 14001 & ISO 9001, 2000 version certified. Listed on Taiwan OTC market. |
|
2002
|
Implementation of IN SHIN factory plan at China.
Implementation of e-Documents. Established NL branch office and warehouse as European Market Center. |
|
2003
|
Established IN SHIN factory at China.
Listed on Taiwan SEC market. |
|
2004
|
Established UPS Group for UPS development and manufacture.
|
|
2006
|
All product lines are compliance with RoHS directive regulation. |
|
2007
|
Obtained IECQ 080000 HSPM certification.
|
PACKAGING
I am going to group packaging and the exterior of this little chassis in one area.

Starting off on the back side of this little box, we see that IN Win has a couple of images of the Matrix chassis and a list of the specifications to the lower left hand corner.

Moving the box over to its side we just have a couple of images of the Matrix chassis.

Flipping the box over 180° on to the other side of the box, we again see the same image that was on the first side, but at the bottom there’s technical information about type of chassis, color, and such written here.

Now finally, here’s the front of the box. You thought I forgot it didn’t ya? Nopers, I didn’t. The picture explains it all.

Upon opening the box, we are greeted with the instruction booklet. Look. The bag is on the case this time. My dog, Sierra, didn’t end up eating this one.

Pulling the chassis out of the box itself we see that In Win used the standard Styrofoam on the ends of the chassis and wrapped the chassis in plastic. I really need to be more gentle when pulling cases out of boxes. I keep breaking off pieces of the Styrofoam.
EXTERIOR

The left side of the chassis is shown here. In Win put a vent on the side panel around the area of the CPU cooler. I will have to check this thingy out later.

Looking at the front of this little chassis in this shot, it appears that the front is a split design for the 5 1/4 drive bays. We can also make out the front Power and Reset buttons half way down the chassis and to the right.

The right side of the chassis

The back side. Hmm, now how do we hook up all of our cables and run them to our monitor, mouse, keyboard, etc.?

Ohh, that’s how. We open the back door and now we can plug all our stuff to the motherboard. In order to close this back door, In Win included a little pop out around the video card area so we can hook up our monitors, and for the other items (i.e., mouse, keyboards, etc.). We just route them through the little notches. I will explain these in a bit.

Now that little vent I mentioned earlier, well, it pops out. Actually it hinges outwards. And it has a little filter on the inside of that little door.

Looking at the vent here from the front of the chassis.

Well, the front doors don’t open the way I thought. They instead open like louvers do. This is the right hand door opened up and we can see this is where our front I/O ports are.

In this fuzzy picture the left side door is opened, showing us where the 5 1/4 inch drive goes. Notice it’s not flat like we are used to seeing in chassis but laid on its side.

For those who are running the old floppy drive we put that at the bottom of the chassis. Well, In Win definitely made sure that this case just flows.
Now, before I continue I have to say this. Objects May Appear Bigger Than They Are while in this chassis.
INTERIOR

We need to start removing panels and such before we install our computer components. To remove the rear door we need to lift up on the little tabs located at the bottom and lift out.

Viola! It’s removed.

Now, it’s time for the side panel. After fiddling with it for a few minutes, I found out that the panel slides back about an inch, then you’ve got to lift it straight out.

It’s removed. I like it when things go right.

In Win, placed a fan over where the hard disk drive and where the floppy drive goes (if you are still using a floppy). You can only use one HDD and one floppy or two HDD’s with this chassis

The PSU. No comment from the peanut gallery (me being the peanut gallery).

Ok, now this weird. After scratching my head for a couple of seconds, I figured out that this is the CPU cooler’s vent from the chassis. Next question. How do you remove it?

After scratching my head and thumbing through the destruction (I mean instruction) manual, I learned that I have to remove the front door assembly. Looking from the front of this chassis, with the front door assembly removed, we see where the CD/DVD drives go. And nope. This is not an air channel for the CPU. In fact, that little door from the left side panel is where the CPU cooler draws air from.

Now I removed the CD/DVD drive holder/air channeler from the CPU thingy. It’s different when removing this little piece. You have to lift up the back of this peice, then swing it untl it is 90° to the chassis, then lift it out.

I removed the CPU air chamber.

The back side of the PSU.

The bottom Side of the PSU is shown here and we see that it’s only a 300 watter. Plus, it’s really small in size. But it should be okay for a small HTPC set up.

The wires of the PSU are layed out in this photo and include one 24-pin main power plug, one 4-pin CPU power connector, two Molex connectors, two SATA connectors, and one floppy connector.
This case is beginning to look more like a Chinese puzzle box. Let’s hope things go just as smooth as it did pulling it apart.
INSTALLATION

The included bag of screws.

The motherboard stand off screws. These were already mounted inside of the chassis.

I put the motherboard in the chassis and left the Gemini II CPU cooler on. What was I thinking? Well, the chassis can fit the CPU cooler nicely, but I won’t be able to use a CD/DVD drive or put in that CPU air channeler thingy. Just great, now I gotta rip it out to change the CPU cooler. Hmm, now what CPU cooler I have that is small enough? Oh yeah, the stock cooler will work.

And so I put on the stock CPU cooler. I use retention plates on all my coolers. That’s why you see little brass thumb nuts near the CPU cooler. Well, here’s what it looks like with just the motherboard and video card installed. I kept the PSU out during this portion to make things a tad easier to install. I forgot to mention this earlier, the wires running from the front to the back in the chassis (bottom side) are the front on/off, reset buttons and power/HDD LEDs.

This picture is after I installed the PSU and hooked up the front USB’s. Wow, it looks like my cable management has improved some. Remember though that I hid the two Molex and SATA power plugs.

Putting in the CPU air chamber thingy here. Notice that the air chamber fits over the CPU cooler and allows the CPU cooler to pull air from the out side thru the left side panel.

Putting the CD/DVD drive holder with DVD drive in it here. Oh great, now I gotta rip this out so I can put the power plug on to the DVD drive. Just when things were going so smooth I just gotta make it harder on myself. Any who, this is what it looks like once you get these two pieces put together and on the chassis.
When I was putting on the side panel, I had difficulty putting the side panel back on, mainly because it just would not go in the way it was supposed to. After a few minutes cursing, yelling, and making funny little faces (like any of these helped me out), I just put my hand on the side panel and it popped right into place. All I needed to do was slide it forward into its lock.


Here’s what the back looks like with the back door opened and with all the components installed. Well, since no components or myself were harmed during the making of this review, let’s wrap things up.
CONCLUSIONS
The Matrix chassis by In Win is sturdy, solid, and, as my daughters say, cute. This chassis would be a perfect candidate for those who want an HTPC in a chassis that is both functional and stylish. The back side of the chassis is the ugliest part about a chassis but it won’t be seen. In Win has a good idea by using a door to help cover up the back side of the chassis to make it more uniformed to the rest of the chassis. By using a little pop out door for the CPU intake and then placing a filter here will make cleaning the inside of the computer a lot easier. I am not a big fan of doors on chassis myself, but there are instances where the use of a door is a necessity. I mean, who wants people to see CD/DVD drives and USB headers or floppy drives on their computers, especially around your HDTV, where it is most visibly seen? Tidiness goes a long way.
The only real problems that I encountered with this great little chassis was that it had a Chinese puzzle box feel to it when taking on/off the side panels, and the other internal components just to be able to install a motherboard, or if it needed to cleaned the inside. I feel that the chassis should be easier to get into and out of and easier to install components into it. I do realize the purpose of the design of this little chassis but it could have been done a little better. Also, there’s the actual size of the chassis. I am not saying that they need to make it a full tower size, but it’s rather small foot print makes it difficult and or near impossible to replace a simple thing as a PSU, let alone locating one that is in the 500 watt range. For me personally, I feel this is more of an HTPC type of chassis than a gaming chassis because of its inability to house a large PSU, multiple HDD’s, or large video cards. Also there’s its inability to handle a large CPU cooler without interfering with the design of the CPU air chamber and the CD/DVD drive bay.
At the time of writing this review I could not find a price for the In Win Matrix chassis and thereby making a point system difficult to properly judge this product.
Bjorn3d is adding a new rating system for you readers to better understand on how we reviewers judge our products we review for you. This does not total up the final scoring of the product we are reviewing.
- Performance 8
- Value N/A
- Quality 9
- Warranty 8
- Features 8
- Innovation 9
PROS:
+ Solid design and sturdy
+ Aesthetically pleasing
+ CPU air chamber design
+ Ability to use full height cards
CONS:
– Somewhat Chinese puzzle box feel when taking this chassis apart and putting it back together
– Not large enough to accommodate normal sized PSU’s if replacement is needed
Final score of 7.5 of 10 and receives the Bjorn3D Seal of Approval.


