Have you ever been in a situation where you were trying to fix a friends computer, or yours for that matter, and the PC had so much spyware that it locked up and prevented you from running any tools? Or maybe youve had a situation where you couldn’t even boot into Windows because Windows was corrupt or missing a file. I have and its not fun. Fortunately, a friend told me a couple years ago about Bart’s PE and it has been a great tool ever since. I take it with me whenever I go out on call to fix a PC.
INTRODUCTION
Have you ever been in a situation where you were trying to fix a friend’s computer, or yours for that matter, and the PC had so much spyware that it locked up and prevented you from running any tools? Or maybe you’ve had a situation where you couldn’t even boot into Windows because Windows was corrupt or missing a file. I have and it’s not fun. Fortunately, a friend told me a couple years ago about Bart’s PE and it has been a great tool ever since. I take it with me whenever I go out on call to fix a PC.
The Bart’s PE disk was created by a man from the Netherlands named Bart Lagerweij. He had been engaging in the age old method of creating and using DOS-based boot disks to help him troubleshoot PCs. He would carry around several diskettes that had an assortment of programs. In 2002, he saw a Windows PE (Pre-installed Environment) bootable CD-ROM from Microsoft in action and wondered if he could make something better. He began coding a program to build a new customized PE disk. He eventually figured out how to do it and anticlimactically named it PE builder. His PE builder program allows a person to add programs and utilities to the CD that you might want to use in the Windows environment.
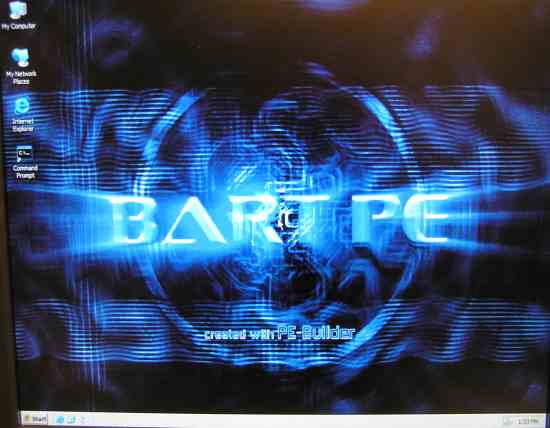
There are several different programs that can be added to the disk to help backup, recover, image the PC, and troubleshoot many problems. Examples of the many programs that can be installed include Lavasoft Adaware SE, SpyBot Search and Destroy, HijackThis, CWShredder, AV7 Personal, McAfee Stinger, RootKitty, Handy Recovery, Free Undelete, DBXtract, DriveImage XML, Symantec Ghost, and many many others. Once you have added the files needed in the builder, pop the CD or DVD into the drive and boot from the CD/DVD ROM. It will start with a bootup screen for Bart’s PE and then will go to a “Windows is Loading” screen. It is actually loading off the CD instead of the hard drive. The operating system loads into RAM so that it does not physically use the hard drive. Once the PE disk has booted you can browse the internet, update programs, make an image of the PC with Ghost, run file management tools, use remote desktop, and there is even an option to use VMware while in PE. USB support is also standard now with the latest version of PE Builder. Most people use Bart’s PE to retrieve files off of a hard drive that will not boot, use Ghost to reimage the hard drive, run an integrity check on the disk or run some defragment tools. Defragmenting from within Bart’s PE is a better option because none of the files on the hard drive are actually being accessed by Windows at that time. Sometimes Windows will not allow a file to be moved while it is in use. That is not a problem if you are using the Bart’s PE disk.
Disclaimer: In order to install the programs and utilities on to the disk a licensed copy must be purchased. This includes the operating system. That being said, we can move on.
GETTING STARTED
Before you go through the process of making a Bart’s PE disk there are a few things you will need. First get a copy of Bart’s PE Builder.
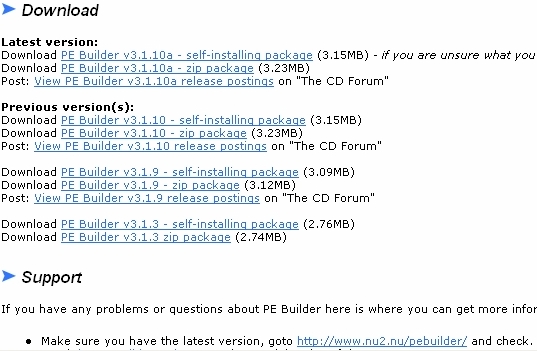
Download the latest version for Windows XP: PE Builder v3.1.10a – self-installing package. Once it is downloaded, double-click the installation icon from wherever you saved it. Click on the “Run” button to begin the install, and select all the defaults throughout the install.
After the installation has finished, locate your Windows XP with Service Pack 2 disk and copy the i386 folder to c:PE Builder3110a. This will be used to create the Windows environment. As of right now, Bart’s PE does not support Windows Vista or Windows XP 64bit. The Bart’s PE team is working on making a new builder for Vista, but will not be working on a builder for 64bit.
PLUGINS
The next step in the process of making the PE disk is finding plugins and programs you want to put on the disk. Common places I go include:
There are a couple plugins that are essential to making the Bart’s PE disk work. The nu2xpe-1.5 plugin and XPE plugin can be downloaded from the links below.
Spyware and viruses are typical reasons I use the Bart’s PE disk. Common programs I put on the disk include: Lavasoft Ad-Aware SE, AVG Antivirus 7.0 and Symantec Ghost. Ad-Aware is used to clean spyware and malware off of computers. AVG is an antivirus program and Ghost is a program that allows you to clone a computer if you have made an image previously or want to make an image, which is a copy of the computer.
PROGRAMS
Since these programs are commonly used to combat problems, I thought I would use these as examples when putting a Bart’s PE disk together. Let’s begin with Lavasoft Ad-Aware. In most cases with plugins, they need the program files from the program they are associated with so that the plugin will work. The program will have to be installed on a PC so that the program files can be copied to the plugin folder. Bart’s PE comes with a plugin on the disk but it does not work correctly so we will download a new plugin here. The Lavasoft Ad-Aware SE program can be downloaded from here. I will walk through the process of adding the files to the disk, but for now let’s install the programs we need onto the computer.
The last program to install in this example is AVG Anti-Virus. It is also not native to the disk, so the program and plugin will have to be downloaded also. You can download the program from here. The plugin can be downloaded from here.
PLUGIN INSTALLATION
Once these programs have been installed and the plugins have been downloaded, the process of getting them onto the CD begins. Let’s start with Ad-Aware SE.
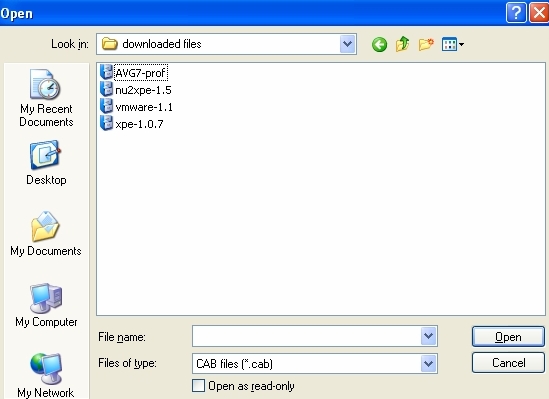
There are actually two methods of adding plugins onto the CD. The first method is to navigate to the PE Builder3110a folder on the C drive and drop them into the plugin folder. Make sure and look to see if there is already a plugin folder for the program you are trying to install. If not, make the folder name detailed enough so that you know what is inside that folder. The second method is to open up the PE Builder program and click on the plugin button. After doing so, click the add button and find the files that were downloaded, as shown below.
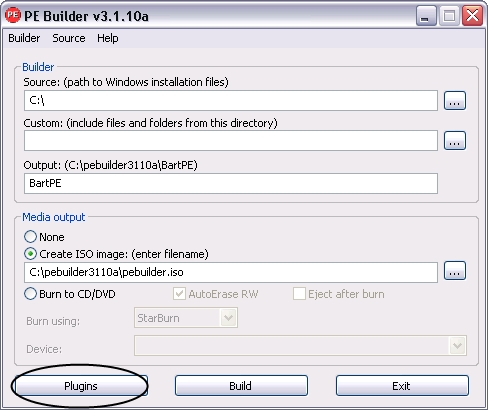
Click the Plugins button
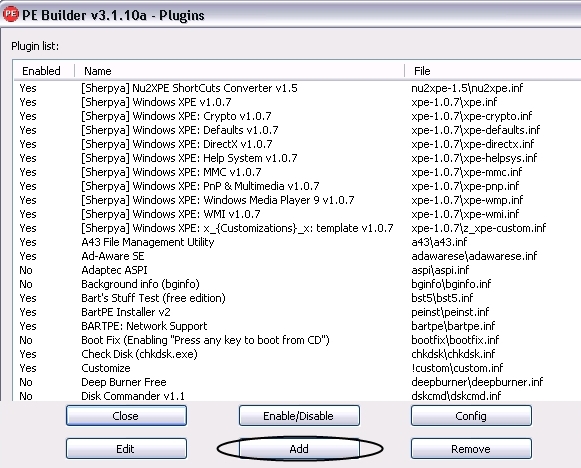
Click the Add button
Add the plugins that were downloaded
If the files that have been downloaded are not .cab files they are probably .zip files which will need to be unzipped and then copied to a detailed folder name under the plugin folder.
ADDING PROGRAMS TO DISK
Once the plugins have been added, the files from the programs will also need to be added to those plugin folders. Some plugins want the entire program’s folder and some only want certain files. Start by going to the plugins folder. Once there look at one of the folders that was downloaded. For instance, look at avg-prof. In that folder are several files and another folder. Open the HTML file. This will give instructions as to what needs to be copied to that plugin folder.
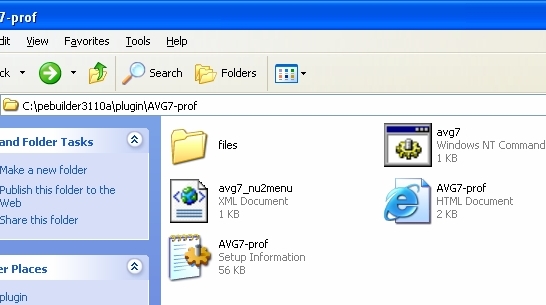
Image shows contents of a typical plugin folder
The HTML file in this case says to copy all files from the “C:Program FilesGrisoftAVG7″ directory to the plugin”files” directory.
Once all the instructions have been followed, the plugin should work. Now open the PE Builder program and click on the plugin button. Click the add button at the bottom and find AVG7-prof in the list and click on the enable button. A method I have found to make sure all the files it wants are there is to try closing PE Builder. Follow these steps for the rest of the installs making sure to enable the programs in the list that were downloaded..
After everything has been installed and enabled there are some things that will need disabled in order for the XPE plugin to work. In the list below, disable the following plugins:
- PENETCFG: Automatically start PE Network configurator
- PENETCFG: PE Network configurator (theTruth)
- Nu2shell v1.0
TWEAKING THE DISK
The XPE plugin does give the option to customize the look and feel of the disk a little bit. Find the C:PE Builder3110apluginxpe-1.0.2 folder and rename the file, “ze_pe-custom.inf.sample” to “z_xpe-custom.inf”. Next, open z_pe-custom.inf in Notepad or Wordpad. Many options can be changed here but I will focus on a few. Everything in red indicates what needs to be changed or has been changed.
Changing Startup Screen
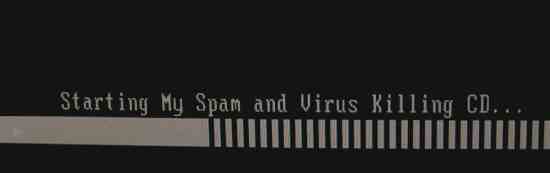
When Bart’s PE boots the startup screen says “Starting Windows XPE …”. Find the value in the list and change it from this:
“txtsetup.sif”,’SetupData”,”loaderprompt”,”””Starting Windows XPE …”””
To this:
“txtsetup.sif”,”SetupData”,”loaderprompt”,”””Starting My Spam and Virus Killing CD...“””The “Starting My Spam and Virus Killing CD” can be replaced with anything you want obviously.
TWEAKING THE DISK: PART 2
Changing Taskbar Settings
By default XPE is set to have the taskbar at the top when in Windows. To change this to be at the bottom, scroll all the way down to the bottom of the file and change the entry below. Red text indicates what has changed.
; TaskBar on Top – Autohide
;0x3,”SoftwareMicrosoftWindowsCurrentVersionExplorerStuckRects2″,”Settings”,
; 28,00,00,00,ff,ff,ff,ff,03,00,00,00,01,00,00,00,3c,00,00,00,1e,00,00,00,fe,
; ff,ff,ff,fe,ff,ff,ff,02,04,00,00,1c,00,00,00
; TaskBar on Bottom – Autohide
;0x3,”SoftwareMicrosoftWindowsCurrentVersionExplorerStuckRects2″,”Settings”,
; 28,00,00,00,ff,ff,ff,ff,03,00,00,00,03,00,00,00,3c,00,00,00,1e,00,00,00,fe,
; ff,ff,ff,e4,02,00,00,02,04,00,00,02,03,00,00
; TaskBar on Left – Autohide
;0x3,”SoftwareMicrosoftWindowsCurrentVersionExplorerStuckRects2″,”Settings”,
; 28,00,00,00,ff,ff,ff,ff,03,00,00,00,00,00,00,00,B2,00,00,00,28,00,00,00,00,
; 00,00,00,00,00,00,00,B2,00,00,00,00,04,00,00
; TaskBar on Right – No AutoHide
;0x3,”SoftwareMicrosoftWindowsCurrentVersionExplorerStuckRects2″,”Settings”,
; 28,00,00,00,ff,ff,ff,ff,02,00,00,00,02,00,00,00,4e,00,00,00,1e,00,00,00,b4,
; 03,00,00,fe,ff,ff,ff,02,04,00,00,02,03,00,00
; TaskBar on Bottom – No Autohide
0x3,”SoftwareMicrosoftWindowsCurrentVersionExplorerStuckRects2″,”Settings”,
28,00,00,00,ff,ff,ff,ff,02,00,00,00,03,00,00,00,3f,00,00,00,1e,00,00,00,fe,
ff,ff,ff,e4,02,00,00,02,04,00,00,02,03,00,00
Once the Bart’s PE disk is customized to your liking, try burning it onto a CD and see if it does everything that is expected. If it does not, then go back and add plugins or change what you don’t like or doesn’t work. It is rare if the disk is created to your specifications on the first try. Either way, this is an easy way to have a powerful tool at your fingertips.
CONCLUSION
This disk can be a life saver when troubleshooting computers that are acting up or not booting into Windows. If there is something that you want to change that was not covered, make sure and Google it because there are many different versions of Bart’s PE and many other people have made it their own. Their are tons of forums that talk about tweeking Bart’s PE and more than enough documentation to help you do it. There are tons of plugins out there that will suit pretty much any need computer wise. So, find those plugins and happy troubleshooting.