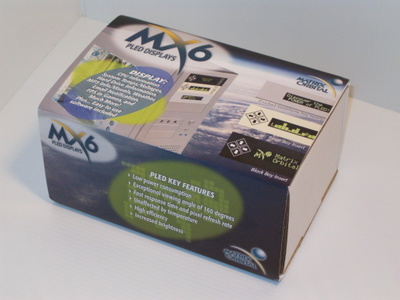
Matrix Orbital’s MX6 series showcases their PLED technology. Discover why it’s the sharpest, fastest, and smartest little display around!
Introduction
After spending some time with Matrix Orbital’s MX4 series of Character LCD kits, I nearly leaped out of my socks when word came that their new MX6 series was nearly ready for primetime. Promising higher contrast, lightning response times, and low power draw, Matrix Orbital’s new PLED displays are the centerfold of their new lineup. Now that I have thoroughly experienced the MX6 myself, I can certainly say that I am not disappointed.
 |
| Thanks to Matrix Orbital for providing the review unit! |
Features and Specifications
The PLED unit is quite a compact and capable piece of hardware, and packs a lot into a small space. Following are features and specifications inherent in the MX6 series PLED kit:
|
|
| Display | |||
| Module Size | Display Size | # Characters | Character Size |
| 116mm x 37mmx0mm | 18.20mm x 82.20mm | 20 x 2 | 5.5mm x 3.2mm |
| Interface | |||
| Type | Speed | ||
| USB | 19200 bps | ||
| Expansion | |||
| One Wire | GPO | Advanced GPO | |
| 4 | 3 | 3 | |
| Environmental Conditions | |||
| Temp Range | Max Humidity | ||
| 0ºC-50ºC | 90% | ||
| Power Requirements | |||
| Supply | Backlight | ||
| 25 mA | 20 mA | ||
Package Contents
Smelling the factory air as it oozed forth from the package as I opened it, I was surprised to see just how much stuff Matrix Orbital had crammed into the tiny box! Matrix Orbital dropped in a few goodies for review along with the unit itself:
- Matrix Orbital MX6 Kit with mounting screws, software CD, and installation instructions
- Indicator LED Bus kit with installation instructions
- Two Thermal Probes
- One USB Cable
- Matrix Orbital Case Badge/Sticker
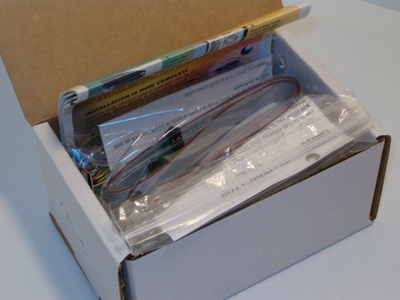 |
| The well-stuffed package. |
All of the manuals provide clear directions, but require some basic computer knowledge. However, newbies need not fear…basic intuition should be enough! It is merely basically a matter of lining up connectors and making sure things are plugged in the right place, and diagrams are provided. One nice thing to note is the new color manual provided for the MX6, it lets you get set up quickly.
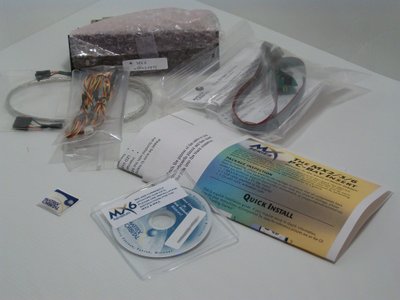 |
| The package contents, sprawled about. |
The included thermal probes seem to report temperature data consistant with that of thermometers placed in the proximity. These gizmos are especially useful for “zoning” your computer case; multiple fans can be managed and “linked” to the probes so that no one section of your computer case gets too hot, while maintaining minimal noise.
 |
| The thermal probes. |
The Indicator LED bus provides exactly what it is in its title…”indicators” for various conditions with your computer that you specify. You could, for example, use one Indicator LED to let you know if new email has arrived, and another for some other task such as for an alarm of some sort…the possibilities are endless and can be unlocked with the included LCDC software, which will be covered later on.
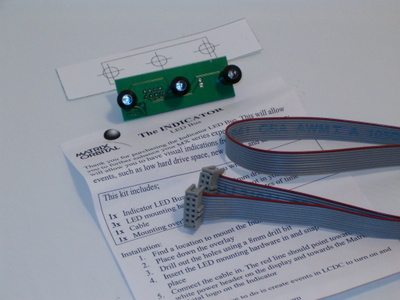 |
| The very bright Indicator LED bus. |
Hardware Installation
As with the MX4 Series, installation requires some work, knowledge, and planning. Some basic wiring is required; for example, you may have to run a USB cable through the inside of your computer and out the back through a vent or possibly open expansion slot with backplate removed (unless you have a free header on your motherboard, in which case you can connect the MX6 to that). Also, depending on what accessories you are using and other devices you are connecting, you may have to put some consideration into layout (cable length can be an issue, as an example). Things like temperature sensors should be placed in appropriate zones or next to devices that need monitoring.
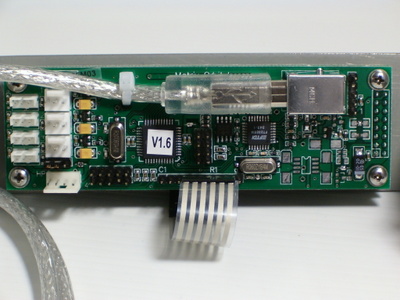
 |
| The front of the PLED unit. |
To actually start off installation, you have to allocate an open 5 1/4″ drive bay. My Silverstone TJ06 test chassis provided an interesting test bed, as it is nearly entirely tool-less…all drives slide in on rails. In this situation, some special treatment may be in order on a case-by-case basis. Depending on chassis layout, you may actually want to run your cables to the MX6’s many feature connectors before you actually mount it in the drive bay, as the little connectors on the back of the MX6 can be rather ackward to reach (that and lighting may be an issue). Better to avoid any damage beforehand! I’m sure that with a little ingenuity, patience, and common sense there should be no real problems.
 |
| The back; note the expansion connectors on the left. |
One other thing to keep in mind is that although the PLED display draws significantly less power, it still pulls enough to possibly conflict with other devices on the same USB channel. I recommend installing the MX6 on its own, powered USB port (on a powered hub, or directly into the computer). If you plan on managing fans or powering other devices with the MX6, there is a handy little floppy power header onboard to provide adequate power without swamping the USB bus.
LCDC Software
The real genius behind the scenes is the included LCDC software. Fully supported by Matrix Orbital and used by a large fan base, LCDC’s user friendly interface and numerous features are complemented by a growing set of 3rd party plugins. Installation is a snap using the included mini-CD; all that really needs to be done is to enter the product key packaged with the CD.
Rather than rewrite the books on how to actually configure your MX6 and utilize the basic functionality within LCDC, I must point you towards my previously written introduction to LCDC, written for my Matrix Orbital MX4 Series Review here at Bjorn3d.com:
Keypad Powered by LCDC
One intruiging feature that I unfortunately was never able to test within my MX4 Series review was the keypad that is included on the faceplate of many MX-series models. Thankfully, this time around the MX6 includes a 7-button keypad that can be programmed to fulfill your needs; here is how you can use LCDC to allow keypad interaction with your PC!
First of all, if your LCDC software is already running, click the icon in your system tray and stop the display from running. You can’t enter or edit events while the display is still running. Pop open Screen Builder, and head over to the Events tab. Once here, create a new Event.
The MX6 keypad is configured as followed (Same as the MX2/3 series):
|
|
||||||
|
|
THIS IS A NICE PLED SCREEN |
|
||||
|
|
Make sure to select the “On Keypad Press” event, for a generic keypad press event. Other versions of the keypad press allow it to do different things at different times. Enter the letter code for the keypad button you want the event to respond to, using the keypad layout table above.

Select the screen or action you want to take place. Now you are done! Save the display file, close the screen builder, and start your display to test out the new keypad event! It really can be alot of fun figuring out new things you can do.
 Comparison Results
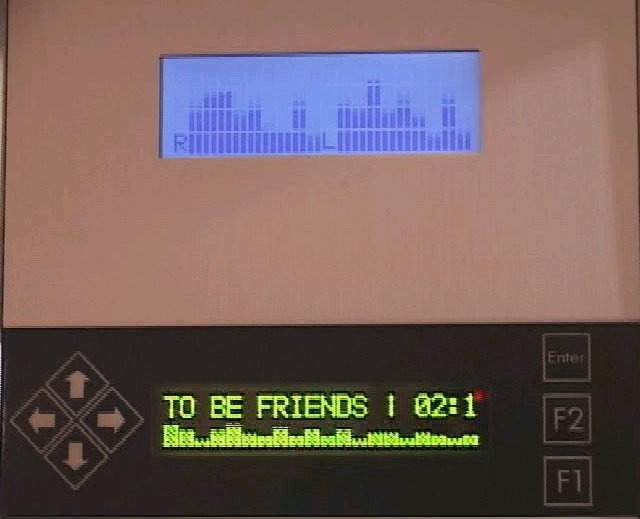
You may be thinking now “why buy the MX6 when Matrix Orbital or some other manufacturer has bigger displays, or more variations to the color?” This is very true…for example, my previous Matrix Orbital experience was with their MX4 series which allows the display of twice the data. However, simply going by such figures is misguided in my opinion. The MX6, because of its PLED design, provides FAR more contrast and legibility than just about ANY LCD display. The brightness is excellent and saying that the PLED display has viewing angles almost does it an injustice since you can see the display from just about any angle, like a piece of paper. Combine this with significantly less power draw, less heat output, and higher tolerance due to the fact that each LED is self-illuminated, and you have a serious winner on your hands in just about every category.
 |
| Download the 4.3mb MPG video above now! |
I have created, for comparison purposes, a test video showcasing the improvements that can be had by the MX6 over an LCD-based unit like the MX4. You will notice that the PLED display on the MX6 has non of the “bleeding and smudging” tendencies of an LCD, and that the response and refresh times seem smoother. Also, you will see just how much better the viewing angles are, and how much better the contrast is…almost an improvement in any way. Rather than continue on this tirade, perhaps if you view the video yourself you will see just how much better it is through your own eyes!
Finally, a last concern is the color issue. As of now, Matrix Orbital’s PLED displays are only offered in green-on-black. Their LCD displays offer many different color varieties and configurations, so if green and black just don’t do it for your setup you may have to forgo the PLED and fall back to a less advanced LCD kit. Unfortunately, I don’t know if Matrix Orbital has any plans for any other colors, so this is the best I can say…for now.
Conclusion
Despite its smaller screen size when compared to other competing products, its ability to accurately and easily communicate data because of its vibrance and clarity makes the MX6 an excellent choice. Also, for the more technically challenging situations, the MX6 draws very little power and can operate in fairly extreme conditions.
Hardware elites and novices alike can enjoy the functionality and programability offered by Matrix Orbital’s MX6 Series of PLED Display Kits. Complemented by a full range of add-ons that can be purchased at Matrix Orbital’s web site including thermal probes, the Indicator LED bus, fans, and more, the MX6 is also full of expansion options. Why stop there, when you can even make homemade addons as well?
Technical support is equally abundant, with Matrix Orbital’s support forums providing a haven of information and eager help. The included LCDC software is also well supported.
Finally, as if the options currently available aren’t enough, you also can drive your MX6 with 3rd party software to provide functionality in Linux and other operating systems. It really is hard to miss with Matrix Orbital’s MX6, so I hereby award it an 8.0 out of 10 and Bjorn3d’s Seal of Approval for a “very good” product that offers something for everyone.
Warranty: 1 Year Limited
Price: $109.95 at Matrix Orbital
| PROS |
| Brimming with features |
| Excellent support (1st and 3rd party) |
| LCDC software |
| Excellent contrast, visibility, and viewable angles |
| Good worksmanship |
| Lots of addons |
| Competitive Price |
| Fast fast fast! |
| CONS |
| Only 2 lines of information at one time |
| Only available in green-on-black |
| Newbies still need some technical aptitude |
| Installation may be challenging in a tool-less case |


