Hercules’ latest Radeon 8500 incarnation is the 3DProphet 8500. As opposed to their FDX8500 LE that Bjorn3D looked at here, this new 3DProphet 8500 is running 128 MB of DDR SDRAM. This new 3DProphet is also running a little hotter (figuratively) than Hercules previous LE model, with a core and memory speeds of 275MHz. With this card, Hercules now offers three video cards based on the Radeon 8500 chipset with the 3DProphet FDX 8500 LE, 3DProphet 8500 LE, and this 3DProphet 8500 128MB. With this review well look at what the extra speed and extra memory gets you. Well also take a first look at how this card handles TV-output to a television.
Specifications
The paper specifications of the Hercules 3DProphet 8500 is what youd expect for ATIs Radeon 8500.
| Basic Specifications |
|
| Features |
|
The street price of the 3Dprophet 8500 is around $134. For comparison, the street price of the Hercules FDX8500 LE is $88.
Installation
 |
The card came in the standard packaging, cardboard box. Software included a Hercules driver disk and a copy of PowerDVD XP. The packaging also included a patch cord for the TV-out port, albeit a short one (3″). |
| The card itself is a welcomed, shorter card than NVIDIAs Ti4400/4600. Output ports include VGA output, DVI output, and the already mentioned S-Video output for a TV monitor. The heatsink on the graphics chip is the familiar, radial aluminum type with a recessed fan. | 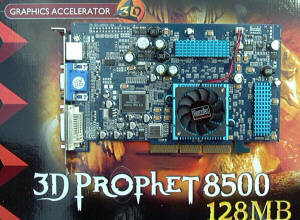 |
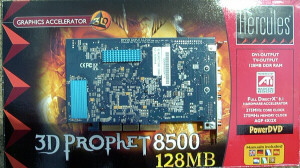 |
Youll note that memory is double sided on this card, which is more or less mandatory for this amount of ram. Heatsinks are nicely laid out over all memory chips. Each heatsink spans two memory chips. The heatsinks have always been something Ive appreciated from Hercules. |
Installation was a breeze under Windows XP on my Athlon rig. My computer specs are as follows:
- Epox 8KTA3 VIA KT333 motherboard
- AMD Athlon XP 2000+
- OCZ 256MB DDR PC3000 2-2-2
- Pioneer DVD-ROM
- Lite-on CD-RW
- Maxtor 40GB 7200RPM HD
- 3Com 3C905C NIC
- Hercules Gametheatre XP audio
I installed the card by simply turning off the computer, swapping in the 3Dprophet 8500, and rebooting. At boot-up in XP, I simply inserted Hercules driver CD and let it auto run.
The driver CD menu includes several software items, including 3Deep and Hydravision. 3Deep is an advanced, automated piece of software that attempts to adjust video quality on the fly, based upon the images in the window. You need to go through a simple set-up process after 3Deep is installed. It takes you through a series of screens and asks you to adjust the monitor settings.
Besides the somewhat annoying 3Deep icon that appears when its working, I suppose I just dont have the eyes to notice the adjustment in video quality. But, perhaps, this is saying that 3Deep is working correctly.
Hydravision is the software which is used for governing the TV-out. More on this when we look at TV-out on the next page.
Once the drivers are installed, ATIs drivers will bring up a window with wizard type programs for setting up your video options, including TV-out. The first window like this that you will see, is the following:
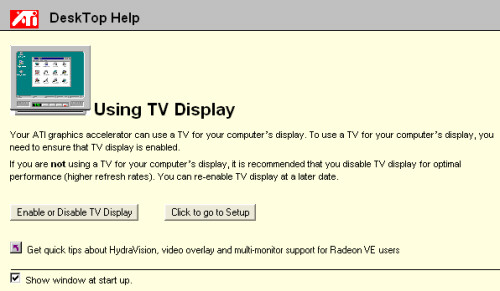
At the time, I skipped this set-up since I didnt have a TV connected. It didnt matter since the drivers allow you to go back and set things up later.
Television Output
I borrowed my old (c.1984) Montgomery Wards (actually manufactured by Sharp) 13″ television from my parents. I used this TV with my first computer, a Commodore 64. Its great little set that actually has RCA (composite) inputs and a monitor mode. I used Hercules S-Video to RCA patch cable on the card and then I ran a standard RCA cable to the TV video input port. On boot-up, I hadnt installed Hydravision form the driver CD. I wanted to see what the Radeon would do without it first.
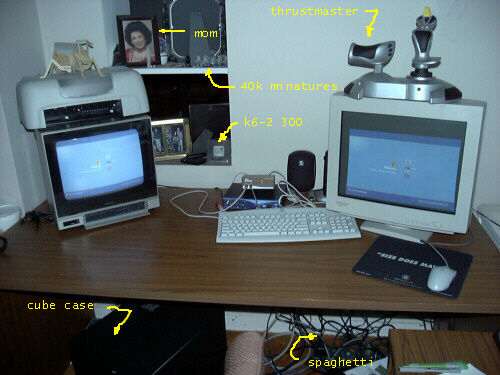
As you can see in the above picture, besides the TV being dwarfed by my 19″ Hitachi CM771 monitor, the Radeon actually set the TV as the default monitor and my POST screens were shown on it. The Hitachi was battling for supremacy as it clicked on and off, trying to find a refresh rate or something. Once Windows XP took over, I got this cloned screen scenario with the login screen being mirrored on both screens.
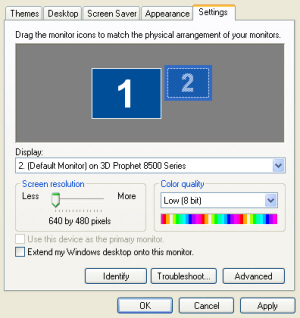
Going to the video display showed the above settings. Monitor 2, the TV, was running at 640×480. The old 13″ TV looked surprisingly good at this resolution. It was a little blurry but usable.
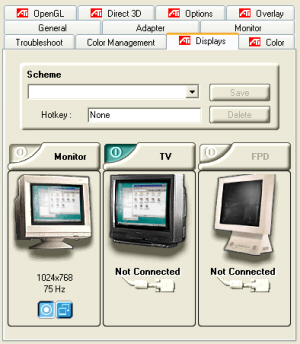
Going to the advanced display settings, under the Display tab, we see the monitor selection screen. Note that it says the TV is not connected, but the setting under the TV tab worked and, obviously, the TV was functioning.
Television Settings
Clicking on the TV button in the above screens brings up a new window with 4 tabs.
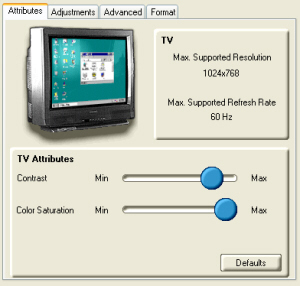
The first tab, Attributes, gives you a summary of what is supported (note that this is what the Radeon supports and not necessarily what your TV supports) and brightness and contrast sliders. The best part of these TV controls is that all of these settings are live, i.e., when you change the settings, the effect is immediately shown on the TV. You dont have to hit the Apply or OK buttons to adjust your TV video settings.

The second tab lets you adjust screen position and size. I didnt need these since the TV display came up just fine.
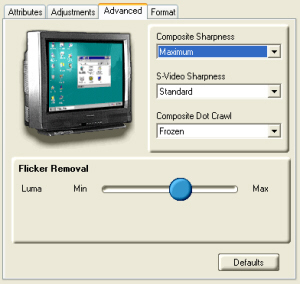
The settings on the Advanced tab are the ones I found most useful. These settings provided the most flexibility in sharpening the TV image.
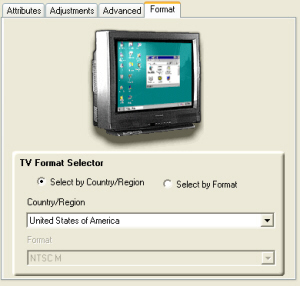
The final tab allows you to set the Radeon for either NTSC or PAL. I certainly hope it defaults to the correct region, depending on where you live. I was lucky it came up correctly for me.
After playing with this, I installed Hydravision from the CD. Accompanying Hydravision is a quick, multi-display control applet that loads to your tray, as seen below
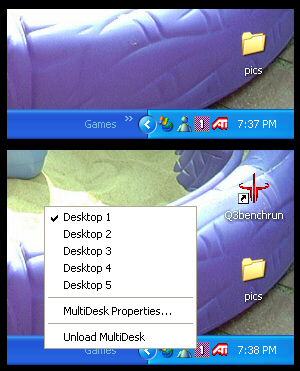
As the picture shows, this is quick access for multiple desktops. This can be very handy if youre doing development work since this tray allows you to switch screen very, very quickly. The pic also shows that you can unload Multidesk if you dont wish to use it.
On to Hydravision…Under the ATI tray icon, you can access the Hydravision controls.
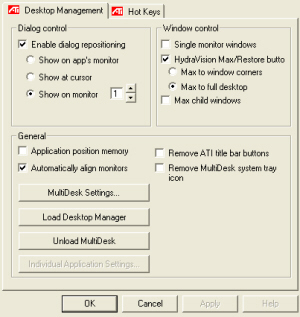
The first tab shows general preference settings for how you want to handle multiple displays. Some useful features here are the Max/Restore button which is placed next to the standard Windows Maximize and Minimize buttons. This new button allows you to max/min to the given desktop on each monitor. Another feature that I appreciate is the Application position memory. This feature will permit given applications to go to a specific desktop when reopened.
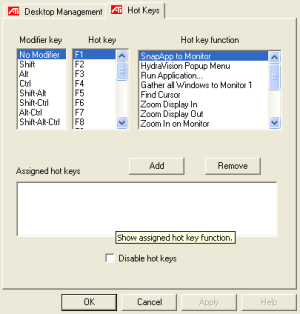
The second tab in the Hydravision settings allows you to set-up hot keys to perform certain tasks. This has never appealed to me. The mouse has always been quick enough for my tastes.
Television Output Conclusions
In the end, the 3DProphet 8500’s multi-display support worked well. The TV-output support, I felt, was very good…unfortunately, the TV that I used was less than stellar.
3D Performance
After disconnecting the multi-display, I ran some benchmarks. Ill be comparing the 3DProphet 8500 to the Hercules 64MB FDX8500 LE. For testing, well look at 3DMark2001SE, Quake 3 Arena, Comanche 4, and Return to Castle Wolfenstein.
3DMark 2001SE
3DMark is a synthetic DirectX 8.1 benchmark. It runs through a series of different specific tests, resulting in an overall score….higher is better. Settings in 3DMark include Pure Hardware T&L, 32-bit color depth, and 0 to 4x AA.
At 1024×768, the new 3DProphet 8500 128MB, with its faster core and memory, yields between 14% and 22% performance boost over the 8500 LE model. I was actually surprised to see this much boost, but it is welcomed. At 1024×768 with 4xAA running, the 3DProphet 8500 is running a few hundred short of 3000 points. This resolution and AA level is where I game at, and the 3DProphet 8500 seems to provide enough horsepower under this test to support that.

At 1280×1024, we see the 20% performance margin again. Even though only 2xAA is supported at this resolution, the 3DProphet 8500 would give us enough of a score to warrant playing at 4xAA here.
At 1600×1200, no AA is permitted by the drivers. That’s unfortunate as the Hercules might perform adequately at 2xAA, given the noAA scores. The 3DProphet 8500 is still giving us >17% performance boost over the LE model.
Quake 3 Arena
The age old OpenGL benchmark is again used here. Setting for Q3A include 32-bit color and textures, trilinear filtering, and max texture detail.
The 3DProphet 8500 128MB is a good 23% faster than the 8500 LE at 1024×768 w/o AA. At higher AA levels, the benchmarks get a lot closer together. But, again, at 40FPS at 1024×768 w/4xAA, Id be happy all day in Quake 3 based games.
The benchmark gap again narrows at the 1280×1024 resolution. The 8500 LE trails its big brother by 15% without AA. Both cards perform adequately at 2xAA.
At 1600×1200, the 3DProphet 8500 still leads by 13%. With both scores around 100 FPS, this resolution could benefit from some antialiasing.
Comanche 4 demo
Comanche 4 has proven itself as a formidable benchmark. In my past experience, it has seemed to be CPU intensive, resulting in relatively low 3D card scores. For CM4, DirectX 8.1 is the API. T&L support is also used.
The 3DProphet 8500 128MB positively crushes the 8500 LE in CM4. All benchmarks are 50% higher and are above the magical 24 FPS mark, which is generally considered a minimum.
Return to Castle Wolfenstein
Based on the Quake 3 Engine but juiced up with more triangles and big textures, RTCW is a great benchmark for current day 3D cards. Similar to Q3A, RTCW was set-up to run 32-bit colors, max texture quality, and trilinear filtering.
The 128MB card is a whopping 54% faster than the 8500 LE at 1024×768. This boost does diminish as AA increases, but it is still a generous improvement over the 8500 LE.
Surprisingly, at 1280×1024, the 3DProphets lead increases to 80%! I suppose we should assume that the 8500 LE is just suffering more than the 128MB card.
It gets even worse at 1600×1200. The 8500 LE is 115% behind the 128MB 3DProphet 8500.
Conclusions
From looking at the results of the newest benchmarks used here, Return to Castle Wolfenstein and Comanche 4, the 3DProphet 8500 128MB has shown significantly better gaming performance than the Radeon FDX8500LE did under the same tough tests. Combine this with the rather slick controls for dual displays, and this is a quality gamers video card for the sub-$150 price.
 |
With quality TV-output and good 3D Gaming performance for the price, Im awarding the Hercules 3DProphet 8500 128MB a 8.5 out o 10. |


