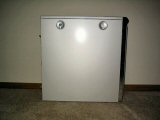
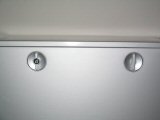
Antec is betting it all with the brand new P160 all aluminum case. Stylish and quiet make quite the combination. Throw in the TruePower 430W power supply and you have a combo worthy of any menu. Come take a look at these two in action.
Introduction
If it’s not a power supply, it’s usually a case that I’m reviewing around here. Well, now I have the best of both worlds brought to me by the wonderful people over at Antec. The P160 all-aluminum case, the latest offering from Antec, along with the TruePower 430W PSU are on the chopping block for a run-through and evaluation.
I was really looking forward to taking this case for a spin and seeing what it has to offer. A case that has been comically touted as being made from “recycled fighter jets” by Antec is one that anybody would want to put under the microscope. I have had the opportunity to look at other Antec models in the past and have yet to be disappointed, but can the streak of success continue? I’ll stop yapping now; you start reading.
Features and Specs
This table was taken from Antec’s website and shows all of the specs of the P160. Thanks to Antec for providing the table.
|
|
P160 SpecSheet
|
|||||||||||||||||||||||||||||||||||||||||||||
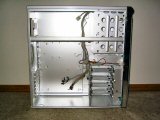
The inside of the case is very roomy. There is actually space between the motherboard and the PSU to work with. No more hanky panky between the HSF and PSU to deal with. I also like the fact that I can maneuver and work with components inside the PC with a little less hassle than before. The extra room helps deal with the tangled web of cables and mess that can become a pain in the you know what to any user.
One of the best features by far in this case is the removable motherboard tray. Thank the heavens above for a case with a removable tray. I don’t know how many times I have been frustrated trying to place a motherboard in the bottom of a case and get everything settled, then have to screw it down and mess with it all deep inside the case. This tray is a great one to use on top of everything. It is held in place by a small retaining bracket that easily comes off with the twist of an attached thumbscrew. Slide the tray to the right….voila!!….it’s out of the case and ready to hold a mobo.
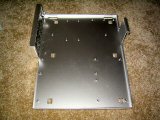
The case also features sideways facing internal HDD trays. The snap-in trays fasten to the HDD with special screws (included with case) that attach to the four holes on the bottom of your drive. The ability to place the drives in such a position keeps the pesky IDE cables and power connectors away from the motherboard and the center of the case. This of course helps out with the ever prevalent clutter of a case.
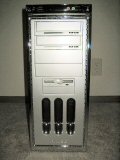
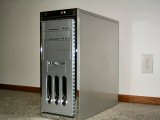
The front of the case features two silver 5.25″ drive covers and a drive cover for a 3.5″ down below. The lower portion of the case features three decorative bezels adorned with blue LEDs to add a little bling bling to an already strong looking case. The inside of the bezels feature a black grate that holds behind it a removable filter. Behind the filter, a 120mm fan can be attached to the front of the case for airflow.
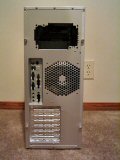
Speaking of fans, the case does come with one 120mm fan in the back of the case. Along with the fan comes a somewhat interesting installation scheme. We will talk a little more about this later.

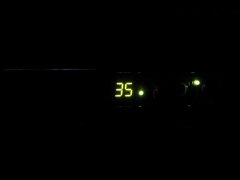
The front of the case also features the I/O and temp sensor module at the top. It can swivel approximately 45 degrees top to bottom to keep in eyes view. The power and reset buttons along with two USB ports and a firewire port adorn the top swivel. There are also audio hookups and a temperature monitor that displays measurements from two included thermal sensors inside the case.

Installation
It’s time to put this thing together. We can talk all day long about this thing, but how well does it work?
I wasted no time pulling out the motherboard tray and placing the standoffs included with the case on it. The holes were marked for standard ATX or Micro ATX boards. No problems so far, always a good thing. I attached the board to the tray and was ready to roll on through the process.
Connecting all the included ports to the board was also a snap. The front USB ports connected with one simple plug to each internal USB connector on my board. The front audio….that’s where a little trouble started to brew. By releasing the cables from an included bracket at the top of the case, the cables were long enough to reach the bottom of my motherboard and plug in the audio. Part of me wishes that these cables were a little longer so I had more options to route them out of the way of other components. The cables at that point were hugging my video card and would easily encounter a PCI card or two on your board if you have them. Not a big deal, but still kind of a pain to deal with.
Well, life’s a bummer so I just kept moving on. Doh, problem number two arrives, but is gone just as quickly. What was an initial problem with my CD-RW fitting into the supplied drive covers became only a game of add and subtract. I had to move the drive back, then remove the tray cover, but leave the whole front cover on, only removing the cover of the CD drawer. A little adjustment of the drive cover button and it was working, pretty smoothly at that. Putting the floppy drive in with the removable 3.5″ drive tray was a breeze. Hey, I was happy so far.
Installing the hard drives was also not too bad. The snap in trays were very easy to attach to the drives and I was ready to put the cables on and crank it up. The drive trays facing sideways in the case are awesome. A great way to avoid cable mess in your case. I really like the design that Antec used.

So now we are ready to power it up right? Oh yeah, the 120mm rear fan needs to be installed. I told you we would discuss the installment of this one later, well here it is.
The fan has four rubber connections on it to pull through holes in the back of the case. The instructions are specific that you should use caution when pulling the rubber pieces through. Well………that’s for darn sure. As I pulled the first two pieces through…..a tiny tug left me with a SNAP….broken off. It wasn’t just caution I needed to use, it was a surgeon’s hand I should have been using. It seemed way too easy to pull the connector off. I can see the benefits with vibration reduction by using such an installment option, but I would much rather just use a rubber washer or other grommet than the system used by Antec. It seems flimsy and way too easy to break accidentally.

Power on, ready to rock! Nope……we encounter a problem once again. No LEDs in the front. Where is all my blue pretty light? A quick removal of the cover and inspection of the wires leads to another issue. The positive lead on the LEDs pulled apart from a shrink wrapped connection inside the cover. DOH! I didn’t see it prior to installation, so I’m not sure if it was caused by my installation or the case came that way. The wires are quite short and if you are not careful it could be pulled apart when removing and installing the front face. I stripped off the shrink and played electrician for a little bit and they were on and looking good. Not too big of a deal, but a setback is a setback.
 |
 |
430W TruePower PSU
Now we move onto one of the finest pieces of this sweet little package I received. Although the TruePower 430W PSU does not come with the P160, I was fortunate enough to be able to take a look at it when the good folks at Antec sent one along.
Well, if you have ever read a review of a TruePower PSU in your life, you know they are not messing around with providing a high quality PSU. This thing is once again TOP NOTCH. Dual fan construction keeps it running nice and cool. I have never heard (literally) a line of PSUs that can be so darn quiet. This PSU is so quiet you could hear a mouse sneeze across the room. With seven 4-pin molex connections to fill your PC with power, you will have a lot of trouble not finding juice for everything your heart desires.
The TruePower PSU uses advanced temperature sensing to adjust its fan speeds according to levels recorded in the case. There are also dedicated fan power connections so that the PSU can control the speeds of your case fans according to temperature also. This helps keep the overall noise level to a minimum.
It may be a small point, but I love the fact that the connections are black. It adds a cool look to the PSU, breaking away from the normal clear or white plastic ends. If you are worried about your case looking good on the inside and the outside, this PSU will add that little touch that you may be looking for. This PSU even has two SATA connections for that new RAID configuration you’ve been looking at.
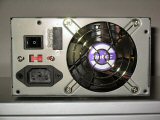 Flashy looks I do not need! |
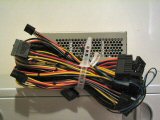 Power anyone? |
 Sticker says it all. |
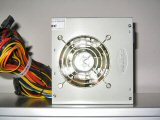 Dual fans keep the PSU nice and cool. |
Although it’s not a flashy PSU with LED color and mirror finish, who really needs those when you are getting a PSU that is cool as a cucumber and provides some of the most stable and reliable performance around?
Quiet as a mouse, stable as a rock, this puppy is positively performance perfection (or whatever “p” adjective you can think of). This PSU only adds to how ridiculously quiet this case can really be. If you want the perfect addition to the P160, don’t look any further than the 430W TruePower PSU.
Conclusion
To sum it all up, these are once again two amazing products from the people at Antec. Let’s take a look at the good and the bad of the P160 first.
Pros:
- Looking good, really good
- Quiet like you wouldn’t believe
- Sweet side-mounted HDD tray
- Nice and roomy
Cons:
- Short control panel cables
- Fragile fan mounting design
- Pricey
There you have it folks. The Antec P160 is a sweet case that will turn heads and leave you without a noise induced headache. It is a little on the expensive side, averaging around $120 at most major online retailers. The only thing you really have to watch out for is that fragile LED cable and the short length of the included control panel connections. This is a great case that I recommend everyone looking to upgrade or start from scratch should put on their list. I give the Antec P160 an 8 out of 10.
The 430W TruePower PSU doesn’t have to work hard to get a ton of Pros from me. The Cons, well are there any?
Pros:
- Stable
- Powerful
- Quiet
- 2 SATA Connections
- Temperature sensors adjust fan speed to keep noise down
Cons:
- Relatively pricey
The TruePower 430W PSU, although around $80, is an awesome PSU all the way around. An awesome addition to anyone’s PC! Awesome PSU deserves an awesome score of 9.5 out of 10 and the Bjorn3D Golden Bear Award!

Antec shines through once again with two great products to start saving some extra cash for. If you consider one, definitely consider the other. They make a great couple 😉
 Bjorn3D.com Bjorn3d.com – Satisfying Your Daily Tech Cravings Since 1996
