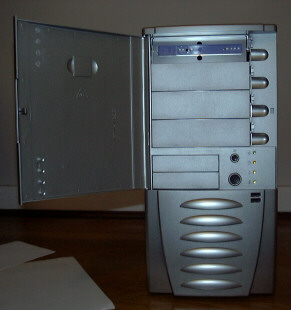
With aluminum construction, an included carry strap, a side window, LED fans, and a little custom modding, the Antec LANBOY is a light and capable LAN rig worthy of showing off at LAN events.
To be completely honest, the first words on the net about Antec releasing a case named “LANBOY” got my heart pumping. I envisioned a small cube case for MicroATX motherboards, similar to the SFF Shuttle style equipment. Once images were available on the net, this was found to not be the case (pun intended). I became less excited about it when I discovered that it was just a mini-tower, ATX case. However, when I received the LANBOY, I immediately changed my mind. Even in its double thick cardboard box with Styrofoam padding, this case weighed practically nothing. My heart started pounding again.
Specifications
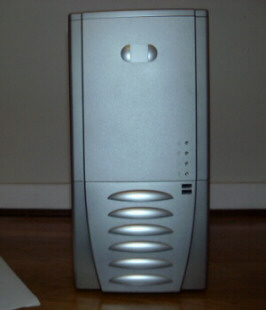 |
Before I discuss the physical, published specs of this case, I wanted to discuss the name. As I mentioned above, I expected something different from a “LANBOY”. However, I think Antec has still held true to the naming of this case. Its an ideal base for a LAN rig because: (a) the thin aluminum is extremely light (10.4 lbs.), and (b) it comes with a nylon carry strap to help lug it to and from LAN events. |
The actual specifications of Antecs LANBOY are as follows: Features:
|
|
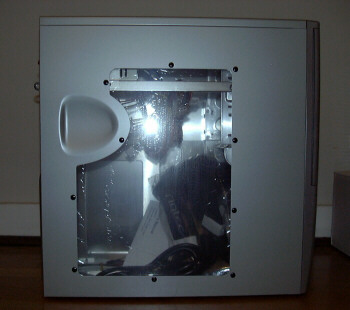 |
My thoughts on the physical construction of this case are different than what Im accustomed to from Antec. Firstly, gone is the handy, latching side panel that is prevalent through most of Antecs products. Not a real big issue, but Im assuming the lack of it is due to the thin aluminum construction and to just save weight, which are fine in my book. |
|
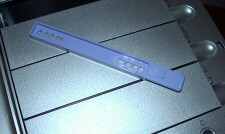
Secondly, the external drives fasten by Antecs latest incarnation. The pic shows a purple plastic slide rail, which mounts to the right side of the drive. The left side is attached via the traditional screws thorugh the aluminum cage, inside the case. This system seems unorthodox but it works nicely, and drives install quickly. |
 |
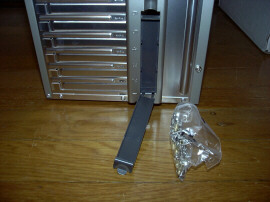 |
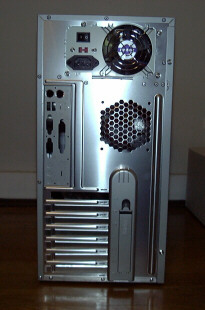
On the back, at the PCI/AGP slot connectors, is a small plastic cover. I found this to be a curious part. The plastic cover hides the screw mounts of the add-in cards (which are actually external to the case, making them more easily accessible to a screwdriver), and it contains a small cubby hole, which Antec used to ship the bag of screws in. I decided to keep spare screws in there, for lugging to LAN parties. |
|
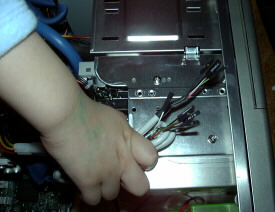
The LANBOY also has two front USB ports (thankfully not hidden behind the drive door). This pic shows that the internal wiring for these USB ports are not the pass through cable that is often seen, where you need to fish te cables out the back of the case to the rear motherboard ports. The spaghetti of plugs are actually nicely labeled for installation on a motherboard’s front USB header. All that you need to do is match up the plugs to the pin out assignment specified in your motherboard manual. |
 |
Installation
Ive had several working computers at home for some time, and Ive actually had a dedicated LAN gaming computer for a few years. I intended to swap my parts out of my LAN rig into the LANBOY. I also planned to upgrade my LAN rig to run more day to day tasks while I was at it. The specs of my LAN rig include:
Inspired by the case window, I took it upon my self to do a little modding. Antec was nice enough to send along an LED fan; their 80mm Blue UV Fan (below). You’ll note that it has two power cords. It has the small 3-pin connector, for connection to the motherboard and a 4-pin connector. The 3-pin powers the blue light while the 4-pin powers the fan. This fan’s 4 pin cables are nicely shrouded in black flex tubing, for case modding appeal. The only down side to this fan is that, with the 4-pin connection, it won’t directly hook up to an add-on fan controller without further modding.
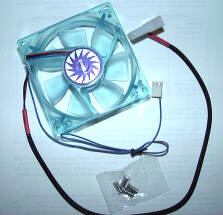
Unfortunately, my Intel brand motherboard only has two fan power headers on board. Therefore, I couldn’t hook up both the Smartpower power supply (which also has a 3-pin connector for the PS’s blue LED light) and the Blue UV fan. I quickly ordered a few 3-pin to 4-pin adapters, but they weren’t here in time to post this review (I’ll have updated photos posted here in a week). I’m only using the one Antec fan too. With the Blue UV blowing in from the front, and the Smartpower sucking out at the top-back, the Intel set-up runs cool enough.
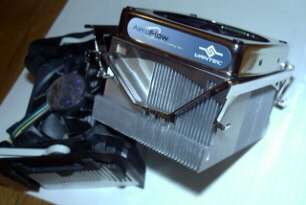
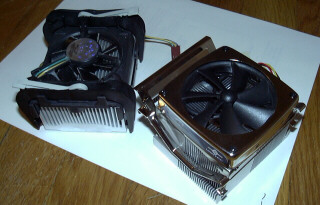
Besides getting the LED fan installed, I took the modding effort one step further. I ordered an attractively styled P4 heatsink, the Vantec Aeroflow:
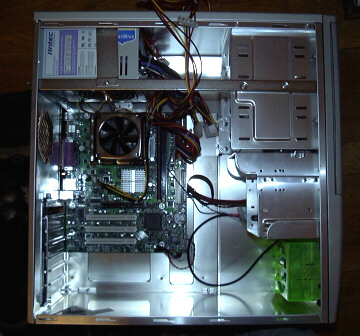
With the heatsink and motherboard mounted and wired, even the mini tower LANBOY looks empty with just a Micro ATX motherboard. For real modders, a full ATX scale board would look nicer.
Compared to the retail heatsink, its a nice piece, and the noise level was not appreciably louder than the retail fan.
I really went all out and painted my external drive front bezels to match the titanium hue of the LANBOY.
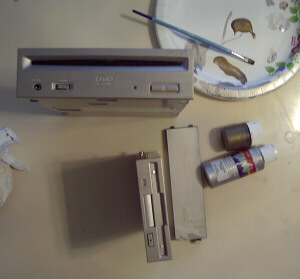
After mixing some silver and bronze metallic acrylic paints, I found a good mix ratio. I tested my mixes along the way on one of the 5.25″ drive bay covers, which will just be thrown out anyway. The mix was about 75% silver and 25% bronze. I mixed enough to paint about 10 drives. The Pioneer CD-ROM and LS-120 had beige bezels, and only took 2 thin coats of paint. The CD-RW was originally black and it took three generous coats to cover. Unfortunately, with the three coats, it shows a few brush strokes. My recommendation is to buy beige drives if you wish to do any custom painting.
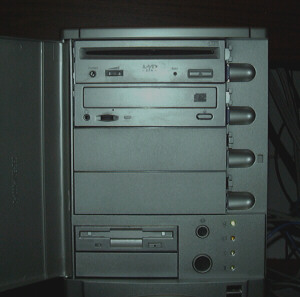
In the end, the drives are pretty darn good match. You can tell that the finish is a little smoother than the spray painted finish on the front case bezel, but they look good in regular lighting (i.e., not under intense camera flash). They are often hidden by the drive door, but it is still a nice touch in my opinion. And, as my grandfather always says, “A blind man would be glad to see it.”
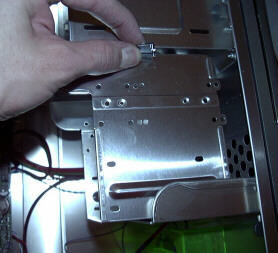
Installing everything was a relatively easy affair. Antec saw fit to include their latch removable, internal 3.5″ drive cage. This has always been a wonderful piece. Unfortunately, the removable cage is right in front of the AGP slot. If I had a long GeForce4 Ti installed in this computer, I couldnt remove the cage without removing the video card. It was even a tight situation with the standard AGP sizing of the Radeon 9700.
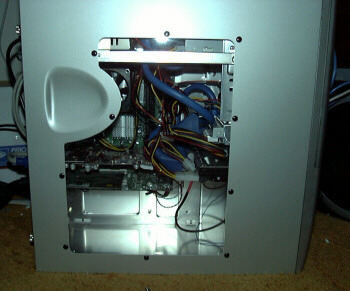
I used blue rounded cables to match the blue lighting of the Antec fan and Smartpower power supply. They get a little lost amongst the multi-colored power supply cables though. But they are good to help in letting air flow through the case. A few cable cover tubes from the local Radio Shack are definitely in order to help hide the clutter. I may even consider a home made shroud between the drives and motherboard.
Conclusions
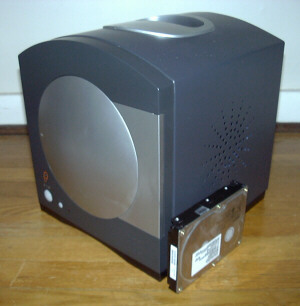 |
This is a pic of my old LAN rig. Its housed in a now unavailable Micro ATX Pia cube case, running an Enhance Micro ATX 200W P4 ready PS. It was el cheapo steel construction and a knuckle buster, but it was very, very small with reasonable cooling. I only had one hard drive, one CD-ROM, and one floppy drive installed in that case. Even with the additional drives that Ive put in the LANBOY, it is noticeably lighter than the cube case! |
To prove my point, here is my 4 year old daughter lifting the built LANBOY, using the included carry strap!

Antecs LANBOY has definitely proven itself to me to be a worthy base for a LAN rig. I consider this a high honor since I am very interested in small and, hence, light systems. I have at least 4 Micro and Flex ATX chassis laying around, but none of them offer the functionality while retaining the light nature necessary for an ideal LAN rig. Im giving the Antec LANBOY a 9.5 out of 10. I debated the score (with myself) for some time. Its not 10 out of 10, due to a very few issues. The interference with the drive cage and the AGP card sticks out in my mind. I also miss Antecs hand latching side door mechanism. However, the four usable external 5.25″ drive bays in such a compact case are worth noting. The fit and finish of the case is also top notch.

 Bjorn3D.com Bjorn3d.com – Satisfying Your Daily Tech Cravings Since 1996
