Transcoding
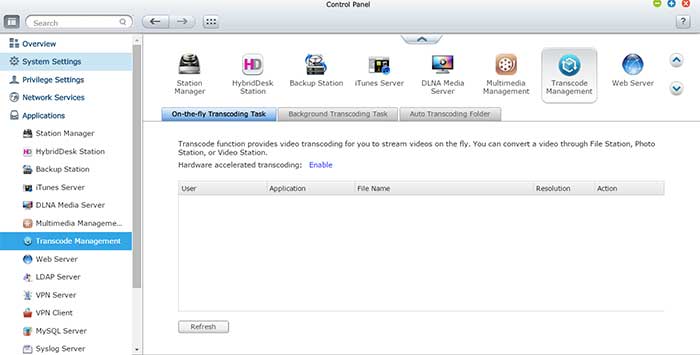
There is no doubt that QNAP want the NAS to be your media streaming device. Not only that you can use local display to show video to your TV, the unit also supports transcoding. In fact, the unit supports 4K video playback and transcoding, a big improvement over the TVS-463, making the TVS-471 more future-proof. Leverage on the Intel HD 4600 graphics with QuickSync support, the unit can be a very powerful video transcoder. As we all know, Intel QuickSync is current the fastest transcoder out there, so we are very glad to see QNAP implemented such feature onto their NAS.
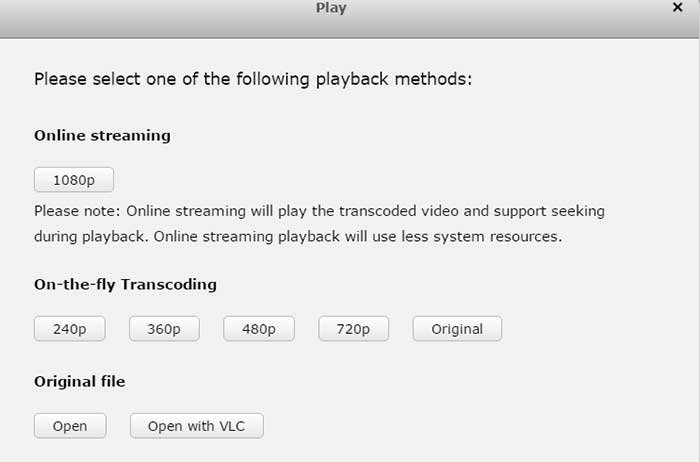
In order to use transcoding, you would need to install the CodexPack under the HybridDesk Station. Once it is installed, you would see the Transcode management under the Application. The unit supports on-the-fly transcode when a movie is played back with the File Manager or the Video Station. When a video file is selected, a window pops up asking for the playback methods. We are presented with Online Streaming, on-the-fly transcoding, and original file. Online Streaming will playback transcoded video and supports seeking. Obviously, in order to use it, you would have to first transcode the video to the compatible format but this would reduce the resource usage as the unit no longer need to re-transcode the file. On-the-fly will playback the video while it is being transcoded and original will bypass the transcode all together. Transcoded files are placed in @Transcode folder under the same folder as the original file. Unless you move the files to a different folder, these files would be aggregated under the same name as the original file in the Video Station except that you can select the “Streaming” version for the transcoded file. Background transcode is also supported where you can just right click on a video file on File Station or Video Station to add to the list to the Transcode Management. The unit even supports automatic scan where it will scan a specific folder(s) for any video files and automatically transcode them to H.264 format.
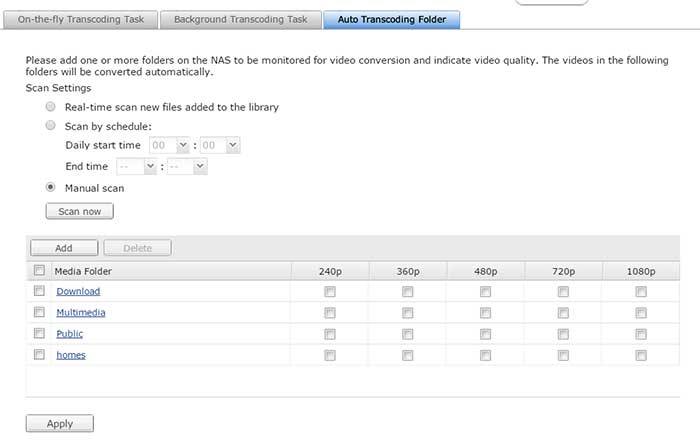
QNAP does not offer much customization when comes to transcoding. We are only presented with the screen resolution of: 240p 360p, 480p, 720p, 1080p, or original resolution. That is all we get as the software analysis the the video file and will choose whatever it thinks is the best profile to use to use for the converted file. The NAS will enable hardware assist whenever it is possible, which is something that you want to do though not all of the file formats are supported. We noticed that with the .MOV file, the decode and encode is done with the software on the 4.1 firmware but the latest 4.2 beta firmware from QNAP has added support for hardware encode/decode.
We noticed that when we transcode the same file to the same resolution with the TVS-471 and the TVS-463, we ended up with two different results so the software definitely will take the hardware underneath the NAS into consideration when choosing the profile to use. The Intel unit (TVS-471) transcode the file using Baseline L5 and produces larger file size at 5.52GB (average rate of 9.425Kbps). The AMD unit (TVS-463), on the other hand, uses Baseline L4.2 and outputs a file size of 2.46GB (average rate of 4.205 Kbps). Additionally, we notice that the Intel model matches the pixel size in height while the AMD matches the width as our original file has a resolution of 680×336 and the Intel yields 2184×1080 while the AMD yields 1920×948.
Curious with how the devices would handle at clip that is already at proper resolution, we transcoded a 1080p clip h.264 to 1080p. Again, here the Intel unit is producing higher file size of 452 MB despite the fact it is using Baseline L4 profile but it has higher overall rate of 6.357 Kbps. The AMD system is using Baseline L4.2 profile but it is encoding at average of 4.747 Kbps and yields file size of 337GB.
It would be a bit hard to compare the performance with the hardware assisted transcoding between the TVS-461 and the TVS-471 since the profiles used are different. Though, not only that the Intel unit is transcoding at higher bitrate and higher profile, it is clearly able to finish the job sooner. We noticed that the TVS-471 finish the job twice as fast as what we can achieve with the TVS-461.
Additionally, we tested on-the-fly playing transcoding playback and noticed that for the most part, the playback is very smooth.There is about of a second of delay initially or when skipping to a section of video as the system is caching the data but once it has begun playing the video, it is smooth and no hiccups. With the TVS-463, we did had an issue with a Bluray rip that cause a severe lag with on-the-fly transcoding playback but on the TVS-471, it is almost smooth play. There are a couple of instances where it will momentarily pause but overall, quite smooth.
We really like that QNAP has taking advantage of the Intel QuickSync on their NAS. Not only that transcoding wih the NAS can save power, it also frees up the computer resources. In addition, having the ability to transcode files allows us to play any video clip using the Video Station, even for file formats not supported. This saves us the trouble of having to download the file to a local host for playback. Additionally, it also helps us to reduce the bandwidth for a smooth playback on our mobile device while on the go or on a weak WiFi network and keep the original high bitrate contents saved on the NAS. We do like to see, however, that QNAP offers the ability to customize the transcoding setting and even create customized profiles. It would also be beneficial to place the transcoded file to a specific folder for quick upload or having the ability to automatically upload the files to popular sites like YouTube once the transcoding has finished.
Feature: QVM Desk and Virtualization Station
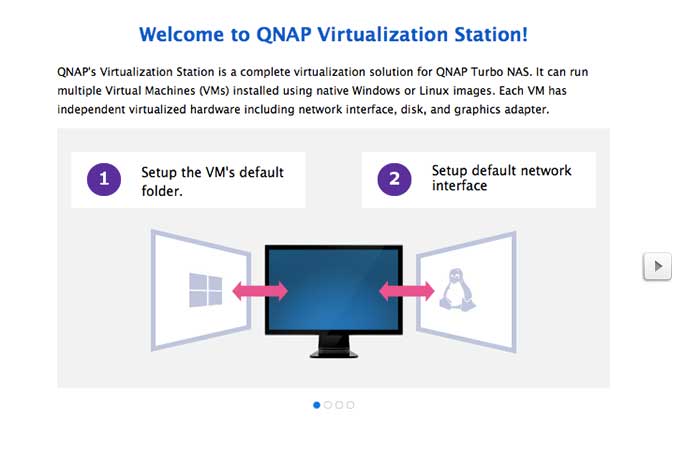
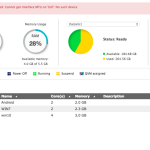
QVM Desk is a full fledge virtualization machine that is unique to the QNAP x86 NAS. While other NAS devices such as Thecus and Synology offers virtualization support, their implementation still treats the NAS as more like a storage device. QNAP’s Virtualization, on the other hand, gives us the ability to turn the NAS into a real machine where it is capable of running a long list of operating systems. The NAS supports Linux CenTOS 6.0 to 7.0, Fedora 11 to 19, RedHat Enterprise 6 to 7, SUSE Enterprise Server 11, Ubuntu 10.04 to 14.11, Opensuse 11 and 12. Android x86 4.4 RC1, UNIX FreeBSD 8.3, 9.1, Sun Solaris 10, Windows XP to 8.1, and Windows Server 2003 R2 to 2012 R2. Notice the support for Android x86 which would come very handy for the mobile app developers. While the official list did not include Windows 10, we had no issue running it on our unit.
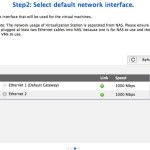
Any NAS from QNAP with hardware virtualization (VT-x for Intel or AMD-V for AMD) is required to run the Virtualization. In addition, the NAS must have 2GB of RAM and 2 ethernet ports as the virtualized environment utilizes its own dedicated ethernet port. QNAP’s Virtualization is powered by QUMU. File transfer between the VM and NAS is done internally despite the fact that the NAS and the VM are using the physical network. We have been playing with the 4.2 beta OS and the requirement for the dedicated network interface has been removed as the VM can run off the same ethernet port as the NAS’s main port and data transfer between the NAS and the VM is now done through internal as oppose to physical network.
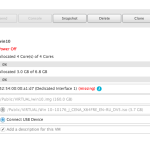
Under VM, USB pass-through is supported. This allows you to plug into an USB device such as external hard drive to the NAS USB port and access those files. While the official documents states that the pass-through only supports USB 2.0 ports, we had no trouble of using the USB 3.0 port. It is clear that Virtualization works much better with the Intel based NAS than the one found on the TVS-463 that uses AMD SoC. Possibly due to the fact QNAP has been implementing this on Intel based NAS longer and also that the USB 3.0 port on the TVS-471 is directly coming off from the Intel chipset as oppose to the third party controller.
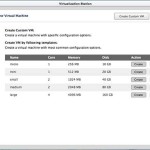
Setup the VM is quite easy. Under Virtualization Station, click on Create VM, select one of the template or use custom to create your own. QNAP gives us the option to adjust the number of CPU cores, amount of memory, create VNC password, and the amount of disk space allocated for the VM. Once the VM is created, there is option to even further fine-tuning the setting such as video, audio, USB, and storage. Note, in order to access the internet under VM, you would need to plug in the secondary ethernet port as it runs on its own dedicated port.
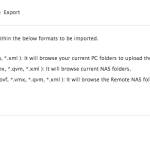
QNAP offers the ability to import and export VM, snapshot, and enable desktop operation on web browsers. The system support importing from *.ova, *.ovf, *.vmdkc. It supports export to *.ovg, and *.qvm, a QNAP’s proprietary format. QNAP’s approach with snapshot is like doing incremental backups where only the changes has been saved instead of doing a full backup every at every single snapshot. This would simplify the process and also makes the saved file smaller and faster backup and restore.
Virtualization performance is surprisingly good with the built-in console thanks to the Intel Core i3 and the Intel VT-x support. For most part, we can use the system at 1680×1050 without feeling that it is being bugged down. At 1920×1080 resolution, we start to notice that it is a bit too slow where we can notice the mouse cursor lag. There is a slightly performance improvement with a VNC which if you are planning to use virtualization for a long term, it is definitely worth to use the VNC. Though we did not notice as big of performance difference between the built-in console and the VNC as what we did with the TVS-463. It is great to see that QNAP is able to deliver a good experience here given to the fact we are only using this on a relatively midrange Core i3 processor as oppose to the more high-end Core i5 or i7. Having the ability to run multiple operating systems means that software developer can test their application across multiple operating systems and platforms. It would also offer legacy support if you happen to still need to run an older OS for hardware/software compatibility.
 Bjorn3D.com Bjorn3d.com – Satisfying Your Daily Tech Cravings Since 1996

