The Gelid ICY VISION cooler can fit many different video cards, but what can it do when used on two of the hottest running cards in the same system?
Introduction
Modern GPUs produce a lot of heat. Keeping them cool is a major concern for gamers, enthusiasts, overclockers, and anyone else that pushes their components to extremes. Knowing, this some video card companies offer non reference coolers on their cards, usually at a slightly higher price point. Other companies offer aftermarket coolers that allow users to swap out the stock setup for one that gives better cooling and/or offers less noise.
The GeLid Icy Vision Revision 2 does both. Designed to fit a variety of both NVIDIA and ATI/AMD cards these dual radiator 5 heatpipe coolers claim to offer superior cooling on even the known to run hot GTX 480. The Icy Vision coolers have been available for a while now, and we decided to see how they can handle an SLI setup. GeLid was kind enough to supply us with a pair of them so we could see what they can do.
The GeLid Icy Vision (GC-VGA02-01) is available from several outlets with prices ranging from $30.99 to $54.99 USD.
Features and Specifications
- 5 High Performance Power Heatpipes
- Premium Aluminum Fins & Pure Copper Base
- 2 x 92mm S-Shape Fans for 20% additional Air Flow
- Ball Bearing for Long Life Time
- CrossFire & SLI Compatible
Compatible to:*
AMD™: HD4850, HD4870, HD4890, HD5830, HD5850, HD5870, HD6850, HD6870, HD6950* & HD6970*
Nvidia™: 9800GT, 9800GTX, GTS250, GTX260, 275, 280, 285, GTS450, GTX 460, GTX465, GTX470, GTX480, GTX550TI, GTX560TI, GTX570, GTX580 & Quadro 4000
*In combination with the Enhancement Kit for Rev. 2 ICY Vision
The compatibility list is based on ATI & Nvidia’s reference board layout ONLY. GELID Solutions holds no responsibility for incompatibility on non-standard cards. Please refer to the height restriction drawing. Installation manual for AMD and NVIDIA cards to download.
Design Concept:
The “Rev. 2 ICY VISION” cooler contains 5 power heatpipes in a unique heatpipe constellation. The
heatpipes are interlaced into 85 optimized high-quality Aluminium fins. Together with a flat stack fin
soldered Copper base, they enable the most efficient heat transmission and dissipation from GPU
core in its class. Besides the heatsink, two 92mm UV-reactive fans with 11 blades in S-shape generate 20% additonal air flow than traditional fans. The fan contains a high-quality ball bearing to ensure a longer lifetime in high temperature environments.
Both VGA fans blow cold air directly to the card
while case fans draw hot air from the PC case.
Test platform with the overclocked Fermi GTX 480:
INCLUDING:
– More Heatsinks for Ram & VRM
– High Quality GC-2 Thermal Compound
– Case Fan cable to power supply or motherboard
This cooler is RoHS, WEEE compatible and has a warranty of 5 years.
Take note that GeLid specifies that this cooler needs an enhancement kit to be completely compatible with the AMD/ATI 6900 series cards.
Specifications:
| Air Flow (CFM / CMH): | 67.14 / 114.13 |
| Bearing: | 1 Ball & 1 Sleeve |
| Cable Length (mm): | 200 |
| Current (A): | 0.5 (0.25 / fan) |
| DC Voltage (V): | 12 |
| Fan Speed (RPM): | 2000 (+/- 10%) |
| Fan: | 2 x 92 x 15 S-Shape UV Blue Fan |
| Heatsink Dimensions (mm): | 216 L x 95 W x 52 H |
| Life Time MTTF at 40C (h): | 50’000 |
| Noise Level (dBA): | max. 26 |
| Static Pressure (mmAq): | 1.3 |
| Warranty (years): | 5 |
| Weight (g): | 465 |
A Closer Look
When the Gelid Icy vision coolers arrived they were stuffed into a box that wasn’t quite big enough for them. Once we removed them we noticed some slight damage to the plastic packaging but nothing to cause concern.
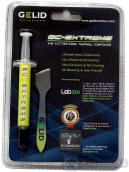
Packed in the box the ICY Visions came in was a sample of Gelid’s GC-Extreme thermal compound. So now we have to decide do we use it or the GC-2 that came in the ICY Vision packages.
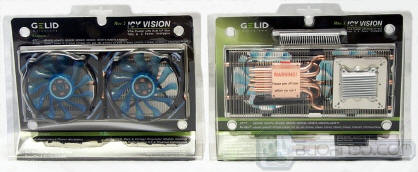
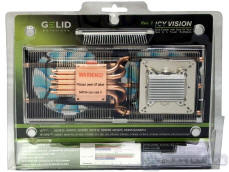
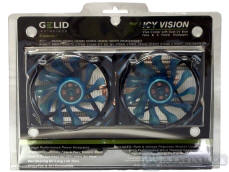
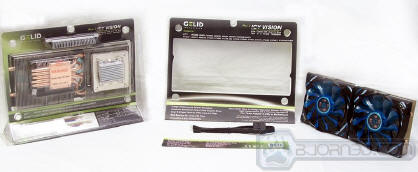
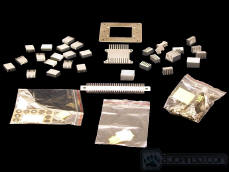
The packaging is straight forward a clear plastic container allowing perspective consumers to see the unit itself as well as read the specs and claims on the cardboard insert. Hidden in the triangle shape formed by the bottom of the package were all the heatsinks, screws, thermal pads, a tube of GC-2 thermal compound, and an extension cable to allow users to connect the fans to the system instead of the video card.
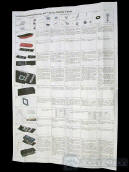
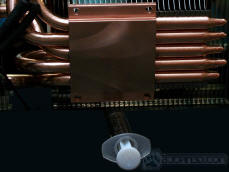
Here’s everything that is hidden in the triangle except the extension cable which can be seen in the one of the images in the last section. Included is a 2 sided instruction sheet. One side has the parts list and installation instructions for ATI cards, the other is instructions for Nvidia cards. Take note that the print is VERY small. also tucked in there is everything we need to mount this cooler on several different cards from ATI or Nvida. Not all these pieces are used on every card, and some are brand/model specific. This last shot shows the mating surface of the cooler. It has a decent finish, but nowhere near the mirror we’d like to see.
Assembly
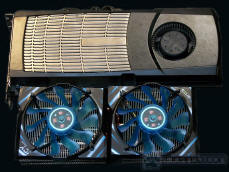
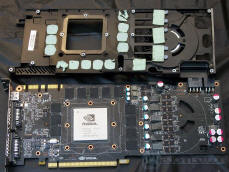
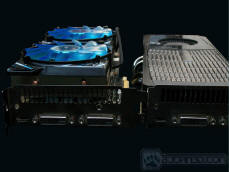
Since this review is covering the use of these coolers on dual GTX 480’s the assembly process will by necessity only cover those cards. Installing one on a different card could entail a slightly different process. The above images are the ICY Vision Rev. 2 cooler and the card we are installing it on. Because it is made to work on a wide range of cards it is not as long as the stock cooler for this card.
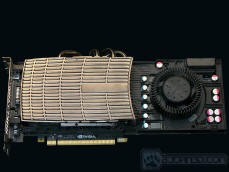
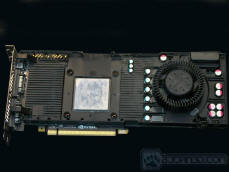
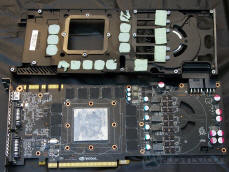
The first step is to remove the stock heatsink. This requires removing the plastic shroud that houses the fan and directs the airflow through the heatsink. There are several clips on each side, press them in with a small flat screwdriver of similar object. Next, flip the card over and remove the four screws holding the heatsink to the card. Turn it back over, grasp the card with one hand and the heatsink with the other. Using a gentle twisting motion (it doesn’t have much range of motion) remove the heatsink.
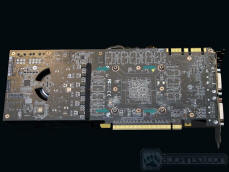
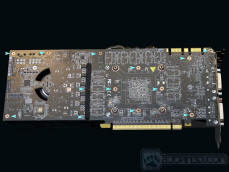
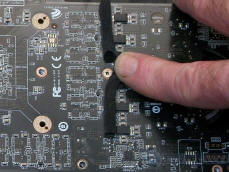
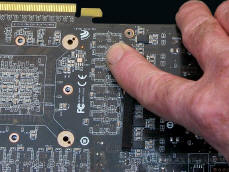
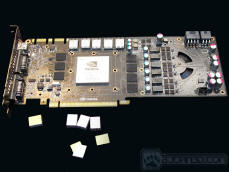
Next step is to remove the rest of the screws. On this card two of them are hidden under the foam strip that protects the card when used in a close SLI setup. Don’t forget to remove the ones on the end. Unplug the fan. Then gently lift the plate off the card, if it won’t come up try using a small flat screwdriver to help it. It should take no effort at all. If it seems like it’s still attached it probably is, so don’t force it, and check for missed or hidden screws. Once it’s off it’s time to clean it. Using a tissue or paper towel wipe the GPU, memory and VRMs off, then re-clean them with some isopropyl alcohol to remove any residues. Before the next step users should wash their hands to remove any skin oils.
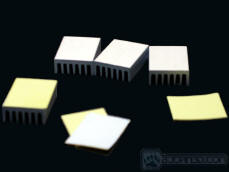
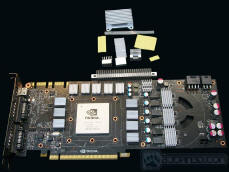
Sorting through the various heatsinks included we got the ones need for these cards out and prepped. Simple enough, use the supplied pre-cut double sided thermal tape and attach it to each of the heatsinks that will be used. Next peel the other side and press the heatsink onto the memory or VRM for ten seconds. Due to a lack of fingernails we used an Exacto knife to facilitate the removal of the tape covering. Remember to clean the chips, VRMs, and hands before starting this step. At this point we were pleasantly surprised at how easy it was so far. Now we have card along with the “left over” heatsinks not used on this application.
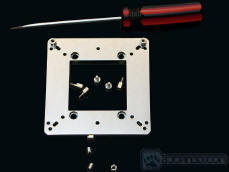
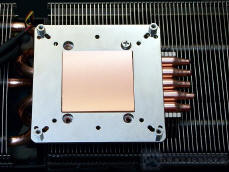
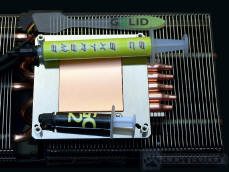
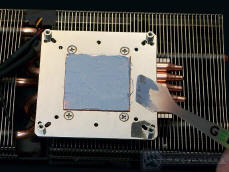
Progressing to the next step we separate the hardware we need, which in this case are 4 standoffs, 4 small nuts to hold them to the mounting plate, and four screws to mount the plate to the cooler. then it was time to decide which thermal paste to use. We went and looked at the comparison done here at Bjorn3D.com of these very same products and chose to use the GC Extreme instead of the GC 2. (The GC2 was packaged with these coolers, the GC Extreme was sent in the box the coolers were shipped to us in.) Using the spreader that came with the GC Extreme made applying the paste very easy. Next, plug the fans in.
NOTE: Though the GTX 480 has a four pin PWM fan connector, the fans on the ICY Visions are not PWM. If you wish to adjust the fan speed on one of these coolers you must use the supplied cable to attach them to a fan controller.
The last step was to use 4 more screws to attach the cooler to the card. Now our readers might rightly expect that we would take a picture of this, and most days they would be right. Unfortunately, that is the one image we forgot, in our haste to start testing it was missed.
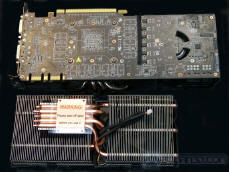
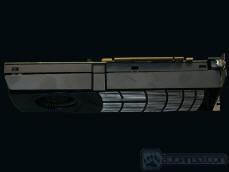
We did take one of the mount itself half way through putting the cooler on, and one comparing it to the stock cooler after we finished the first card.
The assembly process for this cooler is far easier than it seemed when first looking at the instruction sheet. It is a bit time consuming however. While the second card went quicker it still took the better part of half an hour per card. Perhaps longer fingernails would speed the process up.
Installation into the case was the same as any video card would be. Take note that use of this cooler requires room for 3 slots. To use these coolers in SLI the system must have at least 2 slots between the PCI-E slots being used.
Testing & Methodology
Settings used on each benchmark or game were kept the same for both the stock coolers and the Gelid Icy Vision coolers. Each benchmark was run , and if possible a screenshot was used to record the cards temperatures, if not they were recorded in a text file. All temperatures were obtained from or verified by MSI Afterburners On Screen Display application and HWiNFO64 during testing. Both cards were overclocked to Core clock 800/ Shader clock 1600/ Memory clock 1850. Ambient temperature during testing was 20.5°C (69°F). All testing was done with SLI enabled.
Game benchmarks: Batman Arkham Asylum, Just Cause 2, Alien Vs Predator benchmark only
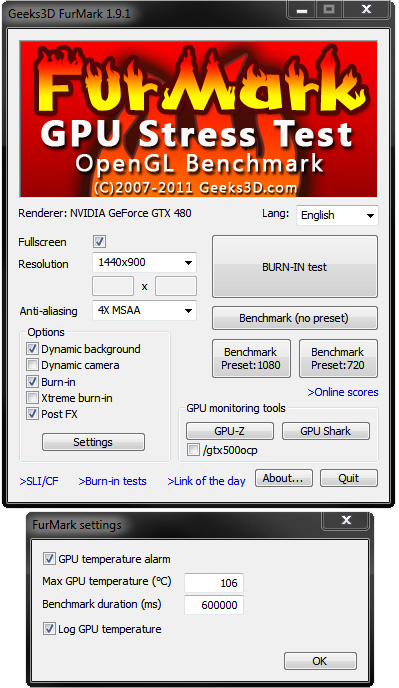
Synthetic benchmarks: Unigine Heaven Benchmark v2.1, FurMark 1.9.2, OCCT 4.0.0 And as an added bonus for those that run Stanford University’s Folding @ Home app we included it, the rest of our readers can think of it as a real world test, an actual productive app using the CUDA cores on these GPU’s.
| Test System | |
| Case | Enermax Fulmo |
|
Processor |
AMD Phenom II X4 9500 (Agena)
|
|
Motherboard |
Asus M3N-HT Deluxe (bios 3401) |
|
Memory |
4 GB Patriot 8500EL series PC2-6400 |
|
Drive(s) |
Maxtor 7H500F0, WDC WD 1600BEVT |
|
Graphics |
Video Card 1: NVIDIA GTX 480 (reference)
Video Card 2: NVIDIA GTX 480 (reference)
|
| Graphics Coolers | Stock reference & Gelid Icy Vision Rev. 2 |
|
Power Supply |
Enermax Revolution87+ 1000w |
| Operating System | Windows 7 Ultimate (SP1) |
| CPU cooler | Evercool Transformer 3 w/ Noctua NF-F12 PWM fan |
| Case fans | 2 included 120mm Vegas, 1 included 180mm Vegas, 2 included 120mm, 1 added NZXT 140mm |
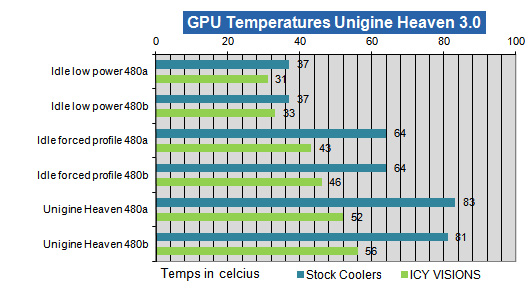
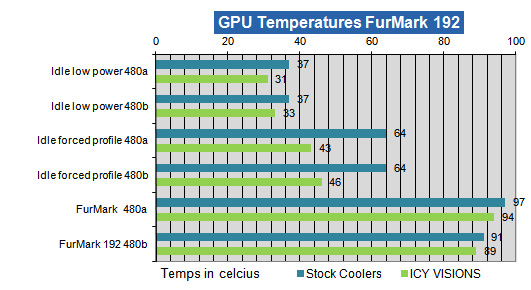
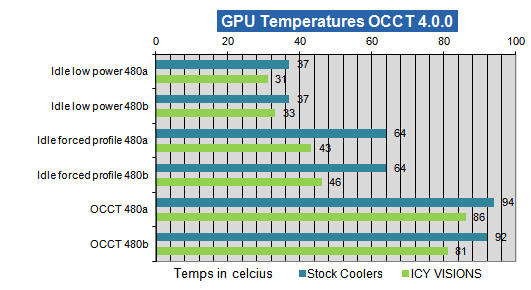
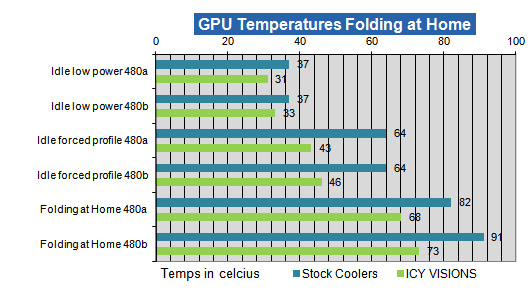
All charts include the idle temps both in low power mode, with the NVIDIA Power Management Mode set to “adaptive” (true idle) along with the overclock profile set as both 2D and 3D (MSI Afterburner settings), and the NVIDIA Power Management Mode set to “Prefer maximum performance” (the so called “forced profile”) as a baseline to compare how much the cards heated up.
During the testing process we observed that no matter what the fan percentage was the RPMs remained constant on the ICYVISION Rev2 coolers..
The first thing we noticed when we fired up the system was how quiet these coolers are. Since they run at a fixed RPM, they do not get louder as the card heats up like the stock coolers do.
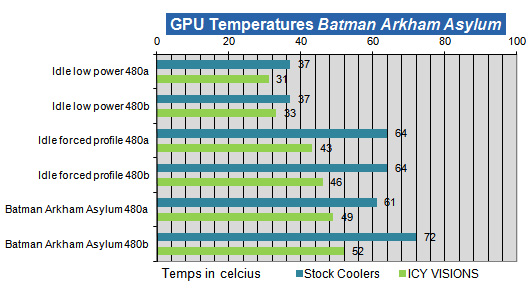
Batman Arkham Asylum
All games tested with settings turned up as high as is available since we weren’t worried about frame rates and needed to push the GPU. For Batman and Just Cause 2 we played the game for awhile then ran the benchmark.
With the stock coolers we were getting what we used to think of a decent temps. Once the ICY visions were in place those temps dropped across the board. Throughout the testing one card ran hotter. We figure this was due to one of two reasons, either the placement in the case’s airflow, or some difference at the time of manufacture. We even did one run (unrecorded) with 3D enabled just to see if it would heat things up a bit more. There was no discernable difference.
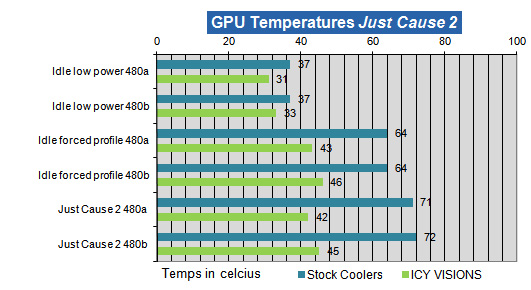
Just Cause 2
With Just Cause 2 we saw a more of a difference. Motion blur was turned off after the stock coolers, we assume that accounts for a small percentage of the difference. We know we should have re run the test but as none of the other tests were similarly buggered, we choose to let it stand as is.
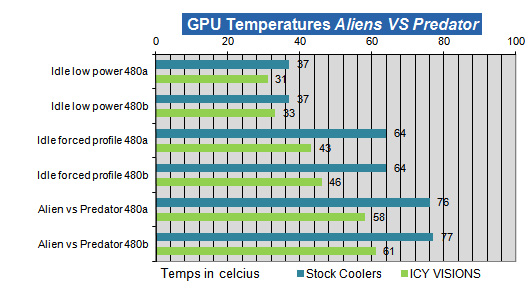
Aliens vs Predator
For Aliens vs Predator we just ran the bench four times to heat the card and took the readings from the last run.
This one shows that as the cards work harder the ICY VISION looses some of it’s advantage. The fixed RPM means it cannot adjust to the work load. However it also means that it will not get louder as things heat up, and is still far below the temps registered with the stock coolers. We ran the benchmark only for this one because we could get it as a standalone. Of the three it definitely taxes the cards the hardest. After watching the benchmark we think it’s time to find a copy of this game.
Let’s move on to the the synthetics.
Unigine Heaven v3.0
| Unigine Heaven Settings | |
| Render: | direct3d11 |
| Mode: | 1440×900 8xAA fullscreen |
| Shaders: | high |
| Textures: | high |
| Filter: | trilinear |
| Anisotropy: | 16x |
| Occlusion: | enabled |
| Refraction: | enabled |
| Volumetric: | enabled |
| Tessellation: | extreme |
After running Unigine Heaven for about 15 minutes to warm the cards up, we ran the benchmark. The ICY VISIONS did a great job of keeping the cards cooler than the stock coolers. We saw a bigger difference here than elsewhere so we re ran the test, twice and enabled 3D the second time. That got us up to 58 & 56°C at one point. Watching the temps go up and down with the GPU load we realized that the ICY VISION coolers reacted quicker than the stock coolers, enabling them to keep the temps far lower since Heaven doesn’t push a constant steady load at the GPU.
FurMark 1.9.2
FurMark ran the cards the hardest of all, reaching temps higher than any other test. Again the temps show that as the cards reach their upper limits the ICY VISION coolers lose some of the advantage they have. They still perform better than stock and the stock coolers sounded like harrier jets at this point of the testing while the ICY VISIONS were nice and quiet.
OCCT 4.0.0 OCCT settings
OCCT on the stock coolers ran a bit more evenly coming in with temps just 2 degrees away from each other. The ICY VISIONS showed us a 5 degree difference with an 8 to 10 degree drop from the stock coolers.
Folding @ Home
The current GPU3 Work Units (80xx) for F@H run the GPU at a steady 97-99 % load using the CUDA cores of these GPU’s to run scientific simulations. They are known to use more power and work the cards harder than any of the previous Work Units, and will generate as much or more heat than any games we currently have available. For those folding 24/7 or even most of the day, these coolers will keep the cards running at lower temps which should extend their usable life.
These GeLid ICY VISION Rev. 2 GPU coolers did a wonderful job cooling the GPUs. Using them in SLI (or Crossfire) did not seem to affect their performance one bit. They are far quieter than the stock coolers and do a much better job of cooling. Connecting them to the Sentry 2 fan controller allowed us to adjust the fan speeds and isolate the noise from these coolers. At full RPM the ICY VISION’s fans produce about the same volume as the stock coolers at 45-50% (not tested). They are very quiet by comparison. Just so we we would know, we re-ran the folding at home app with the fans at 60%, this made them virtually inaudible and the cards leveled off at 73 and 81°C. Still lower than the stock coolers
We would like to take this opportunity to remind our readers that these coolers take up 3 slots compared to the 2 the stock coolers use. They can ONLY be used in SLI/Crossfire on a board that has at least two empty slots under the top card. Using them on this ASUS motherboard stopped us from reinstalling the PhysX card, and left us with only one PCI slot open.
Conclusions
The Gelid ICY VISION Rev. 2 GPU cooler has been reviewed on some other sites. But none have done it on a multi-GPU configuration, so we thought we’d try that. The system is now far quieter, and it no longer throws tremendous amounts of heat out the back. It now throws a more moderate amount out the top.
These coolers do what Gelid claims and tame even a pair the notorious GTX 480 cards. They are much easier to assemble than looking at the instruction sheet made us think they would be. There are many extra instructions for various cards, but once we started, and saw that only a small portion applies to any given card, it didn’t seem so daunting a task. Installing the cards with the coolers mounted is as easy as installing any other card. The cards feel less rigid due to our having removed the stock heatsinks and shrouds, which act as a structural support for the PCB, but they are still more than strong enough. One bonus feature is that the tool less locks on the PCI slots now work with these cards as the housing that was in the way is gone. As for how well these cards work, the tests speak for themselves.
We feel these coolers could benefit from a set of PWM fans. Since they have the 4 pin PWM connector on them, and are made for use with cards that use PWM we don’t understand why they use a DC fan that can only run at full speed on this circuit. The plastic fan and shroud are very like what we find on the similar “factory name brand” coolers that come with the name brand cards. That said, they feel like a toy. This is subjective, perhaps it’s because of handling the heavy stock coolers and then mounting these. The heatsink/heatpipe portion seems well constructed and very solid, for an aluminum fin structure of course.
The size of the ICY VISIONs will be of concern to some consumers as it blocks the 2 slots under the PCI-E slot the card is in. In our case they reduced a triple SLI board to 2 way SLI and one PCI slot. Effectively blocking every other slot on the board. The other concern is that replacing a stock cooler that throws even some of the heat out the back, with a cooler that radiates all the heat into the case, means that even a case with good airflow may see an increase to the CPU and chipset temps. It’s a trade off of sorts, and one that worked out well in this case. None of the temps were high enough to cause true concern. With proper planning the use of these coolers will not be a problem in a well designed case.
Overall we are quite pleased with the ICY VISION Rev.2 VGA Coolers.
| OUR VERDICT: Gelid ICY VISION Rev.2 in SLI | ||||||||||||||||||
|
||||||||||||||||||
| Summary: The Gelid ICY VISION Rev.2 GPU coolers when used in SLI work well giving users improved cooling performance, while reducing noise levels coming from the system. They are well made, and have a killer 5 year warranty. This easily earns them the Bjorn3D Seal of Approval. |
 Bjorn3D.com Bjorn3d.com – Satisfying Your Daily Tech Cravings Since 1996

.gif)
.gif)
.gif)







Thank you for sharing. Your post worth of reading. Waiting for new posts. buyincoins