Prlimatech Has proven they can make a great CPU cooler perform even better by changing the design of the heatpipes.
Armageddon is upon us.
Nope, it is not the end of the world either. Prolimatech has brought upon a great CPU cooler that breaks away from their traditional CPU cooler design. We all know Prolimatech’s MegaShadow, Megahalems CPU coolers to be one of the best CPU coolers out on the market today. Even I am rather shocked at the performance of their new CPU cooler, the Armageddon.
The Armageddon is built upon the Mega series CPU coolers, but has a slight twist to it. Instead of the heat pipes running up the side of the CPU cooler, they have the fin array run from them towards the center. Prolimatech, decided to run the heat-pipes in the center of the CPU cooler then run the fin array towards the outside of the CPU cooler; therefore putting the heat pipes in direct contact of the airflow from the fans. This CPU cooler is one of the first heat-sinks to fully utilize not just one 140mm fan, but two 140 mm fans, for a push pull configuration.
Since “Minor Me” been demoted from regular computer duties, to HTPC duty for our new 40″ HDTV. I can think of no better candidate to use this new CPU cooler on. Let’s get “Minor Me” out of moth balls, throw on the Armageddon CPU cooler, then overclock the proven, and very reliable Intel Core i5 750 CPU, and see how our temps fair. Just because “Minor Me” is on HTPC duty does not mean it won’t be cranking out the frequencies. It will just be cranking out the frequencies as we watch our Blue Ray movies.
- Prolimatech Megahalems Rev B. CPU Heatsink – $64.99
- Cooler Master Cooler Master Blue Ice Blue LED Chipset – $12.57
- Cooler Master Hyper N520 CPU Cooling Fan – $42.66
- Cooler Master Hyper 212 Plus CPU cooler – $25.53
- Cooler Master V8 CPU Cooler – $57.91
Specifications
| Heatsink Dimension | (L)144mm X (W)50mmX (H)160.3mm |
| Heatsink Weight | 750g |
| Heatpipe | Ø 6mm X 6pcs |
| Suggest Fan | 140mm X 140mm X25mm |
| Suggest Fan Speed | 800~1200rpm |
| Suggest Noise Level (dBA) | Below 26dBA |
| Air Flow | 57CFM |
| Direction of heatsink | Faces the rear exhaust system fan |
& Packaging

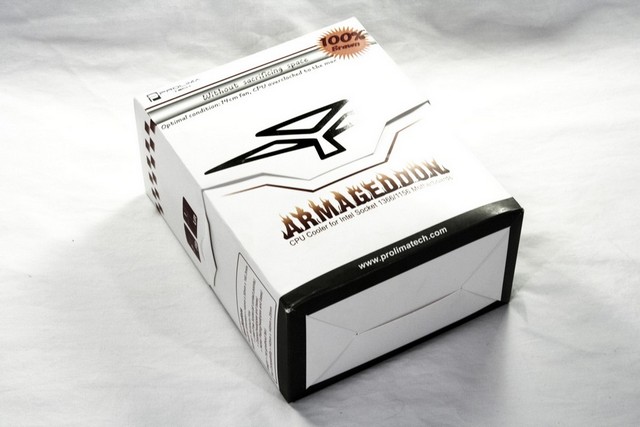
Starting off on the packaging, Prolimatech uses the same signature white box for the Armageddon CPU cooler. This CPU cooler also is better optimized for the massive 140mm fan.

Right on the upper top corner of the box, Prolimatech puts on there 100% brawn. This is one area that Prolimatech was not lying about. You will have to wait and see till the testing portion to see this.

This time Prolimatech puts some form of specifications on the box itself. As they stated on the front of the box, this heat-sink is best suited for 140mm fans.

This is one area that thoroughly impresses me about Prolimatech. Their continuation to package up their heat-sinks extremely well.

How Prolimatech packaged up the Armageddon, again they went the extra mile to ensure this heat-sink would not get damaged during transport. The fans that Prolimatech shipped with this CPU cooler, were not packaged properly; therefore these fans did not fair to well upon receiving this CPU cooler.

OMG, it’s attack of the multiple mounts. The only area I am not to crazy about Prolimatech’s CPU coolers. What comes inside that little box that falls out when you open the packaging. You will get a retention plate, two crossover braces, a heat-sink crossover hold down, four retention plate insert nuts, four stand off studs, two CPU hold down crossover brace screws with four fan clips. Forgot to mention you will get some thermal paste as well.
Overview

Starting off on the screws that hold down the CPU mounting cross-brace, these are much smaller then what Prolimatech used on their previous CPU coolers.

These are what Prolimatech decided to use to hold our fans onto the this heatsink, I personally prefer the use of the wire fan clips myself.

Looking at the Armageddon CPU cooler dead on. If you notice, this CPU cooler has all of its heat-pipes running width wise with the fin array, and that the heat-pipes are in direct contact with the air that comes from the fan(s).

Turning the Armageddon 90°, this CPU cooler is fairly thin compared to Prolimatech’s previous CPU coolers. By reducing the thickness of the CPU cooler, allowed me to use my taller Gskill 2000MHz Rip Jaws.

The heat-pipes used in this CPU cooler, run width wise of the CPU cooler. The heat pipes are also the 6mm design we saw with other CPU coolers.

Prolimatech, decided that 8 (4 total) heat-pipes just was not enough. Instead they used 12 heat pipes (6 total), this should wick heat away fairly quickly from our CPU’s.

The heat-pipes are coming from the base of the CPU cooler, then they twist their way to the aluminum fin array.

A better image showing how Prolimatech twisted the heat-pipes from the CPU cooler base to the fin array.

Looking at the side of the Armageddon CPU cooler, the fin array is in two pieces. The heat-pipes are the exact center on which the fin array gets soldered too. Also Prolimatech made sure the fin array was evenly spaced apart not to hinder airflow with the Armageddon CPU cooler.

Time to turn our attention over to the base of the CPU cooler. Like always remove any protective coverings prior to using any CPU cooler.

I was expecting a little better polish on the base. We can make out the reflection of the small screw in the base, but it is a bit hazy.

The top cover that Prolimatech used is mirrored. What I prefer to see on the base of the CPU cooler.


All 12 (6 actual) heat-pipes, 6 to each side, end up on top of the Armageddon CPU cooler. Being these were used in a U shaped configuration, 6 on each side (left and right) gives us a total of 12 heat-pipes.

The CPU cooler cross-brace, instead of having the screws that secure this brace to the two CPU socket mounting braces, ride directly on top, Prolimatech sank the hole a bit into the CPU cooler cross-brace hold down. (OK, there is way to many parts when I start confusing myself on trying to say what is what.)
Installation

Time for us to install the Armageddon CPU cooler onto one of my computer’s “Minor Me”. Since I could not hold the camera to take pictures, and hold the retention plate, while holding onto the retention plate nut inserts while at the same time screw in the CPU socket mounting cross-brace stand off studs (I should mention I was doing this while the motherboard was in my Cosmos 1000 Chassis that I modded the motherboard tray to give me this ability). So I skipped a few steps. All I want for Christmas, is not my two front teeth, but a simple CPU cooler mounting system. It was rather interesting night for me.

These have a neoprene washer that is glued right on too the bottom of the CPU socket cross-brace stand off studs. You can tighten these up till they stop.

I use this same 5 dot pattern for all of my CPU coolers (water cooling blocks included). This serves two purposes, one it allows the thermal paste to distribute evenly across the entire surface of the CPU IHS, and two it will tell me how flat the base of the CPU cooler is.

I missed a step, I need to install the Armageddons CPU socket cross-braces first. Notice the 3 holes are pointing towards the center of the CPU? make sure you have this on both CPU socket cross-braces.

Sorry for the slightly blurred pictures, I was trying to take a picture with a really low shutter speed. It appears the base of the CPU cooler is fairly flat.

Much better picture, Reconfirms what I have on the CPU cooler.

Fully installed CPU cooler. the CPU cooler hold down cross-brace screws inset into that brace, this will make sure they will not get into the way of the fans.
Testing Methodology
|
Test Setup &Testing Methodology “Minor Me” |
|
| CPU | Intel Core i5 750 Lapped |
| Motherboard |
ASUS Sabertooth 55i |
| Case | Cooler Master Cosmos 1000 (Modded) |
| Memory | GSkill RipJaw |
| Video Card’s | Sapphire 4870 Vapor X |
| Hard Drives | Western Digital 160 Gig HDD |
| CDRom Drive | Lite On Blue Ray |
| Power Supply | Cooler Master Ultimate 1000 Watt PSU. |
| CPU Speeds Used | 3.6, 3.8, & 4.0 GHz |
| Operating System Used | Microsoft Windows 7 Retail |
| Video Card Cooler |
Arctic Cooling |
| CPU Cooler |
Prolimatech Mega Shadow, Armageddon, Cooler Master Hyper 212+ |
For testing purposes there is only one way of testing out CPU coolers. Set the maximum temperature of the CPU, in this case I will be setting this maximum temperature to 60°C +/- a few degrees, then see how far each individual CPU cooler will go as far as CPU frequencies. I do not like going above 65°C on my CPU’s, it is pointless to go this high of a temperature on our CPU’s when it can cause possible and or serious damage to our CPU’s. Also by using this limitation, this will allow me some flexibility with my ambient air temperature. The ambient air temperature upstairs is 23°C. Since “Minor Me” been demoted too being the official, seriously over powered HTPC. I like to keep things fair during the testing phase of the CPU coolers. I will be using the same exact thermal paste on all CPU coolers, the thermal paste I am using, is none other then Arctic Cooling’s MX 3. It is unfortunate I was unable to test this CPU cooler with a pair of 140mm fans, the fans that Prolimatech sent with this CPU cooler were seriously damaged (almost to the point of non recognition). I had to mount a couple of my 72CFM 120mm fans to this CPU cooler. This required a small amount of modification to the fan clips to accommodate these fans. Your results will vary greatly from my own tested here.
Results
Time to see how these CPU coolers performance does on a Core i5 750 CPU.
Default Speed CPU speed of 2.66 GHz
| Core i5 750 2.66GHz |
Idle | Load |
| Prolimatech Armageddon |
24°C | 34°C |
| Prolima Mega Shadow |
25°C | 39°C |
| CoolerMaster Hyper 212+ | 26°C | 39°C |
| GELID Solutions Tranquillo |
24°C | 42°C |
During our default CPU core speed testing, we can see the Armageddon comes out with a commanding lead during the load times of the Core i5 750 CPU. Which is telling me by putting the heat-pipes in direct contact of the airflow drastically improved the overall outcome of the Armageddon CPU cooler.
Overclocked CPU (CPU cooler specific)
I should mention during the overclocked portion of testing I turned off any power saving portion pertaining to the CPU to get me a better temperature reading across all CPU coolers. And to make it fair as well.
| Core i5 750 @ Maximum CPU core speed achieved |
Idle | Load |
| Prolimatech Armageddon 4.0GHz |
31°C | 62°C |
| Prolima Mega Shadow 3.8GHz |
26°C | 58°C |
| Cooler Master Hyper 212+ 3.6GHz | 28°C | 60°C |
| GELID Solutions Tranquillo 3.6 GHz | 28°C | 62°C |
Let’s heat things up a bit and see how the CPU coolers fared on overclocked settings with a 60°C +/- a few degrees. The Armageddon clearly decimates all other CPU coolers tested here today. This CPU cooler is still within my set limitation of 60°C, also this CPU cooler was able to outperform the MegaShadow on CPU frequencies by another 200MHz on top of that. Which makes this a perfect candidate for any seriously, over sized, over powered, over killed, overclocked, HTPC’s.
Closing Statements
I am rather impressed by the performance of the Prolimatech Armageddon CPU cooler. Since the 140mm fans that came with the CPU cooler, got crushed (completely and totally unusable), and I only had one extremely low flow 140mm fan (40 or so CFM), I had to hook up a couple of 120mm fans to this cooler. I prefer the use of 120mm fans over the 140mm fans, because these smaller 120mm fans do provide a bit more umpth behind the air flow they produce vs the 140mm fans that seem to just move air and not truly blow air. I liked how Prolimatech put the heat-pipes in direct contact with the air flow from the fans, as this will allow a much better temperature control vs having the heat-pipes off the the edges of the CPU cooler itself. By keeping the 12 heat-pipes (6 actual) similar to the Mega Shadow CPU cooler, this really shows the improvement of this design.
The only area I am not too thrilled about is the mounting system that Prolimatech has in play for this great CPU cooler. It almost ruins it for this CPU cooler. Way too many pieces and parts to keep track of and install. Having only a price point on or around the 65 USD mark, for such a low price even I can overlook some misfortunes.
- Prolimatech Megahalems Rev B. CPU Heatsink – $64.99
- Cooler Master Cooler Master Blue Ice Blue LED Chipset – $12.57
- Cooler Master Hyper N520 CPU Cooling Fan – $42.66
- Cooler Master Hyper 212 Plus CPU cooler – $25.53
- Cooler Master V8 CPU Cooler – $57.91
| OUR VERDICT: Prolimatech Armageddon | ||||||||||||||||||
|
||||||||||||||||||
| Summary: The Prolimatech Armageddon, is a perfect candidate for any seriously, over sized, over powered, over killed, overclocked, HTPC’s, or computer. |


