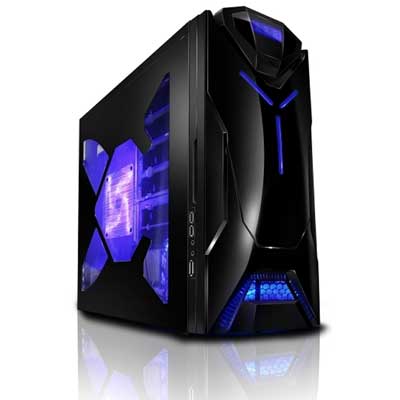
NZXT is at it again with yet another computer case offering. This time, NZXT will be entering into the market of budget gamers.
Budget PC gamers make up a fairly large part of the computer industry today, and NZXT has realized that with this case. Built off the success NZXT had with the Guardian chassis not too long ago, they used ideas from that and altered a few things to come up with the Guardian 921.
Today we will journey into the depths of the hard drive cages and take a look out how well NZXT lived up to their name with this product. From airflow, to noise levels, this case looks like it’s ready to take care of some serious business!

About NZXT
NZXT, a company built upon gamer’s dreams, hopes to create products that put consumers first. With the objective of designing unique products catered for hardware enthusiasts and gamers, NZXT has grown into a globally renowned brand recognized for dedication towards creating the next great gaming product. NZXT has won numerous awards from media and publications from across the globe with a product line spanning from gaming chassis, power, and gaming input devices. As a corporation formed by gamers, NZXT continues to expand into new horizons and push the limitings further with each product unveiling.
Our dedicated sales and customer service team will also work diligently to earn your trust and loyalty. All our products are built with high quality material and engineered in the best conditions.
NZXT products are designed and engineered in the United States and manufacturered overseas in China and Taiwan.
NZXT was established in 2004 in Los Angeles, California.
SPECIFICATIONS
| NZXT Guardian 921 – Specifications |
|
| Series | Crafted Series |
| Case Type | Mid Tower |
| Dimensions (W x H x D) |
206 x 459 x 522 mm (8.1 x 18.1 x 20.1 in.) |
| Cooling System | FRONT: 1 x 120mm blue LED fan (included) REAR: 1 x 120mm fan (included) SIDE: 1 x 120mm blue LED fan (included) |
| Drive bays |
9 Drive Bays |
| Material(s) | SECC Steel Chassis |
| Expansion Slots | 7 |
| Weight | 8.2 KGS or 18.1 lbs (W/O Power) |
| Motherboard Support | ATX, MICRO-ATX, BABY AT |
FEATURES
- NZXT Crafted Series Design: NZXT’s latest addition to the Crafted Series takes cues from gaming culture with elegant curves and a newly designed clear side panel
- Spacious Interior and Solid Construction: Built from solid .88mm and 1.00mm steel, the Guardian 921 gives the user ample space for large, high-end video cards and space for up to four internal hard drives
- Constant Temperature Monitoring: Three temperature probe monitoring system allows the user to constantly gauge thermals within the system at all times to prevent overheating
- Multimedia and peripheral inputs: E-SATA, Intel HD audio, mic, and two USB inputs are standards with the guardian 921 allowing for maximum peripheral input
- Silent Cooling: Comes standard with 3 120mm fans installed to maximize cooling performance with minimal noise
PACKAGING

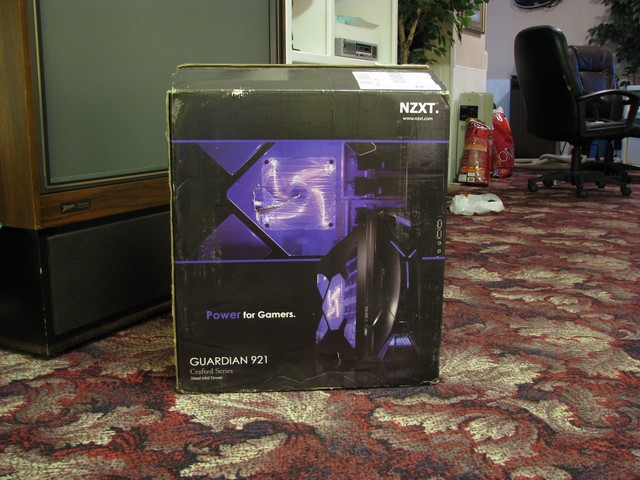
Guardian 921 Box Front
The box looks great except for the fact that the UPS guy didn’t seem to like it. It’s plenty big for the case, but not big enough for it to slide around on the inside.

Guardian 921 Box Side
The side of the box tells the buyer about all the specifications in four different languages.

Guardian 921 Interior Packaging
This case is centered in the middle of the box by 2 large styrofoam peices that keep it from touching all edges of it.
PICTURES

Guardian 921 Overview
This case looks like it’s ready to house some mad gear! This case has a unique a sleek design from other cases that I have seen and used.

Guardian 921 Back
Here we can see that the power supply loads at the top of the case. There is a 120mm exhaust fan, and some tool-less PCI slot covers. Also at the very bottom, NZXT has graciously offered us two water cooling holes to run tubes through the the outside in and vice-versa.

Guardian 921 Motherboard Side
Not too much to this side except for a slight indentation on the right side to make it easy for the user to remove this side panel.

Guardian 921 External Ports
This case has has the standard 2 USB, audio and mic jacks that just about every case has, but it also has an E-SATA port.

Guardian 921 – Everything Installed
Here you can see how my GTX280 graphics card has ample amount of room, even in this mid-tower case. There are quite a few cable management things built into various parts of this case, one being a small hole that you can see at the bottom under the blue things on my motherboard.
BUNDLED ITEMS

The Bundled Items
Along with the Guardian 921 mid-tower chassis came an installation guide, more than enough screws and standoffs, and quite a few of the tool-less drive installation brackets. The bracks have 2 pins on them and you stick them in the screw holes of the hard hard drives then just simply slide them into the bays.
Let’s see what this puppy can really do, and move on to the end result and conlusion.
TESTING
For those of you wanting know how this thing holds up to some abuse, this is definitely the right place. To test the chassis, I installed all of my components into it. Here are the components I used for this:
- ASUS P35 SE/EPU Motherboard
- Q6600
- Thermalright Ultra 120 Extreme CPU Cooler
- XFX GTX280
- Corsair 550HX PSU
- Western Digital 640GB
- Hitachi Deskstar 250GB

Everything Installed
From this picture you can see the that everything fits, and there is still plenty of room for expansion. Notice the two 120mm fans one at the bottom right, and the exhaust at the top left, however not shown here, the other fan is on the side panel that closes the case off. I’ve got two hard drives insatalled, and with the loading and unloading facing out of the case, they each took literally 30 seconds to put them both in. The DVD drive was installed at the top in the bay with the black tool-less insallation pushed to the right. In order to install it, all I had to to was slide it into the bay, push the black thing to the right, and lock it by pushing the black button that sticks out down.

The Entire system put together, up and running!
The picture above showcases this case surrounded by absolutely no light. As shown above, the lights are impressively bright, and light up a significant portion of my basement. The illuminated blue rectangle at the top left of the case is the temperature displaying LCD.

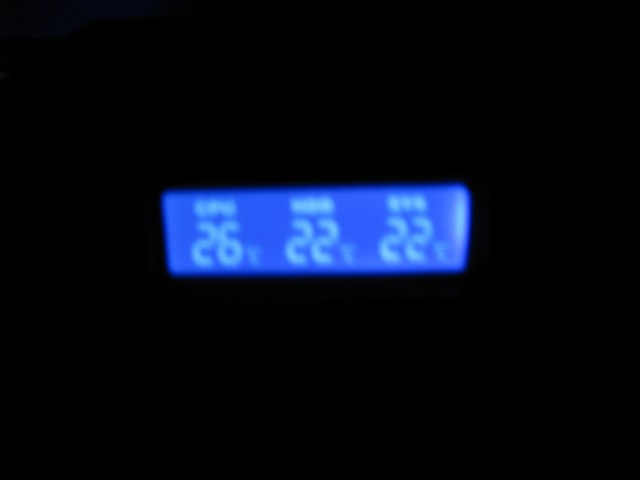
The LCD Temperature Read-Out
This nifty little screen shows you the temperature of the CPU, HDD, and the temperature of the case depending on where you place the temperature monitor. The readings are in celsius, and are very accurate. This screen is located at the top of the case on the front panel, just above where the reset and power buttons are.
CONCLUSION
Moving to this chassis from an Antec 900, I believe this case has stood up to the NZXT brand name. Offering features like the LCD temperature read-out, and some decent cable management, NZXT did a great overall job with this one. When installing my components, the only tool I needed was a phillips screw driver, and that was only used to tighten the screws on the motherboard and power supply. Every other aspect of the installation such as hard drive installation, PCI ports, and even the DVD drive installation was 100% tool free. Well, that is if you don’t count your hands as tools.
Having good air flow in a case is a must for gamers, however, that is something this product is lacking. With only 3 fans, it’s got plenty of room for expansion, and even some higher powered fans. Although it has a minimal amount of fans, this sucker is quiet! The loudest noise coming from the inside is the fan on my GTX280, which is folding so I always keep the fans going at 65%.
Cable management is another must have in cases made for gamers, and this case was able to provide several instances. The first being on the side of the power supply that is closest to the motherboard side of the case, there is a somewhat small hole there to there to guide your cables directly from the power supply to the back of the motherboard tray. This hole was a lot smaller than it could have been, and was a little tight getting all of my cables through. Next, near the very bottom of the case, just below where the motherboard ends and in the middle of the case, there is a tiny hole for small cables to come through. On the backside of that hole, there was barely any room to get the sound connectors to fit through so I could pull them to the other side, and it took some creativity to get them through.
Pros:
+ Looks really good, especially in the dark
+ Decent cable management features
+ Solid Construction
+ Very Quiet
+ Plenty of room for larger graphics cards such as the GTX280
+ LCD Temperature Read-Out
+ Tool-less design makes for extremely easy installation
+ E-SATA Port on the front panel
Cons:
– Airflow
– Low powered fans
– The exhaust fan doesn’t have LED’s
– Only 3 fans included
– A bit pricey @ $79.99
This chassis provides looks, quality, and performance all-in-one, and is bound not to disappoint you! The NZXT Guardian 921 case is the perfect case for those wanting to build a budget system, but also want a very good looking case.
Final Score of 8 out of 10 and the Bjorn3D.com seal of approval.

 Bjorn3D.com Bjorn3d.com – Satisfying Your Daily Tech Cravings Since 1996


