Looking for a mouse that not only has smooth moving capabilities , but has lightening fast response times . That can be adjusted on the fly from making precise movements on and off the battle field , too extremely quick movements with out ever having to go into a mouse configuration. Well I bring you a mouse that can, I bring you the Razer Lachesis Mouse. Lets Look at how well this mouse Performed.
INTRODUCTION
The mouse is the most essential piece of equipment of our computers. It not only allows us to easily access key areas of our Operating System, it also defines us as to who we are and how we go about doing that. Today, I am going to show you a mouse that can not only define us, but it will allow us to have even more control on how we can interact with our Operating Systems. This mouse has everything. It not only give’s us the ability to make precise movements in games, but it gives us that same precision that we need in our other day-to-day tasks with our programs. You can go to extreme speed by pressing a button, as well as go from one profile to another with out ever loading a program to change that profile. With just a quick click of a button, you can go from one profile to another. This is just a start of what this great mouse can do. So, whatever your true needs are of a mouse, this mouse can and will give it to you. Today, I bring you, The Lachesis Mouse By Razer.
About Razer
Razer collaborates with gamers to develop, manufacture and market cutting-edge gaming peripherals utilizing proprietary technologies that give gamers the competitive edge. We reinvented the computer gaming industry by bringing this competitive edge to gamers when professional computer gaming was in its infancy. In the mid 90s, with the advent of networked gaming and competitive first-person-shooter (FPS) games, gamers found that their legacy peripherals were inhibiting rather than enhancing their gameplay.
In 1999, the Razer Boomslang™, the stuff of gaming legends, was launched after much research. Featuring an unprecedented precision of up to 2000 dpi when other mice maxed out at 400 dpi, the Razer Boomslang, powered by proprietary opto-mechanical technology, offered up to five times the accuracy of other gaming mice. It came as no surprise when professional gamers widewide such as Jonathon “Fatal1ty” Wendell and Sujoy Roy readily adopted the Razer Boomslang as their gaming mouse of choice. In just two years, more than 100,000 Razer Boomslangs were sold by Christmas.
The next quantum leap came with the unveiling of the Razer Diamondback™ in San Francisco at the Grand Finals of the World Cyber Games 2004. The Razer Diamondback™ was the world’s first 1600 dpi optical gaming mouse. Powered by Razer Precision™, the Razer Diamondback was the first gaming mouse ever to sweep all the major gaming awards available at that time. It also outclassed an entire genre of gaming hardware to be awarded the highly coveted Gamespot’s Gaming Hardware of the Year 2004 accolade. The Razer Diamondback was considered the de rigueur gaming mouse of its prime with most of the leading gaming professionals adopting it as their weapon of choice.
Having led the technology arms race and overpowered competitors, Razer once again stamped its authority in gaming technology in the fall of 2005, by launching the Razer Copperhead™.
Sporting the world’s first 2000dpi laser sensor in a gaming mouse, the Razer Copperhead scored another world first by being an “intelligent mouse,” possessing 32kb of onboard memory powered by Razer Synapse™. It is also the fastest mouse today, utilizing a full speed USB bus when other mice are still low speed USB devices, and is up to 8 times faster in terms of data polling.
Shortly after the Copperhead, the Razer Tarantula™ was launched. It is the first definitive keyboard created for Gamers by Gamers, featuring anti-ghosting capabilities, 32kb of onboard memory powered by Razer Synapse, 10 programmable gaming hot keys and an optimized Hyperesponse™ gaming key-top with fully replaceable keys. The Razer Tarantula was launched at CES 2006 (Las Vegas) and immediately was a finalist in the Best of CES Show.
The realization that gamers also need excellent positional audio and crisp acoustics led to the launch of the Barracuda™ HP-1 and AC-1, Razer’s initial foray into audio. Hot on the heels of the Barracuda, Razer unveiled the Razer DeathAdder™ towards the end of 2006. Featuring a 3G Infrared sensor, 1800dpi and easily 2.25 times faster than conventional mice, the DeathAdder also has a response time of 1000HZ/1ms and 5 customizable buttons.
Right about then, Microsoft and Razer decided to co-develop and co-brand Microsoft’s next generation of gaming peripherals, culminating in the Microsoft|Razer Habu gaming mouse, and the Microsoft|Razer Reclusa gaming keyboard.
Further diversifying the product line for gamers, it was in the Spring of 2007 when Razer and THX announced a partnership on next generation audio products. With that, the Razer Mako™ was announced at CES 2007, Las Vegas, and garnered Wired Magazine’s ‘Most Innovative of CES.’ The Razer Mako is in a class of its’ own, with an innovative downward firing design eliminating distortion from the ‘desk-bounce’ phenomenon, which creates a rich, omni-directional soundstage with a broad and uniform response pattern.
Undoubtedly, Razer is the worldwide leader in terms of professional gaming peripherals. While we are light years ahead of our competitors in terms of technology, design and ergonomics, we are not resting on our laurels but are developing other key products and peripherals with the gamer in mind to bring that competitive edge to gameplay that Razer is synonymous with.
Headquartered in Carlsbad, California, Razer collaborates with gamers to develop, manufacture and market cutting-edge gaming peripherals utilizing proprietary technologies that give gamers the competitive edge. Razer products have earned critical praise and won multiple awards from around the world for their precision, sensitivity, usability and distinctions in product design. Engineered to near perfection, Razer’s reputation of being the leader in gaming peripheral technology is embodied in every single Razer product. For more information,
Razer – For Gamers. By Gamers™.
Since Introductions are done lets go over the specifications.
SPECIFICATIONS & PACKAGING
Let’s take a quick look at the Lachesis’ specifications and the contents of the box.
Specifications
- 4000dpi Razer Precision™ 3G Laser sensor
- 1000Hz Ultrapolling / 1ms response time
- Nine Independently programmable Hyperesponse™ buttons
- Variable true DPI setting adjustments in increments of 125 DPI
- On- The-Fly Sensitivity ™ adjustments
- Always-On™ mode
- Ultra-large non-slip buttons
- 16-bit ultra-wide data path
- 60-120 inches per second
- Nine independently programmable Hyperesponse™ buttons
- Scroll wheel with 24 individual click positions
- Zero-acoustic Ultraslick™ Teflon feet
- Seven-foot, lightweight, non-tangle cord
- Approximate size: 129mm (length) x 71mm (width) x 40mm (height)
- Gold-Plated USB connector
Packaging
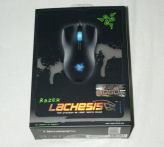
Here we have the front cover of the Razer Lachesis Mouse showing us an image of the the mouse. Also, it shows us that this mouse uses a 3G laser with a 4000 DPI.
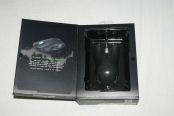
Once we flip open the front cover of this box, we see the Lachesis mouse to the right. On the inside top cover is another image of the Lachesis mouse and in green letters it has “Bringer Of Silent Death”
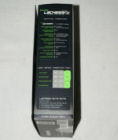
Moving the box over to its side we see the specifications of the Lachesis and a comparison to other mice.
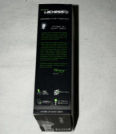
Flipping the box over to the other side we get a message from the Razer Guy.
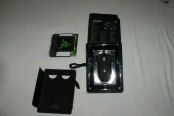
Here’s quick glimpse of the contents of what comes in the box when we first remove the mouse. We get a self sealing plastic bag (left) and the Lachesis mouse in a plastic encasement.
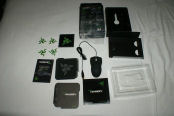
Here are the contents of the box laid out. From left to right, we see 2 sets of stickers of the Razer logo and a booklet with some of the items that Razer makes. Right below the stickers we have a card with the picture of the Lachesis mouse and printed on it “Bringer Of Silent Death” in green with a quick explanation of the mouse. Moving to the right we get a Certificate Of Authenticity. Right below this certificate is the manual on how to use the Lachesis mouse. It also contains a disc with the software to properly configure the mouse in Windows. Then right next to the manual we get a instruction booklet printed in 8 different languages. Finally, there is the Lachesis Mouse to the far right. If you look closer at the USB port on the mouse you will notice it is gold plated.
Since the specifications plus whats been included in the contents are done, let’s move over to the Overview and Software section to see exactly how this mouse can be configured.
OVERVIEW AND SOFTWARE
Overview
From Razer
Equipped with the revolutionary 4000dpi Razer Precision 3G Laser™ sensor, the Razer Lachesis™ gaming mouse takes on the same lethal traits as its namesake that will send shivers down your enemies’ spines. Add 32KB of on board memory, nine programmable Hyperesponse™ buttons, as well as an impressive 1000Hz Ultrapolling™ with 1ms response time, and you’ve got a formidable weapon in your arsenal of destruction. Victory beckons – move in for the kill.
Let’s take a quick Look at the mouse itself.
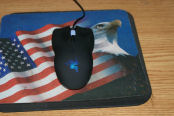
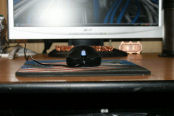
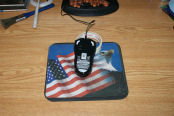
Here is a top view of the Lachesis mouse. As you can see, it dwarfs my mouse pad. Also, notice the scroll wheel and the emblem on the back of the mouse lights up. You will also see two buttons right behind the wheel.
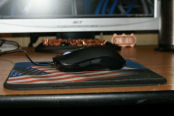
Here is s side view of the mouse. It has a sleek profile to it (considering the size of this mouse). We can also see two more buttons are placed on each side, giving use a total of 9 buttons to use. There is one on the wheel, two right behind it, and two on each side of the mouse (right and left).
This is the front view of the mouse. Here is what I liked about it. It has a shape similar to that of a Viper Snake. As you will notice, this mouse also has a wide stance to it.
Finally, we flip over the mouse on its back so that we can see what’s on its bottom side. Off to the top right is a profile button. This is used as one of the ways for the on-the-fly profile change or or it can be used to reset the mouse’s profiles. In the center of the mouse we see the 3G Lazer Sensor. Towards the bottom is the normal FCC information and the bar code. Up towards the front and back of the mouse are the Ultraslick Teflon feet that this mouse just glides on.
Software
Let’s take a look at all of the adjustments that can be done with the Lachesis Mouse.
It is required to use the included software for this mouse. The software will allow you to make a multitude of adjustments and macro buttons for each specfic need. Once we installed the included software and restarted the computer, we needed to click the new task bar icon that the software placed on our desktop for us. We were shown a configuration window with Razer Lachesis up top, the type of firmware being used with the driver version, and to the far right we have an update button. By clicking on this button, it will take you to Razer’s driver download page in your web browser where it can update the driver of the mouse and/or update the firmware of this mouse. Right below all of this we have the adjustments.
Just clicking around showing you the adjustments that can be made with each of the mouse’s buttons. As we can see, each button is completly programmable to your specific needs (for whatever game or program you use). Also, you can turn off the LED’s of the mouse.
Towards the bottom of the configuration window, we have some adjustments that control the response time of the mouse’s buttons (preconfigured settings) of 125hz(8ms), 500hz(2ms), 1000hz(1ms). Moving right below this setting is where can set the mouse DPI settings. These adjustments can be set by you to whatever you want them to be. Default settings are 500 DPI, 1000 DPI, 1500 DPI, 2000 DPI, and finally 4000 DPI. If you look closely at the DPI setting portion (2nd and 3rd Image), I adjusted the 2000 DPI setting to 2250 DPI.
Now, going back to the upper left corner we see an Advanced Settings tab and a Sensitivity tab. By clicking on the little arrow, you will bring these out. On the Advanced Settings tab is where we can individually adjust the X & Y axis, the Windows pointer speed, and Windows acceleration. Moving right to the Sensitivity tab, we have a sensitivity adjustment for the pointer, the scroll speed of the mouse wheel, and the on-the-fly sensitivity show on-screen option. Then, there is the pointers double click speed with test window, I did notice that by setting this to max, I couldn’t double click fast enough to break the glass in the test box(I guess my fingers are just not that quick).
Which brings us to the Advanced Functions tab. In order to use this tab you have to set one of the buttons to Advanced (I set button 7). This is where we can set up the macroing with the keyboard.
Finally, we can move back to the main configuration page to see where the profiles can be saved. Towards the bottom third of the configuration window you will see the active profile being used inside a green box. Buy clicking on this box, it drops down the profiling tab where we can save each profile, saving up to 5 profiles.
TESTING
I used various tasks to get a better feel for this mouse. I ended up only using a couple of different profiles to switch between during my testing. Profile 1 was set for extreme gaming with quick movements and the buttons were assigned to my particular need. I then made a second profile that was much slower and I reassigned each of the keys to different buttons just to see if on-the-fly profiling switching worked. The game that I used was EA’s Crysis Warhead. As most of us know, this game goes from needing to move very quick to needing the mouse to move more slowly. I also used Paint Shop Pro for my Windows based program to better test the precision movement of this mouse by cutting and pasting images in this program.
Once I gotten familiar to the adjustments of this mouse, I felt it was time to start playing. Due to the slightly odd shape and its slightly larger size, this mouse took a couple of hours for me to get used to its button placements and its high DPI modes. My wrist did hurt a little bit at first, but that ended up subsiding in time. As the more I got used to the mouse the more comfortable I got with it.
After a few minutes in Windows and starting Crysis Warhead with my personal mouse settings on the buttons, I noticed that this mouse moves incredible smooth across my mouse pad. Also, the turning movements in Crysis Warhead were moving incredibly fast and smooth. My head kept getting blown off by the KPA because I was turning around way too fast for me to see the enemy. So it was time to test the on-the-fly DPI adjustments. With my character freshly spawned, I hit the DPI adjustment button a few times, dropping the DPI down. Now, I noticed that I was starting to chew up what little acreage I had with my small mouse pad. Being unable to turn fast enough to track the multiple enemies I found myself facing and consequently, I kept getting my poor little ole’ head blown off again.
Armed now with the knowledge of my previous encounters (stop hitting buttons so many darn times), this time when I re-spawned, I immediately maxed the DPI out on the mouse and then clicked the DPI adjustment down once giving me a good turning speed. Finally, it’s the the KPA’s head’s that are getting blown off and not my own. I brought up the scope of the weapon, and looking through the scope my targeting reticule was moving all over the place, so I dropped the DPI adjustment down a notch or two. now I had a more precise movement of the targeting reticule in the weapon’s scope to better take out my enemies.
After a few hours or so of playing Crysis Warhead, I exited the game to see how the on-the-fly profile switching worked. Quickly saving the profile I was using for Crysis Warhead, I made a new profile with different pointer speeds, slower mouse clicking speeds, and changed a couple of buttons around, then saved that as a profile 2. When I restarted Crysis Warhead I switched to profile 1 and started my killing spree once again. I quickly switched from profile 1 to profile 2 to see if there was any difference. What I ended up finding out, and very quickly mind you, was that my little ole’ head was getting blown off again. The buttons were no longer where they were supposed to be, and I was moving much more slowly and I couldn’t respond fast enough to the multiple enemies that I was facing.
I closed out Crysis Warhead, went back into Windows and started up Paint Shop Pro to test this mouse in a photo type program. While I was in Paint Shop Pro, I began noticing that the mouse curser was either moving way too fast across the screen or, that when I adjusted the DPI down, it was moving way too slow. Also, when I clicked on the menus they were not opening up properly. So I brought up the mouse’s configuration window while Paint Shop Pro was running in the background, made an adjustmentn went back in to Paint Shop Pro and checked it. I did this for about 20-30 minutes until the mouse started working properly for me. My cutting, pasting, and being able to manipulate the images was a lot easier. Also, my hand wasn’t getting tired from moving the mouse around the work area.
THOUGHTS & CONCLUSIONS
Thoughts
The Lachesis Mouse performed extremely well in gaming, allowing us the quick response time needed to gun down the enemy. It also allowed us a slower, more precise movement that’s needed for more precise shots (with out having the target bouncing all over the place) with just a quick click of a button. The quick change from profile to profile was well thought out for this mouse. It allowed us, the user, to go from one game profile to another game profile quickly, or go from game profile to another profile for our favorite Windows programs without ever having to go through the mouse configuration to switch out each profile. Also, it gave us the ability to macro keyboard settings for each specific game or program and save key bindings to each profile as well. This mouse also includes on-board 32k memory. This allows us to retain the last profile loaded into the mouse (when moving the mouse from one computer to another) without having to install the software and having to reprogram the mouse again on a different computer. This mouse can do a variety of tasks. It’s not just only for gaming. It is very flexible and has a multitude of adjustments that can be made to better suit your personal needs.
Conclusions
The only things I found to be problematic were the odd shape and the slightly larger size of this mouse. This will make it difficult to get used to this mouse at first. The multitude of adjustments can be overwhelming as you find your self constantly going from game/program and to the mouse’s configuration to adjust this mouse for this or that particular application. I did a quick price check on Google and Pricegrabber to see what the price range is for this mouse and I found that this mouse runs anywhere from 60-90 U.S. dollars. You may also want to consider purchasing a large mouse pad to go along with this mouse if your current mouse pad is of a smaller design.
Pros
+ Being able to switch from profile to profile and make DPI adjustments on-the-fly without reloading the mouse’s configuration every time
+ 32k On-Board Memory on the mouse simplifies the switching from one computer to another without reinstalling and reconfiguring the mouse each time
+ Extremely smooth non-jarring movements
+ 9 fully customizable buttons
+ X and Y separate adjustments
Cons
– Odd shape and its slightly larger size may be problematic with smaller hands
– Pricing may deter some
– The multitude of adjustments that can be made might overwhelm people and having to go from application to configuration constantly may get tiresome.
Final Score: 8.5 out of 10 and the Bjorn3D Seal of Approval
 Bjorn3D.com Bjorn3d.com – Satisfying Your Daily Tech Cravings Since 1996

