As hard drives’ price getting cheaper, having multiple hard drives seem to be the trends. Now, wouldn’t you love to be able to mount them all in a place that’s easy to exchange them? Today, we will be lookin at ICY Dock MB454SPF-B Multi-Bay Backplane Module, a multi-bay backplane module that allows to mount multiple hard drives using the space of three 5.25 to house 4 SATA I or SATA II hard drives. Come join us and see all how this module performs.
Introduction
One of the best features about SATA hard drives is that they are hot-swappable (able to disconnect them without powering down the system). However, not many of us are able to take advantage of this great feature because most of the hard drives are mounted to the 3.5’’ slot and it would be somewhat a burden to take off the side panel in order to remove the hard drives (not to mention that many cases still have their hard drive cage facing to the back of the case instead of rotating them 90 degrees and facing to the side panel to provide easy removal). The solution for this problem is using the multi-bay backplane module, which basically uses a few 5.25’’ spaces to mount the hard drives, so the hard drives can easily be installed or removed.
A few months ago, I reviewed ICY Dock’s 5.25’’ removable enclosures, I liked the fact that the enclosure is really easy to use and the cool looks. However, the enclosure only houses one hard drive (which I bet man yof us do), so if you got a lot of hard drives, you would need to purchase many enclosures. It it not only impratical to do so, but also quite costly. Luckily ICY Dock also has the multi-bay enclosure to solve this problem. Today, we’ll be looking at ICY Dock’s MB454SPF-B, a multi-bay backplane module that allows to mount multiple hard drives. ICY Dock actually sells other multi-bay backplane modules that can accommodate 3, 4, or 5 hard drives. The MB454SPF-B that we are looking at today utilizes the space of three 5.25’’ to house 4 SATA I or SATA II hard drives.
Product features:
- Drive Fit : 4 x 3.5″ Hot Swappable SATA I or II
- Device Fit : 3 x 5.25″ device bays
- Internal drive security, exchangeability, expandability and maintenance capabilities
- Compact and space saving for multiple drive fit
- Durable aluminum built cooling
- Huge warm air outtake fan cooling that’s detachable
- Advanced drive monitoring system built internally w/ visual & audio indicators
Module Specification:
|
Item Number: Black |
MB454SPF-B |
|
Internal Host |
7 pin SATA |
|
Drive Fit |
4 x 3.5 “ SATA I / II |
|
Drive Bay |
3 x 5.25” |
|
Transfer Rate |
3Gb/sec. |
|
Insert & Extract connection Via |
15 pin direct hard drive connection |
|
Structure |
Aluminum body w/ partial plastic |
|
Drive Cooling |
Detachable rear outtake fan w/ aluminum heat dispersion |
|
Alarm Indication |
Audio & Visual |
|
LED Indication |
Drive activity/overheat/failure, Fan working/failure status |
|
LED Display Color |
Green : Device Power ; Amber : Drive activity/overheat/failure ; Red : Drive failure |
|
Drive Security |
Drive tray locking mechanism |
|
Dimension (L x W x H) |
220.0 x 147.0 x 127.0 mm w/ fan |
|
Weight |
3.50 lbs. |
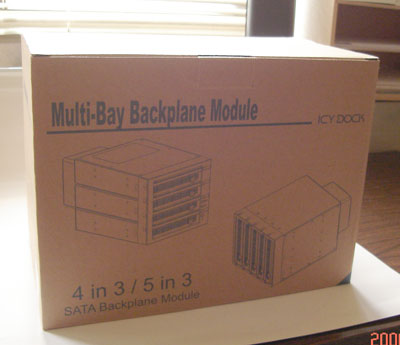
Let’s take a closer look at the unit. The box of the Multi-Bay Backplane Module is very plan looking, just a big brown paper box, nothing fancy.
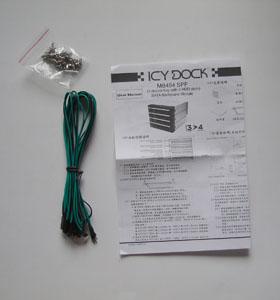
Well, the box is not the product, let’s dig in. Opening the box, you will see the Multi-Bay Backplane Module, a manual, a bag of screws, and cables.
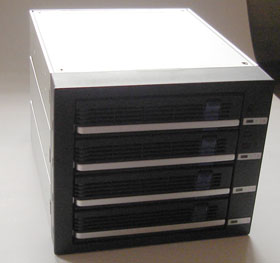
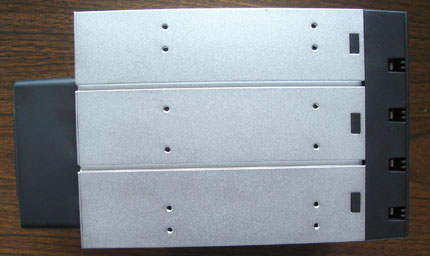
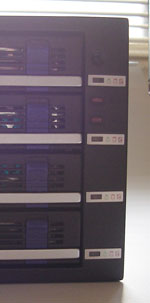
Opening up the box, you will see that MB454SPF-B fits into the three 5.25’ drive spaces to provide spaces for four hard drives.
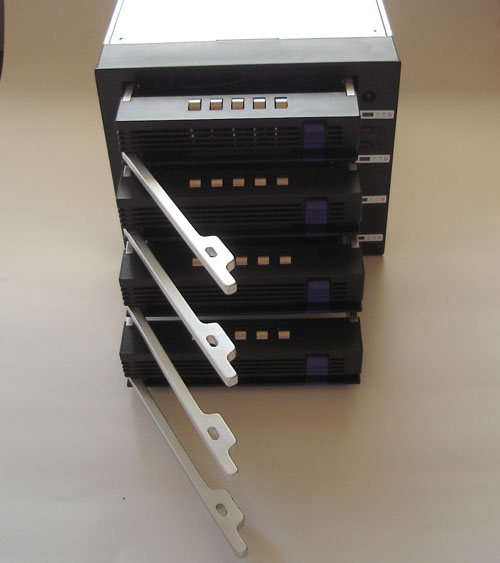
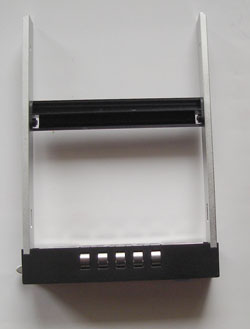
The hard drives are mounted to the caddy that slides in and out of the bay. The drive caddy is made up of aluminum and plastic. It has build in anti-shock technology to keep the hard drives secure. In addition, there are some vent in the front to allow air to flow into the bay and through the hard drives to keep them cool. The hard drives are secured into the caddy via screws on both side of the rail (be sure to remove the block in the middle of the caddy when installing the hard drives). The handle for the caddy has a spring so when you gently push the blue button, the handle will spring open. Push the caddy all the way back into the bay and push down the handle will close the tray.
The unit comes with a rear fan to keep the hard drive cool. The fan is removable, so if it gets in the way or it is making too much noise, you can always remove it. The unit is slightly over 7 inches (18 cm) deep without the fan and slightly under 8.7 inches (22 cm) with the fan. It is slightly smaller than most DVD drive when the fan is removed and slightly bigger than the DVD drive with the fan. The size with the fan attached shouldn’t post too much problem for most people unless you got a small system that does not have enough clearance or if you got one of the monster PSU, like the Enermax Galaxy 850W that was reviewed, which is much larger than standard PSU. For most people, the fan size shouldn’t post too much problem.
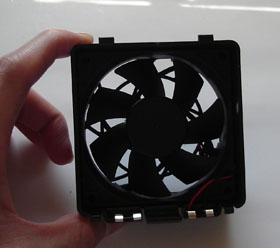
The unit has build-in feature to give warning when the cooling fan is damaged/failed and when the product overheats. When the fan stops working, the Fan Fail light will show red and the alarm will buzz. Pushing the reset button (on the front of the module) will disable the buzzer but the warning light will keeps in red until the fan is replaced or removed (ICY Dock states in the manual that the fan can be replaced without shutting the system off, but it is a bit hard to remove the fan from the module). Further, users can set the temperature at which the unit will give out warning. Three temperature can be set at 45°C, 55°C, and 65°C. When the unit goes above the preset temperature, the buzzer will buzz and the light will turn red. Hitting the reset button will once again turn off the light but the light will stay in red until the temperature is below the temperature setting. These are great features to have to keep the harddrives cool. One problem with these features is that it will only works when the fan is installed.
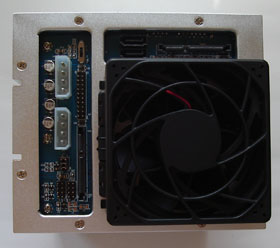
Removing the fan, you will notice the PCB. There are two areas where the connectors are located. One of them has one SATA data connector, one SATA power connector, two 4-pin molex power connector, and some cluster of regions of pins. These pins are used to indicate the hard drives’ status. The other region only has one SATA power connector and three SATA data connectors. When I first saw the two SATA power connectors and two 4-pin molex connectors, I was a bit puzzled as to how should I power the unit. I read the manual but unfortunately, I couldn’t find any information. After contacting ICY Dock, they told me that the 4-pin molex connectors is designed for people who may not have the SATA power connector on their PSU. If you got the SATA power connector on the PSU, you just need to use the two SATA power connectors and there is no need to use the 4-pin molex connectors. ICY Dock said that they will update this information to their manual as well as having labels on the enclosure.
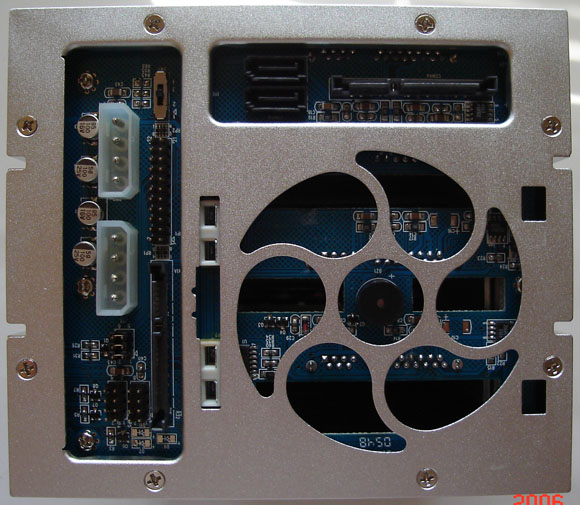
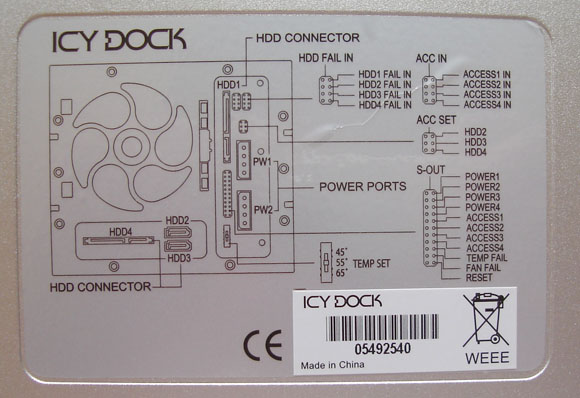
The HDD’s access status can be monitored using the cables included; however, the motherboard must support this feature in order for it to work. ICY Dock included all the needed cables to get these information from the motherboard to the back of the unit. The information on how to hook up the cable is printed on the enclosure, so it makes connecting them quite easy (no more searching for the manual). It’s a nice thought by ICY Dock. I guess ICY Dock could make it even easier by providing a cable which one end has all the connectors bundled together and other hand has individual connectors to connect to the motherboard, it would greatly simplified the installation process. Also, the cable connectors could have been color coded or labeled to assist installation. Still, it’s quite easy to figure out how to hook up the cables. ICY Dock does not include SATA data cables. I think it would be nice if ICY Dock can include some longer SATA cables. Given to the fact that most motherboards design the HDD to be installed in the 3.25 slot, they tend to place the HDD connectors close to the middle or the bottom part of the board, therefore, by putting the HDD into the 5.25‘’ slot, it may be a little bit far from these connectors. In addition, most SATA cables that comes with the motherboard or hard drives are 6 feet long only, so it may not bee long enough to route the hard drive to the 5.25” bay if you got a tall server case. Not a big deal, just need to buy slightly longer cable.
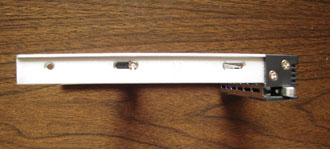
The side of the bay has mounting hole to assist the installation. It is the standard hole that is found in all DVD drives, thus it shouldn’t pose any problem with the installation. Also notice the grooves between the mounting holes, it is designed to fit the resting stands for the 5 ¼’’ drives.
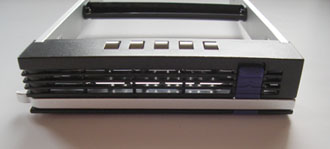
On the front of the bay, you will see a reset button and HDD power/failure indicator and access indicator for each hard drives. Also, you will see to LED for the fan fail and over heat indicator.
Impression and Testing
The installation process is fairly simple. There are couple of small problems that I encountered. First, the fan do gets in the way when you are trying to install the cables. I have one of those 90 degree angled SATA data connector, and the closeness of the fan to the connector makes it hard to connect the cable when the fan is installed. The solution to this is first install all the cables without the fan then mount the fan back to the bay. In addition, the closeness of the fan do also pushes the cable slightly. I do not have the straight SATA cables but I am assuming that if you are using a straight cablem, rather than using the 90 degreed angled cable, you should be fine.
One thing that I found out when I install the system is that the power connector on the bay actually works on all 4 hard drives. You can hook up either one of the 2 SATA power connectors and use that to power any of the 4 hard drives (provided that you hook the data to the right drive). The data connector, however, do need to be hooked to the right drive and right connector in order for the system to recognize the hard drive. Since I do not have extra SATA hard drives during the review period, I couldn’t test to see if the bay requires both power connectors to be plugged-in in order for all four hard drives to function or not.
Testing System
- Processor: AMD Athlon 64 X2 4200+ Manchester
- Memory: 2x G.Skill Extreme Series (F1-3200PHU2-2GBZX)
- Motherboard: DFI Lanparty nF4 SLI-DR (BIOS NF4LD406)
- Graphics Card: Gigabyte GeForce 7800 GT (GV-NX78T256V-B)
- Sound Card: SoundBlaster Audigy 2
- Power Supply: Enermax Galaxy 850W EGA850EWL
- Testes hard drives: Maxtor DiamondMax Plus10 250GB Hard Drive (Maxtor 6B250S0), 250GB, 7,200 rpm, 16 MB Cache, SATA 150
The hard drive status actually works without the cable on my Maxtor hard drive. The light blinks as it was stated in the manual. Since my hard drives usually runs below 40 degrees, I couldn’t really test the temperature sensor probe on the bay because the lowest it allows to be set is 45 degrees. From previous reviews, I have shown that the SATA enclosure that uses the SATA natively doesn’t cause any performance hit. Rather than doing a full benchmark, I decided to run a quick HD Tach to see if there’s any degradation in the performance.
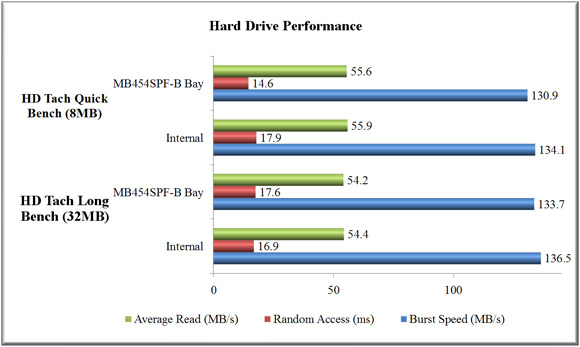

As you can see the performance is very similar. When the hard drive is mounted to the MB454SPF-B bay, the burst speed is slightly lower compare to when the hard drive is connected directly to the motherboard. The difference is less than 2% so it is hard to say if this is real performance hit or just fluctuation in the benchmarks. The average read speed, random access time, and CPU utilization all are fairly comparable whether the hard drive is connected to the motherboard directly or through the MB454SPF-B bay.
Conclusion
What can I said about ICY Dock’s MB454SPF-B Multi-bay backplane module? It’s a great little tool for the people who have multiple hard drives and constantly in need to remove them. Not only that it supports SATA I but also SATA II. The module is well constructed and easy to use. The product is currently selling at a price around $120 on Newegg and PC Pitstop. It’s a bit expensive for average home-users; however, if you do routinely remove the hard drives, or if you are running RAID or a home server, having this module bay would be an invaluable tool when it’s time to replace the hard drives. Overall, this is an excellent product. For those people who are looking into buying this module, you need to be sure check couple of things. Make sure that you have enough 5.25’’ space for the enclosure and make sure that you have enough clearance on the back of the 5.25’’ bay if you plan to use the fan.
There is a little recommendation that I wish ICY Dock has incorporate into this module bay, a key lock. Unlike many of previous ICY Dock product, this module bay does not come with a key lock. It is unfortunate as by leaving the drives free from access without any lock, it has render the hard drives wide open for any potential thieves. I wish ICY Dock can add a key lock to the unit in the future release so that the data can be secured.
ICY Dock MB454SPF-B will recieve a 9 out of 10 score (extremely good) and won our Seal of Approval for its good performance and ease of use.

Pros:
+ Easy to use
+ Sturdy construction
+ Support SATA I and SATA II and hot-swap
+ Removable exhaust fan
+ HDD status indicator and temperature sensor
Cons:
– A bit expensive for average home users
– The fan gets in the way during installation (although you can remove the fan if you like)
– No key locks for the drives


