We take a look at Gigabyte’s new liquid cooling kit.
Introduction
As the major processor makers cram more transistors on a wafer, the amount of heat processors generate increases. While air cooling techniques are still sufficient to handle the greater heat output, much better solutions exists. Using a kit with parts pre-selected can often times be better than a similar do-it-yourself system and also cost much less. In this review we will look at the water cooling alternative with a complete kit provided by Gigabyte Technology – the 3D Galaxy Liquid Cooling System.
Features & Specifications
Features
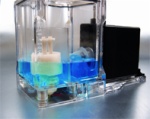
- Combined pump and reservoir for easy filling
- Baffle in reservoir that helps remove air quickly
- Relay built into pump/reservoir assembly so the pump turns on/off with the system
- Automatic shuttoff of system if water level becomes too low when using the relay
- Fan mounted on the waterblock for MOSFET cooling
- Cool blue LED’s
- Radiator fan speed control
Specifications
| Water Block | Dimensions | 68 x 92 x 30 mm |
| Material | Cu base + Plastic Top | |
| MOSFET Compliant | Yes | |
| Pump | Dimensions | 61 x 60 x 46 mm |
| Maximum Capacity | 400 L/hr | |
| Noise | 20 dBA | |
| Life time | 70000 hr (MTBF) | |
| Bearing | Ceramic bearing | |
| Radiator | Dimensions | 125 x 197 x 64 mm |
| Material | Aluminum | |
| Fan size | 120 x 120 x 25 mm | |
| Fan Connector | 3 pin | |
| Reservoir | Dimensions | 75 x 75 x 92 mm |
| Capacity | 0.3 liters | |
| Tubing | Dimensions | 1/2 inch ID x 7 feet |
| Material | UV sensitive flex vynil | |
| Coolant | Volume | 0.6 liters |
| Color | UV sensitive blue | |
| Campatibility | Supported sockets | AMD: 939/754 Intel: 870/670/570/478 |
| Supported cases | Any tower* |
Package Contents
 |
 |
 |
 |
 |
 |
 |
 |
 |
Installation
First, I unpacked everything from the box but left the items in their packages to show it off. Next I took the radiator assembly and figured out if I wanted it inside or outside the case since it gives you both options if you decide to take the radiator out of the shroud. After that, I laid the tubing out and cut it. With the tubing as flexible as it is, it was really easy to cut with just a Swiss army knife.
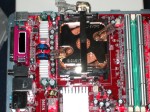
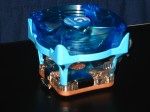
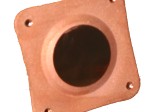
Once I had the three tube pieces I needed, I took to mounting the block to the board. Included in the kit is an assortment of clips and brackets to fit any of the sockets listed on the previous page. All that is needed for a socket 754 was a retention bracket, so mounting it to the board did not require any changes. Thankfully, the block does not come with a thermal pad and included in the kit is some thermal grease. If you are not too liberal with it you might be able to get a couple mounts out of it. In my case, I mounted it a few times to make sure it was on correctly and that I was getting the right temps. Again, this whole process is very simple. The only problem I noticed with the block is that it does not fully cover the heat spreader on the processor. The corners of the heat spreader are left bare due to the circular base.
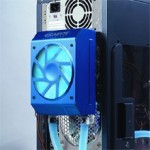
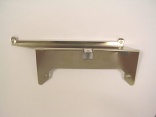
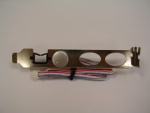
Next came mounting the radiator. As I said, it can be mounted inside the case if it has a 120mm fan port, or using the included mounting bracket that attaches to the top of the radiator and the bottom of the power supply, it can be mounted on the back of the case. The instruction book did not make it blatantly obvious as to how the bracket should go on, but it only took a minute to figure out. A fan speed controller also comes with the kit and is part of the PCI pass-thru bracket for the tubes. This is the only downside to the fan controller because it is at the rear of the case, which makes it rather hard to adjust.
With the block and radiator mounted, it was time to mount the pump. Included in the kit is a 3-inch strip of Velcro. One side sticks to the case and the other to the pump. I found this to be very handy when I needed to set the pump just outside the case to fill it, because then I could just stick it back into place. The other option is to screw it to the bottom of the case with the hole provided. It is designed to mount this way in the Gigabyte 3D Aurora cases. Now that I had the pump mounted, I put the tubes and secured with the included hose clips. Although the clips do not close tight enough for my liking, the tubes do squish enough to create a good seal. To finish the pump installation, all that is left is to take the wire harness and plug it into a 12v plug from the power supply. To get the auto power off on lower water level, the power switch pin will also need to be hooked to the wire harness.

Finally, it is time to fill the system and turn it on. Filling the system was the easiest experience I have had filling a system. The homemade kits I did were a pain to fill. With this, there is very little backflow from the pump, so all it took was filling the reservoir full twice and then about half way on the third time. Took less than 2 minutes to do. Now that it is all installed and ready to run, it is time start the testing.
I thought the best way to show off the features would be to capture them live. Below are a couple videos of the system in action. The first is as I was filling the system and letting it shut-off the PC when it ran out of liquid. If you turn your volume up a little, you can hear it beep when it runs out. The second shows it all running in the dark making some cool effects with the turbulence above the LED in the reservoir. These are encoded using XviD, which is free and open source.
Testing Results
Basic System Specs
- AMD Athlon 3200+ (2GHz, 1MB L2 Cache)
- Leadtek Winfast K8N
- Allied 400w PSU
Testing Equipment and Methodology
To measure the CPU temperature, I used the diode reading using as reported by the Winbond chip using the nVidia nTune application, which was real handy, because I could log the temperature every 30 seconds to see the trend. To measure the fan speed, I used SpeedFan, which reads from the Winbond. The onboard readings have been known to be slightly off, and I was unable to find information for this particular board, so as far as I know the readings are correct. To measure the water temperature, I used an Oregon Scientific digital thermometer with a temperature probe from Lowe’s. I simply stuck the end of the probe into the reservoir on quiet side of the baffle. The testing methodology was very straight forward. At each fan setting, I waited 15 minutes for the temperature to stabilize before taking a reading. To generate heat on the CPU, I used Stress Prime 2004. Now, on to the results.
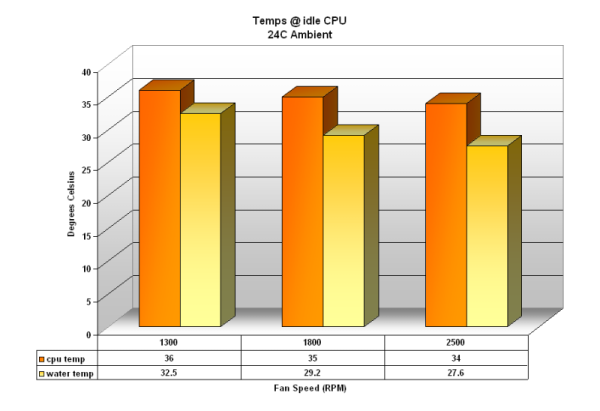
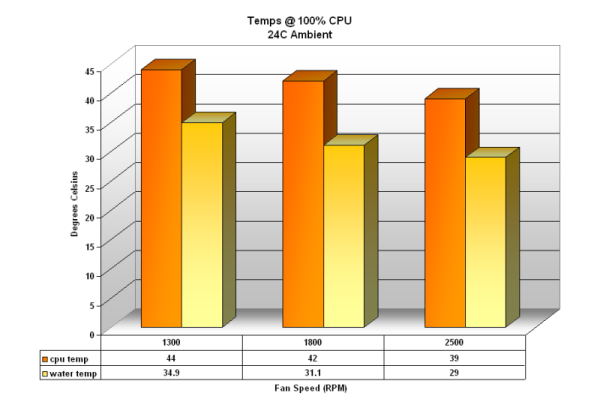
With the CPU idling, the temps are very good, in the mid 30’s. I noticed that the radiator does a very good job of cooling the water as the air flow is increased, but the block appears to be rather inefficient as the CPU temps do not scale with the water temps. I attribute this to the thick base on the block.
Running the stress test on the CPU really increases the temps by at least 5C with the fan at full speed and 8C with the fan at low speed. Again, there is a large spread between the water temp and the CPU temp, but the CPU temps scale much closer to the water temps.
Conclusion
The 3D Galaxy Liquid Cooling kit is a good performer for an entry-level kit. A few improvements could be made by not using the radiator/fan assembly just mounting the radiator to the case and using a different block that completely covers the heat spreader. The kit is very easy to install and fill and can be completely internal. The fan is very quite at 1300rpm, tolerable at 1800rpm and down right loud at 2500rpm. The inclusion of a fan to put on the block to cool the MOSFET components is a huge plus as it should increase the lifetime of the motherboard.
- Easy Installation
- Easy to fill
- Good temps at little noise
- Safety shutoff
- Built-in power relay
- MOSFET compliant
- Pump’s buzzing noise
- Block does not fully cover processor
 Bjorn3D.com Bjorn3d.com – Satisfying Your Daily Tech Cravings Since 1996
