Thermaltake is now offering a case for the LAN party goers out there – the Xaser III Lanfire. Does this smaller, lighter version of the popular Xaser III case have what it takes to make a good choice for your current or next PC? Read the review to find out.
Introduction
Thermaltake is a company that needs no introduction among enthusiasts of great CPU coolers and cases. The company also sells various other cooling products, from external liquid cooling systems to VGA coolers, and various other products like keyboards and power supplies. And in true Thermaltake fashion, most of their products have some unique quality, whether it is in the style or the function. With the Xaser line of cases, Thermaltake has gained a lot of fans of their unique and interesting case designs. To appeal to the gamer on the go, Thermaltake recently released the Xaser III Lanfire VM2000A. I don’t think that Thermaltake was struggling to gain acceptance from the LAN party crowd; the company just wanted to make a bolder statement in the segment to compete more directly with the other cases out on the streets that are marketed to LAN party gamers. The Lanfire version of the already popular Xaser III series was obviously made for travel. It was made smaller and weighs about 4.5 kg less than its bigger brother, the Xaser III Super Tower. Obviously, this move was to make it a more appealing chassis for a LAN rig. Let’s see if Thermaltake has accomplished their goal with this new case.
Specifications & Features
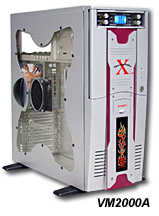
The specs and features of the Lanfire illustrate Thermaltake’s desire to add a lot of features to its first LAN-centric offering. The chassis comes “pre-modded” with a side panel window shaped like an ‘X’ and the EL Flash Fireball in the front panel. These are the types of features that make a system stand out at a LAN party. And to make your every day computing more convenient, the Lanfire has front panel USB 2.0 and FireWire ports and Hardcano fan controller with an alarm and an LCD for temperature monitoring.
Specifications:
- Net Weight: 4 kg (8.8 lb)
- Case Dimension (H x W x D): 440 x 180 x 460 mm
- Drive Bays: 3 x 5.25″, 2 x 3.5″(external), 2 x 3.5″(internal)
- Material:
- Chassis: 0.8 mm all aluminum made
- Front Panel: silver color – ABS plastic; red color – aluminum made
- Expansion Slots: 7
- Motherboard Compatability: standard ATX and micro ATX
Features:
- Thermaltake EL Flash Fireball in front panel
- Included Fans:
- 90 x 90 x 25 mm (1800 rpm, 21 dBA) in rear panel and side door
- 80 x 80 x 25 mm (2050 rpm, 21 dBA) in side panel and front
- Retractable foot stands
- “X” type side panel window
- Hardcano 5.25″ Drive Bay
- 4 VR function fan speed controller
- Temperature monitor LCD with alarm
- Record and adjust presetting temp (blue back light)
- Alarm function with red light warning
- °C/°F display switch
- Front panel lock
- Front Ports: 2 x USB 2.0 & 1 x IEEE1394
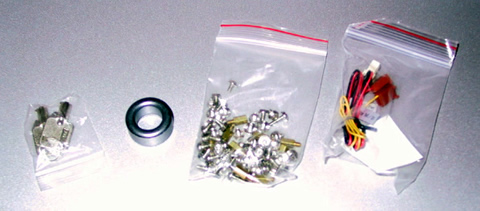
Thermaltake includes with the Lanfire the usual package of various screws, keys, an adapter to change one of the connections on the Hardcano to accept a 3-pin connector, and a metal ring that I’m clueless about.
A Closer Look
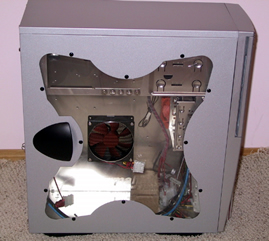
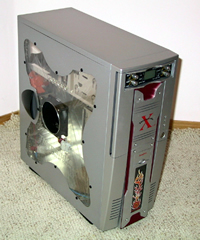
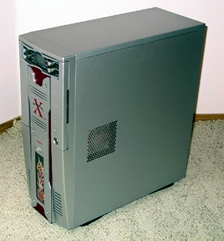
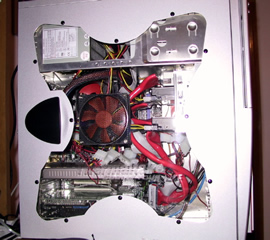
The Lanfire’s red highlights compliment its silver color to make a good-looking case. As you can see in the first picture below, the side panel window is large enough to allow you to show off all your hardware if that’s your thing. Just throw in some cold cathodes and let the exhibition begin. Later on, we’ll see what it looks like with my hardware in the case so you can get an idea of what this puppy looks like all loaded up. Another thing you can see in the first picture is the black piece of plastic in the rear of the side panel. That is a handle to help pull the panel off. I think it is ugly and detracts from the otherwise nice looks of the case. I think a panel should come off easy enough that it does not need a handle, and that is why I am not a fan of this one.
 |
 |
 |
 |
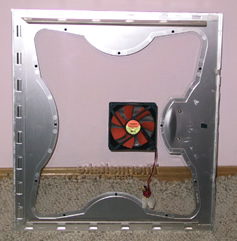
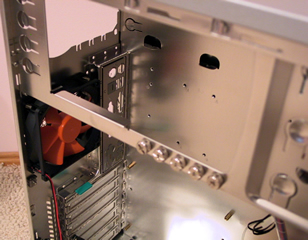
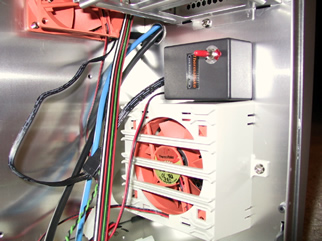
Speaking of fans, the Lanfire comes with a nice cooling system that consists of four fans – two 80 mm and two 90 mm. You can see all of these fans in the pictures below. One 90 mm fan is installed on the back panel, and the other is on the removable side panel. The other side panel holds one of the 80 mm fans. The other 80 mm fan is in the lower front of the case for air intake, and it is installed in a fan cage.
 |
 |
 |
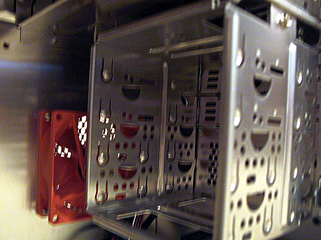 |
In the upper, right picture above, you can see the thumb screws that Thermaltake includes with the case. I will discuss their use on the next page where I discuss my installation experience with the Lanfire. The EL Flash Fireball switch can be seen in the lower, left picture. It is a simple On/Off switch and is located above the front fan. Unfortunately, this means you have to remove the side panel in order to toggle the Fireball on or off. And in the lower, right picture, you can see the 3.5″ drive drive cage. This cage is removable and can hold up to four 3.5″ devices.
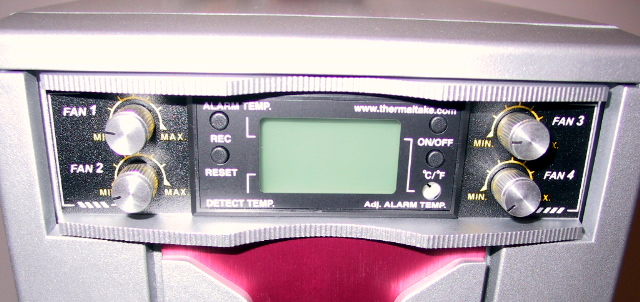
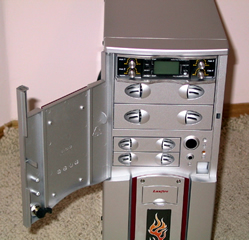
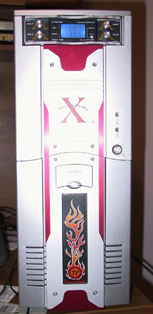
The Hardcano fan controller is another main attraction of this case. As seen in the picture below, it features an LCD for displaying temperatures and the ability to control four fans. You can set it up to control the four case fans or the four case fans and another fan, like the CPU fan. The latter option complicates things a bit, but it may be worth it for people who would like to be able to make their PC as quiet as possible when they do not need the best cooling possible. A thermal sensor is included with the Hardcano. Thermaltake provides some thermal tape so that you can secure the sensor to the bottom of your CPU.
The Hardcano’s LCD glows blue under normal operation but changes to red when the detected temperature is above the alarm temperature. Also, the LCD can be turned off, and the temperature units can be set to either Celsius or Fahrenheit.
Working with the Case
Because I think it is very important that a case is easy to work in, I decided I would transfer my entire hardware setup to the Lanfire from the Chieftech X-Sonic Mid-Tower Case that I’ve been using ever since I reviewed it a while ago. Naturally, I will be comparing the two a little because that is what I like to do. Keep in mind that the X-Sonic is actually a little bit shorter than the Lanfire. Here’s a list of the hardware I put in the Lanfire:
- Leadtek nForce2 Ultra 400 Deluxe Limited Motherboard (review)
- AMD Athlon XP 2000+ with Thermaltake Extreme Volcano 12 HSF (review)
- Two HDDs and one FDD
- Two optical drives
- Leadtek WinFast A350 TDH MyVIVO (review)
- Hauppauge WinTV PCI card
- Leadtek WinFast K7NFAL ACR card
- Enermax EG465P-VE(FC) Power Supply (review)
The first thing that caught my attention with this case was unfortunately a bad one. I had more trouble than I should have when removing the side panel. It even has an annoying handle to help remove it, and it was not really much help. I am not sure what the problem was. The panel just would not slide as easily as I would expect it to. Also, it would be nice if thumbscrews were used instead of regular screws for the side panel. Apparently, Thermaltake decided that thumbscrews were better for the drives than the side panel. I don’t understand why we can’t have the best of both worlds.
After getting the side panel off, I was able to start loading it up with hardware. I started with the power supply. It was very easy to slide the power supply into place and fasten it to the back panel. The Lanfire even provides a little extra width for beefier power supplies.
Before getting anything else in the way, I installed the motherboard next. My full ATX form factor nForce2 mainboad was a tight squeeze, as it is with many mid-tower cases. However, this one seemed to be worse than others I’ve worked with. I had to be very careful with the placement of my hands or they would get in the way, preventing me from being able to lower the board into the case. Once the motherboard was in the case, though, I had no problem mounting it and getting the connectors into the back I/O panel. Unfortunately, the very nice I/O plate that the case comes with did not work with the motherboard, so I had to use the cheap one that came with the motherboard instead.
Installing drives in this case was a little bit more interesting than I would have liked. It started off fine with the 3.5″ drive cage detaching from the case easily enough after removing a couple screws. Thermaltake provides thumbscrews for installing drives and insists (in the manual) that you only use one per drive. If you have five drives, as I do, one per drive is what you would have to do unless you would prefer to use regular screws on the drives. The thumbscrews are not the only thing holding the drives in place. The drive bays are designed with “tabs” that provide force on the drives to hold them in place. These “tabs” and one thumbscrew do seem to suffice for holding drives in place. In the picture below, you can see the thumbscrews and all the drive bays and their “tabs” (little Q-tip shapes). Up to this point the drive installation was fine. It was when I tried to hook up the IDE cables that I ran into some trouble. Since the two 5.25″ bays are located at the very top of the case, the IDE connector placement on the installed motherboard becomes a critical factor in determining how long of cables will be needed to connect to the drives. The IDE connectors on the Leadtek motherboard that I installed are near the bottom of the case. I was unable to get both optical drives connected with a 24 inch cable! Maybe if I would have worked at it more I could have succeeded, but I was frustrated and decided to give up on it. I seriously doubt that I could have made it work. I would suggest planning on the possibility of needing really long cables with this case. Since the 3.5″ bays are located under the 5.25″ bays, I had no problem whatsoever hooking them up.
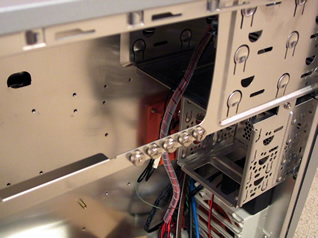
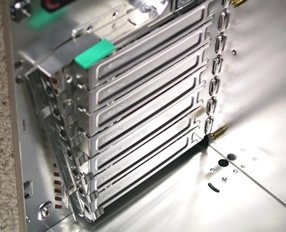
Adding my three expansion cards was better than I have been used to with the X-Sonic case. Actually, the main issue I am referring to is the ease of installing the rather portly Leadtek A350 (with its TwinTurbo II cooling system). Because the 3.5″ bays are located higher in the Lanfire, none of the drives were in the way when I installed the video card. That was a relief. Also, Thermaltake employs a unique securing mechanism, seen in the picture below, for the expansion slots. None of the cards or other devices in the slots needs to be screwed in, the “lever” is simply snapped into place to firmly secure all components in their slots.
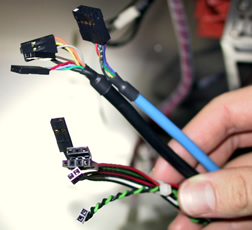
One of my favorite little niceties included with this case are the front panel connector cables, pictured below. The FireWire cable is a single connector and the USB 2.0 connectors are grouped to make plugging them in much easier than it is with those cases that have separate connectors for each wire. The case wires for the power switch, HDD LED, etc. are also shown (the bottom set of wires) in the picture below.
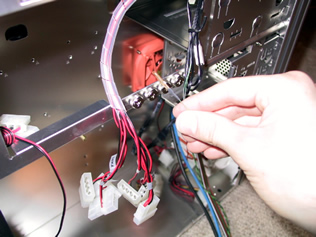
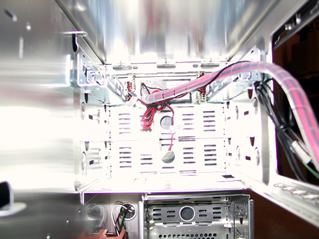
Hooking up all the power, including the Hardcano fan controller was my last step in this installation. The left picture below shows all the connectors and the thermal sensor for the Hardcano, and the one on the right shows how the cables come out of the back of the Hardcano, which is mounted in the upper 5.25″ bay. I think hooking up the Hardcano would be a bit intimidating to a complete newbie. I admit I am a newbie to fan controllers, but I did not have too much trouble hooking this thing up. It took more than a few minutes because you have to manage your molex power connectors well when you’re connecting four fans that need to be connected to power and the controller. That would be simple enough, but combine that with five drives, a video card, a HSF unit, and the EL Fireball that all need power as well, and now you’ve got a somewhat daunting task in front of you. I eventually fed power to everything that needs it, and then I was left with two molex connectors from the Hardcano that I’m still puzzled about. They have a label reading “For Power Supply” on them, with only two pins in them. Well, I did not connect them to anything and all seems to be working just fine. Unfortunately, the manual did not mention them, and I could not find any information on Thermaltake’s website to shed some light on this subject.
 |
 |
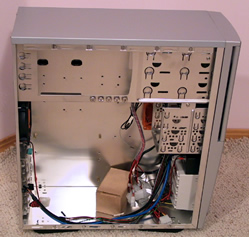
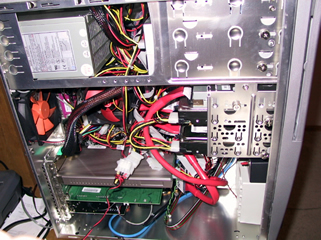
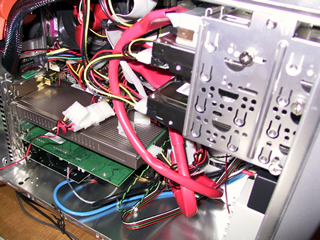
Here are some final pictures of the system. As you can see, it got a little crowded in the middle of the case, with all those cables. With a little work, I’m sure I could get a lot of that clutter cleared up.
 |
 |
 |
 |
Conclusion
I have mixed feelings about this case. Many of my grievances with this case seem to be due to personal taste and not flaws in the case; however, some things about the Lanfire just do not seem to make sense to me.
For a LAN rig, this case could please some people, but I don’t think everyone would be thrilled with it as a LAN box. It is lightweight, and fans of Thermaltake’s Xaser series of cases would probably be impressed by it. As for me, I’ve never really been a big fan of them, mainly because of the door on the front. I’ve never seen any good reason to have a door on the front of a case. OK, so you can lock it. Why would I want to lock it? I’m not sure. Maybe I have my brand new copy of Max Payne 2 in there and I don’t want anyone to be able to steal it. Why would anyone go after that when they could just pop the side panel off and get the expensive video card in there? Obviously, a door with a lock does not seem necessary to me, but others must like it or Thermaltake probably wouldn’t put it there.
The Lanfire does come packed with features, and for barely over $100 at newegg.com, it seems like pretty good deal. The Lanfire is almost all aluminum, with the most notable exception being the ABS plastic front panel. I am sure Thermaltake did this to help keep the price down on this case, since the mid-tower case market has become highly competitive as of late. The Lanfire also features the Hardcano fan controller, the EL Fireball, front USB 2.0 and FireWire, an X-shaped side panel window, and four fans. One thing I really appreciate is that all four fans seem very quiet, relative to the fans I had in my other case. Even better is that this does not cause problems with cooling. This case’s temperature was nearly the same as the temperature in the X-Sonic case.
Overall, my experience with this case was decent. Working with the case was not my most enjoyable experience with a case. That’s for sure. It does have its niceties, though. Being able to slide a drive into a bay and then screw in just one thumbscrew makes all drive installations easy and quick, unless you have problems with cable length, as I did. Inadequate cable length can easily be fixed, though, by buying longer cables. And, cabling experiences will surely vary due to IDE connector placement on motherboards. Adding a rather large GeForceFX 5900 video card was easy because the 3.5″ drive bays are located above (when the case is upright) the AGP slot. That was definitely a positive experience.
Pros:
- Quiet fans (and it comes with four of them!)
- Easy drive install
- Very light
- Front USB 2.0 and FireWire
Cons:
- No thumbscrews for side panel
- Motherboard IDE connector placement could necessitate cables longer than 24″
- Big, black ugly handle on hard to remove side panel
Final Score: 8 out of 10
 Bjorn3D.com Bjorn3d.com – Satisfying Your Daily Tech Cravings Since 1996
