Aluminum cases have been quite popular over the past couple years, and it seems as if regular old steel is the only other option out there if you don’t want aluminum. Well, that is until Enermax decided to produce a titanium case! Check out our review of the CS-B031-TBB titanium case from Enermax.
Introduction
When I found out that I was going to be receiving the Enermax CS-B031-TBB Titanium case to review, I was very excited. I am somewhat of a racing/rallying buff and when I hear the word titanium, I instantly picture the very expensive, lightweight but very durable skid-plates on Formula 1 racing cars. Titanium is known for its extreme strength-to-weight ratio. Titanium is as strong as steel, but it is 45% lighter. It is 60% heavier than aluminum but twice as strong. There is a flip side of course, as titanium is also known for its extremely high cost.
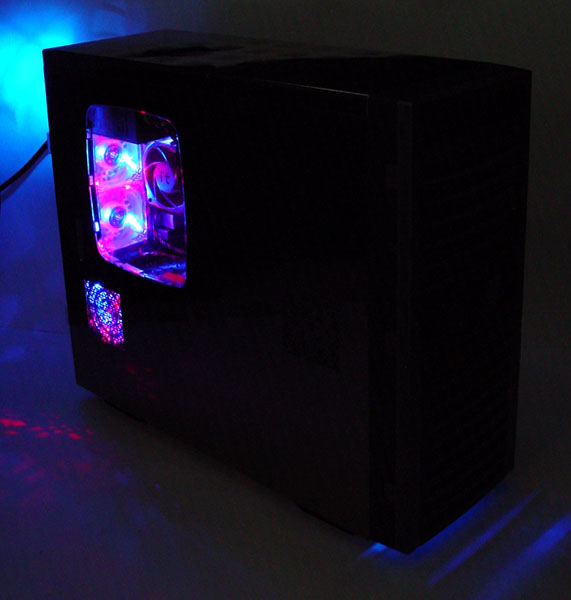
All I could say when I first saw the case was WOW. The construction is immaculate. I immediately got a sense that some serious thought was put into the making of this case. The case is solid in construction without being too heavy and is very aesthetically pleasing. Boy is it SHINY!
Packaging
Packaging is an area I find very significant as I generally have to put whatever Im getting through some long shipping trips with several stops since I live in Barbados. With these long trips of course comes high risk of serious abuse and damage. Packaging normally does not seem to be covered very extensively in reviews either, but I will try to change that norm.
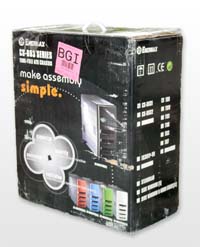
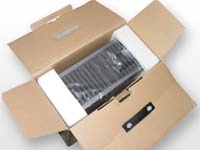
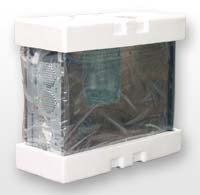
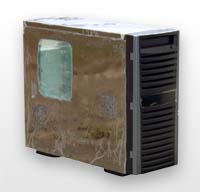
The packaging for the ENERMAX CS-B031-TBB is very good; it survived the trip from Enermax to my freight forwarder in Texas and then down to me via airfreight. The box is made of very thick corrugated cardboard, and the case has protective plastic lightly adhered to all the beautiful panels. It is then wrapped in another clear plastic bag. All this together is then nestled neatly into the foam padding, providing a very safe package for transport.
Features
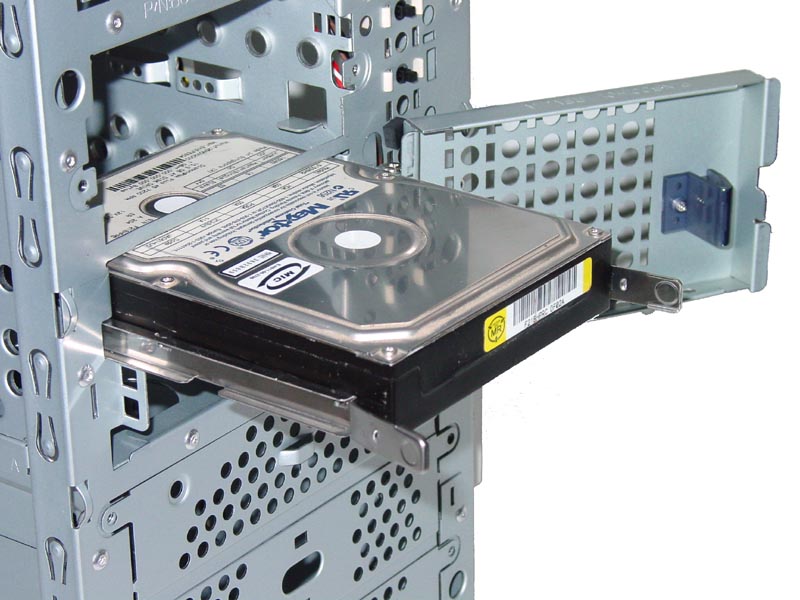
- Special screwless rail kits for 3.5″ and 5.25″ drives
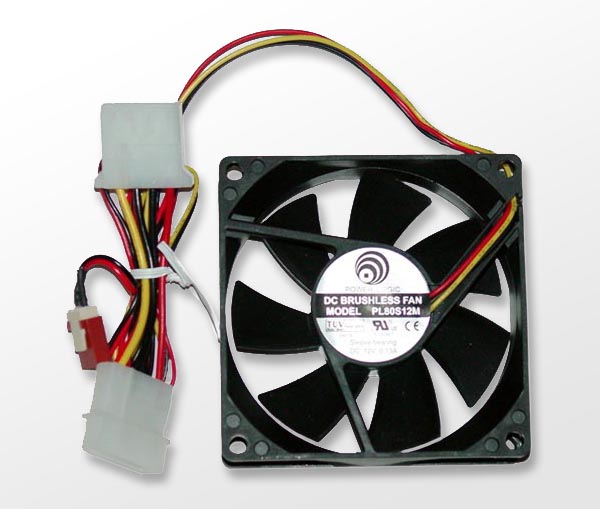
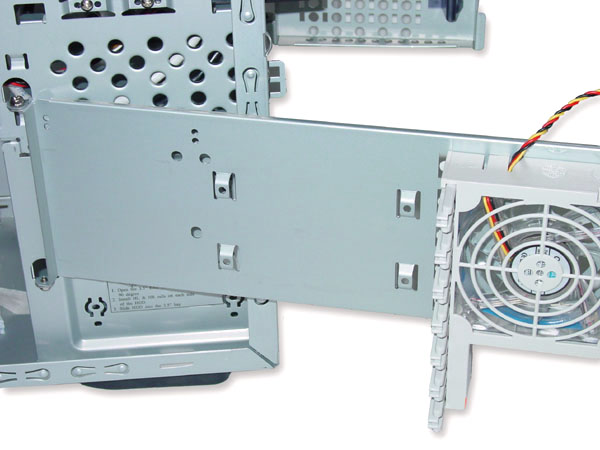
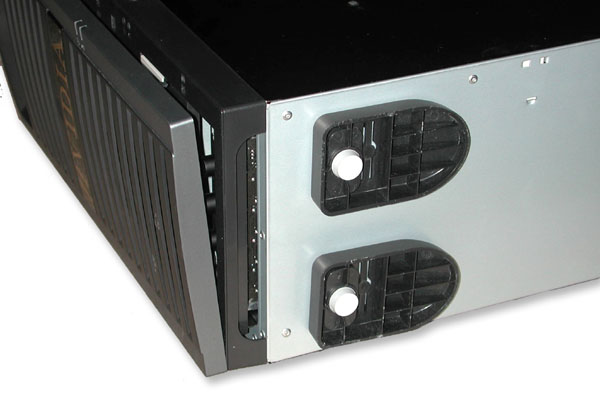
- 1 – 80mm intake fan beside the 3.5″ bay for best ventilation
- 1 – 80mm fan for excellent ventilation of CPU
- 2 – 80mm rear exhasut fans
- A rack beside the fan holder for hanging 1 HDD
- Special PCI slot card holder
- Horizontal bar to strengthen the case structure
- Screwless design (to fix the MB and east assembly)
- Intrusion security function
- High EMI shielding
- It’s made out of TITANIUM!
![]()
![]()
![]()
![]()
Specifications
- Dimensions = 430 x 192 x 529mm / 17.2″ x 7.68″ x 21.16″ (H x W x D)
- Number of 5.25″ Zoll drive trays = 6 open
- Number of 3.5″ Zoll drive trays = 5 (2 open, 3 hidden)
- Space for 4 x 80mm fans
- Space for other fans = 1 fan size 120mm
- Front USB connections = 2 USB 2.0
- Space for MotherBoard = Standard ATX
- Material of case body = SECC 0.8mm Steel
- Piezo / Highfrequency buzzer = Yes
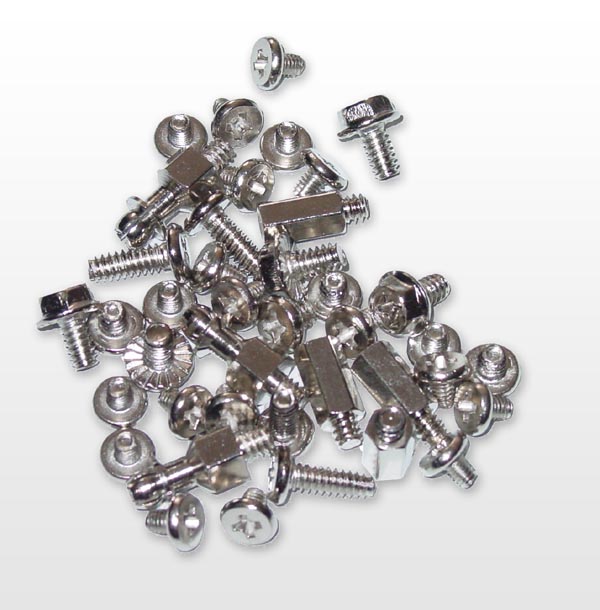
- Accessories = Drive assembly rails, intrussion switch, GUided channel cooling fan set & HDD rotated bracket, footstand, HDD cooling fan box, cooling fan box for back plate, Assembly instructions labels, Accessories kit box
- Conditions of CE -Test = Pass

Layout, Design and Construction
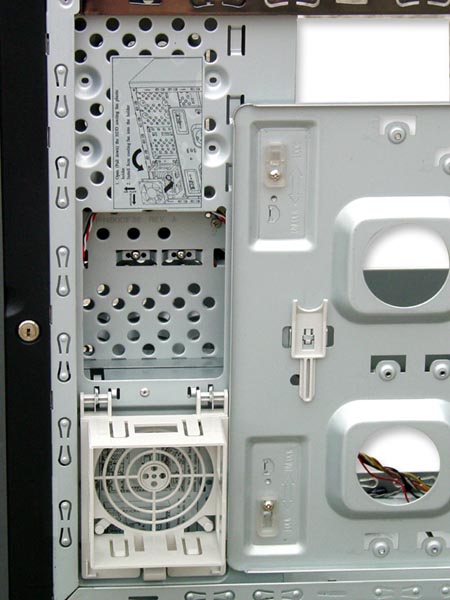
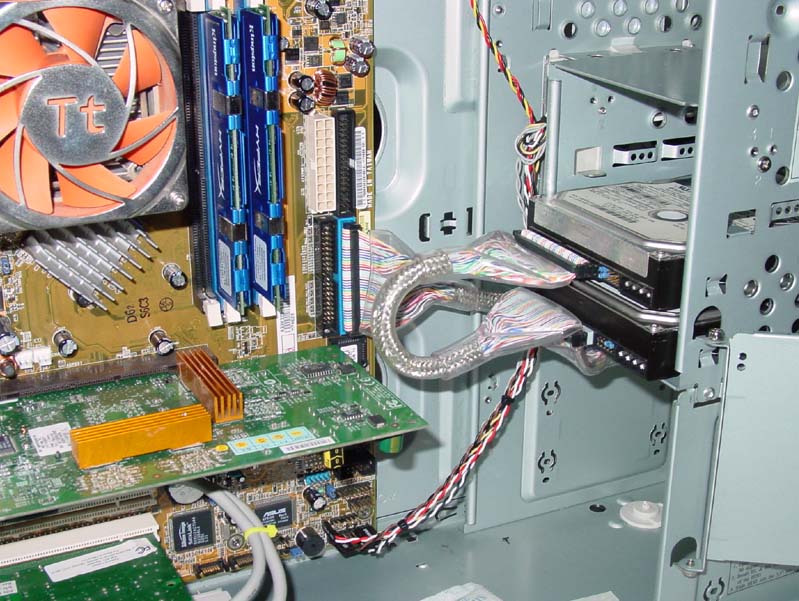
The actual layout of the interior of the case is pretty well thought out, but I do have a few complaints. The issues I have deal mostly with the lack of fans/airflow within the case.
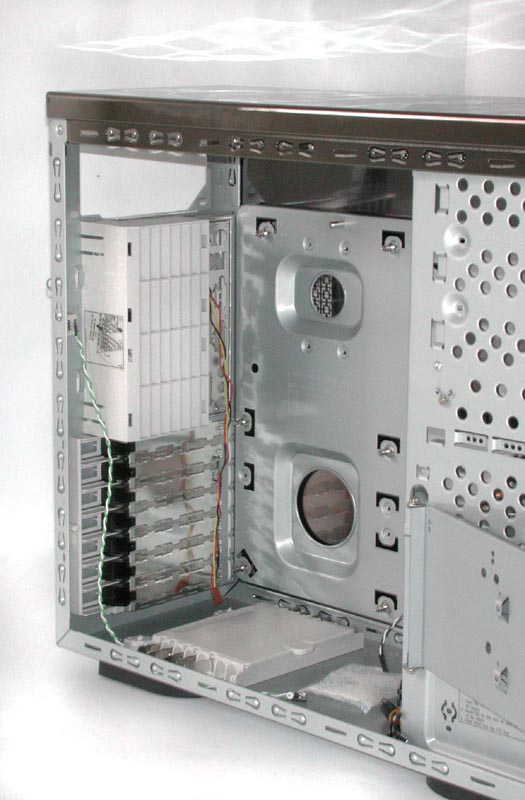
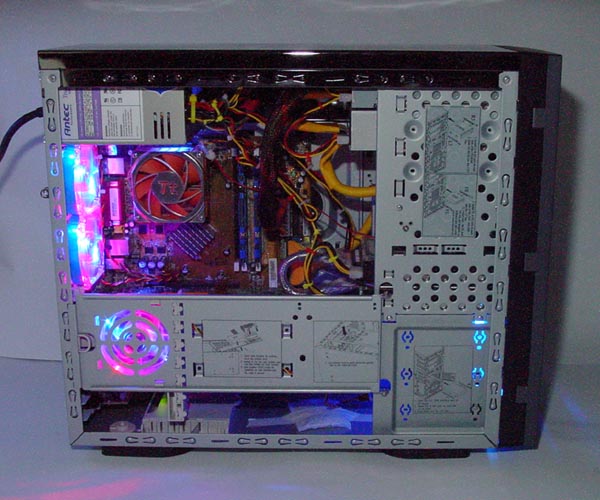
The case hardly receives any airflow externally from the front of the case with the exception of the hard drive cage fan. The rest of the system has to rely on the side panel fan positioned just about in line with my AGP slot (my motherboard only has five PCI slots), but on a six PCI slot motherboard, it would be blowing below the AGP slot, leaving the upper part of the case totally devoid of any cool air intake. After some checking, I found that there is also provision for the use of a 120mm fan in the bottom three 5.25″ drive bays, but this only deals with the bottom half of the case. This is especially important when you have a bigger graphics card like a GeForce4 Ti as they tend to basically divide the case into two halves. If you do not have even cooling throughout your case, the upper part can vary several degrees in temperature from the bottom and cause the CPU temperatures to be higher than need be.
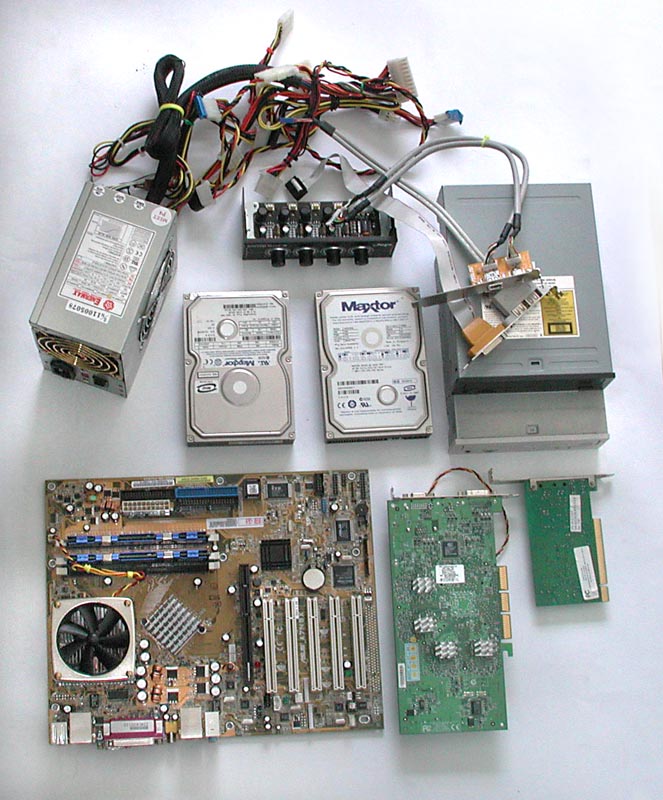
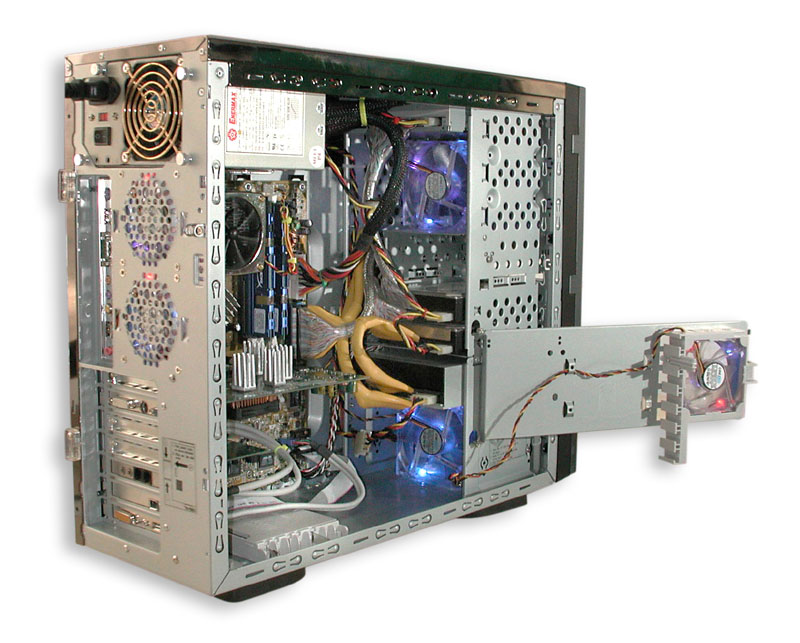
That being said, it can very easily be remedied depending on your 5.25″ bay requirements. I installed my CD-ROM/CD-RW in the top-most bay and then a 92mm fan below it. I then installed my DVD/CD-RW combo drive in the top-most bay of the bottom set of 5.25″ bays and a 92mm fan below it with my fan controller in the very bottom bay in front of the 92mm fan. This seems to have worked out pretty nice. The motherboard is reporting temps of 27-29 C and the CPU is at 41-43 C. This is very close to the temps I was getting with my full tower case and actually the motherboard temps are a little lower. I will be further experimenting on airflow within this case,
One major problem I find with most cases is the size of the holes used in exhaust fan points and have to report that this is the same here. The reason I dont like it is because it causes air blow-back, which can actuallly cause “bad” air inside the case.
Now onto all the great things I like about this case…
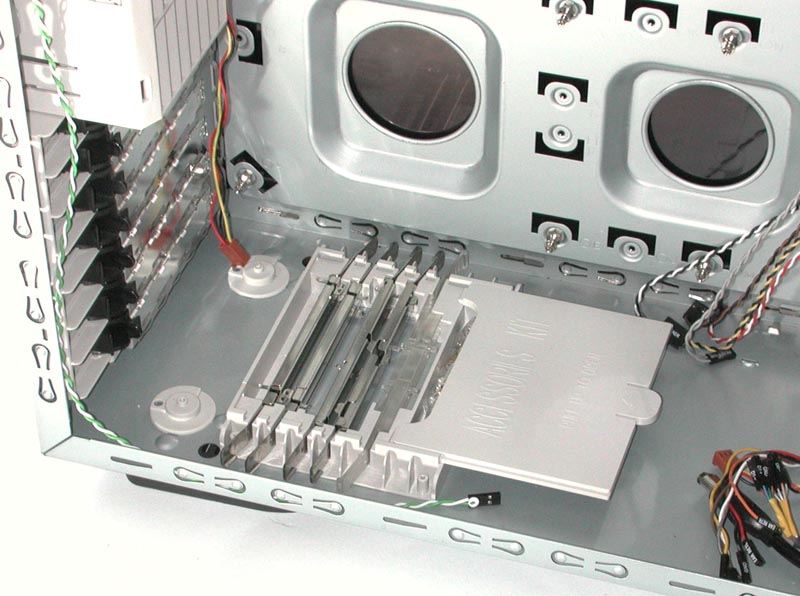
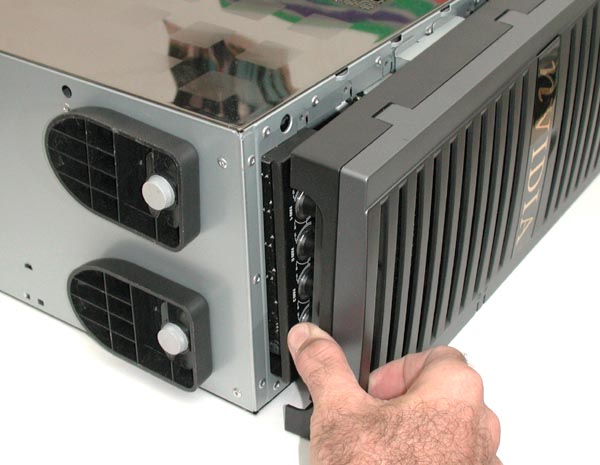
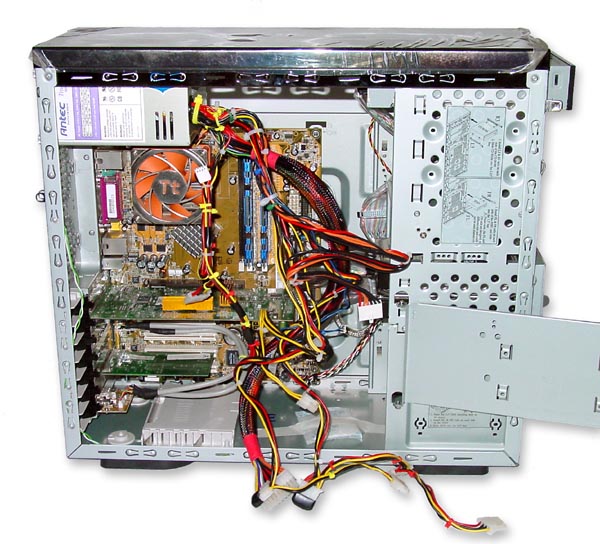
The biggest plus for this case to me is the removable motherboard tray. This was truly a nice discovery once I opened the case, as were all the folded edges. It also has a built-in card retention system to help keep your PCI / AGP card(s) from jiggling free during transport to and from your LAN events or wherever you wish to show this thing of beauty off. The chassis is made of SECC 0.8mm steel (the regular stuff most decent cases are made of) that is very well put together. All edges are folded over to add strength to the case, plus it also stops there from being any sharp edges that you might cut yourself on.
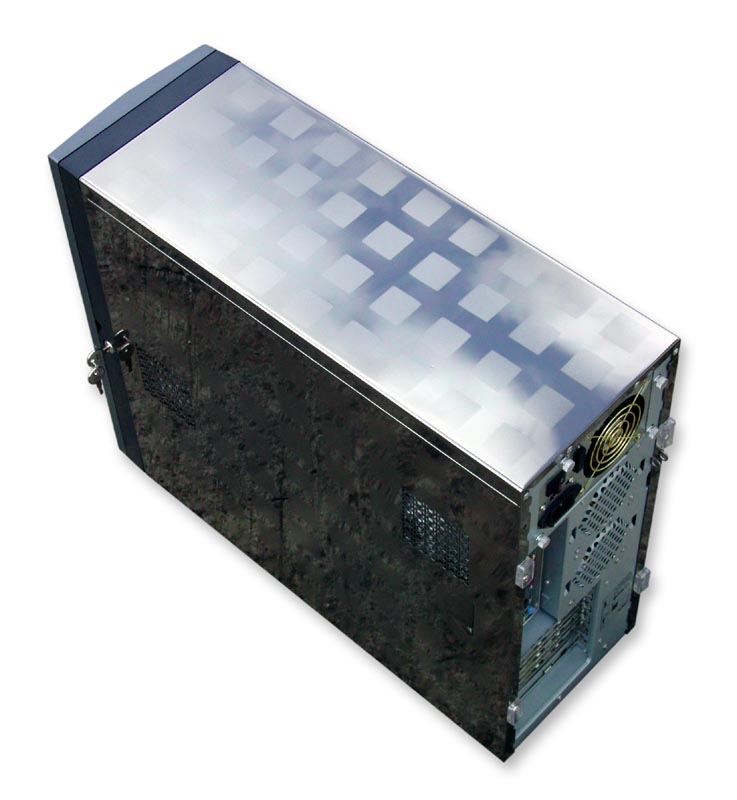
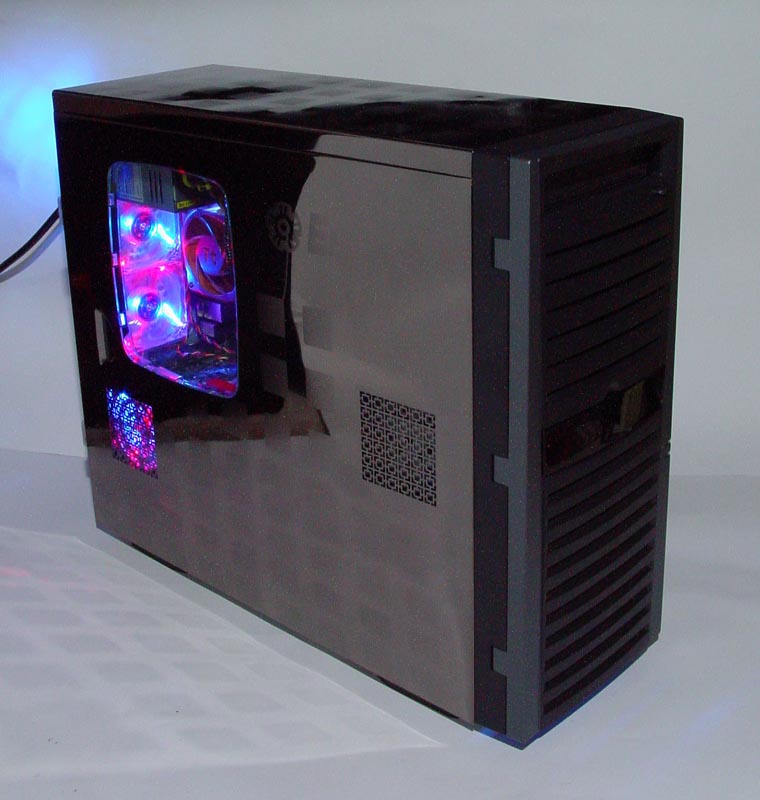
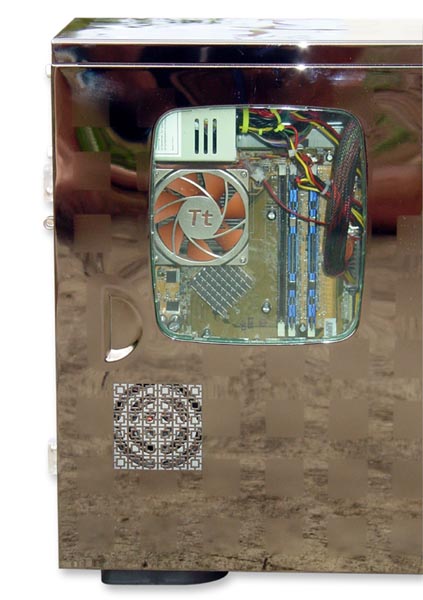
Let us not forget the exterior of this case — it has an absolutely astounding finish. The surface of the panels are so reflective that saying it has a “mirror-like appearance” is kind of like saying “ice can be slippery.” It has a brownish colour to it, but if you look carefully, you will also notice the myriad of visable colors when viewed at different angles. I suspect that along with some serious machining there was some form of heat treatment to achieve this super high gloss shine.
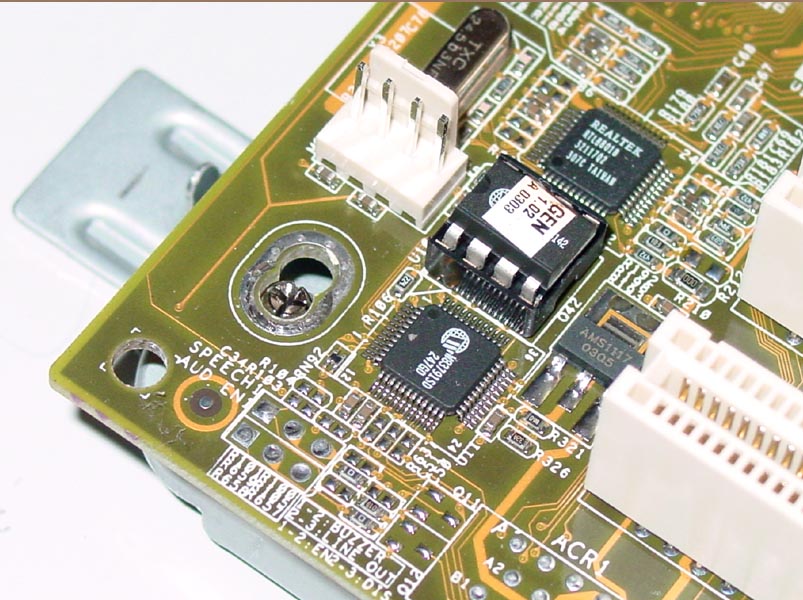
The panels are made from titanium alloy and are polished and/or heat treated to a brilliant “mirror” shine. They have a checker pattern that is seemingly etched onto them adding even more to the overall appearance of the case. The front panel is made of plastic and has a hinged swinging door that reveals the six 5.25″ drive bays and the two externally available 3.5″ bays. The front bezel is easily removable. Internally the wires coming from the front of the case — power button, etc — are all very neatly twisted and organized. They are clearly labelled as is the front panel for USB, IEEE1394/Firewire and sound.
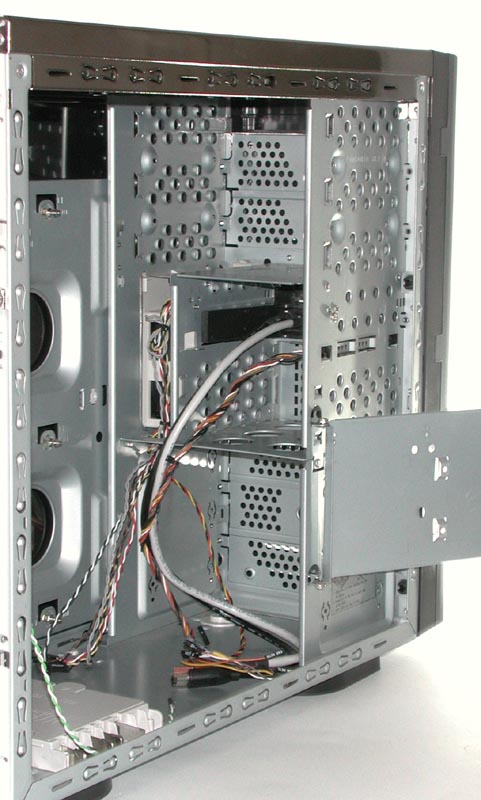
As I mentioned above, there are six 5.25″ drive bays, which is another big plus. These aren’t your normal stack of 5.25″ bays though. Three are located at the top of the case while the other three are located at the bottom of the case under the four 3.5″ (2 hidden & 2 exposed) drive bays. So you have three 5.25″ bays, the 3.5″ bays and then three more 5.25″ bays. Pretty cool!
Motherboard Installation
First up, very big kudos to Enermax for the fact that this case has a removable motherboard tray, and it’s totally tool-less to boot. In this day and age, finding a case with a removable tray is like winning the lottery, but its something that Enermax has delivered. The motherboard mounting system even maintains the “tool-less” nature of the case, but I will have to admit its kind of a scary thought when you first see them. They are of steel construction and similar in design to the plastic ones of yester-year.
Once I removed the motherboard tray (which was just a case of sliding the two locks), I did a quick inspection of the tray and the stand-offs. Then I decided Id give those fancy tool-less motherboard stand-offs a try using my old K6II motherboard. The fit was tight and required quite a bit of pressure to “pop” them through the motherboard holes and just as much to get them back off. After acquiring this little bit of knowledge, plus considering the fact that the K6II motherboard only has four mounting points compared to the A7N8Xs nine mounting points, I decided to wear the stand-offs in a bit by installing them into the K62 board several times (hopefully this worked in softening them up a bit, as I havent tried to remove my A7N8X motherboard yet). Update — I did get the courage to try removing my A7N8X motherboard from the tool-less motherboard standoffs, and it came off without a hitch.
It would seem that after a couple days with the internal heat and the few “wear-in” sessions on my K6II motherboard, they work very nicely. Also a point to note that I checked and didnt realize, you should be able to fit just about any motherboard into this case due to its rather large motherboard tray. My A7N8X is a 9 hole motherboard, and when I took it off and tried my dual Tyan motherboard (a 10 hole motherboard), it had no problems whatsoever.
I can confidently tell you that having the removable motherboard tray along with the tool-less stand-offs made installing my motherboard and system a breeze. I have taken the system apart several times to take photos I thought were needed but had forgotten to take or to just try a different arrangement of components within the case. Without a doubt, I have come to realize just how much I truly missed having an easily removable motherboard tray, I have also come to realize how nice it is to have the rest of the case’s tool-less features.
General Installation
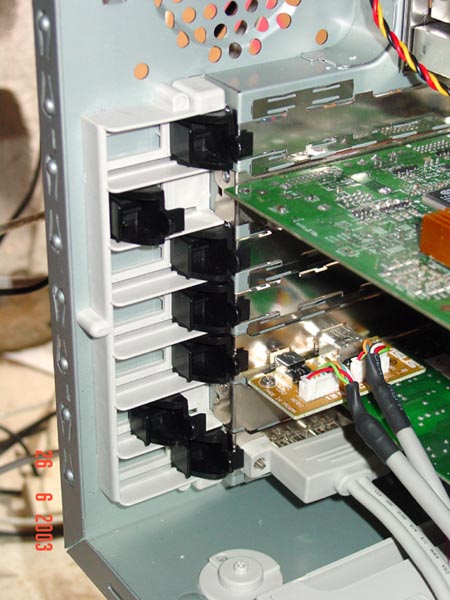
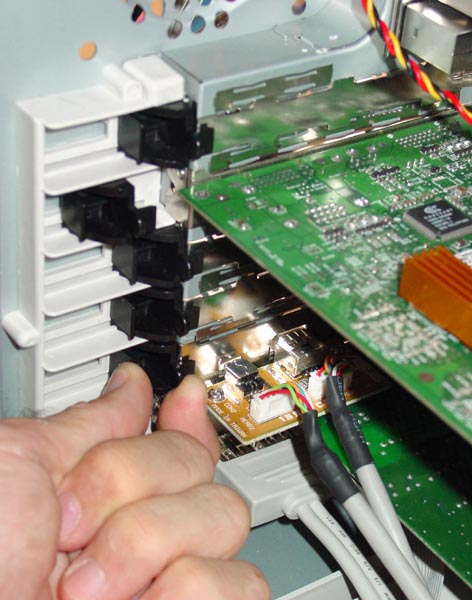
In general, installation was a breeze. One thing I didnt like was the fact that Enermax only implemented the rail system for the 3.5″ bays and the three top-most 5.25″ bays and left you with the old-fashioned technique of using screws for any of the lower 5.25″ bays. Tool-less is what Enermax claims this case to be and with the exception of the aforementioned lack of rails in the lower 5.25″ bays, it is a totally tool-free case, but if you need a tool, its provided for you. I especially like the tool-free implementation for the PCI / AGP slots. It makes switching cards so much simpler and works very well. The only problem I ran into here was when I tried to install my additional USB hub into an open PCI slot, and the mechanism wouldnt close properly, so I had to trim some of the plastic off the actual holder. This though is more a fault of the motherboard manufacturer putting the piece to close to the end of the bracket and not Enermaxs fault.
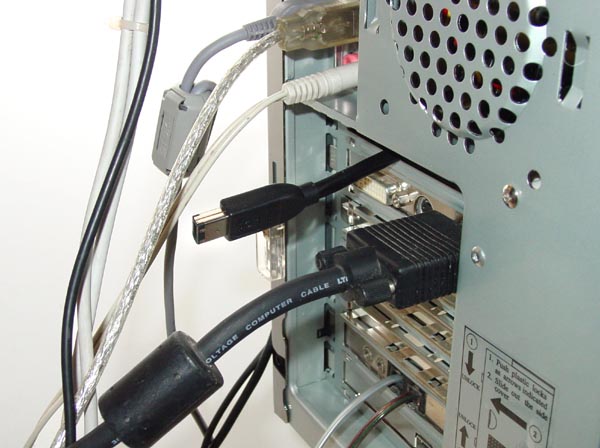
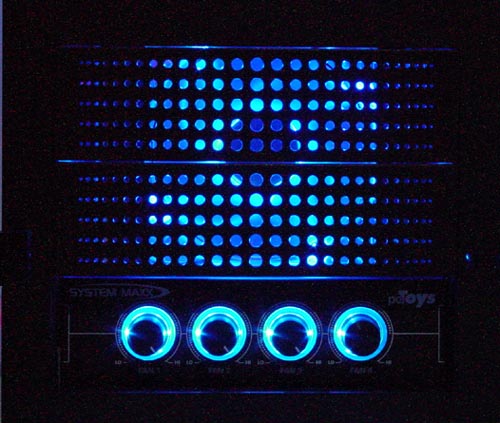
The provided front panel, which consists of USB, IEEE1394/Firewire and headphones and mic jacks, has become a very common feature, but it still should not be taken for granted on any case and is well appreciated. It keeps you from having to reach around the back when you wish to use a game-pad or other USB peripheral, headset or mic or if you are lucky and have any IEEE1394/Firewire video equipment or peripherals. (One thing I did find was that the cable for the IEEE1394/Firewire connection was too short to reach through the back of the case to plug into the rear socket for my IEEE1394/Firewire connection.)
Another nice feature is the ease with which you can remove the front plastic panel. There is a slot at the bottom of the panel that allows you to get a firm grasp and just pull it right off. Now, if youre someone like me who is always trying something new, you will probably leave it like that, but if you want to make it more secure, you can always use the supplied pins that push in the holes in the back to lock it in place.
Conclusion
Well, I hope that I have covered this case thoroughly, both inside and out, and answered any questions you may have had about it. I really like the CS-B031-TBB case. It is shorter than my older full tower case, but it is a little bit longer, providing me with just a little more room between my hard drives and my GeForce4 Ti4400, which is a blessing in my eyes — no more having to take out my video card every time I want to remove the hard drive (without worrying I may hit a capacitor on the card if I dont take it out). Even if the case were shorter, it wouldnt be a problem since the hard drives are mounted from the front of the case using the tool-less rail system.
I absolutely love the construction of the case. It is definitely a very sturdy case yet quite light for how strong it is and considering the materials used. The inclusion of the screwless and tool-free PCI / AGP retention holders are a big welcome, especially when you are always popping cards in and out for testing or just for the heck of it when you get bored.
Although I found this case at Newegg for $85 US, on most other sites it was priced around $110-$120 US. For $85 this case is a steal, and you should pick it up right away if you find it at this price, but at $120 some may find it not so tempting. Even for the $120 price tag, having the removable motherboard tray, tool-less system and great construction makes the case a very good buy still.
Id like to thank Enermax / WaveSonic for letting me have the opportunity to review this case and add it to my collection. I look forward to reviewing any other case they may have or any other great products, maybe a nice 3.5″ bay fan controller unit (hint, hint).
PROS
- Good Construction
- Excellent Exterior and Interior Finish
- Removable MotherBoard Tray
- Good 5.25″ & 3.5″ Mounting system
- Tool-less PCI/AGP slots
- Tool-less Case
- Good weight for size and material used
- Good Accessories
- Re-Attachable EMI 5.25″ drive bays shields
- Chassis Intrusion switch
- High EMI shielding
- Front Panel Sound/Mic, USB & Firewire ports
CONS
- Price (quite expensive & doesnt come with a PSU)
- Cooling System / Setup (needs manual tweaking)
- Front panel IEEE1394 / Firewire cable too short
- Gets finger prints very easily (very minor con)
The Enermax CS-B031-TBB is an excellent and very unique case. There really wasn’t that much I didn’t like about it. I award this case the Bjorn3D Seal of Approval and my own personal KICK ASS CASE AWARD. I give the case a final score of 9/10 and recommend it to anyone looking for a case that is a pleasing departure from the ordinary beige steel case.