With a great set of features and having such an affordable price for aluminum, the X-sonic is definitely worth taking a look at if you are needing a new case. I have a couple issues with the case, but overall the pros outweigh the cons by far.
Introduction
Ever since my brother got a sweet aluminum Lian Li case over a year ago, I’ve been wanting to get myself a nice little aluminum mid-tower. But, as things often go, I always found something more important to spend the money on. OK, you die hard case modders can stop cringing now. I know what you’re thinking, “How could there be THAT many things more important than making a dopalicious LAN-tastic gaming rig?” Bills, my friends, bills.
Luckily my aluminum deficiency has ended thanks to the friendly people at Xoxide who sent us the Black Chieftech X-Sonic mid-tower case for this review. According to Xoxide, the X-Sonic is based off the X-Spider series of cases, which was based off the highly popular Chieftec Dragon case. (I guess the X-Sonic cases are the Dragon’s grandchildren then, er…yeah, that’s it.) And the X-Sonic is actually a leaner case with a reduction of internal 3.5″ bays from grandpa’s four to its two. Unfortunately, the case does not come with a power supply, but I guess that is actually a plus for some who have already invested in a high-quality PSU that they want to continue to use. For this review I basically transplanted everything from my old SuperMicro SC750-A full tower case to the X-Sonic.
Specifications & Features
Specifications:
Features:
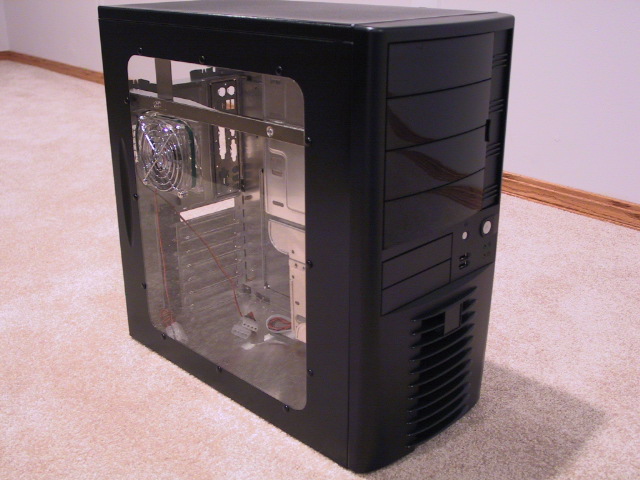
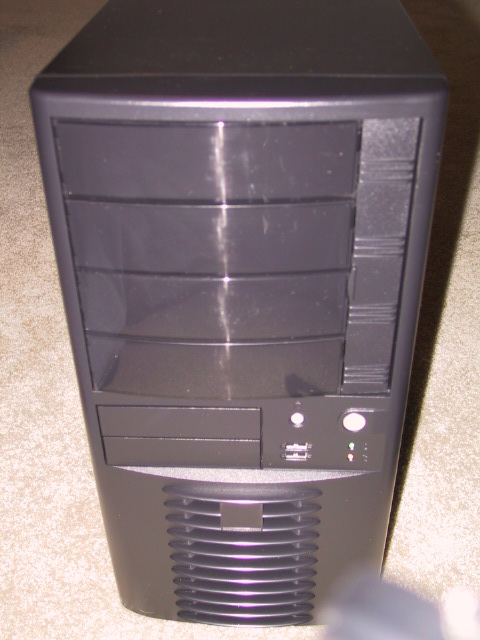
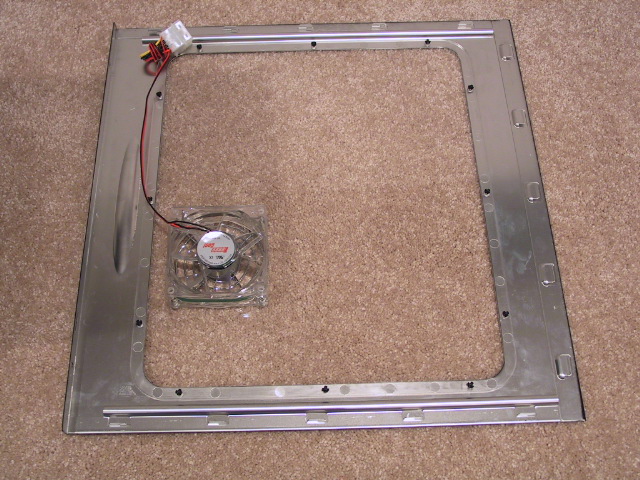
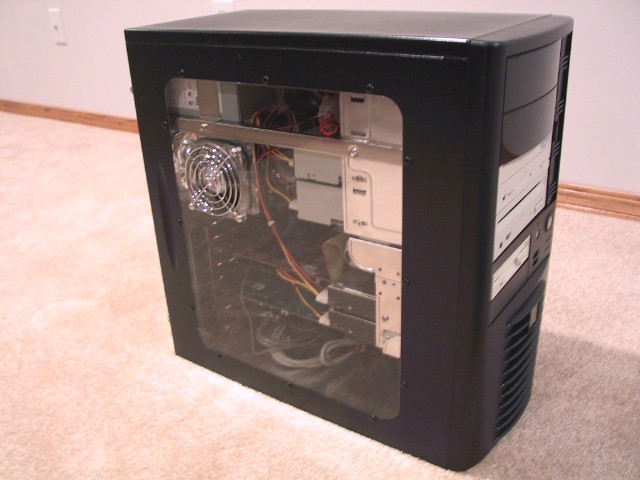
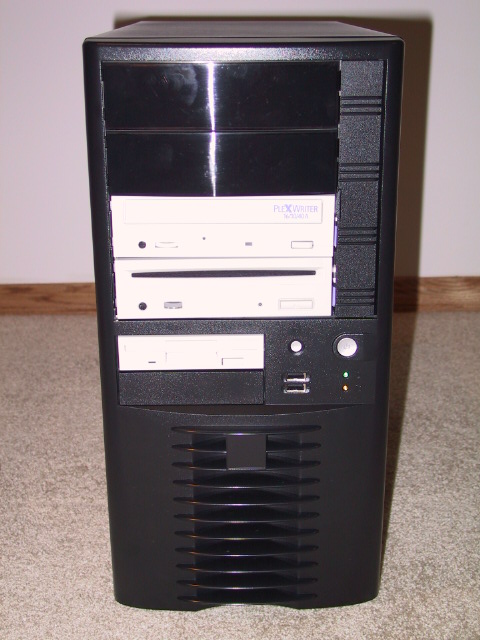
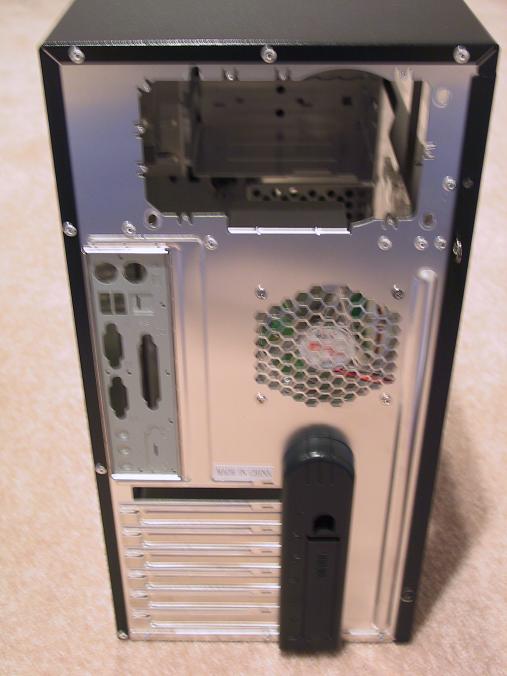
The first thing I noticed about this case is that it is very lightweight. When I picked up the box, I wondered how a case could be in it. I guess it is quite obvious that I’ve never had an aluminum case. Altough I’ve never had one, I know that aluminum cases are light, but it was lighter than I expected. The shipping weight said it was 10 pounds, but I would guess it is way under that, maybe half that. The other things about this case that really caught my attention when I pulled it out of the box were that it has a nice looking black finish, a nice side panel window with a fan mounted in it, and an interesting black plastic cover on the back. The pictures below show these features, along with the front USB 2.0 ports. I also realized this case looks a lot like one I’ve seen before – the Antec LANBOY (check out Gene’s review here).


Installation
When I pulled the case out of its box, I noticed that the side panel window was protected with a plastic material on both sides. This was a very nice way to prevent the window from being scratched during shipping or removing it from the box. Of course, it easily came off leaving behind no evidence that it was ever on, except that the window was spotless. For some reason a power cord was included inside the case. Now, I’ll give anyone props for giving me free stuff, but a power cord? With a case that doesn’t come with a power supply? It seems a little misguided to me. I guess it can just go with my collection. No manual was included, but since this is a case, I don’t see that as a big issue.
I have had my full tower case for a couple years and have grown tired of it. I was anxious to rip its guts out and transplant them to the X-Sonic. I knew that this would be a good test of the design of this mid-tower. The spaciousness of the full tower case has always made it easy to work in; however, it lacks any toolless features or any other such friendly additions. So, there were a few areas that I knew the X-Sonic could trump it, but I would have to see if that proved to be true.
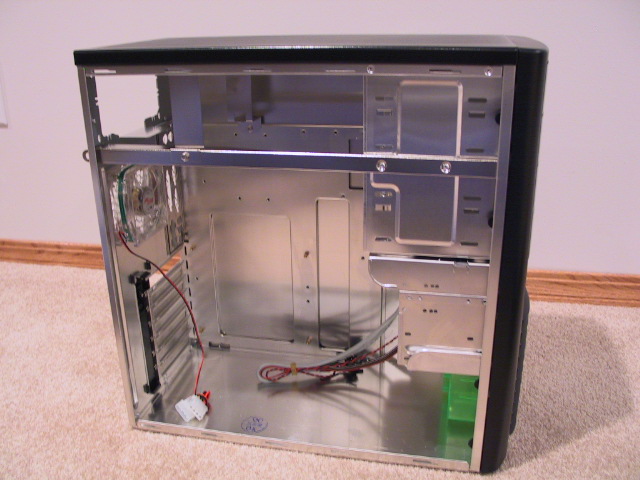
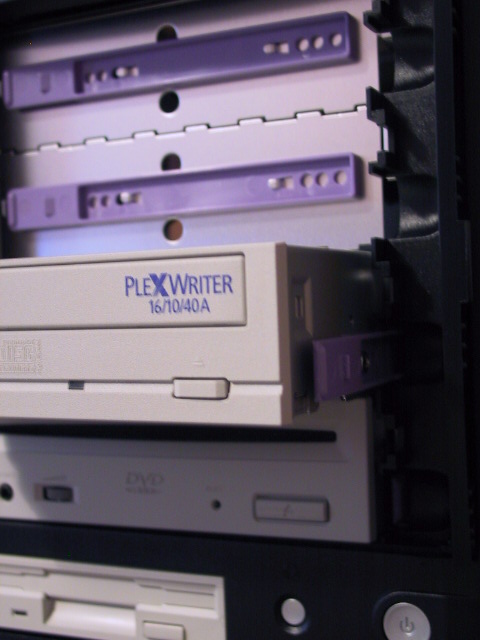
I first installed an 80 millimeter fan in the front intake area of the case. It was very simple since the design is screwless. I simply popped the fan mount off, put the fan in and popped the mount back on. It was that simple. By the way, this front fan housing is made of a green UV reactive material, but, unfortunately I do not have any UV cold cathodes to demonstrate its true potential. But I’m sure it would look pretty sweet glowing out the front of the case. Speaking of the front of the case. The front panel is fairly easy to remove, but you must do it from inside the case. I’ve dealt with plenty of cases that have front panels that you basically pull at the bottom until the panel pops off. That approach will not work with the X-Sonic. A few latches on each side of the panel lock it into place on the front of the case. Simply pushing these back while pulling the front panel will remove it. Then, I moved on to the 3.5″ drive housing. It easily comes out of the case with the push of its lever, which you can see in first picture below. I loaded it up with two hard drives and one floppy drive and, with a little patience, slid it back into place. The lever locking mechanism must be lined up just right for the drive housing to slip back into place, but it really isn’t too difficult if you pay attention to what you’re doing. I decided that I better install the motherboard next before the case became too crowded. Installing the mobo was really simple and straighforward and not too much more difficult than in my full tower, but it could have been a bit more tricky if I would have had anything else in the case. There probably aren’t too many, if any, mid-tower cases out there that wouldn’t have the same issue. Next, I moved on to my CD-RW and DVD-ROM drives. This was a little more interesting. I had to spend a few minutes to figure how these drives were going to go into this case. Under the covers of the 5.25″ bays are drive rails – one for each bay (check out the second picture below). That’s right, one rail! My first thoughts were that they didn’t include enough drive rails to fill up all the bays, only enough for two drives. But, when I took a closer look in the bays, I noticed that the case was designed to use only one rail per drive. This actually works out pretty well. You never have to take off both side panels to do any work with your drives. Actually, the right side panel is not removable anyway. Once I figured it all out, installing the drives was easy.
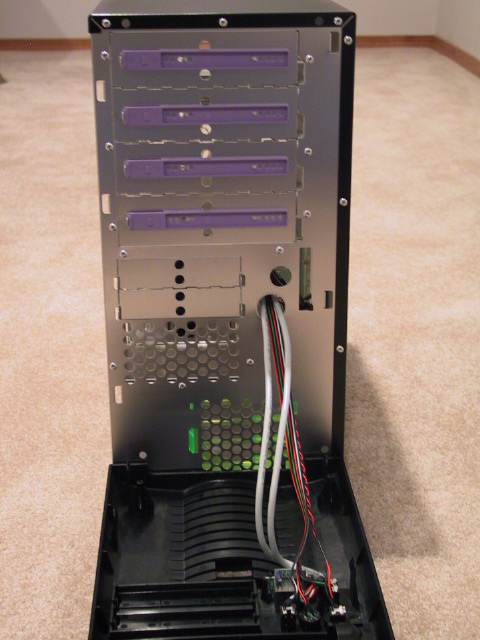
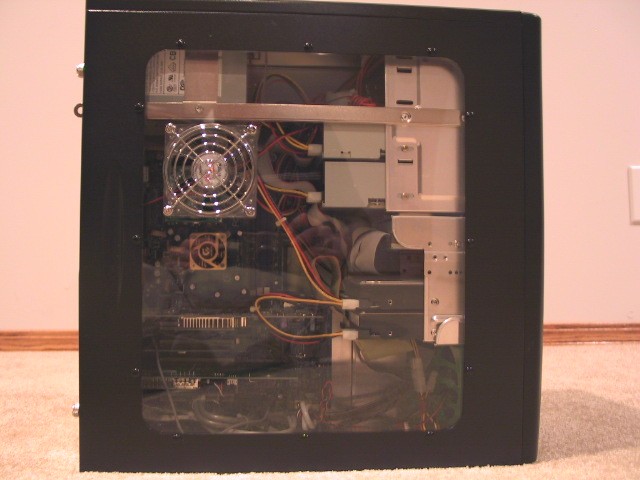
Plugging in all the data cables and PCI cards and AGP card was as uneventful as it should have been. However, I should note that if I had a video card that was any bigger, it would limit my options in the 3.5″ bays. I have an MSI GeForece4 Ti4400, so it has a pretty long PCB, but I assume there are longer ones out there. I’m just not sure what they are, perhaps some of the the new GeForce FX cards would pose a problem, but this is only speculation. Included in the regular bundle of case wires (power switch, reset, speaker, etc.) were the front USB ports’ wires. The front USB access for this case is not a pass through from the back design. There is a set of five wires for each port, and each USB wire is neatly labeled for plugging into a motherboard’s USB header’s pins. The process was quite simple. I’ve been using the front USB 2.0 ports for downloading the pictures for this review, and they work wonderfully. It’s one of those conveniences that once I’ve experienced I won’t be able to go back to the old way ever again. I made the mistake of putting in my power supply last. With everything else already in this small case, it made it a lot harder than it should have been to install a PSU. The drive rail on each of my 5.25″ drives did help make it a little easier, though. I was able to remove a couple screws from each one and slide them out about half way and squeeze the PSU in. This really was more of bad planning on my part than a negative aspect of the case. But this should be kept in mind if your PSU ever dies on you – you’ll have to do a little work to replace it. I did my best to keep the wires and cables out of the way so the inside of the case could be seen clearly. Here are a few pics of the populated case:

Other Notes
One of the main reasons I bought a full tower case a couple years ago was because I was worried about the temperature in my old cramped mid-tower case. So, that was one of the main concerns I had about moving back to a mid-tower. Well, I am more than pleased about the cooling performace of this little case with only three fans in it. My motherboard and CPU temperature readings are now usually a few degrees cooler than they were with my full tower.
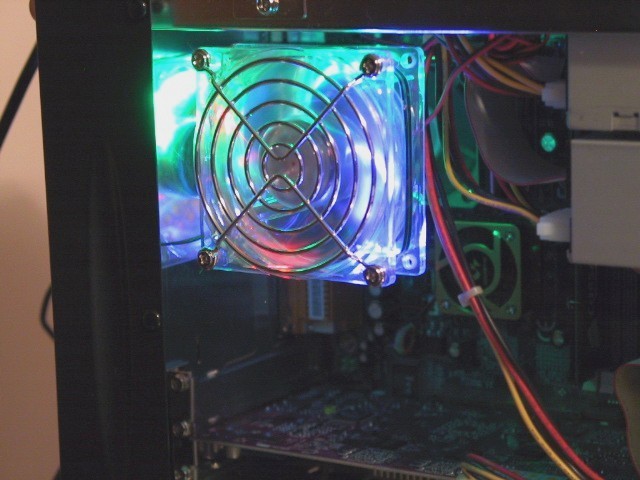
Before doing this review, I had never seen LED fans in person. I had only seen pictures of them. The two 80 millimeter tri-color LED fans that come with this case are tight! From now on, when I’m putting a fan where it can be seen, I’ll have to use an LED fan.
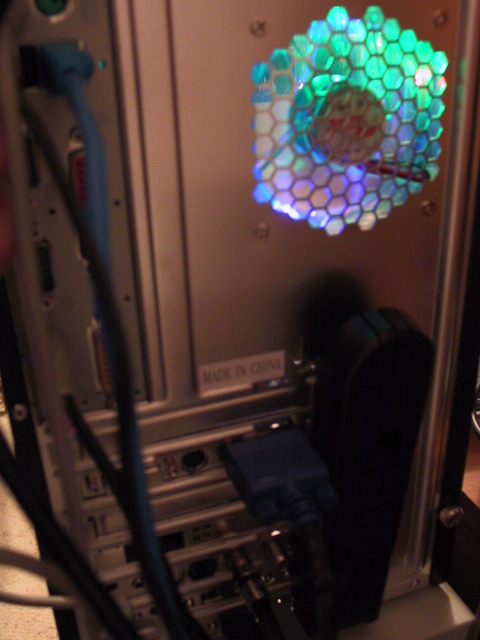
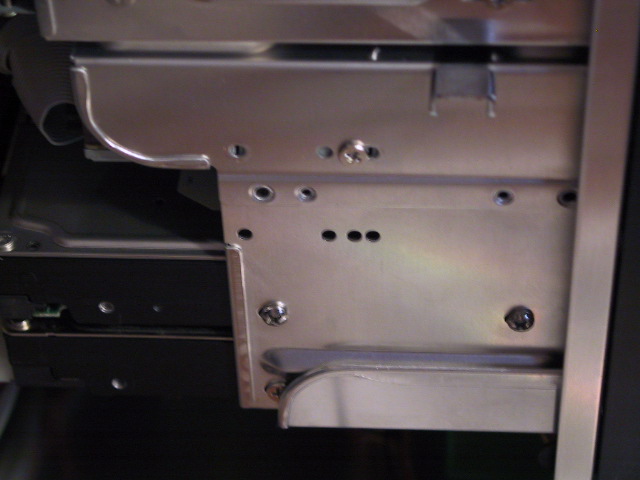
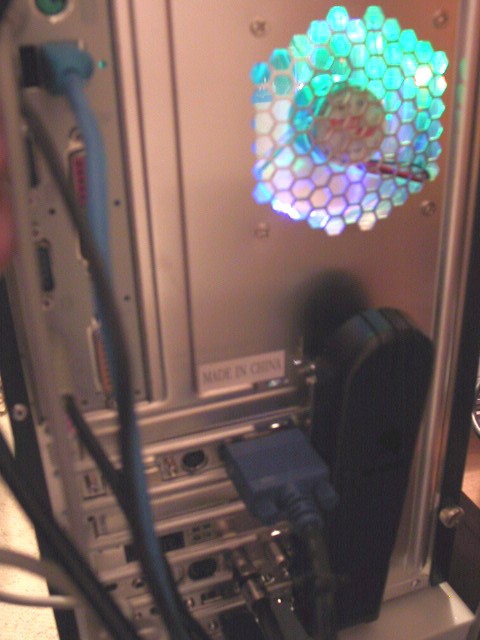
Up to this point I’ve expressed only a couple minor grievances with this case, but nothing that would not make me recommend this case to anyone. That brings me to my main complaint about this case. The back plastic cover that covers the expansion slots’ screw mounts (they are external to the case by the way) was in my way when I tried to plug in my VGA cable. As you can see in the pictures below, I had to pull it out some to make enough room between the connector and the plastic cover. I’m not sure if this is simply a bad coincidence for my graphics board and this case or if it could be a common issue for people with this case. The VGA connector is on the extreme right side of the card, but I still don’t think this should happen. My options now are to leave it half off or completely remove it, leaving a small hole in the back of my case for dust to enter through. It does somewhat sour my experience with this case. I hope it is just a bad coincidence, though. The plastic cover does have a little compartment for storing small parts, e.g., screws and other fasteners. The case was shipped with a little baggy filled with fasteners in the compartment. This compartment could come in handy if the case is used for a LAN party rig. By the way, the plastic cover has to be removed from the inside of the case. That is actually good if you’re taking this on the road to LAN parties or whatever because it will prevent someone from taking off the cover and unscrewing your add-in cards. That is assuming that the case is locked up, of course. There is a small metal loop (it can be seen on a few of the pics above) on the case that a padlock could be put through to secure the case if that is desired.

Conclusion
Overall, my experience with this case was very positive. I enjoyed working with it. I had no problems with sharp edges or other hazards that some cases have. All the scrapes and cuts on my hands came from my old case. Even though I moved from a full tower to this much smaller mid-tower, I don’t feel as if I’ve given up a lot of flexibility or options with the X-Sonic. And it even keeps the internal temperature lower than my full tower case did! That’s very important to me because I want my components to last as long as possible. And I’m already wondering what UV cold cathode I should get to take full advantage of that front UV reactive fan mount.
It’s too bad that I had problems with that rear plastic cover. It seems like a novel idea, but it just didn’t work well with my video card. For me, it really isn’t a major problem because I don’t take my PC anywhere. However, if an avid LAN party goer were to have these issues, it may pose a problem. Then again, it may not. I would recommend this case to anyone who is looking for a pre-modded aluminum case with a window and some cool lighting effects, which is exactly what I was wanting. And I would recommend it to anyone who just wants a great looking case for a bargain – it was only $62.99 at Xoxide when this review was published! For an aluminum case with two multicolor LED fans and a window, that’s a great deal.
Pros:
Cons:
For its lightweight and good-looking design, great price, and included mods, I’m giving the Black Chieftech X-Sonic an 8.5 out of 10! I wanted to give it a 9 but the back plastic cover issue prevented me from doing that.


