ThermalTake has a new series of chassis, that are roomy, and stylish. In a sence these redefine what a mid tower supposed to be. Take a look at ThermalTakes new line up the Element G, T chassis.
Introduction
Thermaltake has been making chassis for years now. Their products were known to be a go between. They where not quite the worst, but not quite the best. At least up until last year. Thermaltake has been changing this standing when it comes to their chassis.
These newer chassis designs from ThermalTake, have been functional, cool, and rugged enough to give us years of use out of the chassis. The Element series chassis are a continuation of Thermaltake’s new out look on how chassis are supposed to be built.
The two chassis we at Bjorn3D are going to be looking at are both the Element G, and T chassis. Both of these chassis can handle a large array of computer components that will also provide us with the much needed airflow we will need to keep our computer components cool. So enough yibber yabbering, lets get on with the review.
SPECIFICATIONS
Element G
| Case Type |
Mid Tower |
| Material | SECC |
| Front Bezel Material | Plastic |
| Color | Black |
| Side Panel | solid w/23cm side fan |
| Motherboard Support | Mini ATX Full ATX |
| Motherboard Tray | |
| 5.25″ Drive Bay | 3 |
| Ext. 3.5″ Drive Bay | 0 |
| Int. 3.5″ Drive Bay | 7 |
| Expansion Slots | 7 |
| Front I/O Ports | USB 2.0 x 2, HD Audio ports |
| Cooling System |
– Front (intake) : – Rear (exhaust) : – Top(exhaust) : – Side(intake) : |
| Liquid Cooling Capable | No |
| Liquid Cooling Embedded | No |
| Power Supply Supported | Standard ATX PSII(optional) |
| Power Supply Included | No |
| Dimension (H*W*D) |
565 (H) x 231(W) x 526(L) mm |
Element T
| Case Type | Middle Tower |
| Material |
SECC |
| Front Bezel Material | Plastic |
| Color | Black |
| Side Panel | N/A |
| Motherboard Support | Micro ATX, Standard ATX |
| Motherboard Tray | No |
| 5.25″ Drive Bay | 3 |
| Ext. 3.5″ Drive Bay | 1 |
| Int. 3.5″ Drive Bay | 6 |
| Expansion Slots | 7 |
| Front I/O Ports | USB 2.0 x 2, HD Audio x 1 |
| Cooling System | Front (intake) : Optional 120 x 120 x 25 mm fan x 2 or 140 x 140 x 25 mm fan x 2 or 200 x 200 x 20 mm fan x 1 Rear (exhaust) : Top (exhaust) : Side (intake) : Optional |
| Liquid Cooling Capable | No |
| Liquid Cooling Embedded | No |
| Power Supply Supported | Standard ATX PSII(optional) |
| Power Supply Included | No |
| Dimension (H*W*D) | 525 (H) x 210 (W)x 480(L) mm 20.7 (H) in x 210 (W) x 480(L) in |
| Net Weight | 15.32lbs 6.95 kg |
Packaging
I am going to include both Element chassis packaging into one page. I will then do separate pages on the over view and installation of these two chassis.
ELEMENT G

Starting off on the Element G chassis first, Thermaltake gives us an image of the top of this chassis, while including the name of the case. Right below the name in gray lettering is “Created for Pros”. We can also see that Thermaltake listed the general specifications of this chassis on the box.

When we open the package up we see the standard styro-foam end caps that many chassis manufacturers use. Unlike other manufactures Thermaltake uses a cloth like covering to keep the chassis from being scratched during transport.

I was looking over the Element G chassis and noticed this dent. The box itself had a small pushed in area that must have happened during transporting (I see that the UPS guys must be kicking for field goals again.). This happened during transport and was not Thermaltake’s fault.

What I ended up doing, was re-shaping that area in hopes I could continue on with my review. This was not exactly an easy task to do, but i managed to get it fixed up as best as I could. The paint that Thermaltake used was durable enough to keep me from scratching it despite me trying to fix this dent, with a block of wood and a hammer.

The chassis out side of its box.
Element T
Since I used the white background on the Element G chassis, and it nearly blinded me, I needed to use something that had a lot less glare in it. So I went down picked up two black sheets and continued on. (those bright white after images are a killer). Now I can see again, LOL.

Here is a look at the side of the Element T chassis packaging. As we can see that Thermaltake did the same thing as the Element G packaging when it comes to presentation.

Oh no, here comes that bright white after image again. Not much different from the Element G, Thermaltake used styro-foam end caps to keep the chassis from flopping around inside of the box, and covered the chassis with a plastic bag.

The Element T out side of the box in all its glory.

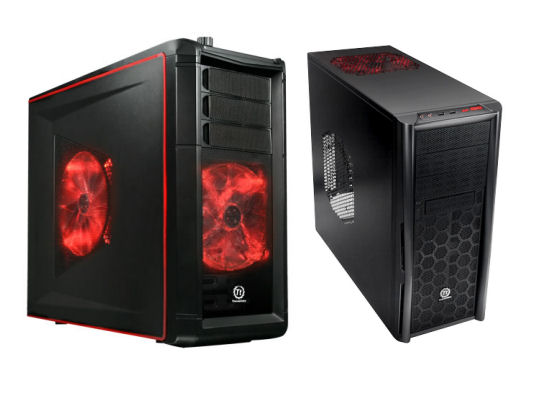
Beauty shot of both of the chassis together.
ELEMENT G OVERVIEW

Since I already did a side view of this chassis, it is time to see what the innards look like. Starting off on the front of this chassis we can see that Thermaltake has a mesh style full front. If you look real closely you can make out the 180mm front fan.

The Element G chassis puts the PSU towards the bottom, I do prefer this type of design as it makes the chassis a bit more organized inside. This also keeps the chassis less top heavy when using large PSU’s. There is an included rear 120mm fan. Along the PCI expansion slots it also appears there is a 60mm fan mounting here.

EEK, its that mouse again. When we look at where the PSU is mounted at we see that up towards the top of the picture there is another 60mm. This can be used along side of the PCI expansion slots.

With the chassis on its side, lets look at the top of the Element G chassis. Thermaltake uses a top mount 180mm fan here as well.


The front IO ports and on/off buttons, there is also a fan controlling knob here as well. This does more then just control the fan speeds (I will cover this in a bit later).

A good look at how the top of the chassis looks like. That fan control knob sticks out like a sore thumb. Thermaltake could have used a disc/button combo instead of that large knob.

A quick look at the internal structuring of the Element G chassis.

Now one area I personally liked about this chassis that makes this particular chassis stand out from the other chassis is how the side panel fan is ran. If you noticed the wire lead from the side fan runs to the front of the panel and stops, and then we can see three pins sticking out.


A better view of the fan connector. This is so if we remove the side panel from the chassis, this fan automatically disconnects from the chassis and we don’t have to disconnect the fan. So no worrying about yanking a fan out its plug when you need to remove the side panel.

Looking at the HDD cage on the Element G, If you look towards the bottom of this chassis. You can barely make out a green circuit board, this is where the side panel fan connects too, to power it.

There are small latches on the inner side HDD cages.

Looking at the 5.25″ bay drives.


On the Element G chassis, the PSU is seperated from the rest of the interior. This should really help on keeping the extra power cables neat, clean and tucked away.

This is a feature I am glad that is gaining speed on, a rearward CPU cut-out so we can remove our CPU coolers with out having to remove the motherboard when doing this task.

Looking at the rearward 120mm fan.

The upper 180mm fan.

The PSU will draw air from the bottom vent of this chassis. The PSU will actually sit about a 1/2″ above this.
|
|
|
|
|
|


The included extras with the Element G chassis. Thermaltake included two 120mm fan holders for the front of this chassis. In case you want to replace that fan with two 120’s instead of the 180mm fan.
Installation

Like any typical chassis installation, we need to start off on the PSU first. I did not show the step on how to remove that upper PSU cover on the Element G chassis. There are two thumb screws that need to be removed then you slide it back and it comes right off. Then you can install your PSU into the chassis.

This chassis has a PSU holder that the PSU sits in. It is a bit of a tight fit so be careful when installing the PSU. I had to tilt the PSU a little bit to clear the side upper lip, then carefully push the PSU down to get it to seat into the PSU holder, finally slide it back to screw it down into the chassis. There is a front PSU locking plate that is attached to the upper PSU cover, this have to removed prior to putting the upper cover back on.

The upper PSU cover installed, just reinstall it in the reverse order you took it out. Then put the PSU locking plate back in and close to the front of the PSU as possible.
|
|
|
|
|
|
|
|
|


Now this step is not necessery at all. If you want to do your motherboard stand offs the way they were intended, then do that. I like to put two of the motherboard standoffs in backwards so that they become studs, so when I put in the motherboard it will be automatically lined up. This is how I do this little tweak.

All of the components installed. I just need to put in the HDD/DVD drives in and hook up the power cables to them and call it a day.

These screws are for the HDDs, these need to get hooked up a certain way. Otherwise the HDD will not go in all the way properly, I found this out real fast.

On one end two of the screws need to go on the two far ends of the HDD itself. Then on the opposite side 1 will go into the center hole, while the other goes to the far end mounting hole. This way I have them hooked up will put the HDD SATA/power cable to the right side of the chassis and you will not see them.
 |
 |
 |
 |
 |
 |
This is what makes this chassis so different from the other light up chassis I have seen. There are six modes for which the lights are lit up. They are off, blue, green, red, one led lights up randomly in a strobe effect per fan, or all four leds light up in a random pattern. This is only possible to switch between these modes by pressing on the fan control knob down.
Element G Overview

Time for us to go over the cousin to the Element G chassis. Looking at the front of the Element T chassis, Thermaltake used a mesh style covering similar to the Element G. But this time I did not see a fan on the front of the chassis.

Looking at the rear of the Element T chassis, The PSU also gets mounted towards the bottom of the chassis. But this time around there are no 60mm fans that can be mounted beside the PCI expansion slots.

Like its cousin the Element G chassis, this chassis can support an external water cooling setup, just by removing these covers.

The Element T chassis is a bit more plain in overall styling. Thermaltake includes a top 180mm fan, also this chassis only supports two USB front headers.

Thermaltake did not go all out on the interior of this chassis. They kept the interior as simple as possible no frills or chills.

The side panel can handle up to a 200mm fan.

Looking at the 5.25″ drive bays. Thermaltake used a single tooless locking mechanism to hold in a 5.25″ drive. Kinda strange that Thermaltake did not do this too all of the drive bays.

The HDD cage, again only one tooless locking mechanism.

On the Element T chassis the rear PCI expansion covers use a vented cover.

The included rear 120mm fan.

Here is the upper 180mm fan that Thermaltake used.

Just like the Element G chassis, this chassis also has a rear ward CPU cut out.

Again the Element T fallows suite with the Element G chassis for the PSU ventilation. But this time with no filter.

The bag of included of screws.

Looking at the front of the Element T chassis, from inside of the chassis.
INSTALLATION

The Element T chassis has raised portions to act as the motherboard stand offs.


I did the same tweak as I did with the Element G chassis, I inverted two screws to act as a stud to hold my motherboard in place while installing the motherboard.


The Element T chassis differs a bit from its cousin the Element G chassis when it comes to the side panel fan. The Element T chassis can handle up to a 200mm fan. But, as I found out real quickly, that if you are using a large CPU cooler, it will interfere with the side panel if a 200mm fan is installed.

You will have to use three motherboard standoffs to properly secure the motherboard down in the Element T chassis. This is where they go on a full sized motherboard.

The front bezel comes right off, just gently grab the bottom of the bezel and lift outwards.


Now we can install two 120mm fans here. I was going to use a red LED fan and a blue LED fan until I found out they were burnt out.

Everything installed.

Just before taking this chassis over to my pops to test it out.
I used his components to test the two Element chassis, because he is the only one that is using air cooling on his computer also, his computer parts haven’t changed since I changed them out a few months ago.
He gets upgraded when I upgrade, he happy, I happy. One of them, I scream, he screams, we all scream for Ice cream LOL….
Testing
I used my dads computer components inside both of these chassis. I used the same exact hardware to perform the testing, I am going to measure the temperatures of the CPU and the video card. This is just to give you an idea on what your temps will be like roughly while using either of these chassis. The ambient temperature is in the 23°C range. The CPU I have installed in my dads computer is a Q6600 clocked up to 3.2 GHz, with a Zalman 9900CNPS CPU cooler, the video card is a HD4870 with a SilenX GPU cooler.
Temperatures
| Idle Temperatures |
Idle Load |
| Element T GPU |
34°C |
| Element T CPU |
29°C |
| Element G GPU |
32°C |
| Element G CPU | 28°C |
I was not expecting much of a difference between these two chassis when it came to temperatures. The Element T was slightly higher in temperature’s but not enough to be really concerned with. And this is only because I was unable to use my 200mm fan on the side panal, and had use a 140mm fan instead.
| Full Load Temperatures |
Full Load |
| Element T GPU |
47°C |
| Element T CPU |
52°C |
| Element G GPU |
43°C |
| Element G CPU | 52°C |
Once again both chassis performed well with in specifications on temperatures. Even with a slightly higher ambient temperature these chassis manage to keep the temperatures from sky rocketing.
Final Thoughts
Both of the Element chassis performed on par or exceeded my expectations of their cooling capabilities. Both of these chassis will provide plenty of “growing room” for those who are constantly changing out computer components, or for those who just want a good sized chassis with good air flow with out having to buy a full sized chassis. As I found out with the Element G chassis, the paint that Thermaltake used is durable enough to with stand quite a few bumps and scrapes with out damaging the finish to badly. Plain and simple if the chassis can handle a good beating with a block of wood then you can be sure the case will not scratch easily.
The only real thing I wish that more chassis manufactures would include is a 3.5″ to 2.5″ HDD adapter. I realize that a lot of users still use the 3.5″ HDDs, at the same point there are a lot of users (like myself) who have 2.5″ HDDs and are trying to convert over to these smaller HDDs.
The Element T chassis goes for around 75 USD, I feel this is a good starting price point for a durable no frills chassis that offers users a lot more flexibility (as far as room is concerned) for when it comes time to upgrade their computers.
- Performance 9
- Value 9
- Quality 8.5
- Warranty 9
- Features 9
- Innovation 8.5
Pros:
+Roomy interior
+Can use a multitude of fan types from 120mm to a giant 200mm on the side panel
+Good cooling capabilities
Cons:
–None that come to mind
This chassis is one of the biggest mid sized towers I have seen to date. During the use of this chassis I did not have to worry about components being to cramped or wire management once installed. I give the Element T chassis a 8.5 out of 10 and the:

The Element G chassis goes on or around the 150USD mark, this is the most expensive chassis out of the two reviewed here, this chassis also provides us with a few more options that the Element T does not. I feel this is a fair price to pay for a chassis, that has a mood lighting effect, it is rigid enough to with stand a beating all the while not scratching the finish of this chassis.
- Performance 9
- Value 9
- Quality 10
- Warranty 9
- Features 9
- Innovation 9
Pros:
+Good cooling capabilities
+The multiple modes of lighting will add that personal touch or mood for your computer area
+Lots of room inside
+Large quiet fans
Cons:
– May become your moms newest chassis
The Element G chassis is an beautiful chassis all around, it is well built, and rugged. Having the fans do six different modes of lighting definitely adds to this chassis. I give the Element G chassis 9.0 out of 10 and the:


