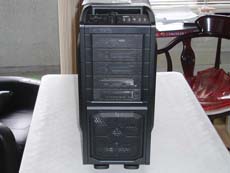
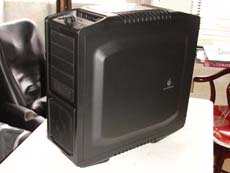
Cooler Master has recently launched their Storm series of products. The first in the line in the series is the Sniper case. A case that is inspired by military weapon which provides a sturdy looks and good performance. We take a closer look at this case and put it through our tests.
INTRODUCTION
A storm is brewing over at Cooler Master. As the turbulence stirs up, the mixture of wind, dust, and water, it mixes and molds these elements to create something magical. No, we are not talking about the physical storm that causes havoc to people’s lives, but rather, we are referring to Cooler Master’s latest line of products that is going to stir up the computer world. The Storm is a line of products from Coller Master that is targeted at the computer enthusiasts. One product off the Storm line-up is the Sniper case, that is the “magical” thing which the engineering and designing team stirs up. As you can guess, this case is going to be the start of this review.

About Cooler Master
Cooler Master was founded with the mission of providing the industry’s best thermal solutions. Since its establishment a decade ago, the company has remained faithful to this mission, emerging as a world leader in products and services for companies dealing with devices where heat issues must be resolved.
A critical component of Cooler Master’s ability to successfully pursue its mission is an unstinting commitment to quality, as demonstrated by the ISO 9001 certification granted to its main manufacturing plant in Taiwan. It has also enforced ISO guidelines and is in the process of applying for ISO 9002 certification at its second and third plants, located in China. Cooler Master has also implemented a number of analytical and testing protocols to ensure top quality, including at subcontractors, to further ensure thorough quality control. Moreover, Cooler Master’s dedication to quality extends beyond manufacturing to every aspect of its operation, including service.
Cooler Master’s current business encompasses a comprehensive lineup of thermal solutions for a full range of applications. Its products range from heat sinks and fans to component housing, chassis, and ducting for computers, industrial machinery, telecommunications equipment, and many other devices.
FEATURES AND SPECIFICATION
Cooler Master designs the Storm Sniper with the following concepts:
- Storm Sniper™ – gaming grade ultra mid tower PC chassis.
- Storm Tactics™ – guarantees unbeatable, secure reliability that is completely tuned to gamers’ needs. With a total dedication to Strength, Security and Control, Storm Tactics will keep your most vital gear fortified and well tuned at all times.
- StormGuard™ – groundbreaking security prevents your high-end gaming gear from being stolen.
The whole idea of the Sniper is inspired by the military weapons where you get a rough looking fierce exterior. Unlike many of today’s cases which is built with aluminum, Sniper is manufactured with steel to give it a more rigid and sturdy construction. Although, aluminum cases generally are lighter and slightly better at conducting heat, the Sniper is not too overly heavy for being made with steel.
Features:
- Fierce exterior design inspired by military weapons.
- Unprecedented airflow from up to 3 huge fans.
- Next generation control center for tuning your lights and fans.
- StormGuard™ – ground-breaking security system for safeguarding your gaming peripherals.
- Convenient handle and foot stand for fast and efficient mobilization and relocation.
- Screw-less design for quick upgrades and maintenance.
Model Number SGC-6000-KKN1-GP
- Available Color Black
- Material Steel, ABS Plastic, Mesh bezel
- Dimensions (D)566.6 x (W)254.6 X (H)551 mm (D)22.3 x (W)10 x (H)21.7 inch
- Net Weight 10.6 kg / 23.42 lb
- M/B Type Micro-ATX/ATX
- 5.25″ Drive Bay 5 Exposed (without the use of exposed 3.5 inch Drive Bay)
- 3.5″ Drive Bay 5 Hidden 1 Exposed (converted from one 5.25 inch Drive Bay)
- Cooling System Front: 200x30mm Blue LED Fan x 1 (500 – 1000rpm, 17 – 23 dBA)
- Top: 200x30mm Blue LED Fan x 1 (500 – 1000rpm, 17 – 23 dBA)
- (can be swapped for two 120mm fans or 120x240mm Radiator)
- Rear: 120x25mm Standard Fan x 1 (1200rpm, 17 dBA)
- (can be swapped for 90mm fan or 80mm fan)
- Bottom: Supports 140mm Fan x 1 or 120mm Fan x 1 w/ Dust Filter (optional)
- Side: Supports 200x30mm Fan x 1 (optional)
- 120x25mm Fan x 2 (optional)
- Expansion Slots Standard x 7, Special x 1
- I/O Panel USB2.0 x 4; IEEE1394 x 1; eSATA x 1; Mic x 1; HD Audio+AC’97 x 1
- Power Supply Standard ATX PS2 / EPS 12V (optional)
COOLER MASTER SNIPER–EXTERIOR
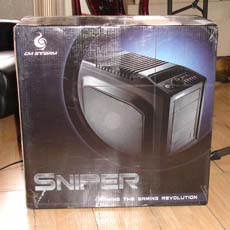
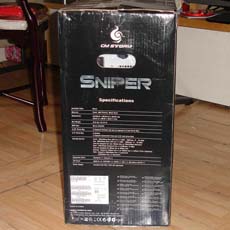
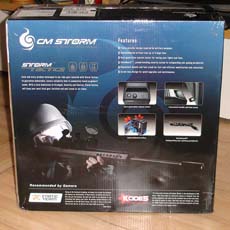
Cooler Master adorns the box with a view of the front of the case on its box. Here you can also find the case’s specification and its features. Two handles to be found on either side of the box to help in carrying the big box around.
|
|
|
|
|
Click for Larger Image
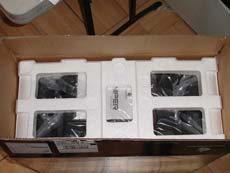
Open up the box and you find the case is being protected against the rough treatment of shipping by two pieces of thick Styrofoam padding and a plastic bag covering the case so that it can’t be scratched.
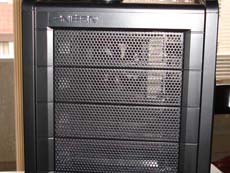
This is a mid-ATX case where you can see that it will accommodate up to five 5.25’’ drives. One of the 5.25’’ drive can be converted to an external 3.5’’ drive. The 5.25’’ drive covers are perforated to allow cool air to enter the case. Despite the fact Cooler Master has put a washable filter on the cover, its design makes it somewhat impractical to use. In order to take the cover off to clean the dust, users would have to open up the case. I believe that Cooler Master designed the drive bays to be installed in such a fashion as to secure the drives in the event that users might be carrying the case to a LAN party. The drives would not be prone to thefts.
Sitting right underneath the 5.25’’ drive bay is a big 200x33mm fan with blue LED and rated at 500~1000 RPM, 17~23 dBA. Again, we see a big mesh on the front of the fan to let cool air entering the case. The filter again is not accessible from outside.
|
|
|
|
|
|
|
|||
Click for Larger Image
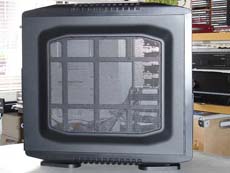
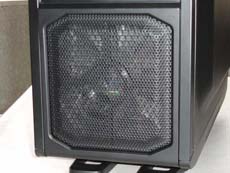
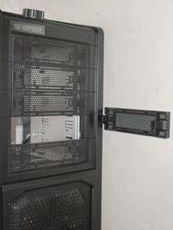
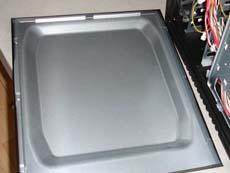
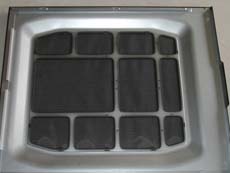
A big meshed opening with dusty filter is on the right side of the case. Users would have the option to mount additional side panel fans. A single 200x300mm fan or two 120x25mm fans can be installed. However, neither fan is included. Both left and right side of the case is slightly fattened and curved outwards to provide spaces for the additional fans and also cable management.
There is a little manufacture defects with the sample unit we have received. As you can see from the picture above, the right panel has a slightly little gap and does not close fully. We are not sure if this is just an isolate incident. The little gap does not affect the case’s cooling ability or noise-level, it is just somewhat an eye-sore to see that little gap.
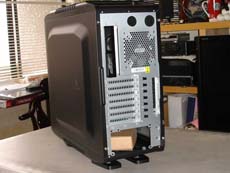
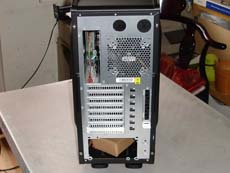
It has been a trend in the computer chassis industry to have the power supply mounted on the bottom of the case. This design gives a better distribution of the center of gravity so the case will be more stable. Sniper follows the same trend. In addition, the case is watercooling ready. In addition to the two opening on the back of the case, there are two extra openings for tubes to pass through next to the PSU mounting area. We see that Cooler Master also provides a place for case lock on the right side. However, since the left side panel is removable, it would leave the left side of the case wide open as there is no place to put a lock on it. This leave the hard drive and some smaller components at the risk of being stolen in a LAN party.
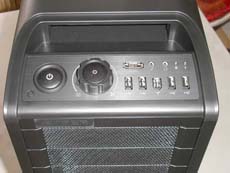
The front panel connectors are located on the top of the case. Here you will find a big On/Off button, a whopping four USB ports, a FireWire port, an eSATA port, and a Mic and Headphone port. In addition, you have the HD activity LED and power LED. Next to the On/Off switch, you will find a big knob which is used to adjust the fan speed. Right in the middle of the knob is a handy button for the fan LED light. It allows users to turn the fan LED on or off, a very simple idea, yet extremely useful. Surprisingly, you don’t find that too often with cases that bundle LED fans until the Sniper. We wish other chassis manufactures would incorporate this feature in their cases.
The top of the case has two very sturdy and handy handles for those who may need to carry the case around to LAN parties. Although, it would be a big hassle to carry a steel case around, the handles sure are useful. There are plenty of opening to be found on the top of the case, just above another 200x30mm fan to helps dissipate hot air out of the case. The fan can be swapped for two 120mm fans or for a 120x240mm radiator if you plan to watercool your components.
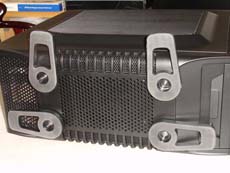
Four large feet with rubber padding are to be found on the bottom of the case. The feet are adjustable. You can hide them underneath the case or, if you need stronger support, they can rotate 90 degrees and extends out to give a stronger support. The feet are tall and they lift the case an inch higher so that the cool air can pass through the bottom of the case. If you would prefer to have rubberized feet, Cooler Master also includes four rubber feet which users can replace.
Accessories
The case comes with a bag of screws, 3.5” to 5.25” drive bay converter, two extra O-rings, a manual, and four rubber feet. In addition, a total of 12 cable ties are included. They are reusable and can be installed in various places inside the case. Since we are talking about cable management, the Sniper is excellent in this area. Not only that, plenty of cable ties are included. You can also hide the cables underneath the motherboard tray. And with the slightly curved side panel, plenty of cables can be hidden here (we shall see it when we look at the inside of the case).
COOLER MASTER SNIPER–INTERNAL
|
|
|||
click for larger image
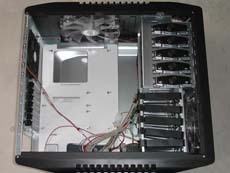
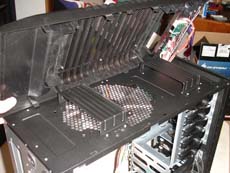
After you remove a couple of the thumbscrews, the side panel pops off very easily. Here we see a very spacious interior. We see the case will accommodate an ATX or a micro ATX motherboard and a piece of paper is taped on the motherboard try indicating which standoff to use. Oddly enough, the motherboard tray itself has no marking or any indication for the standoff. If you are a novice in building computers, be sure to keep the paper in a safe place (though it is fairly easy to know which one to use if you simply match the mounting holes on your motherboard to the tray). The motherboard tray, unfortunately, is not removable, but Cooler Master has placed an opening just underneath the CPU area for easy installation of an after-market heatsink. The opening allows users to work underneath the motherboard near the CPU socket area without remove the motherboard. This is a very good idea and we really hope other manufactures will follow suit and incorporate such a feature in their cases.
|
|
|||
|
|
|
|
|
|
|
|||
Click for Larger Image
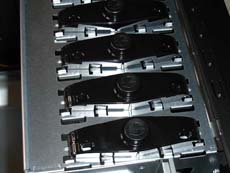
The Sniper uses a tool-less design with their 5.25’’ drive mounting mechanism. Here, you simply press the retention mechanism that secures the 5.25’’ drive to release the lock. Then, insert the 5.25’’ drive. Once the drive is in place, you simply press the button again to lock the drive. It works quite well and quite easily. The locking mechanism only locks the drive on the right side. If you wish to have more support or if the particular device does not work well with the mechanism, you can still add additional screw on the left side to secure the drive. Alternatively, the locking mechanism is easy to remove and traditional screws can be used.
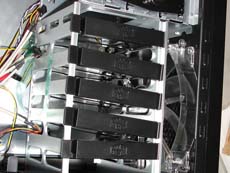
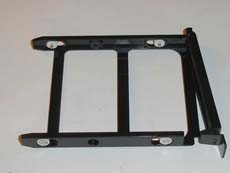
One of the 5.25’’ drive can be converted for external 3.5’’ drive with the included mounting bracket. You would be required to screw the bracket to the drive (which makes the installation not completely tool-less). There are spaces for five 3.5’’ drives. The drives are mounted onto a plastic bracket and then slide into the drive cage. The mounting brackets feels slightly filmy but should be strong enough to support the hard drives. The back of the hard drives are all facing toward the left side of the case to further assist cable management.
The unit we received had brackets that were not installed into the rails securely. I am not sure if this is due to shipping or a lack of quality control over at Cooler Master. Luckily, no damage was to be found.
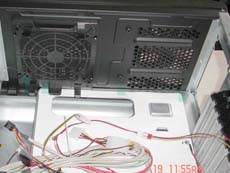
There is plenty of space for even the largest heatsink around the CPU area and also the case is wide enough for even the longest graphic cards. From the back of the case to the hard drive cage it is approximately 34cm, so it would not be any issue even if you use the GTX 295. If more space is needed, the hard drive cage can be removed completely, but that would leave you with a sole 3.5’’ drive bay available, so it is probably not recommended.
Click for Larger Image
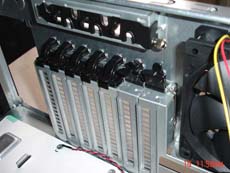
The expansion cards are held to the case with plastic clips that you often find in many tool-less cases. If the particular expansion card does not have enough space for the clip to hold the card, like some of the GTX 260 card’s fan shroud, you can still use screws to hold the card in place. Just above the expansion slot, you will notice a very handy cable management feature.
As mentioned earlier, the power supply is mounted to the bottom of the case. Another 140mm or 120mm fan can be installed next to the power supply. Unfortunately, the fan mounting mechanism comes a tad closer to the power supply so if you are using one of the longer power supplies, such as the Enermax Galaxy, the fan will get in the way.
|
|
|
|
|
|
|
|
||
Click for Larger Image
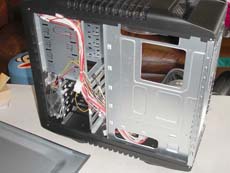
The case is designed so that the cables can be hidden underneath the motherboard tray. The left side of the case is curved outward to hide the cables. The cables for the hard drives are all faced toward left side of the cable to assist cable management. In addition, you see Cooler Master has also placed many holes throughout the case to be used with the cables ties. Cooler Master also places an opening next to the PSU to allow routing of cable underneath the motherboard tray. All together, the case offers plenty of cable management and should help to get the inside of the system clean from cable mess.
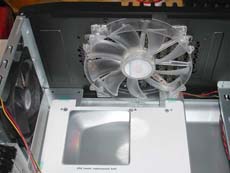
We get a view of the cooling fans. The case includes a 200mm fan and a 120mm fan on the back and another 200mm fan is placed on the front of the case. Two extra fan connectors are available with the included fan extension cable. The extension will only support Molex style header with 2 pin fan connector, which means you would not be able to use the 3 or 4-pin case fans. Oddly, we found Cooler Master uses a 3-pin fan connector for the rear 120mm fan. Given fact that the case has the ability to control the fan, you would expect to find the 2-pin Molex fan connector instead to let the front panel fan control to control the rear 120mm fan. I’m not sure why Cooler Master did not do this.
INSTALLATION, IMPRESSION, AND TESTING
Installation was fairly simple with the Sniper case because of the ample space to work with. With the exception of the PSU issue that was discussed earlier, we did not encounter any issue with our GTX 260 and the Noctua NH-C12P heatsink.
We decided to test the Sniper’s performance by loading up the CPU with four instance of Prim95. In addition, we loaded the GPU with ATITool. These tests will give you the “worse-case” scenario of what is the maximum temperature the components.
We installed the following components to the case:
- CPU: Intel Xeon X3320 (OC to 3.0GHz)
- Heatsink: Noctua NH-C12P
- Motherboard: Gigabyte EX38-DS4
- Memory: 4x 2GB OCZ Memory
- HD: Seagate ST3400620AS
- GPU: EVGA GTX 260 SC (260MHz core/1053MHz memory)
- PSU: Silverstone Decathlon 1000W
- Sound Card: Creative SoundBlaster Fatality
- DVDRW: NEC ND3520
Results
The Sniper’s performance is excellent. Its two 200mm and one 120mm fan setup beats the NZXT Zero case’s six 120mm fan setup. Under idle condition, both case’s performance are very close to each other with the exception of the hard drive temperature. The larger open area near the hard drive cage and the larger 200mm fans of the Sniper are capable of keeping the hard drive running cooler than the NZXT’s Zero. This would be an excellent case for those with multiple hard drives running in RAID.
Under idle, we hardly see any big difference in temperature of the components. We see performance of the fan setting at mid and high are virtually identical with high setting and occasionally it is able to further lower the temperature for 1°C.
The CPU temperature for both cases is fairly similar due to the fact that both cases have placed fans near the CPU socket area to keep the CPU running cool. The Zero has two 120mm fan on the back of the case, while the Sniper has a 120mm fan on the back and a 200mm fan on the top.
Again, the Sniper’s performance is better than the Zero under load condition. We can see that even with the fans on the Sniper set at low setting, the NZXT Zero is simply unable to compete with the more efficient cooling of the Sniper. We see 1~2 degrees lower in temperature with the fan set in mid and/or high level. Keep in mind that we are only using the stock cooling, so if you would need any additional cooling, there are places to add more fans.
Noise
The noise-level of the Sniper is a bit of a mixed bag. The fans are running at almost silence with the fans set at the low level. However, the fan noise is definitely noticeable when the setting is set at mid level; however though the noise is not too bothersome. Unfortunately, the noise-level for the high setting is a bit too loud. It is actually the loudest noise in the system under idle condition. Even under load, the fan noise is a bit loud even when we consider the added noise from the GPU fan revving up.
Luckily the fans are adjustable so users have the ability to balance the noise vs. cooling performance. For general use, I would suggest keeping the fans at mid setting to have a good cooling and acceptable noise-level.
CONCLUSION
The Sniper case from Cooler Master is a very well-thought case. From the design stand point of view, the case has an impressive look, very sturdy construction, and is spacious enough for even the largest hardware components. It has excellent cable management features and the opening on the back of the CPU socket area is a very welcomed feature.
Its cooling performance is also excellent. I am a bit surprised to see with only two 200mm fans and a 120mm fan the Sniper is capable of keeping the internal components running fairly cool. Of course, for those who may need additional cooling, there are spaces on the bottom and on the side for additional fans.
Users would also be sure come to appreciate that there are plenty of front panel connectors, especially the fan controllers and the fan led on/off switch. It is a simple idea but the convenience is sure to be appreciated.
There are a couple of small issues I have with the Sniper case. First, the placement of the bottom 120mm fan mounting mechanism can pose a small issue for larger power supply. In addition, the front panel dust filter can be slightly hard to remove for cleaning. These are simply minor issues. The biggest complaint that I have with the Sniper is with the loud fan noise with the fan set at the high level. However, as our tests shown, users probably will be able to have a good cooling with the fan set in mid level and not be too bothered by the fan noise.
Overall, the Cooler Master Sniper is an excellent case for any gamers for its combination of performance, beauty, and features. At $179.99 retail price over at Newegg, it is not exactly a bargain, but it sure would be a case to consider for those who are looking for a mid-tower case with these features and performance.
We are trying out a new addition to our scoring system to provide additional feedback beyond a flat score. Please note that the final score isn’t an aggregate average of the new rating system.
- Performance 10
- Value 9
- Quality 10
- Warranty 9
- Features 9
- Innovation 10
Pros:
+ Excellent cooling performance
+ Watercooling ready
+ Excellent built and design
+ Fan speed controllers
+ Spacious for even the largest components
+ Excellent cable management options
+ Plenty of front panel connectors
Cons:
– Fan noise at high setting is loud
– Price
– No front panel cover
– May have issue with large PSU’s
– No side panel fans are included
Final Score: 9 out of 10 and the Bjorn3d.com coveted Golden Bear Award.

 Bjorn3D.com Bjorn3d.com – Satisfying Your Daily Tech Cravings Since 1996
