Does the newest addition to the Performance One series from Antec have what it takes to keep your components cool? We think so. Come take a look and decide for yourself.
Introduction
The Antec P182 is the newest addition to Antec’s Performance One family. With a few extra enhancements that were not present on the highly popular P180, the P182 might just be your excuse to upgrade to a new case. Some great features to enhance cable management have been incorporated into this case, and those daring enough to watercool their rig will like the feature that was included just for them. Read on to see what the P182 has in store for those willing to give it a try.
Features
- Attractive gun metal black finish
- Dual chambers structure: The power supply (not included) is located in the lower chamber to isolate heat from the system and lower system noise
- Special three-layer side panels and front door (aluminum, plastic, aluminum) dampen system generated noise, making this one of the quietest cases available
- 0.8mm cold rolled steel for durability used through the majority of the chassis, 1.0mm cold rolled steel around the 4x HDD area
- Cable organizers behind motherboard tray minimize cable clutter
- 7 Expansion Slots
- External fan control on the rear panel for the top and rear fans in the upper chamber
- Double hinge door designed to open up to 270º
- Rubber grommeted ports on the rear for liquid-cooling tubes allow you to mount external liquid-cooling hardware
- Front-mounted ports provide convenient connections:
- 2 x USB 2.0
- 1x IEEE 1394 (FireWire®, i.Link®)
- Audio In/Out (HDA & AC’97)
Specs
- 11 Drive Bays:
- External 4 x 5.25”; 1 x 3.5
- Internal 6 x 3.5” for HDD
- Cooling System:
- 1 rear 120mm TriCool™ Fan (standard)
- 1 top 120mm TriCool™ fan (standard)
- 1 lower chamber 120mm TriCool™ Fan (standard)
- 1 front 120mm fan (optional)
- 1 middle 120mm fan (optional) to cool the VGA
- Motherboard: Up to Standard ATX (12” x 9.6”)
- Case Dimensions:
- 21.3”(H) x 8.1”(W) x 19.9”(D)
- 52cm (H) x 21cm (W) x 51cm (D)
Closer Look: External
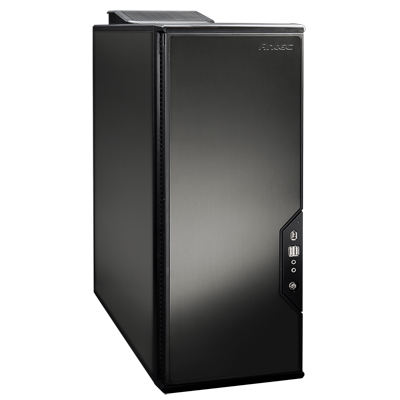
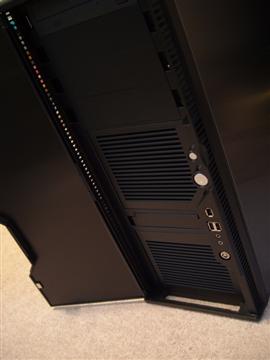
The P182 sports a nice blend of plastic and aluminum to make up its external presence. Both of the side panels and the front door are all composed of an aluminum internal wall, a plastic ‘frame’, and then the external aluminum panel. The external panels are all gunmetal and have a nice semi-reflective surface. No case windows accompany this case, and this should come as no surprise to anyone looking at the P182. This case is designed for efficient cooling as well as low noise output. Many times with the installation of a case window, both of these features can be compromised.
Out front, the door has a nice stamped Antec logo that does a great job of taking credit for the great case, but is not too flashy like some other cases on the market. The front door opens from the right side and has a nice 180 degree range of motion to allow for easy access to any installed optical drives. A small ‘cut-out’ on the right side of the door provides a place for the standard front-panel I/O ports. A single Firewire port resides in this area, along with two USB ports and a microphone and headphone jack. A lock is also provided to keep those unwanted hands away from the power and reset buttons. Keeping the door from swinging at its own leisure are three magnets.
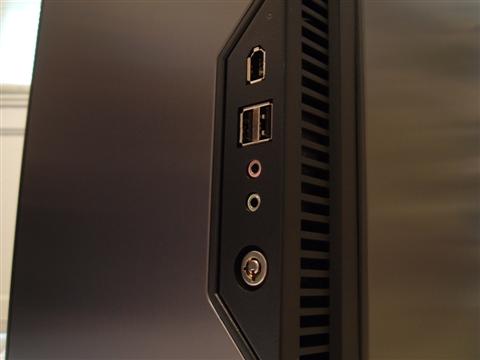
Along the side edges of the front panel are ventilation slots to allow the case’s intake fans to pull in air from the outside while the front door is closed.
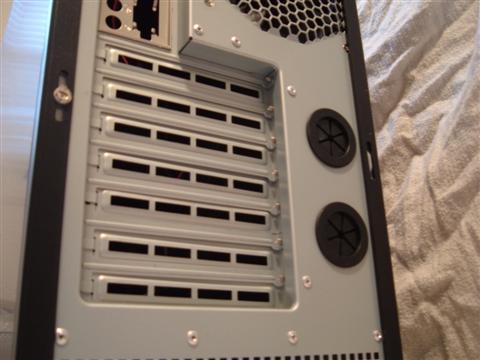
At the rear of the case are all of the standard features like the PSU opening, fan grill, etc. A few features that are a warm welcome on the P182 are two pass-through holes for watercooling tubing and the addition of slotted expansion slot covers. There are also two three-speed switches at the top of the case that control the speed of the two 120mm fans located on the top and rear of the case. More on these extra features to come.
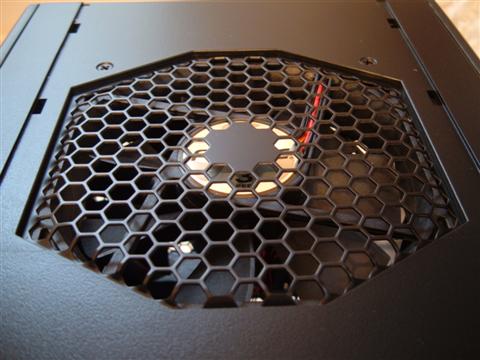
The top of the case is a plastic panel with a nice cut-out for the top-mounted 120mm fan. This case also comes with an optional fan spoiler that attaches to the case above this fan.
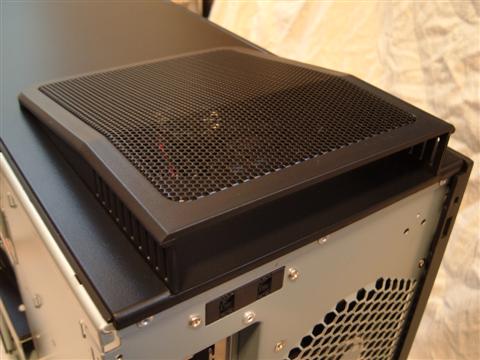
The bottom of the case features four very soft silicone feet to keep the case from scuffing the surface that they are placed on, as well as to eliminate any noise that may come from normal feet transfering any vibrations to your desk.
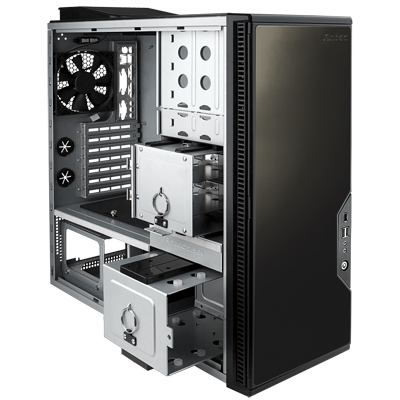
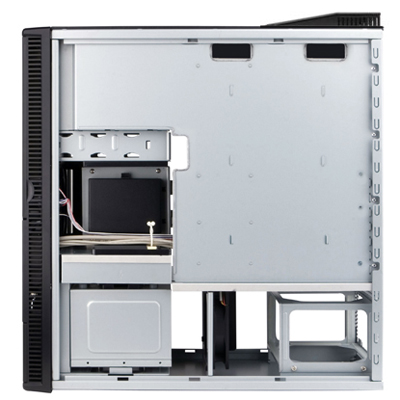
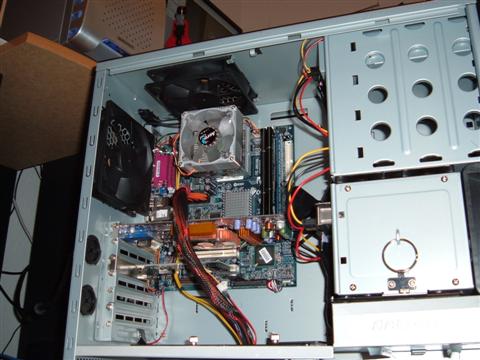
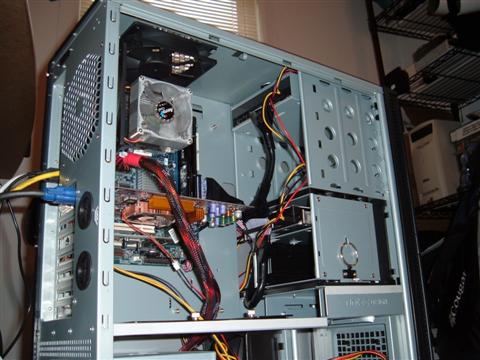
Closer Look: Internal
Cracking the P182 open is as easy as un-screwing two thumb-screws and sliding the side panel off. Once opened up, this case looks almost identical to the P180. This case features the same two-chamber design as is predecessor to allow for improved cooling. By separating the PSU, and optionally the hard-drives, from the rest of the case, the PSU is able to use cooler case air to keep cool and stable. This also allows for the components in the rest of the case to be closer to the fans exhausting air from the case.
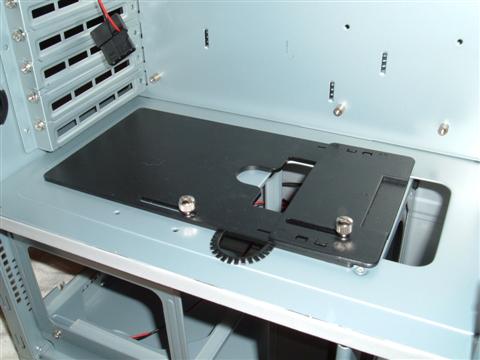
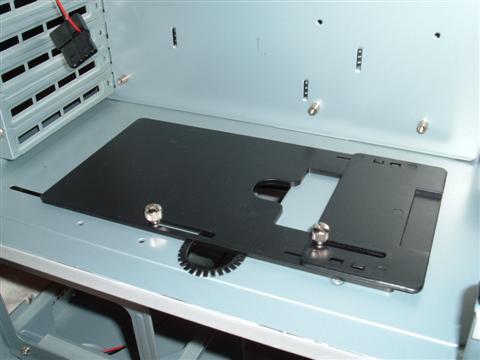
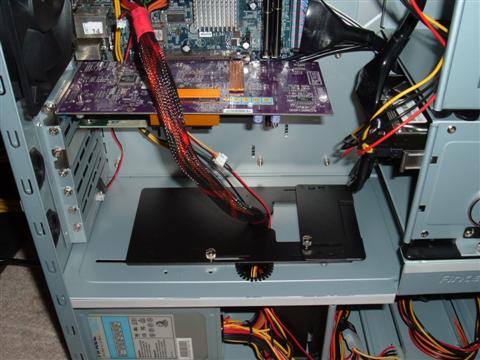
These two compartments are joined to one another by two holes in the panel separating the two. The holes are covered by an innovative sliding panel that allows any cables that need to go from the lower chamber up into the main chamber. The panel then slides into place to make sure the compartments are once again separated.
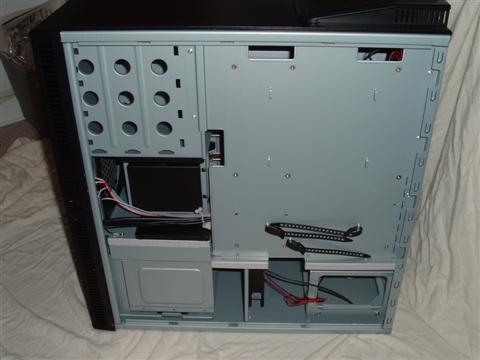
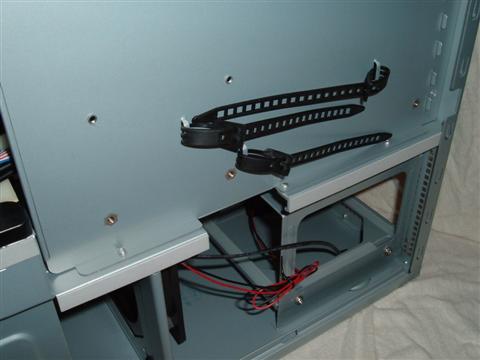
One of the best improvements from the P180 is the addition of two cable routing slots above the motherboard position and one to the side of the motherboard. No more excuses for having a messy case interior. Besides, cleaning up those cables is always good for internal case air-flow. Another routing slot connects the lower chamber of the case to the area behind the motherboard to allow for easy power cable management to devices that do not need to be connected in the main upper chamber, such as case fans. The backside of the motherboard panel has three adjustable straps to keep excess cable from getting out of hand.
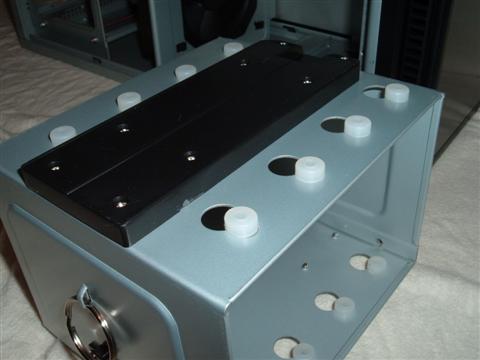
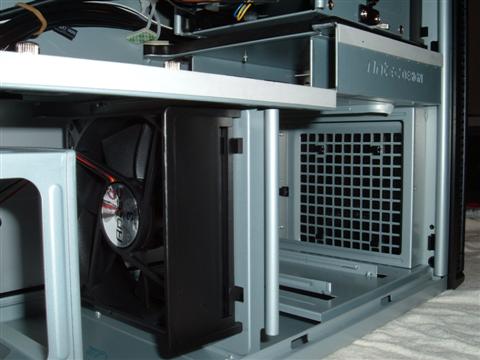
As mentioned earlier, the lower chamber houses the power supply as well as a single 120mm fan and hard drive cage with room for four vertically-mounted drives. The PSU’s mounting brackets are all outfitted with silicon strips to keep any noise from the unit’s fan to a minimum. This is a great feature.
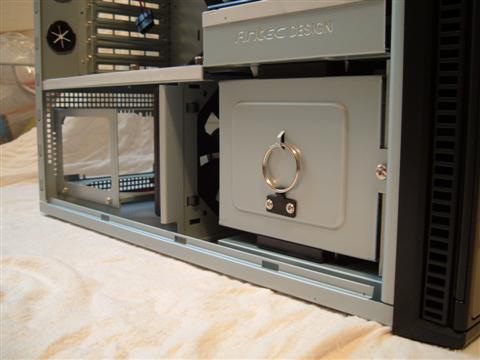
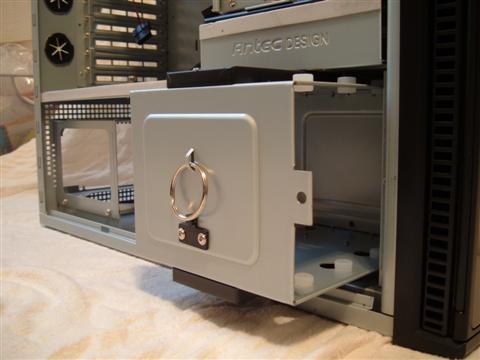
Both the upper and lower chambers feature removable hard drive cages that slide in and out of the case in nicely fitting rails. These cages are held in place by a thumb screw and feature pull rings for easy access. The upper chamber’s cage employs the use of removable hard drive trays, while the lower cage mounts the drives directly to the cage. A great feature on both of the cages are the silicon grommets that allow for improved noise reduction.

The optical drive slots and single 3.5″ external slot all use a very simple drive rail system to keep these devices in place. Simply remove the plastic and metal plate from the slot you would like to use and slide your device with the included drive rails attached into place until it clicks.
Closer Look: Cooling
Antec took no chances with cooling when it comes to the P182. With three 120mm Tri-Cool fans included and room for two more to be added, this case is well on it’s way to keeping all of your components nice and cool. The Antec Tri-Cool fans feature three speeds of operation which is controlled by a three setting switch.
Two of the included fans are used as exhaust for the upper chamber and are placed near where the CPU is on most motherboards to allow for maximum cooling performance. Both of these fans have their speed controllers mounted on the back of the case for easy speed adjustment. The lower chamber’s fan is situated between the hard drive cage and the power supply to pull in air from the front of the case, over the hard drives and back towards the power supply.
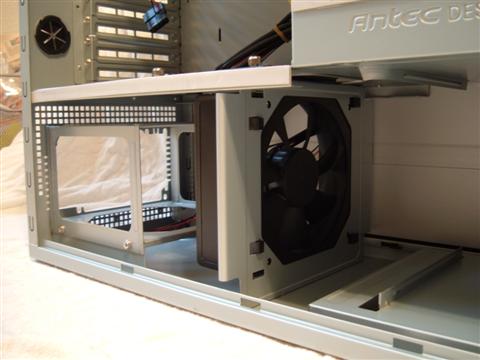
There are two additional 120mm fan mounting positions in the P182. The first is directly in front of the upper chamber’s hard drive cage. This position brings in air directly from outside and blows it across any installed hard drives and into the case. The second spot is an included mounting bracket that attaches to the upper hard drive cage. This is only used if there are no drives installed in this cage.
One spot that I wish Antec allowed for another fan to be mounted in is in front of the lower hard drive cage. This seems like a logical position and could probably be easily achieved with a little time and a dremel. A future mod article? Maybe.
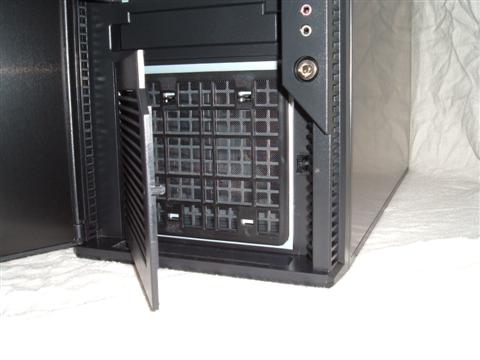
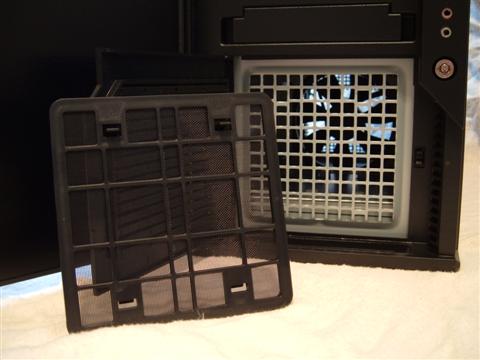
The front panel of the case features two intake grills each with its own intake filter to help keep dust and other unwanted particles from entering the case. The top grill is directly in front of the upper hard drive cage’s fan and the lower grill is in front of the lower hard drive cage.

Both grills are on hinges and have a snap mechanism that allows you to easily get to the filters to clean them as needed. The filters are simply washed with water, dried and placed back in the case.
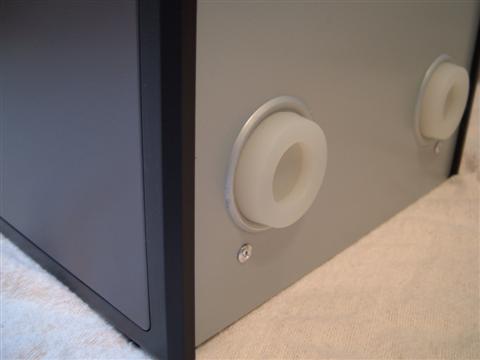
Another great feature of the P182 are the two rubber grommets at the back of the case. These openings allow external watercooling components like radiators and reservoirs to be easily routed into the case. No more having to worry about your roughly cut holes cutting a hole in the tubing or finding the right size grommet to do the job; Antec has done the hard work for you!

Installation
For the time being, I have decided to install a pretty weak (according to today’s standards) system into the Antec P182. When I decide to dive in and build my new PC I will definitely be putting this case to good use. The following components are currently installed in the P182.
- AMD Athlon XP 2000+
- Shuttle MK40VN
- Corsair XMS PC3200, 2x512MB
- PNY GeForce 4 Ti4400
- Lite-On DVD/CD-RW
- Western Digital 20GB
- Antec True 430 power supply
As this motherboard is a mini-ATX formfactor board, I had no trouble getting it into the case and secured. I even test-fit a dead standard ATX motherboard in the case and had no problems with it either.
I chose to install the hard drive in the upper cage, and I also installed a 120mm fan directly in front of this cage for extra cooling. The fan easily attached to the removable fan clip and snapped back into place. The hard drive slid right into its spot in the cage and felt very secure. The optical drive snapped right into place once the drive rails were attached.
The power supply was a little tricky to install, due to the small amount of room between the unit and lower chamber fan. The cables WILL get in the way if you do not take the time to position them away from the fan.
Antec gave plenty of extra cable length for the front panel connectors. This makes it easy to install just about any motherboard. The best part about the installation was being able to tuck all of my extra cables away using the new cut outs. Once all of my power supply connections were made, I closed the hole between the chambers for optimal cooling efficiency.
Picking up the case to move it to my desk confirmed what I had previously not wanted to admit. This case is a BEAST. I knew I was in for a heavy case when the packing slip showed it as weighing 40 pounds! Once loaded with my minimal components it is sure to weigh at least 50 pounds or more. I can only imagine how much effort it would take to lug this case to a LAN party with a full set of hard drives and a water cooling loop installed.
Conclusion
In the short time that I have been using the Antec P182, I have come to enjoy many of the features that it’s P180 brother is lacking. I am usually pretty picky about my cable management, and the extra routing holes and notches allowed me to quickly install the necessary components while keeping it looking clean inside my case. The three included 120mm Tri-Cool fans are an awesome feature, and the extra fan mounting options are sure to please even the most extreme PC builders.
When powering on the P182, I almost have to look at the power LEDs to make sure that it is running. The reason for this is because this case is very quiet. Weighing in at around 40 pounds, it’s no wonder the case is nearly silent. It is currently on the floor next to my desk and when it is on, I have to lower my head to the case in order to faintly hear the whisper of the 120mm fans when they are at their lowest speed setting. The one drawback of the low sound level is the sheer mass of the case. It’s big. And it’s heavy. But it is quiet. Real quiet. And that is just what I was looking for in the Antec Performance One P182. All-in-all, this case is great, even if it is on the heavy side.
Pros
+ Simple, yet sophisticated looks
+ Plenty of included cooling (3 120mm fans)
+ Room for additional cooling if needed (2 additional 120mm fan mounts)
+ Watercooling grommets
+ Improved cable management
+ Plenty of room to work
Cons
– Heavy (Aluminum construction would greatly improve this)
– Close quarters between PSU and lower chamber fan
Thanks to a few greatly appreciated improvements to the P180, I am glad to award the Antec Performance One P182 9 out of 10.


