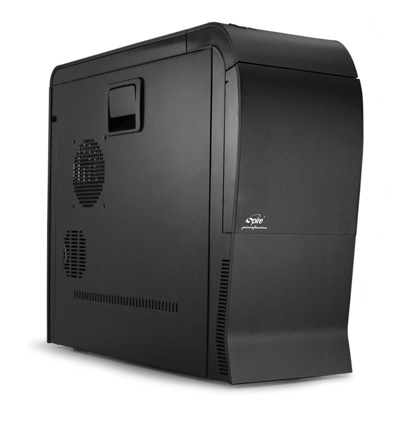
I think its a safe bet Pininfarina is better known by their many sports car designs such as the Ferrari P4/P5 and Maserati GranTurismo rather than by their computer cases. Nonetheless Spire teamed up with Pininfarina Group to design this computer chassis with functionality, creativity and opulent style in mind, and in my opinion came up with some very interesting results! Pininfarinas fresh look at what the professional, stylish computer case should be has brought some great new approaches to the table, and the results should speak for themselves!
INTRODUCTION
One thing often not given very much thought when building a do-it-yourself computer is the case. This is a shame as the one part of the computer the builder will deal with and end up looking at the most is obviously, the case itself! Whether the reason: style, performance, bragging rights, price, functionality, or something else the right case can go a long way towards making using your own computer all the more pleasant to use.
There is certainly no shortage of cases on the market, including more than a few that actually include some very good designs and ideas, but even if you think you’ve seen them all then the Pininfarina designed SP-ATX-PALU computer case by Spire may just surprise you yet.
I think it’s a safe bet Pininfarina is better known by their many sports car designs such as the Ferrari P4/P5 and Maserati GranTurismo rather than by their computer cases. Nonetheless Spire teamed up with Pininfarina Group to design this computer chassis “with functionality, creativity and opulent style in mind”, and in my opinion came up with some very interesting results! Pininfarina’s fresh look at what the professional, stylish computer case should be has brought some great new approaches to the table, and the results should speak for themselves!
About Spire
Spire-Powered by Innovation: Founded in 1991, Spire is a leading premier brand for computer thermal solutions, power supplies and pc cases. In order to meet the needs and demands of the global market, we have established our production facilities in China and corporate office located in the USA. Our overseas branches are located in The Netherlands, The U.K, Germany, France, Taiwan, Japan and Brazil. All locations are located strategically to better work with the customers we serve.Specs
Specs
| Dimensions | 495x200x450mm (L x W x H) |
| Material | Aluminum Alloy Bezel & Metal SECC Galvanized Steel Chassis |
| Material thickness | Aluminum 6.0mm | SECC 1.0mm |
| Color | Pitch Black |
| Mainboard | Extend ATX / Micro ATX / Mini ATX |
| 5.25 Bays | 3 visible ~ 1 hidden |
| 3.5 Bays | 2 visible ~ 4 hidden |
| Bracket slots | 7 ~ Incl. 3 PCIE/AGP/PCI Stabilizers |
| Cooling | 3x 80x80x25mm fans (rear included, right included, left not included) 1x 120x120x25mm (front included) 1x 120 Fan Duct (left included) |
| External | USB 2.0 x 2 | MIC x 1 | Earphone jack x 1 | |
| Connections | IEEE 1394 x 1 |
| Features | Lightweight aluminum & Durable metal frame. Italian Stylish design. Front USB, IEEE1394 & Sound connections. full screen, radiation protected. Side panel access, screw free installation. Optimized internal space design for Highly-efficient airflow. |
| Packaging | 522x260x517mm (L x W x H) |
| N.W. Weight | 13.50 K.G |
| G.W. Weight | 14.50 K.G |
THE BOX
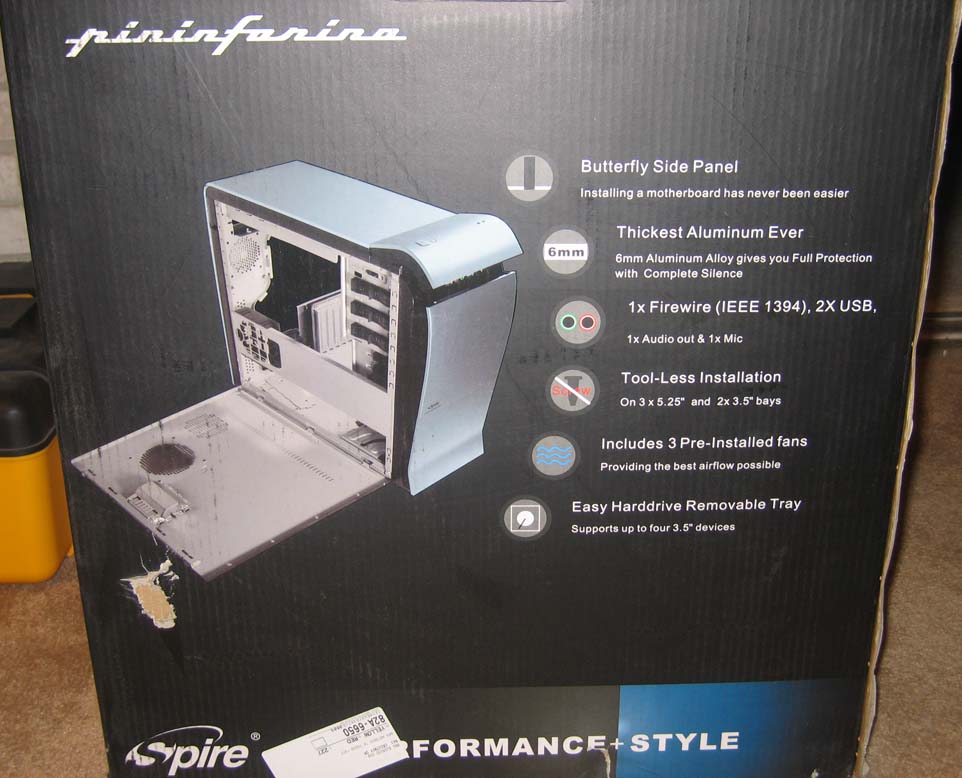
So far things appear pretty commonplace as far as appearances go, except for those that might recognize the Pininfarina name. Note that 6.0mm thick “Alumium” [sic] alloy is unusually thick though for any case, and as I’ll find out soon does make this case fairly heavy at about 30 pounds (13.5KG) empty.
Here we can see the other features of this case. It is somewhat interesting to note the picture is missing a few included items like the side panel intake shroud and rear 80mm fan, and the case’s main feature is not readily apparent either.
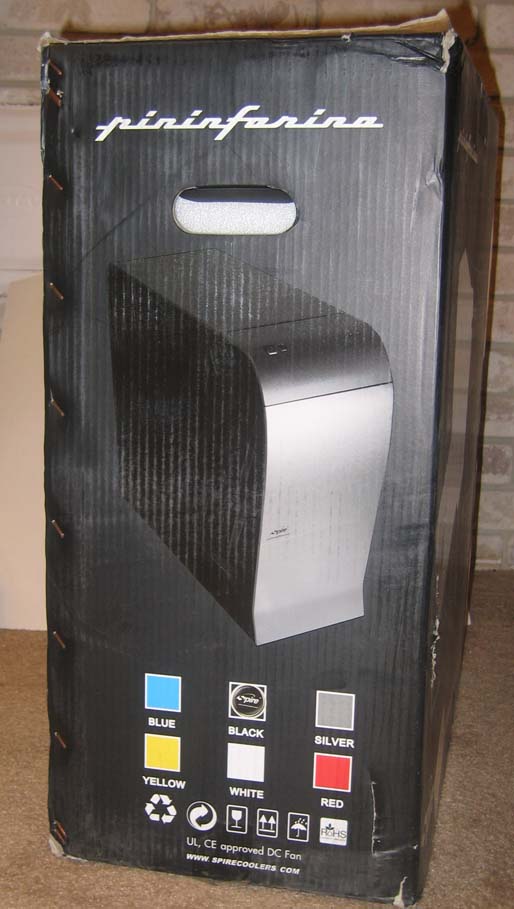
Besides the appropriate Ferrari Red, Corvette Yellow, and Maserati Blue, there is also black and apparently white along with the depicted silver edition. The blue and red don’t appear to look great in the online pictures on Spire’s website, but I’d like to say they’ll look much better in person! It actually makes me almost regret now that this review sample is a nice matte black…
While I am sure all the readers are quite interested in the box, it’s time to open it up! Here we can see Spire wisely suspended the case in two cell membrane foam type blocks. This is the best option in my opinion, as this stuff can absorb countless impacts and not once break apart during the expected rough treatment most parcels seem to get these days.
Please heed the warning sticker, if you lift this case by the front door (located under the sticker) I can guarantee you will only end up with a broken front door panel in your hand!
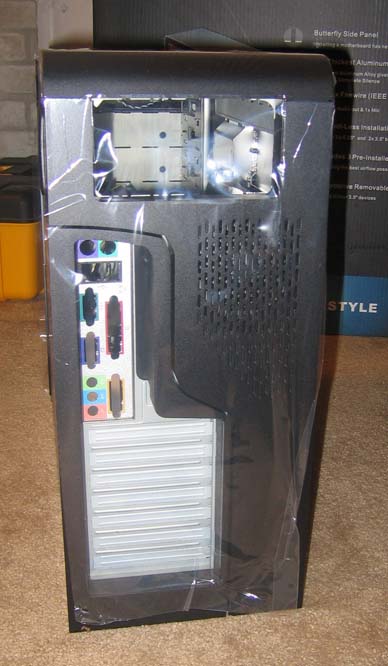
Not only did the case arrive completely wrapped in a thick plastic bag, but Spire also thoughtfully wrapped the entire front, top, and rear of the case in a protective plastic cover. Honestly I am not sure as to why, because the only part they covered is actually ¼’ thick, very scratch resistant non-painted aluminum alloy all the way around, but the thought is definitely appreciated. I’ll just say for those who enjoy unwrapping presents then you’ll love this case.
The Case
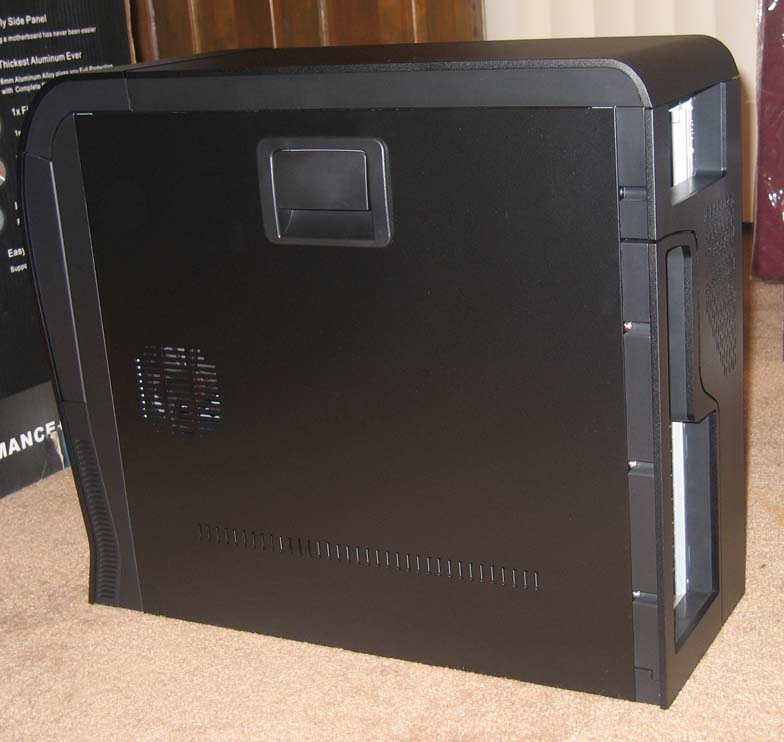
Photographing this case proved to be a small chore and even then I can’t quite capture how it looks in person! The black is very subtle matte black, although the flash effects of my camera will often hide this by producing quite a few gradients. So much for having over 550watts worth of lighting in the room…
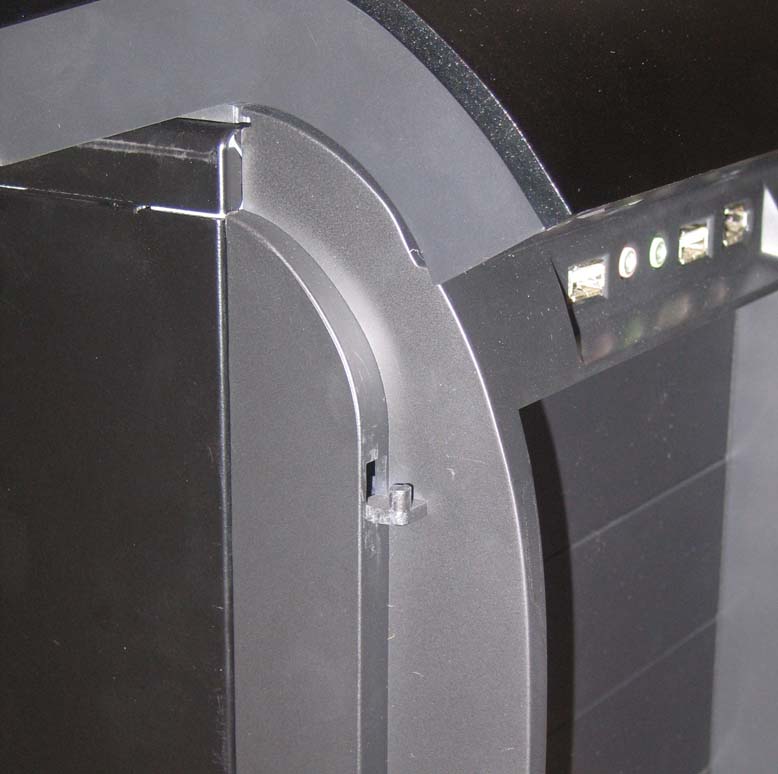
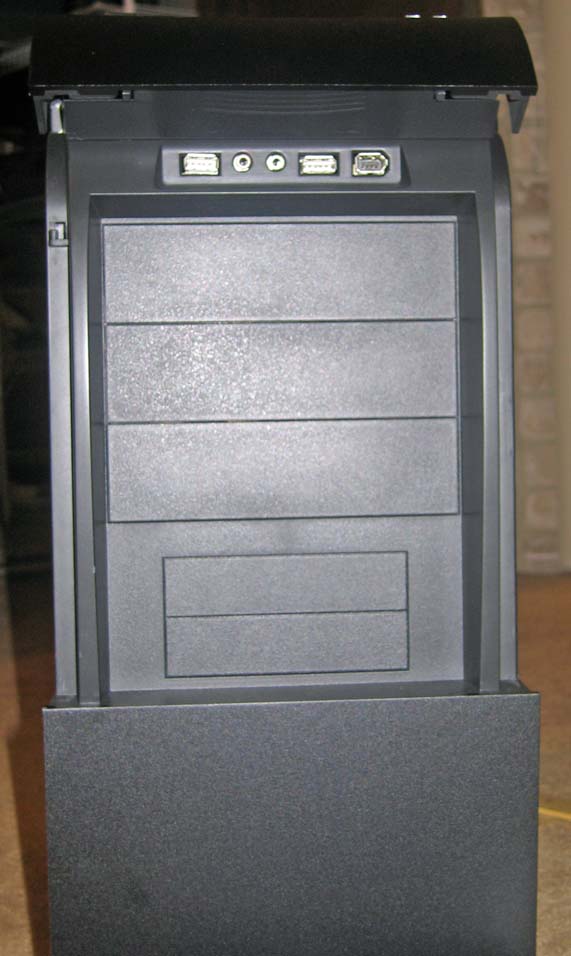
On the top from left to right is the power, reset, power LED, and HDD activity lights, which will glow a searchlight bright blue when the case is on. The buttons were quite responsive during use. Lifting up the cover will reveal two USB ports, a mic input and sound output port for headphones, and lastly a firewire port.
The door (Yes, door) is hinged at the bottom, and features (Car door?) handles which unlatch the panel and let it swing down to lay completely flush on the ground, or simply be completely removed by unlatching and then lifting up and out of the inset hinges.
Interestingly while this is a 120mm fan sized opening, it was not designed for mounting a 120mm fan. It instead features a large duct on the inside to provide the CPU fan with cool outside air. I can say that stock CPU coolers or coolers similar to the Zalman CNPS-7700Cu would best benefit from this shroud, while the use of taller aftermarket coolers such as the Scythe Ninja will require the duct to be removed.
Below that is the 80mm fan intake designed to blow more cool air directly into the GPU area of the system, which is usually by far the hottest part of today’s systems. Speaking of cooling, you can also notice the front grill work which is where the front 120mm case intake fan draws its air.
What’s this? A second door? Well what Ferrari doesn’t feature two doors? Besides the rare feature of having a right panel door, there is an equally rarely seen second 80mm fan intake positioned to blow directly at the upper 3.25” drive cage. Notice I said “at” and not “into”, I’ll cover this in detail later. More grill work can be seen on both the side panel and the front.
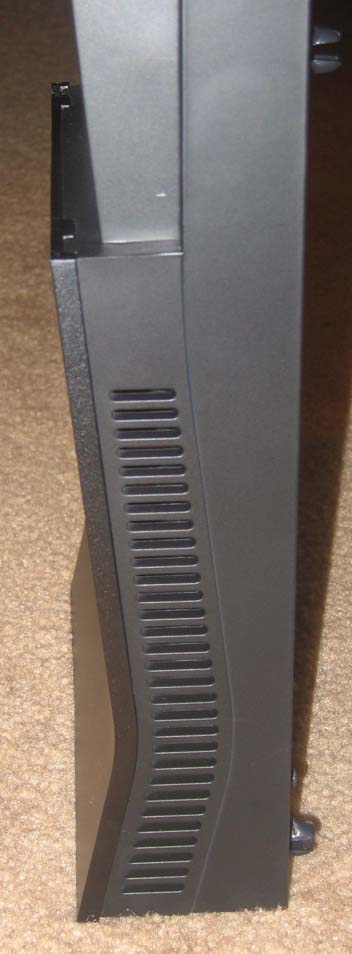
In the above images you can easily see the just about quarter-inch thick aluminum that surrounds the outside front, top, and back of this case. It is an intriguing design that I thought was only for aesthetics, but one that I have quickly grown to approve for several reasons! This “armor plating” while accounting for a good deal of this case’s heavy weight makes these panels very hard to scratch, dent, or even disfigure.
As usually occurs with any person that frequently works on or around computers things happen, namely that I happened to “scratch” a sharp corner of a metal drive cage across the (then removed) door panel. While I would have expected a fairly bad scratch or ruined paint job on any of my other cases, to my surprise there wasn’t any kind of mark to be found on the black metal. The aluminum alloy is indeed painted black, so I am left wondering just how high a grade paint job this case was given.
While both side panels do not share this 6mm “armor plating” and instead feature SECC galvanized steel, it is yet another one of the Pininfarina case’s hidden features, and well worth the extra weight it causes in my opinion.
The Case (cont)
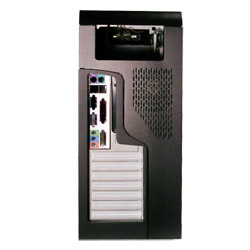
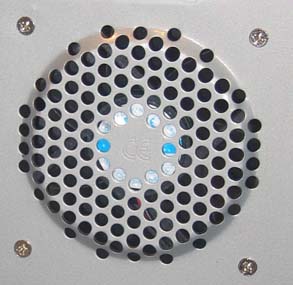
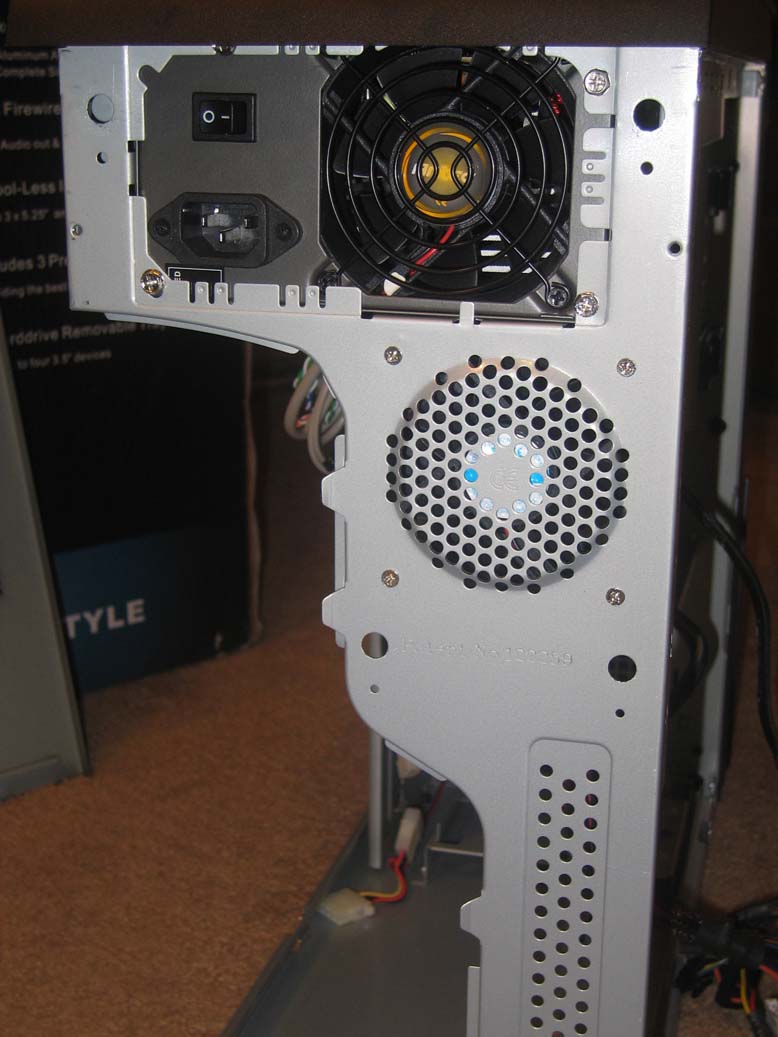
No power supply is included with this case. Also here is my first real gripe with the case design. The rear 80mm fan holes are extremely restrictive; not only from the outside looking in, but the second inside set on the case itself block at least half of the airflow from the single rear 80mm fan! Since this fan is already intented to be the main case exhaust it makes a bad situation worse.
Critique number two would be the use of a single 80mm fan as the main exhaust for the case. If the cooling was exceptional I would overlook it, however the cooling on this case is not exceptional, despite the strategically placed fans. There is just enough room for a 120mm sized fan in place of the rear 80mm fan, which would have gone a long ways towards improving the airflow exhaust with this case.
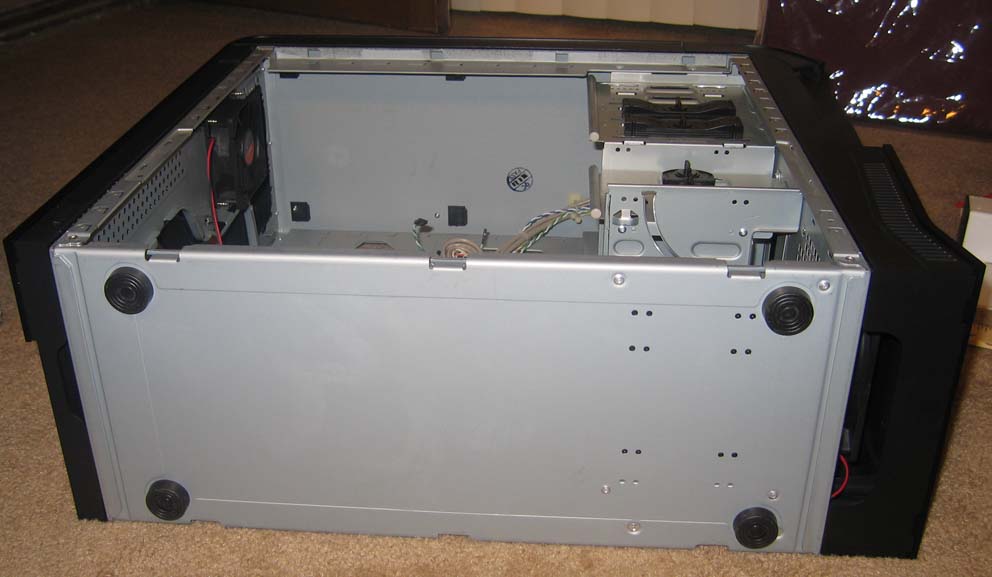
Looking at the underside we can see the unpainted SECC galvanized steel of the main case frame and the feet. Pininfarina went with a semi-soft plastic for the feet which works quite well. Despite the heavy near 50 pound total weight once loaded the case can still be easily slid around, but won’t leave marks or grooves behind especially on faux wood such as particle board computer desks.
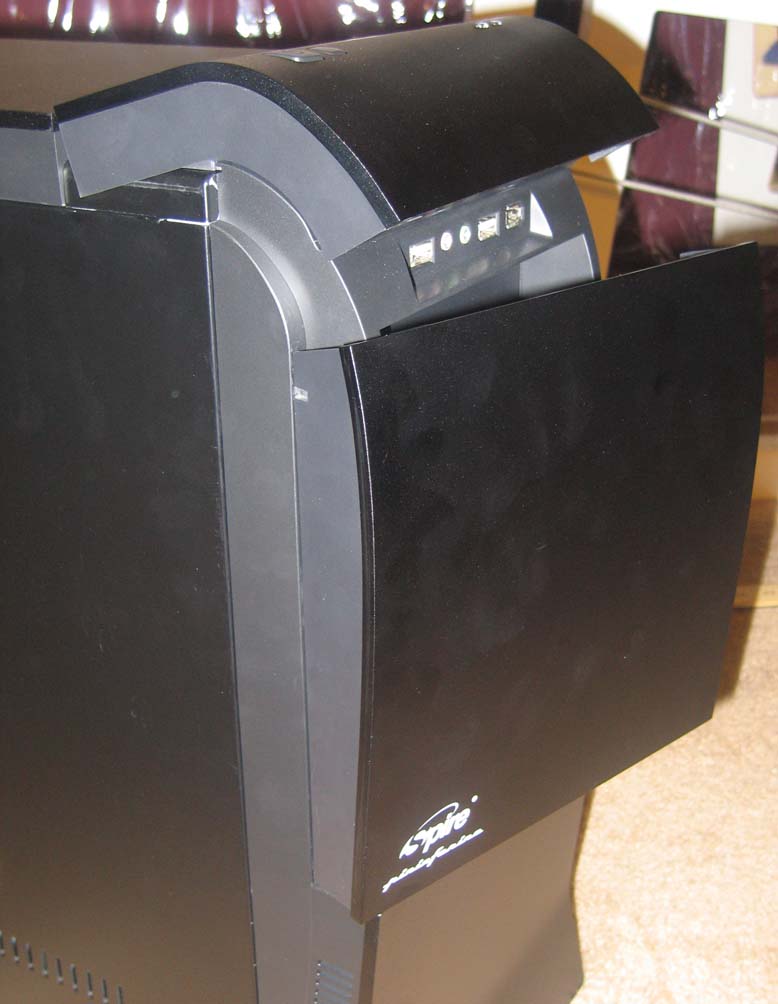
Here we can see fingerprints-sorry, the front door panel with the top cover lifted. Don’t worry, this is not one of those cases that must be wiped clean after handling. It is simply a result of the camera’s flash. After over a week of heavy use I can attest fingerprints and dust will be will hidden except to flash based cameras.
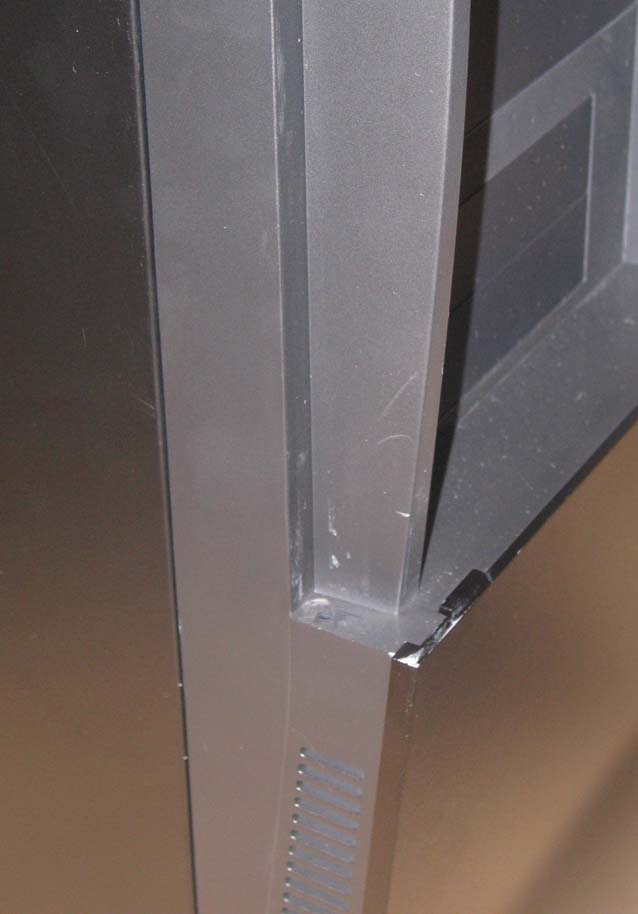
Unfortunately my sample arrived with a manufacturing defect. While the front aluminum bezel plate appears perfectly mounted from the front, the left corner is raised a hair under 1mm above the plastic molding. This causes the left corner of the door to ride imperceptively higher, in fact just barely high enough that I cannot open the door further than in the photo without either breaking the hinge or taking a file to the plastic under the hinge, and filing some of it away to compensate. To give an idea of what I mean, look at the round plastic edge below the notch on the door, then imagine the thickness of a credit card being added to the size of that notch spacing.
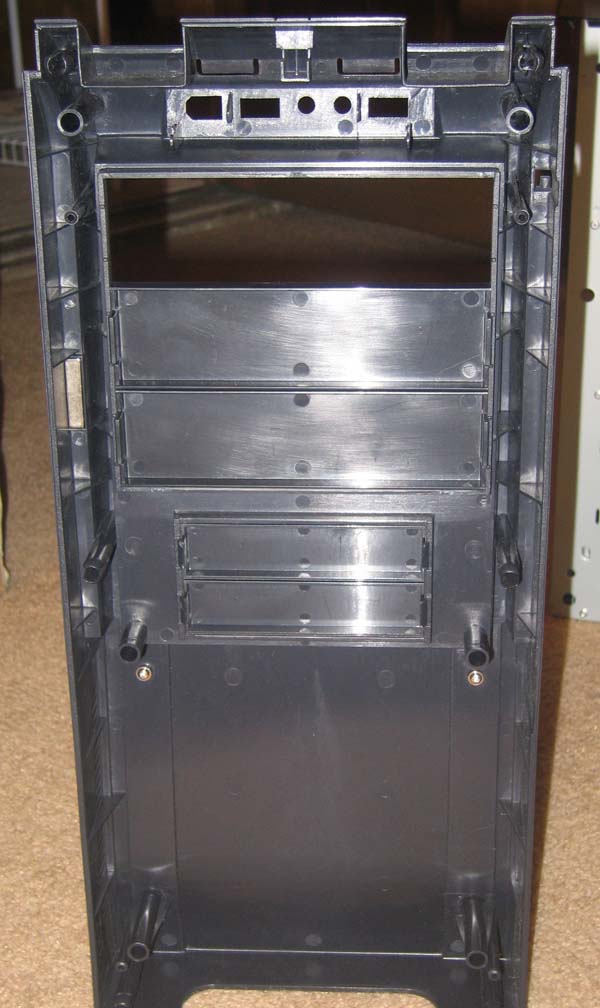
As the plates are screwed onto the plastic front bezel from the inside it’s not possible that this was the result of shipping damage. Thankfully it is a very simple fix, or the door itself can simply be lifted up and removed, as with the side case panels.
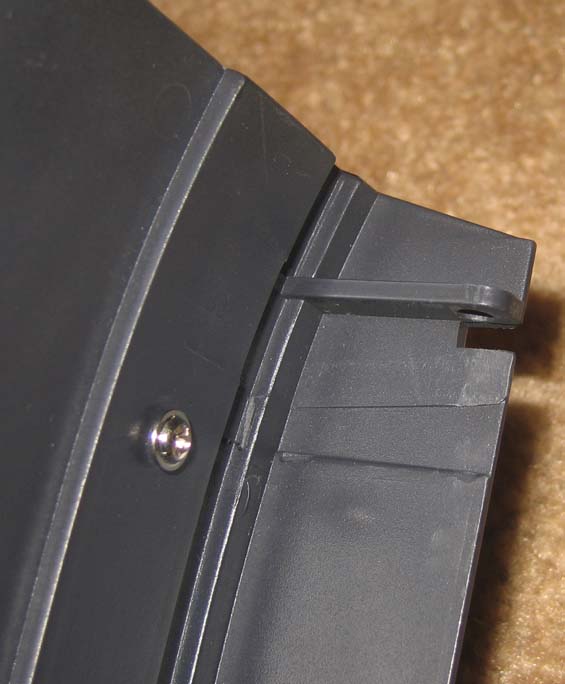
Of all the thought put into the design and styling of this very unique case, I am somewhat appalled that Pininfarina would slack on one critical spot. This is the front panel hinge, and it is simply a small piece of plastic molding. Considering that the door panel has a solid plate of quarter inch thick metal on the front it is quite heavy, which further makes the use of an easy to break plastic hinge unforgivable. Strangely they did use a threadless screw as the base hinge however, so without any of the common “accidents” that can occur around working cases with the front door the hinge should hold up. Unfortunately accidents do happen, so I would wager that this would be the first part to break
THE INTERIOR
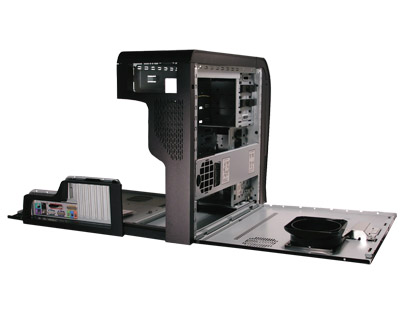
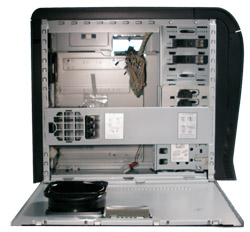
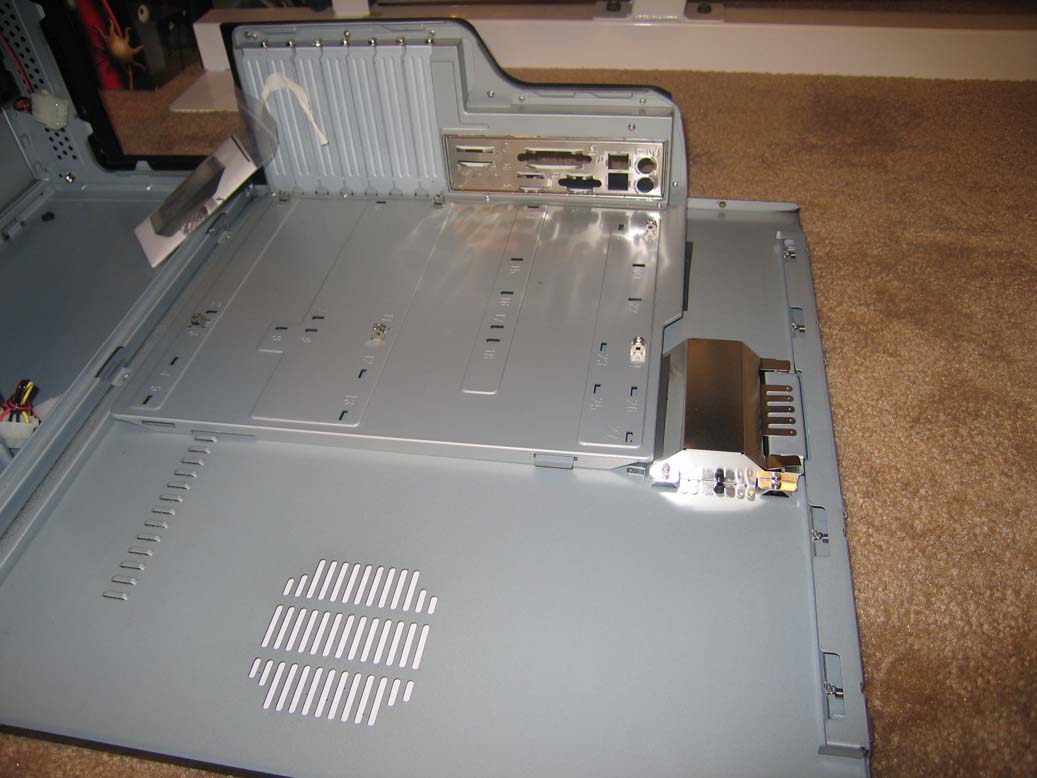
Here we can see the Pininfarina case’s main feature! In place of a removable side panel that requires screws to access, the entire right panel of the case can be easily opened for quick, convenient access via the latch. Instead of including a removable motherboard tray, Pininfarina did one better by designing the panel to be easily lifted out of its hinges and removed just as with the left panel, lock stock ‘n barrel. To say this would be a great help to those who do frequent computer installations is the same as saying there are only a few US Presidential candidates this term (I stopped counting at 18).
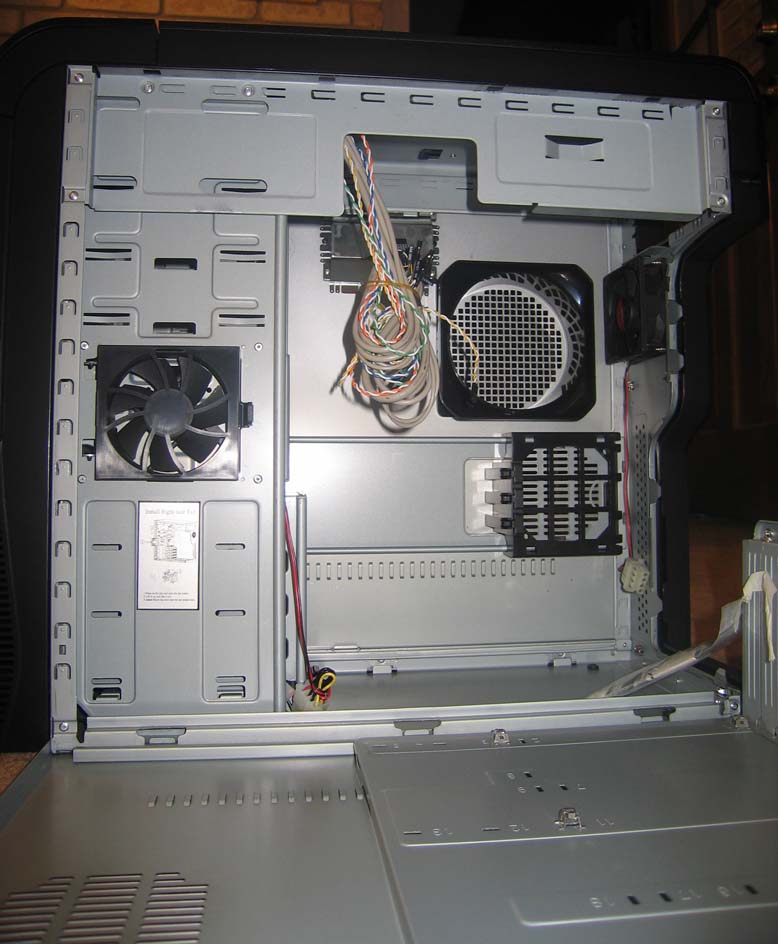
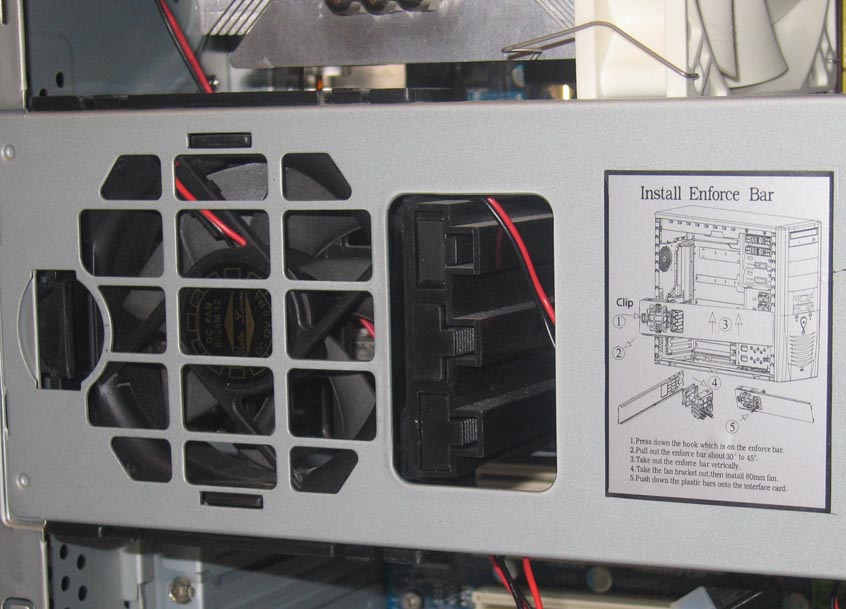
This case features a support bar which holds the side 80mm fan in a clip-in bracket. The bar is also hinged to unlatch and swing out to a 90 degree open position, or for convenience can be lifted out and removed completely. Spotted the trend here yet? 😉
Spire chose to include two out of three possible 80mm fans, along with the one front 120mm intake fan. All use 4pin molex connectors for power. A brief search revealed these to all be 25dB(A), 28CFM, Sleeve based fans although the 120mm will naturally have a higher CFM rate.
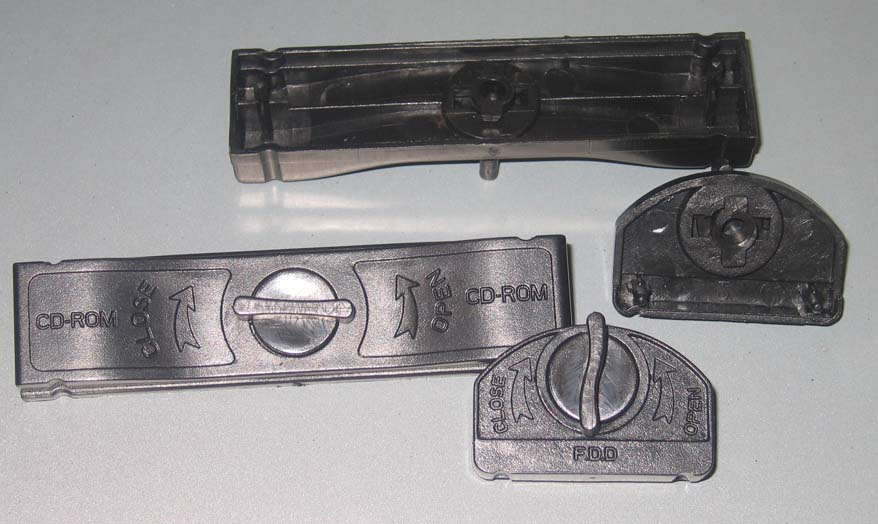
The middle and top drive cages feature a very simple tool-less design that works better than I honestly would have given it credit for. Simply slide the device as normal into the cage, align the little pins on these plastic clips with the screw holes, then press in and turn the knob to lock the device in place, and voilà!
While these devices are only used on one side of the drive bay, they do a decent job of holding the devices in place even working on a couple small Silverstone fan controllers I tried. While lugging the case to a LAN party probably wouldn’t cause these clips to release or shake loose, it still might be a good idea that if a lot of jostling is expect then to simply use screws instead. This is also probably why only the bottommost clip in the middle 3.25” bay is designed to hold a hard drive.
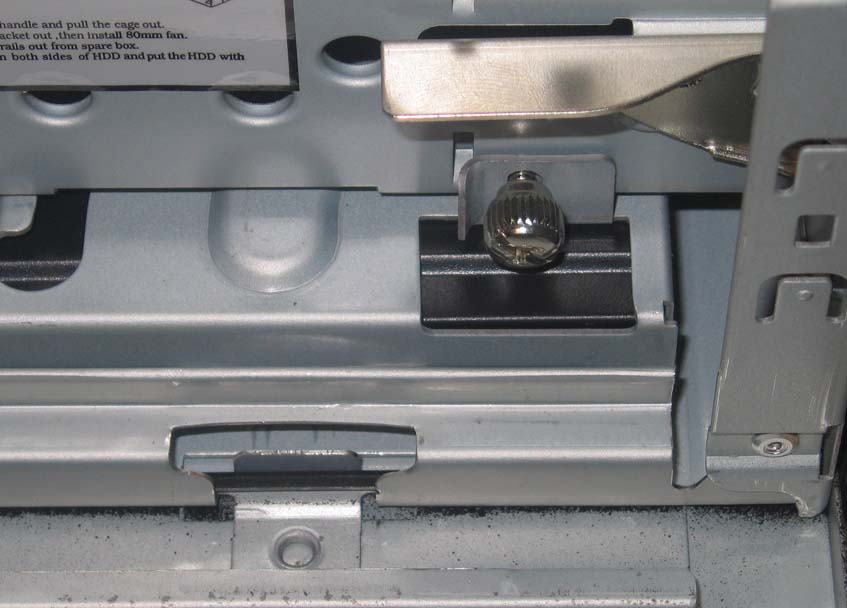
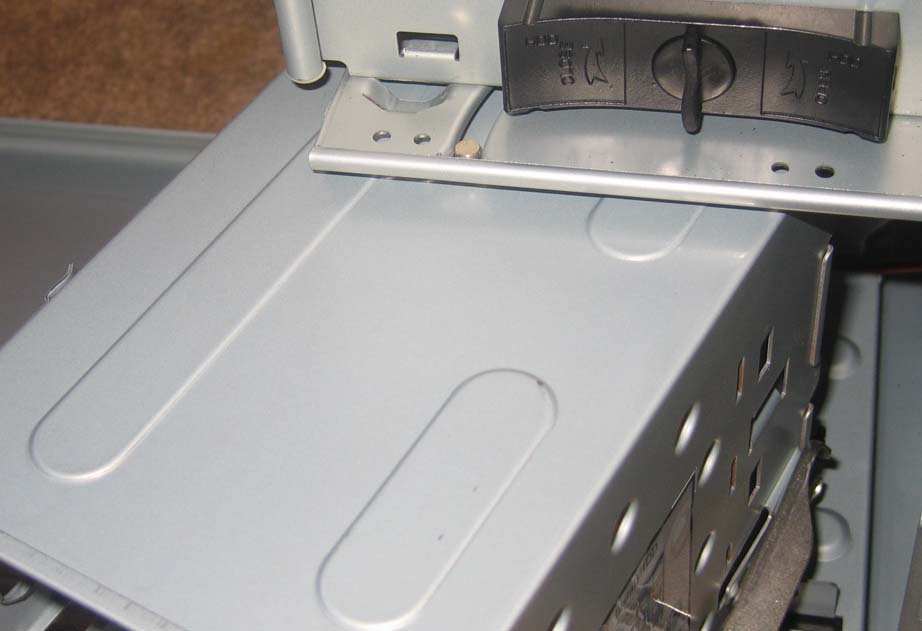
Here is a close up of the release lever and thumbscrew that hold the lower hard drive cage in place. Additionally one of the three hinges that connect the side panel to the case is also shown. To remove either side panel simply tilt the panel almost fully vertical and then lift up! In the short time I have this case them there was nothing to indicate these hinges would be in danger of snapping or wearing out.
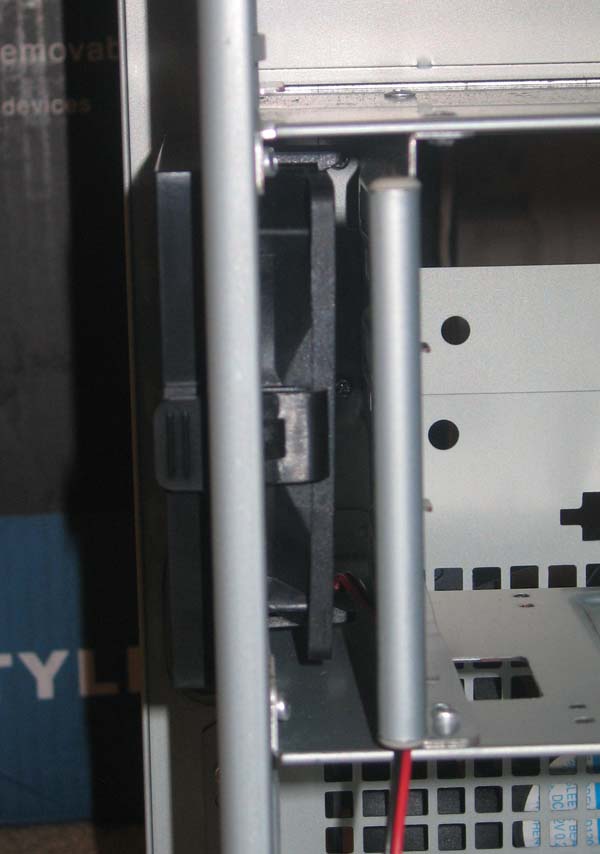
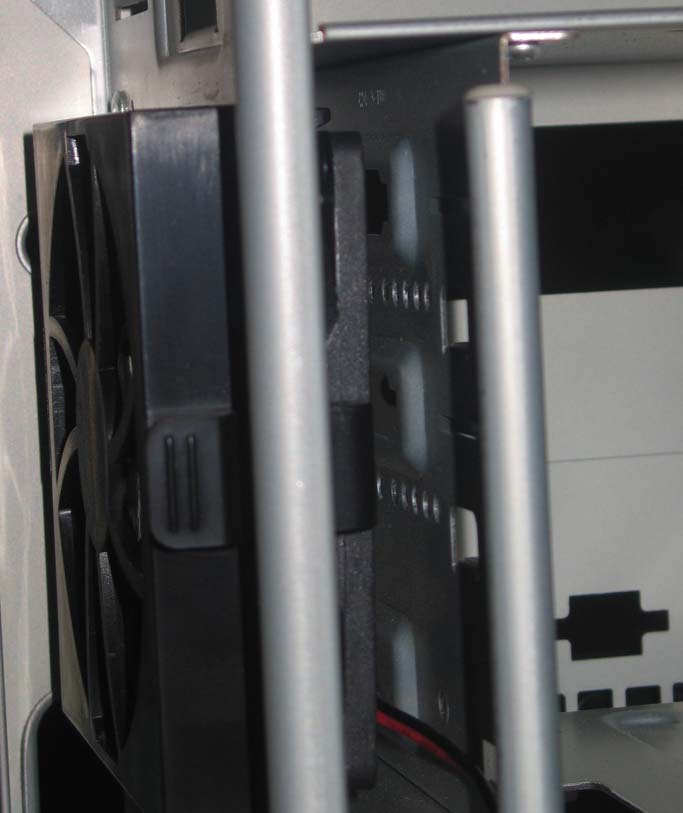
Besides the use of an extremely restrictive perforation pattern on the rear 80mm fan exhaust, the right side fan features a gross oversight in the design that has real consequences. As can be seen, this fan simply has no place for the air to go! The only place the air can go is through the small cage openings (Which any mounted device in the cage would block) and out the thin open strip along the side of the case. When I first powered up the computer I could hear a very distinctive high motorized whine emanating from the case, which I eventually managed to pinpoint to be coming from this very fan.
The noise itself was not easily ignorable, so I swapped out the 80mm fan with a known to be silent Yate Loon model, and to my surprise once powered up the high pitched growling whine was still there, if not quite as bad. Since the noise ceases when this fan bracket is not used (Or the fan intake is completely blocked) it’s safe to say that due to the severe air restriction any fan used (with the possible exception of the lowest CFM fans) is going to generate a whine from trying to force the airflow into the case. Creating a negative air pressure inside the case only marginally reduces the noise.
INSTALLATION
Included in the box is just a small slip of paper with support info. Instead of a paper manual the case comes with four simple stickers to illustrate how remove and install various components. Interestingly one sticker shows there to be an 80mm fan in the drive cage, although there is none. Likely because the 120mm front intake fan already is directly cooling the hard drive cage.
One drawback to this case is both the front and rear bezels are extremely difficult to remove. Probably realizing this either Spire or Pininfarina decided to use a dual clip/screw configuration where either pliers or a THIN neck Phillips screwdriver will allow each of the mounting points to be released. As a nice touch the cable routing holes on the front and rear of the case had their edges rounded inwards to prevent slices to fingers or cables in addition to the various front bays.
While the front bezel only needs to be removed when changing the front 120mm fan, the rear bezel is required to be removed every time when installing a power supply. This makes the power supply the slowest piece of hardware to remove or install with this case.
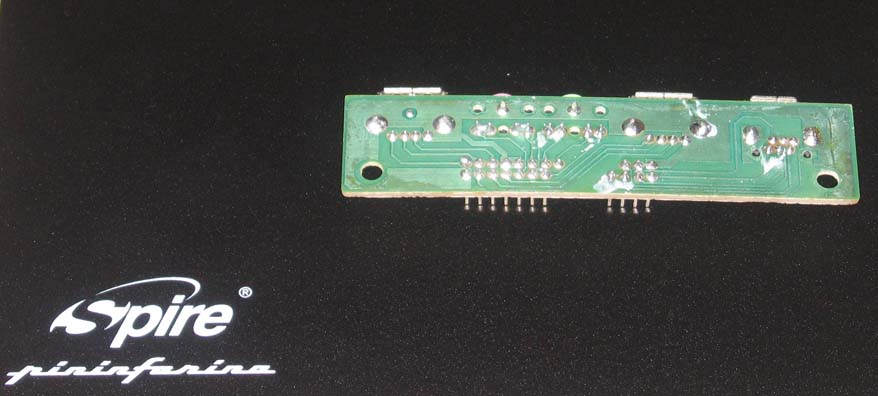
Since we are already here, here’s a gratis shot of the front panel hub where I found another small mark against this case. Corrosion is already evident on some of the back traces one to question how long or even how well some of these ports will continue to function after a year or more. Gobs of some unknown white substance akin to toothpaste were also left randomly smeared across some of the circuits themselves.
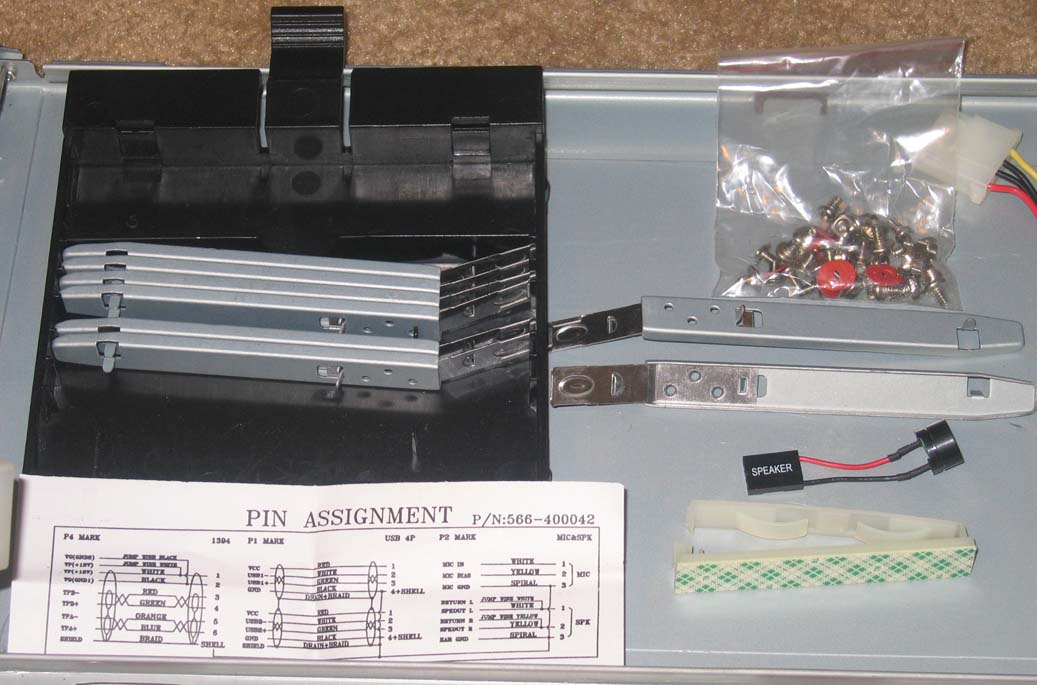
Here is the included toolbox, which snaps into place well hidden under the bottom hard drive cage. Note the prongs on the hard drive rails. I was surprised but happy to find a tiny speaker included in the box along with a long clip with adhesive backing for cable management. It’s amazing the differences small little things can make, this speaker will be a lifesaver those users who are troubleshooting POST or other issues on speakerless boards. Also I should note that meticulous care was shown in the toolbox design, so if properly inserted any unused drive rails and other parts will not be given the chance to rattle and generate noise, even if you shake the toolbox around and pretend to play the Maracas with it.
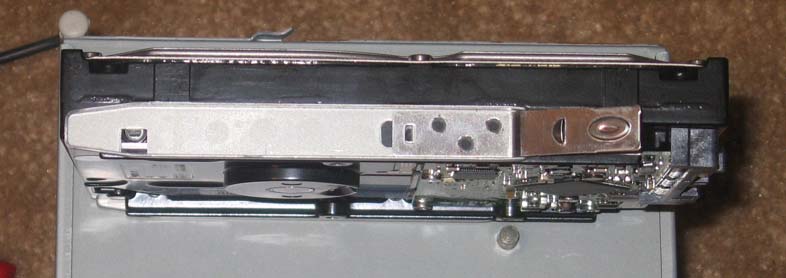
Keeping with the tool-less features, Spire/Pininfarina has developed a sort of “snap-on” rail system for the lower removable hard drive cage, hence the prongs. Each rail uses two metal prongs that allow each rail to basically snap into the screw holes. While it was quick and convenient, I am still left wondering about the possibility of metal shavings being the result at some point, not to mention ruining the screw threading on the hard drive itself. Screws are unfortunately not an optional alternative for HDD installation with the lower drive cage, and admittedly some users may find installing the rails to be a little difficult.
All of that said, I still cannot refute the simplicity of the design, and so far no metallic shavings or ruined threading has occured. Also contrary to the rail systems on a few Antec cases of mine, I was surprised at the ease of releasing the drives; the rail tabs must have been precisely measured to both cleanly lock in place and release with the drive cage. To remove the lower HDD cage you must first remove a thumbscrew then press down on the lever. At this point it will require a firm pull, then however unlike any other drive cage I’ve seen (And I’ve used many!) this one will tilt out towards you guided along on a track for easy access or removal.
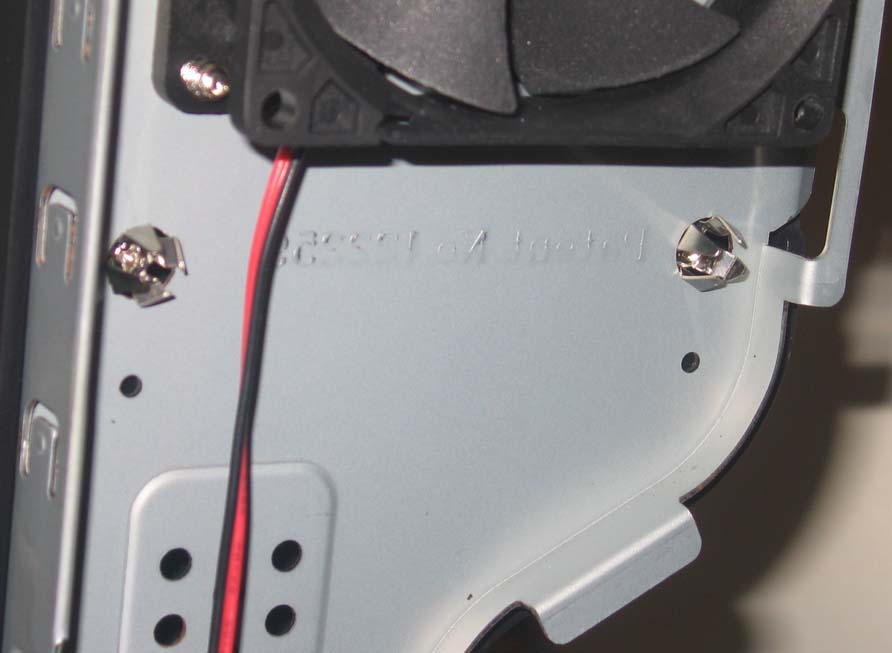
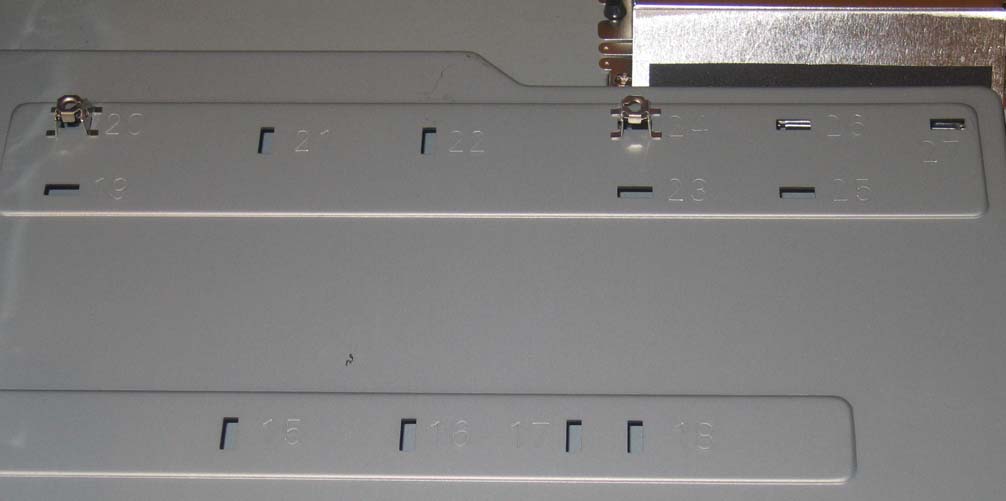
The Pininfarina uses a somewhat unique standoff clip method for mounting the motherboard. Each standoff clip mounting point is labeled with a number starting at 1 all the way to 27, supposedly for easy mentioning of which ones to use for the various form-factors. Each number corresponds with a mounting hole for the bracket to clip into and hold a screw, but despite searching everywhere I could not find out which numbers represent which form factors! While Spire states the case supports Extended, Standard, Micro, and Mini ATX motherboard form-factors, due to the sheer number of extra mounting positions I’d bet even a picoTX size board might fit.
Oddly while there are an option of 27 mounting points, and the official ATX standard calls for 9 screws to be used for installation of a standard ATX motherboard, the Pininfarina case only comes with 8 standoff clips! Any full size ATX motherboard will most likely be one mounting point short because of this. Hopefully none of the eight included clips will become lost or damaged with use as this could pose a serious problem.
Extended ATX motherboards these days are almost only found on server boards, nonetheless this case claims Extended ATX support. I am not sure how though, because 8 clips are not even enough for a standard ATX motherboard, while Extended ATX will require 10 or likely more mounting points. Standard brass standoffs cannot be used on the motherboard tray without some custom drilling work first, so I if considering this case I suggest asking Spire directly for the proper amount of standoff brackets when more than the supplied 8 will be called for.
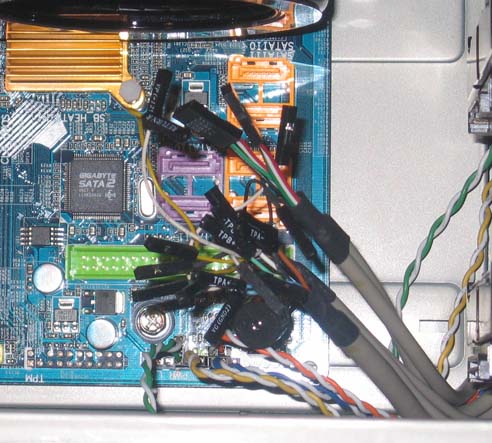
Unfortunately Spire choose to use a slew of the tiny infinitely annoying single pin connectors for the front USB, Firewire, and sound ports. I’m not sure why they choose this instead of the simple one-piece plastic connectors instead, as except for the sound ports on some sound cards the USB, Firewire, and onboard audio plugs are set to a common universal standard. This is the point it’s time to hunt down your motherboard and/or sound card manual and needle-nose pliers!
Pininfarina came up with another use for the sidebar, and that is to give any PCIe cards extra support. Attached to the plastic fan housing are three different plastic “fingers” that can be extended separately as needed to lock a graphics card into place, preventing a card from coming loose during rough handling or traveling. Considering the sheer weight of the latest DX10 capable graphics cards this is a handy feature to have, and easily worked well with a card the size of the 8800GTS.
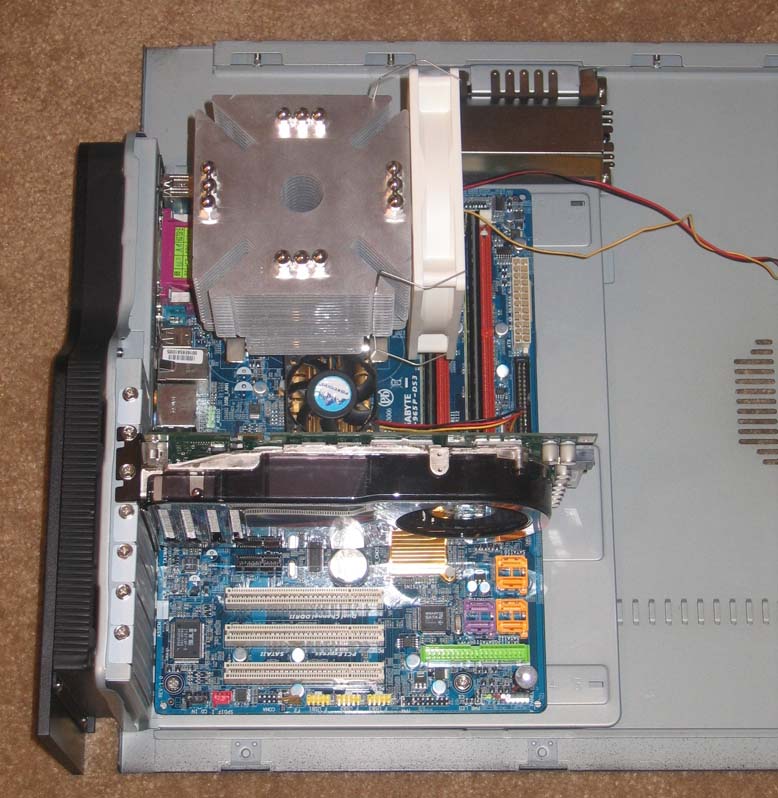
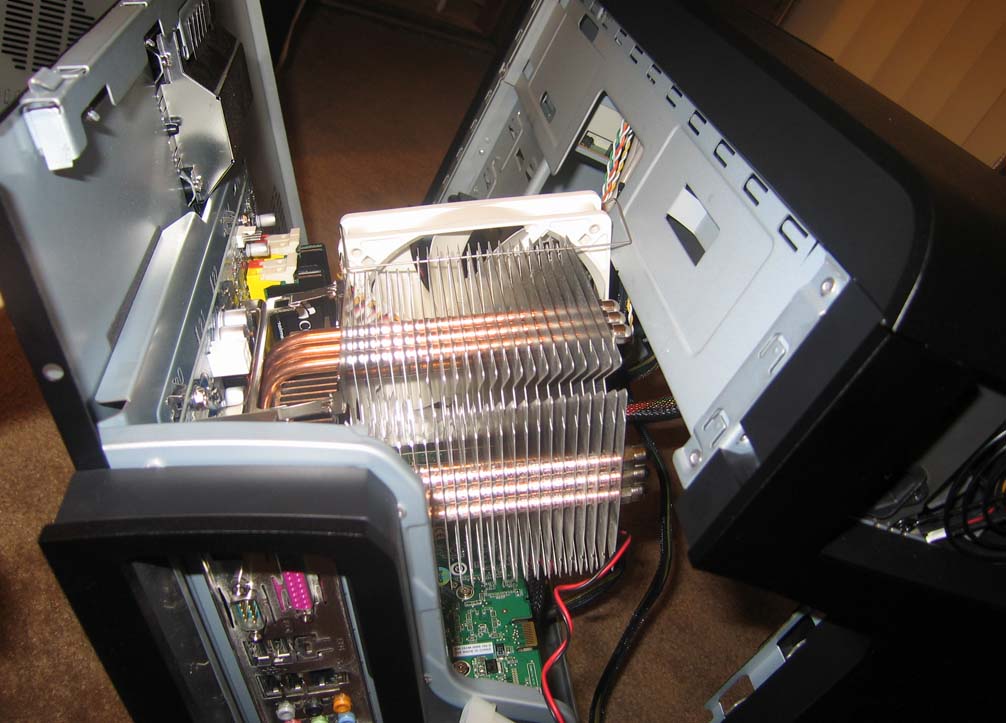
As I was closing up the case by now long past ready to power up the system I hit a snag. Or rather, my choice of CPU cooler did as you can clearly see. While socket location on the board will play a factor in this, generally if the CPU socket is going to be in the standard location then any tall cooler will likely have clearance issues. To insert/remove the side panel itself from the case the panel must be at half of the visible angle, so that is also not an option in this situation.
Since installing the CPU cooler after the board was in the case is simply not an option due to room constraints, I was forced to uninstall the whole board then reinstall into the case with the panel closed. At which point I ran into my second clearance problem. Oh snap! At this point I simply removed the 120mm fan shroud, and at last the system was all set to go with just enough room to spare.
This case provides plenty of places to stream or hide cabling, although if you plan to open the motherboard panel then care must be taken to ensure all cables will still have enough length to do so. Obviously the choice of cooler used should be a careful consideration with this case, although the 120mm fan duct is ideal for stock Intel coolers.
PERFORMANCE
| Test Platform | |
| Processor | Intel Core 2 Duo E6300 1.86ghz @ 3.2ghz |
| Motherboard | Gigabyte GA-965P-DS3 |
| Memory | Corsair DDR2-800mhz 2 x 1GB |
| Drive(s) |
2 x Seagate 320GB Barracuda SATA Drives 1 x Lite-on DVD-R/RW SATA Drive |
| Graphics | FOXCONN 8800GTS 320mb |
| Cooling | Scythe Ninja w/ Silverstone FM121 Fan |
| Power Supply | Antec NeoHE 550watt |
To get things cooking I set up a leisurely overclock of 3.2ghz on the E6300, and proceeded to use both ATI Tool and Orthos to load the system down. The CPU fan and front 120mm intake fan were manually set at medium speed, and then the entire conflagration was left to simmer for an hour before measuring temperatures. Idle temps were measured after 15 minutes with the system completely idle. I found that installing the optional 80mm fan on the left panel and orienting it to vent the hot air away from the GPU worked best and so I tested with this setup. Temps were measured via SpeedFan and ATI Tool, and ambient room temp was kept at near 73F.
| Temperatures (Co) | |||
|
Idle |
Load |
||
|
Processor Core 1/2 |
51/52 |
62/63 |
|
|
Motherboard |
40 |
48 |
|
|
Drives 1/2 |
31/32 |
32/33 |
|
|
Graphics |
54 |
78 |
|
Going into this test I was extremely doubtful that the system would stay cool enough to keep me from hitting the kill switch. To my stark surprise however the system held up and temperatures ceased to climb, leveling off at about 20-25 minutes into the test. While the cooling was not as efficient as the comparatively priced Antec P180B case for example, it was good enough to keep the system stable and most components cool.
Note that these are CPU temps taken from the internal CPU thermal sensors, and that these temps are fairly close to the norm for this setup. The motherboard and power supply deviated the most in temperatures when comparing to the Antec P180, although were on the edge of what I consider safe tolerances. Any warm running chipsets will likely require active cooling via a fan or the CPU fan to stay within safe, stable levels. Suffice to say the cooling is “good enough” to work and keep all but the hotter running PCs running stabily, but this case could have offered much better here, and hence is the biggest mark against it.
As mentioned previously, this case although advertised as completely silent, is unfortunately not due to the airflow restriction with the right panel 80mm fan. Use of a low CFM 80mm fan will correct this though, and the supplied fan can be used to fill the other side panel bracket instead. Once the issue with the side 80mm fan was fixed the case was indeed silent except for the usual low whoosh of airflow, as everything had been meticulously designed right down to the small toolbox that holds unused drive rails so nothing would rattle.
While any HDDs would have to be shuffled out of the way, this case can indeed house the current graphics monster 8800GTX inside. As the retail R600XTX is reported to be shorter in length it shouldn’t have any issue fitting, although I won’t presume to say heat won’t be an issue with one crammed inside this case!
CONCLUSION
No case is perfect, and while the Pininfarina case from Spire has its fair share of downsides they can be either a showstopper, or simply plain insignificant depending on each individual user in question. Spire advertises that “the Pininfarina chassis was designed with functionality, creativity and opulent style in mind”, so is this true?
The unique “butterfly” design of both side panels for instant access, and the ability for almost everything except the power supply to be easily removed and installed at whim without tools certainly says yes to the functionality and creativity aspects! This case is designed to be both worked in or on, with a near total tool-less design that works and attention to details such as rounded edges both within and outside the case.
Opulent style, well every person has their own opinion on styling, but in my humble opinion the case looks great in person and still offers classy, very durable armor-like 6.0mm aluminum alloy plating on all sides except the side panels, which feature SECC galvanized steel instead. With all of the panels and the reinforcing side bar removed, case “flex” was negligible.
While minor issues such as only eight mounting clips might pose an issue, I would go out on a limb here and assume Spire would be willing to quickly supply extras for Extended ATX or full size ATX boards that require more than eight mounting points. The lack of a single mainboard connector for each of the various front panel ports will likely make hooking up the front panel connectors the slowest part of any motherboard installation. However, dubious quality of the front controller hub PCB aside, the manufacturing detail of the case itself was superb and often showed that careful thought had been put into the design.
The biggest negative I have against this excellent case would have to be the cooling. It will adequately cool all but the hottest PCs, but personally the temps were to high for my liking, and there is obvious room for improvement here.
I can easily say this case is unparalleled at offering such functionality and versatility in a stylish, durable design at the $108 price point. While this case cannot claim to offer the best cooling performance, the Spire Pininfarina certainly would make for a great case for anyone that frequently must be tinkering inside their case or changing out hardware. I can only hope Spire asks Pininfarina to design a second (hopefully full tower-sized) case with an improved upon design as I would love to see the results Pininfarina could come up with. I’d certainly be one of the first in line to buy one if so!
Pros:
+ “Butterfly” side panel design
+ Stylish
+ Armor-like plating
+ Tool-less design
Cons:
Final Score: 8.0 out of 10; and the prestigious Bjorn3D Seal of Approval.
Word of Thanks
I’d like to personally extend my appreciation to Spire for sending in a retail sample of this product for review. Without companies like them willing to take the risk, time, and cost to send in products for review sites like Bjorn3d.com wouldn’t be nearly where they are at today!
 Bjorn3D.com Bjorn3d.com – Satisfying Your Daily Tech Cravings Since 1996
