The question is are you willing to risk it? Well I’m not! Since that unfortunate day I have been Chairman of the Board in the “School of Backup”. Along the way I have used several products to facilitate to facilitate my peace of mind, for the last three years I have put all of my eggs in the Acronis basket and have yet to have one cracked. Please join me today as we at Bjorn3d review Acronis’s latest release of their home based product, Acronis True Image 10. We’ll be using build 4942 which is the latest product update released on March 12, 2007.
INTRODUCTION
Imagine if you will the following scenario: It’s a Friday afternoon and you’ve had a long, hard week at work. You come home and after doing your honey-dos you settle in to killing as many aliens as you possibly can in your favorite game to rid yourself of the week’s frustration and prepare for the glorious weekend ahead. About 15 minutes into the carnage you begin to hear a high pitched squeaking noise coming from your trusty computer. Probably a fan that you can change out later, right? You continue your activity and all of a sudden you hear a noise that is reminiscent of crunching corn flakes in a blender and your system freezes. You’re a computer enthusiast and built this rig from scratch and can easily troubleshoot and fix what’s wrong! Well not exactly, your hard drive has just gone from 7200 RPM to around 100 RPM and your operating system, programs, and most importantly years worth of data have just been destroyed.
While maybe just a tad melodramatic, this scenario does happen! I know this for a fact as a few years ago I experienced it. I had three hard drives in my system at the time and two of them held my primary data running in RAID 0. The end result, all was lost and could not be recovered. Had I followed a common sense backup regime, I could have simply replaced the drives and restored my most recent backup and been back to fragging bad guys in an hour tops. Instead I lost everything and had to start over again from scratch. I was a true nonbeliever in Murphy’s Law and now I’m one of it’s biggest supporters.
Granted the technology in hard drives has gotten much better and fortunately this type of scenario doesn’t happen that often anymore. The question is are you willing to risk it? Well I’m not! Since that unfortunate day I have been Chairman of the Board in the “School of Backup”. Along the way I have used several products to facilitate my peace of mind, for the last three years I have put all of my eggs in the Acronis basket and have yet to have one cracked. Please join me today as we at Bjorn3d review Acronis’s latest release of their home based product, Acronis True Image 10. We’ll be using build 4942 which is the latest product update released on March 12, 2007.
I’ll warn you in advance this is one of the most complete software reviews we at Bjorn3D have ever done; it’s lengthy but we hope quite useful to you in making a decision with regard to backup archival software.

Acronis: The Company
Acronis offers storage management solutions that are technically advanced for mission-critical applications but easy to use. The company provides disaster recovery, backup and restore, partitioning, boot management, privacy, data migration, and other storage management products for enterprises, corporations and consumers of any qualification. Acronis has offices in the United States, Europe and Asia and sells its products through retail outlets, resellers and on the Web.
FEATURES & SPECIFICATIONS
| Acronis True Image 10.0 Features | |
| Backup | Backup your entire PC with our patented disk imaging technology |
NEW! Backup Data in Specific Categories: Such as documents (Microsoft Word, Microsoft Excel, Power Point), financial records (Microsoft Money, Quicken), music (Mp3s, iTunes), photos, and videos
NEW! Backup applications settings for the following applications:
- Productivity tools: Microsoft Office
- Email: Microsoft Outlook (including the IMAP folder on the server), Outlook Express
- Browsers: Internet Explorer 6 SP2, Mozilla Firefox 1.5 and more
- Security: Norton Internet Security 2007, Spyware Doctor 4.0, Zone Alarm 6.5
- Audio and Video Applications: iTunes 6, Windows Media Player 10, RealPlayer 10.5, and more
- Instant Messaging: MSN Messenger, Yahoo Messenger 8.0, AOL Instant Messenger 1.2, ICQ 5.1 and more
- Digital Photography: Corel Paint Shop Pro X 10 and more
- Utilities and Drivers: Mozilla Thunderbird 1.5, WinZip 10, Adobe Acrobat Reader 7, and more
- Developer Tools: Microsoft Visual Studio 2003,2005, and more
NEW! Quick Backup: Initiate backup of specific files without being in the Acronis True Image application
Exclude Files: Save space when creating backups by only backing up the types of files you want to keep
Create incremental and differential backups
Perform live backupsRecoveryRestore your entire PC from an image
Restore specific files
NEW! Restore application settings
NEW! Explore Archives
EXCLUSIVE! Snap Restore: allows you to use your system while your PC is being restored
EXCLUSIVE! Acronis Recovery Manager: Simply boot your computer to start the recovery process without boot media by selecting the F11 key, even if your operating system has failedManagementNEW! Create Backup Archive Rules: Ensure that you never run out of space by setting limits on the amount of space allocated for backups, the number of backups and the amount of time you keep backups. The application will automatically manage backups and provide space for new backups
NEW! Backup Policies: Schedule backup tasks that will back up all data, data changes against the previous backup or data changes against the initial backup (i.e.; perform full, incremental or differential backup) in a desired order
NEW! Email Notification: Gain peace of mind by obtaining notification that your backups have completed
Backup Scheduler: No need to remember to run backups on a regular basis; you can have the software do it automaticallyStorage MediaSupports the following storage locations:
- NEW! FTP
- Hard disk drives
- Networked storage devices
- CD-R/RW, DVD-R/RW, DVD+R/RW
- ZIP®, Jazz® and other removable media
- P-ATA (IDE), S-ATA, SCSI, IEEE1394 (Firewire)
- USB 1.0 /2.0 drives, PC card storage devices
EXCLUSIVE! Secure Zone: No need to purchase an extra hard drive, CDs, or DVDs to protect data because you can save data to a special hidden partition on your hard drive
NEW! Password Protect the Acronis Secure Zone: Peace of mind knowing that only authorized users can access the Acronis Secure Zone
Upgrades & EnhancementsPC Cloning: Upgrade your PC without the need to reinstall the operating system and applications, or configure user settings
Add a New Hard Disk: Expand your PC’s storage capability
System Requirements
- NEW! Windows Vista
- Windows XP Professional x64 Edition
- Windows® XP SP 2
- Windows® 2000 Professional SP 4
- CPU: Pentium 133 (and alike) or higher
- RAM: 128 MB or more
- Disk space: 150 MB
- Extra space for installation: 25 MB
FEATURES & SPECIFICATIONS cont.
Special Features
Acronis Secure Zone
The Acronis Secure Zone is a special hidden partition for storing backups on the computer system itself. For archive security purposes, ordinary applications cannot access it. In the Acronis True Image Home wizards’ windows, the zone is listed along with all partitions available for storing archives. Acronis Secure Zone is necessary for using Acronis Startup Recovery Manager and Acronis Snap Restore features. Acronis Secure Zone is always available for backup creation as long as there is space for the backup file. If there is not enough space, older backups will be deleted to create space.
Acronis True Image Home uses the following scheme to clean up Acronis Secure Zone:
- If there is not enough free space in the zone to create a backup, the program deletes the oldest full backup with all subsequent incremental/differential backups.
- If there is only one full backup (with subsequent incremental/differential backups) left and a full backup is in progress, then the old full backup and incremental/differential backups are deleted.
- Otherwise, (only one full backup left, and an incremental/differential backup is in progress) you will get a message about space error. In that case you will have to either re-create the full backup or increase Acronis Secure Zone.
Thus, you can back up data automatically on a schedule and not worry about zone overflow issues. However, if you keep long chains of incremental backups, it will be a good practice to periodically check the zone free space, indicated on the second page of the Manage Acronis Secure Zone wizard.
Acronis Startup Recovery Manager
The Acronis Startup Recovery Manager lets you start Acronis True Image Home without loading the operating system. With this feature, if the operating system won’t load for some reason, you can run Acronis True Image Home by itself to restore damaged partitions. As opposed to booting from Acronis removable media, you will not need a separate media or network connection to start Acronis True Image Home.
Acronis Snap Restore
With this feature, you can boot the OS on a crashed computer before the system is completely restored from an image, and start work seconds after the restoration is launched. The restoration will continue in the background. This feature is currently available for images being restored from the Acronis Secure Zone. Naturally, Acronis Snap Restore cannot be used if the image contains no operating system (a logical partition or disk image) or when restoring file archives.
New Features
Backup locations – set up local or network backup storage locations with automatic archives management
As operating systems, applications and user files, like music or videos, become more and more sizable, archive files tend to eat a lot of disk space. Therefore, it becomes important to get rid of old backups, at the same time preserving maximum of up-to-date backups possible. Users can spend hours exploring multiple files in their backup archives trying to guess which of outdated backups can be deleted without losing important data.
To save users from annoying search and analytic tasks, Acronis offers a new approach to backup strategy by providing, in addition to automatic scheduled backup, automatic management of user archives, stored in folders with special properties called backup locations.
Backup locations can be organized on a local, external or networked drive, on an FTP server or any rewritable media that is recognized by the BIOS.
The main principles of backup locations organization are:
- Automatic naming of backup files
- Addressing to a backup location as to a whole folder
- Automatic consolidation or deletion of outdated backup files in accordance with the rules set by the user.
The rules include:
- Maximum storage space
- Maximum number of backups
- Maximum storage period for the archives
When a user starts a backup operation to a backup location, the selected location will be checked and, if any space limitation is exceeded, the oldest backups will be consolidated or deleted.
A similar feature in Acronis corporate products is implemented in a dedicated Backup Server application. Now users of Acronis True Image Home version can appreciate a simple and user- friendly version of this feature.
Other New Features Include:
- Backup policies – schedule backup tasks that will back up all data, data changes against the previous backup or data changes against the initial backup (i.e. perform full, incremental or differential backup) in a desired order
- Direct backup to FTP servers
- Windows applications backup — save a copy of your application settings
- Microsoft Outlook and Outlook Express backup — back up messages, user accounts and settings
- Data Categories
- Explore archives
- Acronis Secure Zone password protection — restrict unauthorized access to data in your Acronis Secure Zone backups and F11 boot
- E-mail notifications and alerts confirm backup tasks and results.
- Supported operating systems – Yes 64 Bit Windows Support!
- XP Professional x64 Edition
- Windows XP Professional
- Windows Me
- Windows 2000 Professional
- Windows NT 4.0 Workstation Service
- Windows 98
CLOSER LOOK
Traditional Backup vs. Imaging
Most if not all of you reading this review have hopefully used some type of backup solution over the years to prevent data loss. Many of you are also quite familiar with the differences between traditional backup software and “bare metal” imaging software. For those readers that are new to this topic I thought it might be wise to review the differences before proceeding.
With traditional file-by-file backup software files are copied sequentially to the storage media of the user’s choice which in some cases is software limited. This method can be an excellent choice for for preserving data ranging from a few files to an entire disk of data files. In most cases software that truly fits in this category is not capable of backing up operating system files while your system is functioning. Imaging software on the other hand makes a full, exact copy of your hard drive and in actuality a mirror image of the operating system, software, data, and file organization.
There are two types of computer users out there:
- Those, whom we’ll call prepared, that have or will experience a catastrophic event requiring the entirety of their data and programs to be be restored … these individuals took the proper precautions and had a backup of their data readily available
- Those, for lack of better terms that are unprepared, who have or will experience a catastrophic event requiring the entirety of their data and programs to be be restored … these individuals took no precautions and, how shall we say it, are SOL
When a catastrophic event does occur (and it will), with traditional backup software you have several hours of work ahead of you to restore your data as you must:
- Reinstall and update your operating system
- Reinstall some of your programs that could not be effectively backed up with a traditional product
- Reinstall your backup software
- Restore your data on a “file-by-file” or “group-of-files” basis
With imaging software like Acronis True Image Home 10, even in the worst case scenario you:
- Replace your drive(s)
- Boot from your rescue disk
- Choose the image to restore from your archives
- In an hour or less (depending on how much you have to restore) you’re back in business
Which option would you prefer?
Installation
To install Acronis True Image Home,Run the Acronis True Image Home setup file and when the Install Menu appears, select install: Acronis True Image Home

Follow the install wizard instructions on the screen and click the Next button.

You will then be given the options of choosing either Typical, Custom or Complete installation.
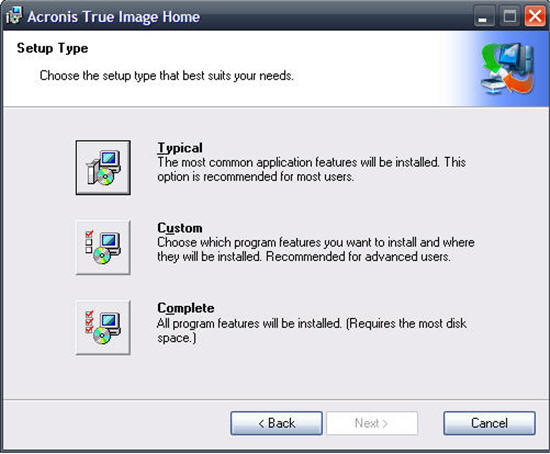
Custom installation gives you the option to install Rescue Media Builder. Rescue Media Builder allows you the ability to create bootable rescue disk or its ISO image anytime the main program is running. I understand that if you purchased the boxed version of Acronis True Image Home that you actually receive a rescue CD as part of the package. I’ve never owned anything other than the downloadable version of the the software so I’ve always made my own rescue disks and highly recommend this option with installation. I also recommend making a new rescue disk every time you download and install an upgraded build of True Image.
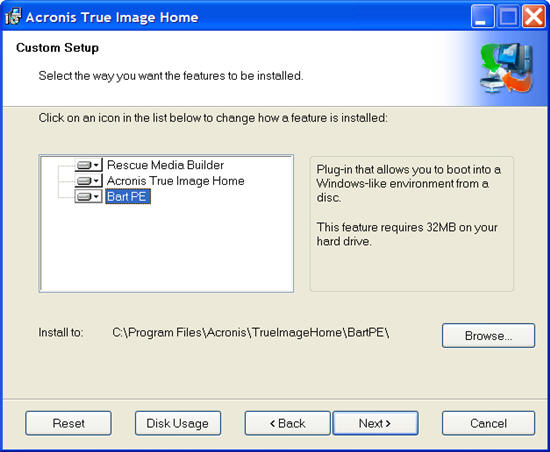
In addition to Rescue Media Builder you are also given the opportunity to install the plug-in for Bart PE. The well-known Bart PE utility is used to boot into a Windows-like environment from CD. Applications are installed into Bart PE in the form of plug-ins. Choosing Bart PE plug-in installation (disabled by default) provides the ability to include Acronis True Image Home in a Bart PE plug-in tab. The plug-in files will be placed to the installation folder along with other program files.
When installed, Acronis True Image Home creates a new device in the Device Manager list (Control Panel -> System -> Hardware -> Device Manager -> Acronis Devices -> Acronis TrueImage Backup Archive Explorer). Do not disable or uninstall this device, as it is necessary for connecting image archives as virtual disks.
User Interface
The True Image interface is divided into a Task Window, Side Bar, Menus Screen, and Tool Bar. With almost every Windows based software product there is generally more than one way to skin the proverbial cat and Acronis True Image Home 10 is certainly no exception. This product gives you as many as four ways to accomplish most of the task(s). Overkill? You decide!
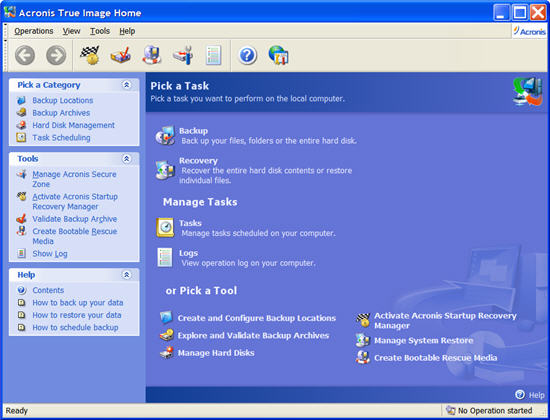
The Task Window located in the center right of the program screen is divided into three separate sections: 1) Task Group; 2) Manage Tasks Group; and 3) Pick a Tool Group. With these three groups you can accomplish every process that that Acronis True Image Home 10 has to offer.

The Task group contains the following operations:
- Backup – create a backup archive
- Recovery – restore data from a previously created archive
The Manage Tasks group contains the following functions:
- Tasks – schedule backup tasks on your computer and manage them
- Logs – open the Log Viewer window
The Pick a Tool group contains the following options:
- Create and Configure Backup Locations – create folders with special properties for storing backup archives, edit the folders’ properties and delete them. Also create, resize and delete a special hidden partition for storing archives
- Explore and Validate Backup Archives – explore file-level archives, mount disk/partition images as virtual drives, run the archive integrity checking procedure
- Manage Hard Disks – clone disk or mark out partitions on a new hard disk added for data storage with the OS and applications kept on the old one
- Activate Acronis Startup Recovery Manager – activate the boot restoration manager (F11 key)
- Manage System Restore – turn on/off Microsoft Windows System Restore tool and set its options directly from Acronis True Image Home
- Create Bootable Rescue Media – run the bootable media creation procedure
The same holds true for Side Bar which contains the Category and Tools windows located in the center left portion of the program screen. The only real addition here is a Help window which is quite thorough and can help to clarify tasks for the new or inexperienced user.
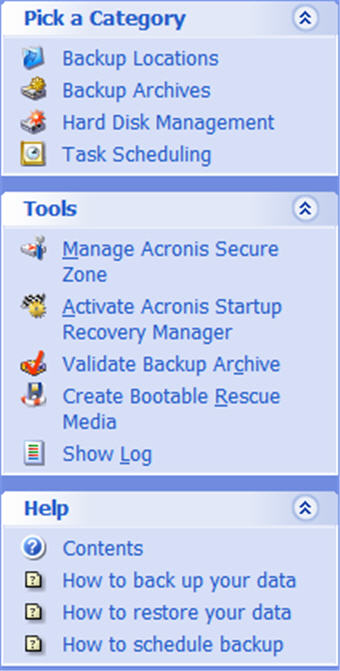
The Menu screen and Tool Bar located across the entirety of the top portion of the program screen. The Menu screen and Tool Bar sections again provide the benefit of a third and in some cases even a forth level of redundancy for most of the options located in Acronis True Image Home 10.

The program menu bar features the Operations, View, Tools and Help items. The Operations menu contains a list of the available operations, including scheduling tasks.
The View menu contains items for managing the program window look:
- Toolbars – contains commands that control toolbar icons
- Common Task Bar – enables/disables the sidebar
- Status Bar – enables/disables the status bar
The Tools menu contains the following items:
- Manage Acronis Secure Zone – create, delete and resize a special hidden partition for storing archives (Acronis Secure Zone)
- Activate Acronis Startup Recovery Manager – activate the boot restoration manager (F11 key)
- Explore Backup Archive – explore file-level archives or mount disk/partition images as virtual drives
- Validate Backup Archive – run the archive integrity-checking procedure
- Create Bootable Rescue Media – run the bootable media creation procedure
- Show Log – open the Log Viewer window
- Options – open a window for editing default backup/restore options, setting text appearance (fonts), configuring e-mail/Winpopup notifications etc
The Help menu is used to invoke help and obtain information about Acronis True Image Home.
The Status Bar at the bottom of the main window is divided into two parts. The left side briefly describes the selected operation; the right side indicates operation progress and results. If you double-click on the operation results, you will see the logs window.
Running Acronis True Image Home
You can run Acronis True Image Home in Windows by selecting Start -> Programs -> Acronis -> Acronis True Image Home -> Acronis True Image Home or clicking on the appropriate shortcut on the desktop. If your operating system does not load for some reason, you can run Acronis Startup Recovery Manager. However, this must be activated prior to use.
If your disk data is totally corrupted and you cannot boot (or if you have not activated Acronis Startup Recovery Manager), load the standalone Acronis True Image Home version from the bootable media, supplied with the retail box or created by you using Rescue Media Builder. Then you will be able to restore the disk from its previously created image.
CREATING BACKUP ARCHIVES
In the early days of the Acronis True Image Home product line (Acronis TI Home 7.0 and Acronis TI Home 8.0) we feel the software could certainly be classified as “imaging only”. Beginning with Acronis TI Home 9.0 we began to see not only a very robust imaging product but also the beginnings of this software melding into more of a dual purpose product. By “dual purpose” I mean additional features were added that allowed users the benefit of not only imaging their entire drive or partition, but the ability to backup specific files that did not entail imaging the entire disk. Acronis True Image Home 10 as we shall soon see takes this emerging metamorphosis to the next level.
The imaging technology offered by Acronis True Image products is what initially helped it to gain its fame. The most important aspect of this patented technology is that the user is able to completely image his/her system while still in Windows. Prior to this Products such as Symantec’s Norton Ghost and PowerQuest’s Drive image (now also owned by Symantec®) offered the ability to image your system but required you to do so running their products in DOS mode with a floppy disk or CD, this mechanism did not always provide the best results.
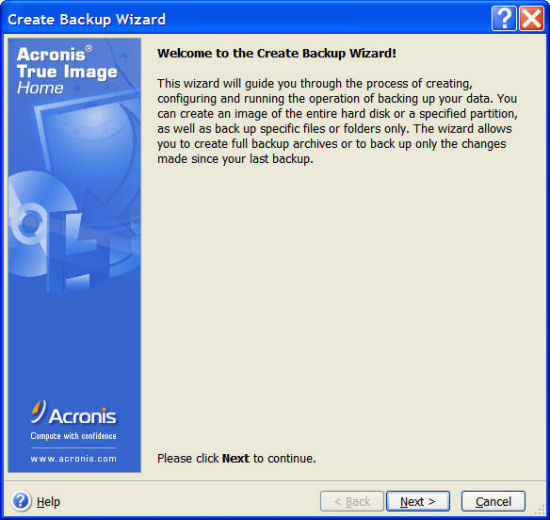
Every backup process offered by Acronis True Image Home starts with the backup wizard screen.
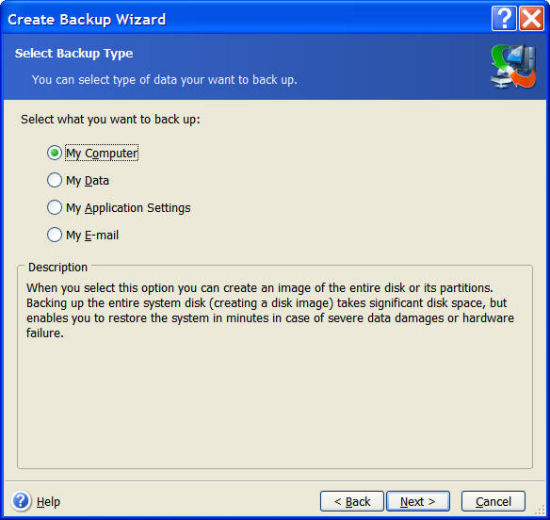
Once the wizard is started you are given the option to choose either:
- My Computer – image backup of any set of disks/partitions
- My Data – file-level backup of any set of files and folders or an entire file category
- My Application Settings – file-level backup of Windows applications settings
- My Email – file-level backup of MS Outlook and MS Outlook Express settings and messages
 My Computer |
 My Data |
 My Application |
 My E-Mail |
| (Click to Enlarge) | |
The four images above show you the specific screens available when you choose that particular backup option. Once your selections are chosen you will be directed to the remaining screens depicted below for even more choices to effectively customize you backup archive.
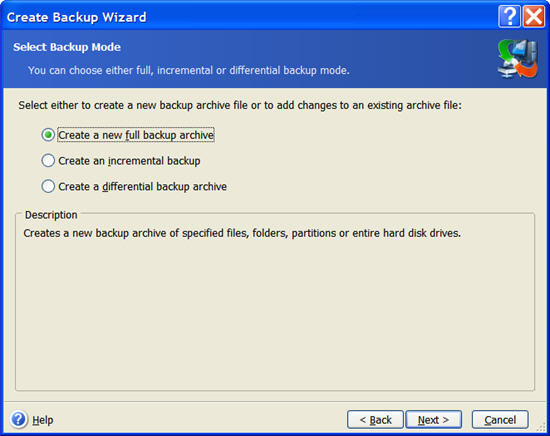
Acronis True Image Home 10 can create three types of backups in the My Computer mode:
- Full Backup – contains all data at the moment of backup creation. It forms a base for further incremental or differential backup or is used as a standalone archive. A full backup has the shortest restore time as compared to incremental or differential ones.
- Incremental Backup – files only contains data changed since the last full or incremental backup creation. Therefore, it is smaller and takes less time to create. But as it doesn’t contain all data, all the previous incremental backups and the initial full backup are required for restoration.
- Differential Backup – Unlike incremental backup, when every backup procedure creates the next file in a “chain,” a differential backup creates an independent file, containing all changes against the initial full archive. Generally, a differential backup will be restored faster than an incremental one, as it does not have to process through a long chain of previous backups.
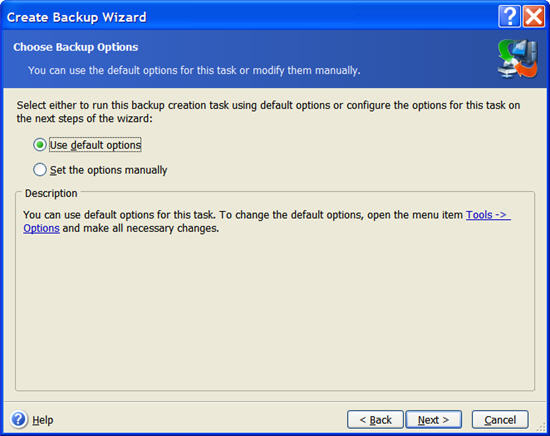
You are then given the option to use either the default options set in the program or change and customize those options to better suit your needs at the moment.
Should you opt to change the default settings, the options available for change include:
- Archive Protection – the ability to control the security of the archived backup by setting password protection
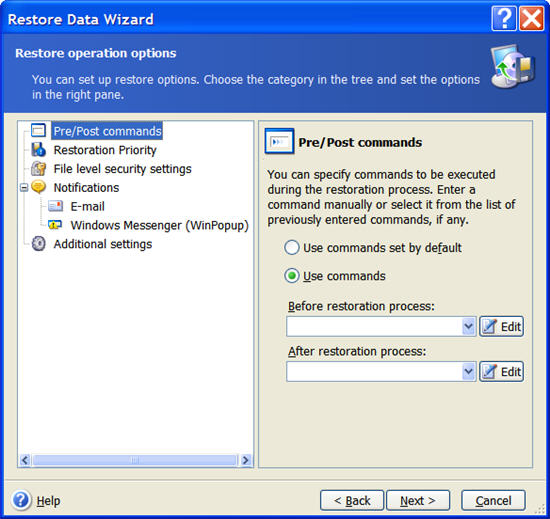
- Pre/Post Commands – You can specify commands or batch files to be automatically executed before and after the backup procedure. For example, you may want to remove some tmp files from the disk before starting backup or configure a third-party antivirus product to be started each time before the backup starts. Click Edit to open the Edit Command window where you can easily input the command, its arguments and working directory or browse folders to find a batch file.
- Compression Level – you are give the options of None, Normal, High, or Maximum compression
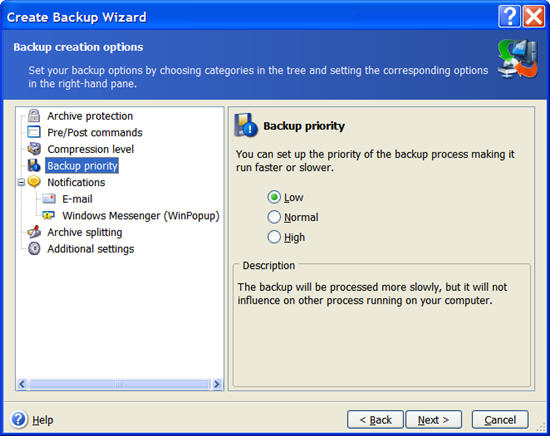
- Backup Priority – the options Low, Normal, or High determine the amount of computer resources utilized for the backup
- Notifications – you are given the option to set up auto-notification through either email or Windows Messenger to signal you when the backup is completed or for some reason fails to complete the process
- Archive-splitting – the option of Automatic splits your archive only when it is absolutely necessary. For example, if there is no free space on the removable media, Acronis True Image Home will ask for the next blank media and split the file automatically. The Fixed Size option is used if you want to specify the archive size limit manually. This method can be used if you are writing the archive to a fixed hard disk or network drive and would like to copy it later to a removable media.
- Additional Settings – this feature allows the user to automatically validate the archive upon completion ot the imaging process
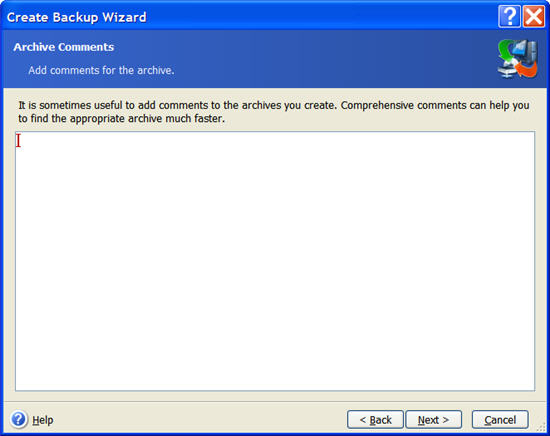
Finally, you are presented with the Archive Comments screen that allows you to give a detailed description of the key information concerning the archive file(s) you are backing up. After selecting the Next button on this screen your backup archive will be created and validated if you chose this option.
Thoughts on Backup Archive
As you are probably beginning to see Acronis True Image Home 10 is not your average, run-of-the-mill backup software package. I have been using an Acronis product for all of my backup needs since version 7 was introduced approximately three years ago. With each new update or product revision Acronis adds quite a few new features, most of which are quite innovative and advantageous. If I were to elaborate on each of the functions that is really of benefit this review would be much longer than it already is. For that reason I have chosen to pick one extremely useful feature and one less than auspicious feature and discuss them.
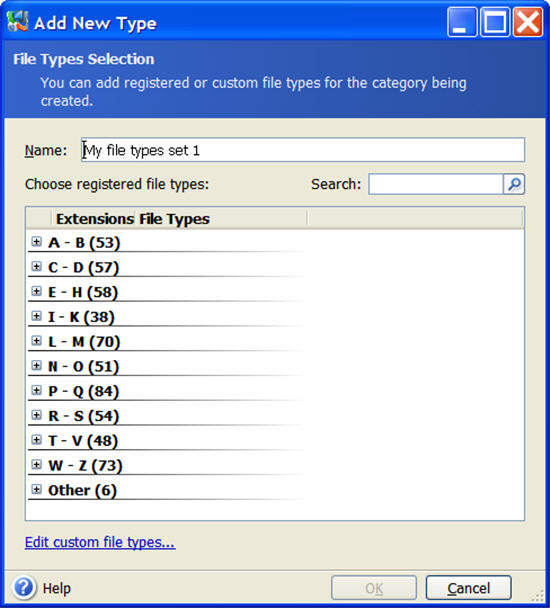
Creating a Custom Data Category in My Data
First the feature of benefit. In the My Data option you are give the ability to create custom data categories that are specific to your needs. To do so first choose the My Data Screen.
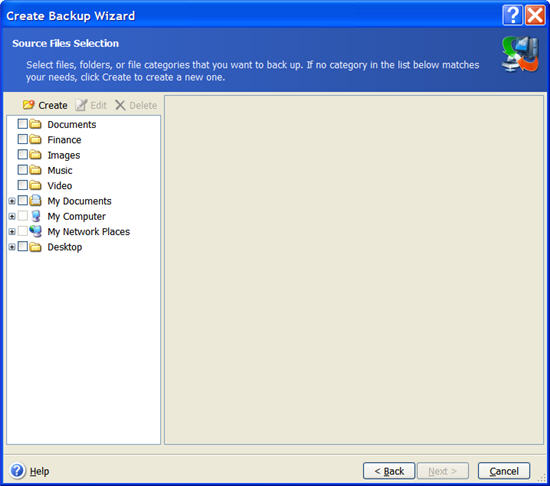
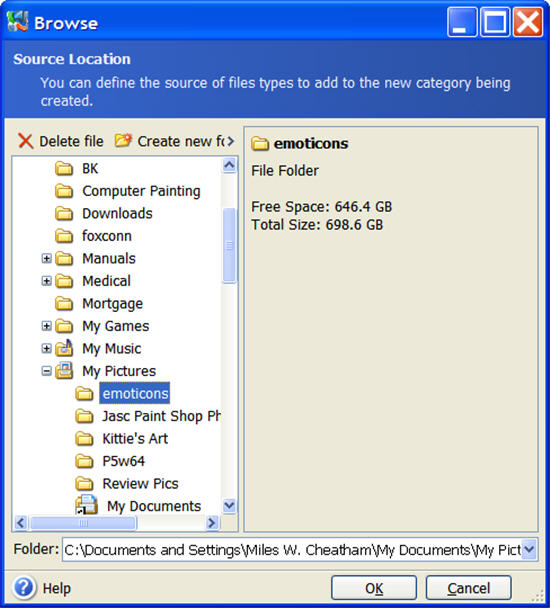
To add a custom data category, click Create, select the folder (data source) and provide a name for the category. You can include all files in the selected folder in the category or apply filters to select the specific types of files that you wish or do not wish to back up.

To set a filter, select its type: Back up files of the following types only or Back up files of all types in the source except the following. Then click Add new and select the desired file types in the appearing window.
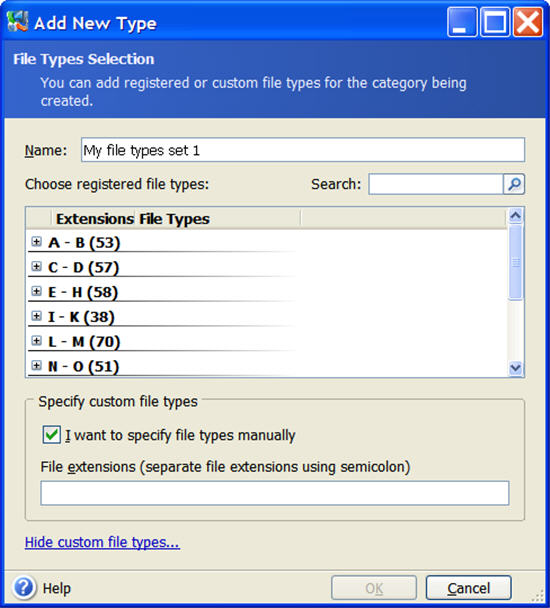
You can select file types:
- By name. Enter the file name in the upper Name field. You can use wildcards and the common Windows masking rules. For example, My???.exe mask will reject all .exe files with names consisting of five symbols and starting with “my”.
- By type. Tick off the desired file types in the list.
- By extension. Enter the extensions (semicolon separated) in the bottom Extensions field. If you do not want to keep custom contents of the current backup, simply select the files/folders from the tree. This set will be effective only for the current backup task.
File filtering can be applied to manually added folders as well. For example, you may want hidden and system files and folders, as well as files with .~, .tmp and .bak extensions, not to be stored in the archive. You can apply custom filters, using the common Windows masking rules. For example, to exclude all files with extension .tmp, add *.tmp mask.
My Applications Settings are Limited
Now for the one area of backup archiving that I found to be less than auspicious. When choosing the My Applications Settings backup option I found that most of the software that I had installed was newer than that specified in My Application. For example I have Microsoft® Office 2007 Professional installed as well as Internet Explorer 7.
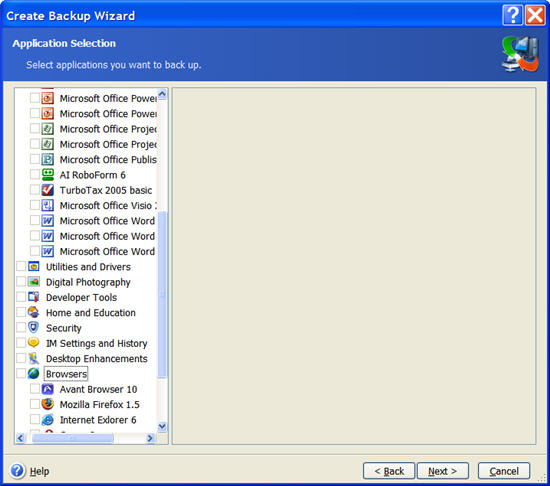
As you can see in the image above all of the options displayed for Microsoft® Office and Internet Explorer are grayed out and not supported as of yet in the My Applications settings.

The only options I actually had available for use in My Application Settings were Trillian Instant Messenger and Acronis Disk Director. I was however delighted to find that the My E-Mail options fully supported Outlook 2007. One thing I will say in support of Acronis is that this missing program support in My Application Settings will most certainly be short lived. I have found Acronis’s support for issues of this type to be one of the most responsive in the software industry.
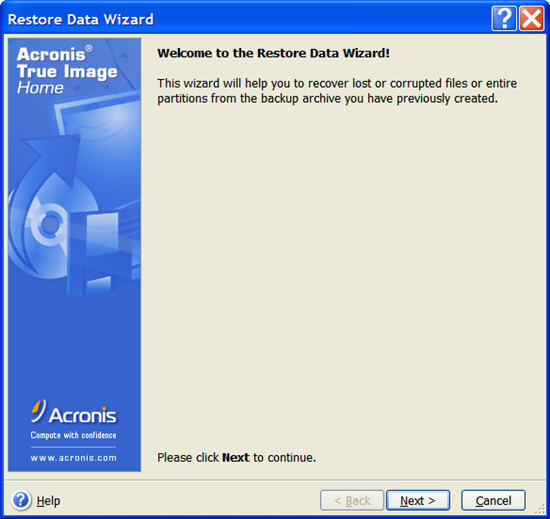
ARCHIVE RESTORATION
Acronis True Image Home 10 can be run in several ways. We recommend that you first try to restore data running Acronis True Image Home under Windows, because this method provides more functionality. Boot from the bootable media or use the Startup Recovery Manager only if Windows does not load.
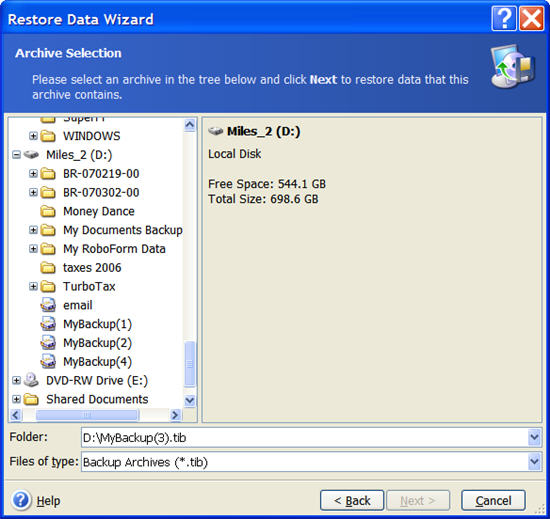
First, invoke the Restore Data Wizard by clicking on the restore operation icon in the main program window.
Select the archive. If the archive is located in Acronis Secure Zone or in a backup location, select it to choose the archive on the next step. If the archive is located on removable media, (e.g. CD), first insert the last CD and then insert disks in reverse order when the Restore Data Wizard prompts you.
If you are to restore files from an archive containing incremental backups, Acronis True Image Home will suggest that you select one of successive incremental backups by its creation date/time. Thus, you can roll back the files/folders state to a certain date. To restore data from an incremental backup, you must have all previous incremental backup files and the initial full backup. If any of successive backups is missing, restoration is not possible. To restore data from a differential backup, you must have the initial full backup as well.

The next option allows you to choose if you want to restore the entire disk or partition or simply files or folders from that disk or partition.
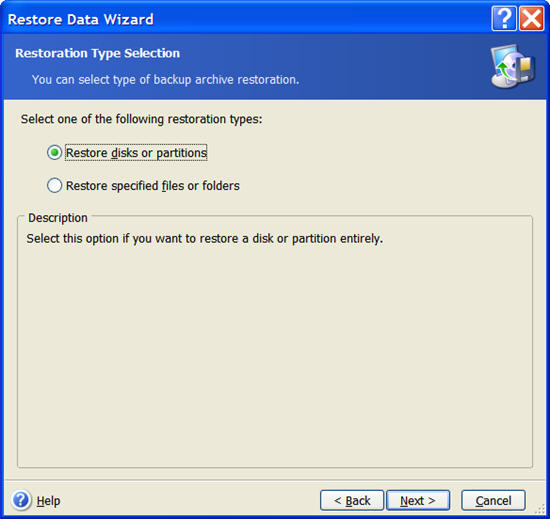
Depending on your selection Acronis True Image Home 10 branches to allow you to select the disk(s)/partitions or files/folders to be restored. The four images below show the various options.
 Disks/Partitions 1 |
 Disks/Partitions 2 |
 Files/Folders 1 |
 Files/Folders 2 |
| (Click to Enlarge) | |
As with backing up archives we are also given the option in restoring archives to change various settings to best suit our needs.
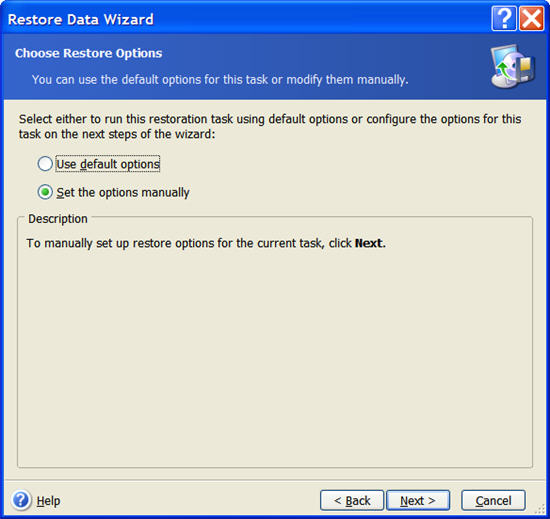
Although almost identical to the option choices listed in backing up archives there is one subtle differences. In Additional Settings you are given the option of verifying the backup archive before beginning restoration of the archive.
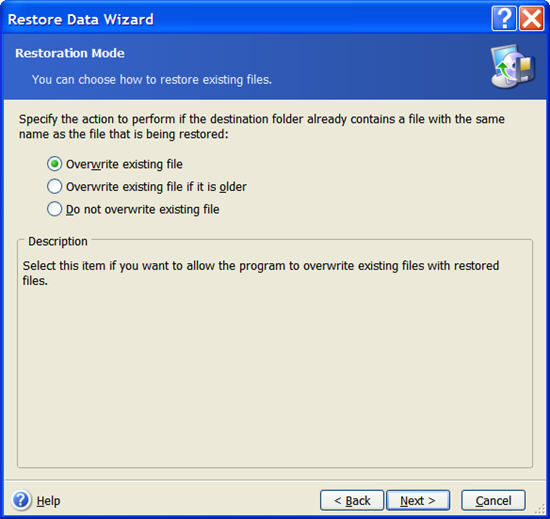
The files overwriting mode option allows you to keep useful data changes made since the backup being restored was done. Choose what to do if the program finds in the target folder a file with the same name as in the archive:
- Overwrite existing file – this will give the archived file unconditional priority over the file on the hard disk.
- Overwrite existing file if it is older – this will give the priority to the most recent file modification, whether it be in the archive or on the disk.
- Do not overwrite existing file – this will give the file on the hard disk unconditional priority over the archived file.
This option is effective only when restoring files from file/folder archives.
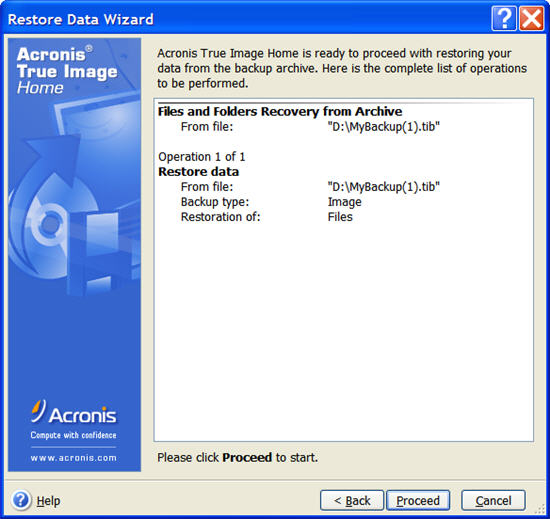
Finally, you are given a summary of the restoration choices that you made. You may choose the Back or Cancel options if your selections are not to your liking. Choosing the Proceed option affirms the choices that were made and begins the recovery of your backup archive.
FINAL THOUGHTS & CONCLUSION
With most products we review at Bjorn3D we generally have no more than three weeks to explore as many of the items’s intricacies as possible before revealing our findings to you, the public. In the case of Acronis True Image I have been using it in one revision or another for the past three years on at least a weekly basis, without ever having a major issue. For that reason alone I am probably a bit biased towards their product’s performance. Being a product analyst I have had many occasions where the need has arisen to restore my operating system, programs and data. I can truly say that none of the Acronis True Image products that I’ve used have ever caused me to lose data, and after all that’s what an archival program of this type is all about, isn’t it?
During the entirety of my experience with Acronis True Image Products I have had two or three occasions when it became necessary to contact support. Every time the problem that I referenced was already known to the support staff and was generally temporarily solved by using a patch or workaround. In all cases the next product update fixed the issue permanently. I deal with support personnel from various companies on a day to day basis in the real world, I have found few that match the professionalism exhibited by the Acronis Support Team.
Ok! Enough generalities, let’s focus on Acronis True Image Home 10. First and foremost, it is the most robust product that Acronis has released in its “home line” of products to date. It occupies around 180 MB of space with a full install and offers some of the features that before were only available in Acronis’ workstation/professional product lineup. The melding of the ability to function as both a full image backup product and a product that will backup most individual files/folders certainly enhances this products worth. Speaking of worth for a retail price of $49.00 USD this product is nothing shy of exceptional.
When it comes to recommendations, I can say without reservation there is no one that uses a computer for any purpose whatsoever that I cannot heartily recommend this product to. I have related my experience concerning catastrophic data, I swore that I would do everything in my power never to allow that to ever happen again. With Acronis True Image products I have finally been able to put those thoughts to rest once and for all. If a better backup utility surfaces, I will certainly use it; but until such time Acronis is the best I have found!
Pros:
+ Ease of operation
+ Speed of operation
+ Highly feature laden
+ User definable backup policies
+ Acronis Startup Recovery Manager
+ Acronis Snap Restore
+ Acronis Secure Zone
+ 64 Bit Windows support
+ Email notification and alerts />
Cons:
– My Application doesn’t yet support Microsoft Office 2007 or I.E. 7.0
Final Score: 9.5 out of 10 and the prestigious Bjorn3D Golden Bear Award.
Word of Thanks
I’d like to personally extend my appreciation to Stephen Lawton and his incredible staff at Acronis for sending in a retail sample of this product for review. Without companies like them willing to take the risk, time, and cost to send in products for review, sites like Bjorn3d wouldn’t be nearly where they are at today!


