Gaming and its associated accessories is a huge multi-million dollar industry. Let’s move on to the “case at hand”, the XG Products Viper 2, the second generation of their popular gaming case.
INTRODUCTION
Yeah boy! Cases are without a doubt one of my favorite computer products to review. This is in no small part due to my opinion that a computer case and its accompanying power supply are two of the single most important elements of any successful system build! Cases vary greatly in size, style, functionality, power, and storage ability depending on the type of operation they will be used for. Case design coupled with associated performance and style modifications are also in my opinion one of the few true art forms left which allow the system build to truly express the persona and character of the builders work.
I will have to be honest and state for the record that I’m not a huge fan of the more aggressive look currently being implemented in the design of case bodies and bezels. The more traditional approach with straight or contoured lines is more of a personal preference. I do not in anyway let this effect my judgement of a case as I’m judging functionality and performance. For the above stated reasons, I will let you know in advance that I’m somewhat anal with regard to case design as it pertains to performance and functionality; looks not withstanding.
With all of that being said let’s move on to the “case at hand”, the XG Products Viper 2, the second generation of their popular gaming case. I’d like to thank Jason Martin and the personnel at MGE, XG Products parent company, in advance for the opportunity to review this stylish gaming case.

FEATURES & SPECIFICATIONS
The features and specifications captioned below are somewhat misleading when compared to those posted in the product comparison on the web page of XG and those on some of other case vendor’s websites. To clarify this as much as I can, these specifications and features are almost identical to those of the product I received. In the Product Comparison Table on the XG’s website and on some of the US vendor sites for this product it is suggested that Viper 2 ships with a “500 watt SLI ready power supply” and two “120mm fans”.
To further confuse things confuse things the carton that this case shipped in states the Features as an “MGE 450 watt power supply that is both SLI and SATA ready” while in a picture next to the features it states “500W, SLI READY”. In the Specifications just below the Features on the same box it states “MGE 400 Watt Power Supply, SLI Ready + Dual Fans (optional)”. In the same “Specifications” section on the box the case dimensions are listed as 540x260x420mm.
If this is confusing to me, it must be horribly confusing to the potential consumer who’s doing product research while eagerly shopping for a home for his new “gaming rig”. One can only hope that these errors are attributable to the fact that this is a relatively new product and XG in its zeal to release it made some mistakes. It could also be due to several versions of the case being available for purchase but other than the term “optional” captioned above in one of the power supply descriptions I could find no mention of this.
One final error is the mention of “four fan slots”. I could only find two, the front and the rear. I guess it’s possible that in marketing vernacular this means that the case will accept more than one size of fan in both the front and rear fan slots. Stretching it a bit it could also refer to the option of having a front and rear fan and a power supply (optional) with two fans. Frankly, I’m very confused!
Features
- front air blower
- side slide door
- LED lighted door with “Viper” emblem
- LCD Controller for time, temperature, and fan speed
- side door lock
- tool-less drive bay
- tool-free PCI expansion slot
- revolutionary design
- stylish “turbo” air ventilation side panel design
- high-gloss mirror paint
Specifications
- Form Factor: Micro-ATX & ATX
- Power Supply: 400W, Smart Fan Control
- Drive BAY: 5.25″ x 4
- Drive BAY: 3.5″ x 2
- DRIVE BAY INTERNAL: 3.5″ x 4
- USB 2: 2 external ports
- Firewire: 1 external port
- Fans Included: 1x120mm Rear | 1x80mm Front LED Fans
- Fan Slots: 4
- Audio/MIC: 1 external port
- LCD: Yes
- PCI Slots: 7 (Tool Less)
- Material: 1.0 MM Aluminum alloy)
- Case Dimensions(DXWXH): 470x200x430mm 18.5×7.87×16.92in
- Weight: 8.0kg
- PSU SATA Connection: Yes
- PSU Main Power: 20pin + 4 pin convertible connector
- PSU PCI Express Connection: Yes
- Color Options: Black, Silver, Blue & Red
PACKAGING
An extremely important aspect of buying any case is what type of condition the finished product will arrive at your doorstep in. This is especially important given the fact that many of the current case models are made out of lighter weight aluminum and tend bend or ding quite easily than their steel counterparts. I was very impressed to see that the people at XG not only double box their product for shipping but have it extremely well secured within its primary carton.
We certainly hope that the other vendors of this product take the same care in double boxing this product before entrusting your future prized possession to the men in the square trucks. Shown below is the inner carton that the case I’m reviewing was shipped in.

A CLOSER LOOK – EXTERNAL
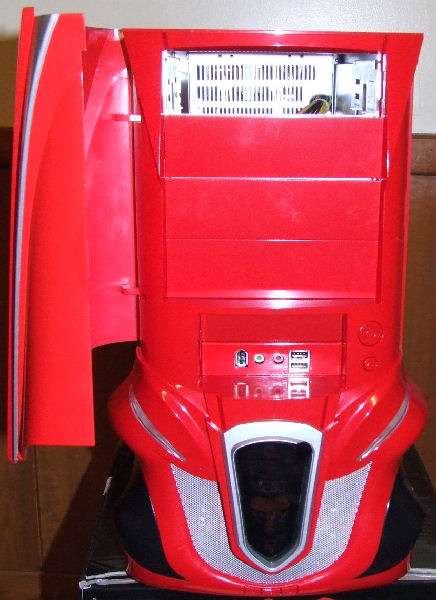
When I first removed the case from its carton, my first thought was WOW! It is truly beautiful and my favorite color fire engine red. The high-gloss mirrored paint job is absolutely awesome. A preliminary visual inspection showed the case’s fit and finish to be superb.
The case’s aluminum construction is thick enough to give it the necessary rigidity to keep noise from vibration to a minimum while still making it light enough to easily transport to your local lan party. Both side panels fit well with less than a few millimeters separation when butted up to the front bezel. All an all the external view is quite appealing.
 |
 |
 |
 |
 |
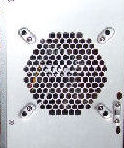 |
You will notice that the last photo I posted above is a picture of the actual rear fan grill on the case I received for review as opposed to the picture next to it which once again came from the XG website in the 360 degree view of the product. Note the difference in both the entire size of the grill and the design of the cuts in the grill. The grill depicted on the website would be extremely efficient with a more laminar flow of air than the actual case grill. Let’s once again hope this was a simple mistake on the part of the manufacturer.
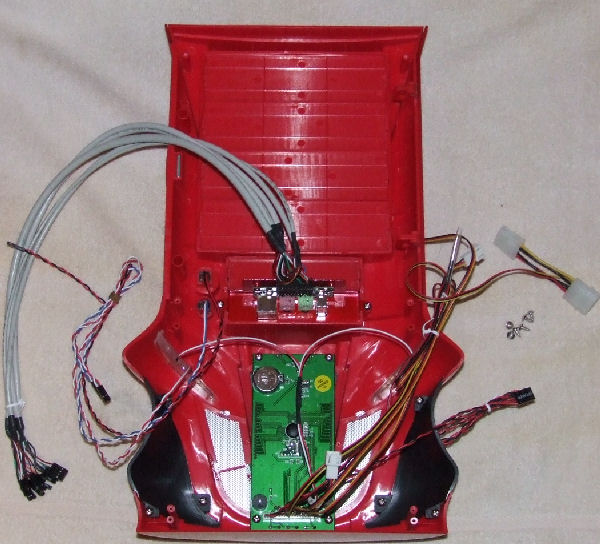
Next let’s look inside the bezel’s front door. There are four 5.25 inch slots. Just below these you’ll notice it provides one open 3.5 inch slot where a floppy drive can be mounted. Below this slot is another 3.5 inch slot where there are I/O ports for: USB 2.0 x 2, a Firewire , a microphone, and audio connection. This can be removed to effectively give the user a second external 3.5 inch slot. Immediately to the right of the external 3.5 inch slots are both the power and reset buttons.
Just below the external slots is one of the coolest features of this case, an interactive LCD display, which provides the following functionality:
- red LCD display
- current time
- CPU operation time display
- CPU temperature display
- CPU alarm temperature display
- fan speed sensor and central power hookup for up to three fans
- switch mode to toggle between the current time and the CPU operation time display
There is only one temperature sensor included with the LCD, a second or even a third would have allowed the user much more detailed information on the state of their system. The central wiring for up to three fans and the ability to measure their RPMs is a nice attribute but does require some serious thought to keep wiring unobtrusive.
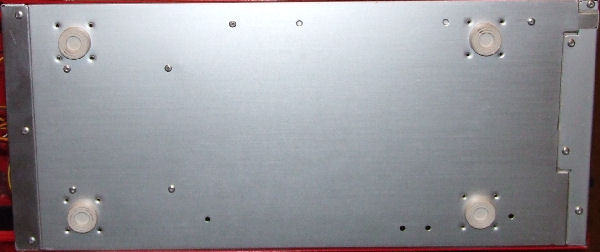
The bottom of the case shows four rubber feet which help to reduce both vibration and noise.
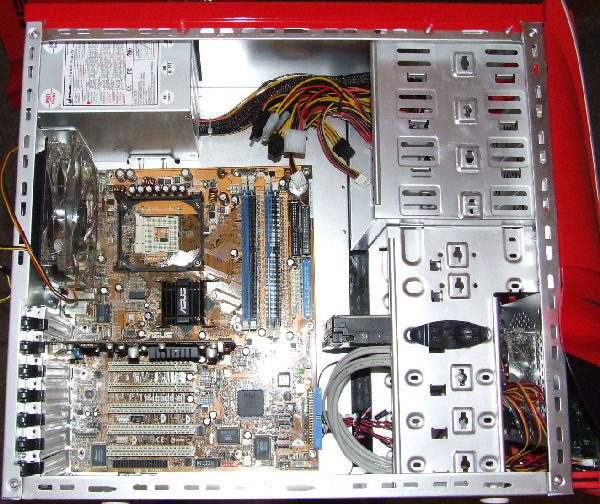
A CLOSER LOOK – INTERNAL
Now it’s time to go inside and look at the internal case components but first we’ll remove the side panels and bezel.
Installation Accesories
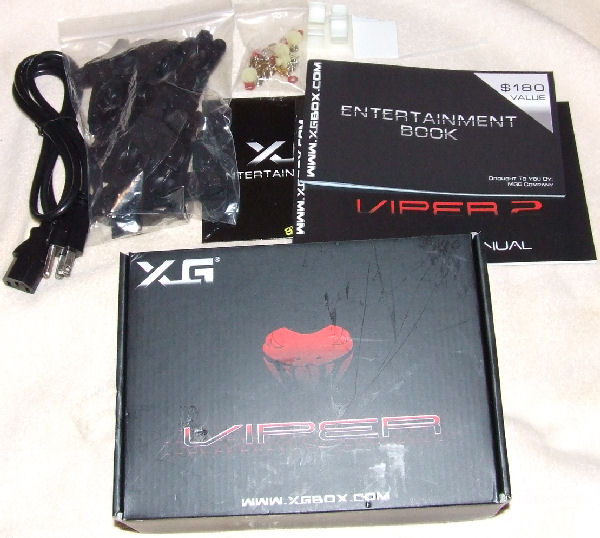
After removing the left side panel you will find a box of installation accessories consisting of:
- mother board standoffs both plastic and brass
- power cord
- plastic attachable wire guides
- cable ties
- instruction manual
- entertainment CD and booklet which offer bonus software and purchase discounts to the owner
Removing and replacing the bezel cover was an extremely difficult and tedious set of tasks, as the bezel cover is held on by six screws on the inside of the case. Four of the screws are essentially hidden by overlap of the case railing and require either a right angle or long, thin, straight phillips head screw driver to be removed. Replacement of the bevel is slightly more difficult than removal. I’m sure there’s some sound mechanical principle behind this design; but for the life of me I could not realize what it was
If you pay close attention to the removed bevel assembly you will notice that the board for the LCD device blocks a significant amount of the airflow generated by the single 80mm intake fan. The bottom of the bezel is open and does help somewhat with the intake, but provides not filtration of the incoming air whatsoever. It is there my recommendation that this case bet mounted on a flat firm surface and not on carpet beneath your computer desk.
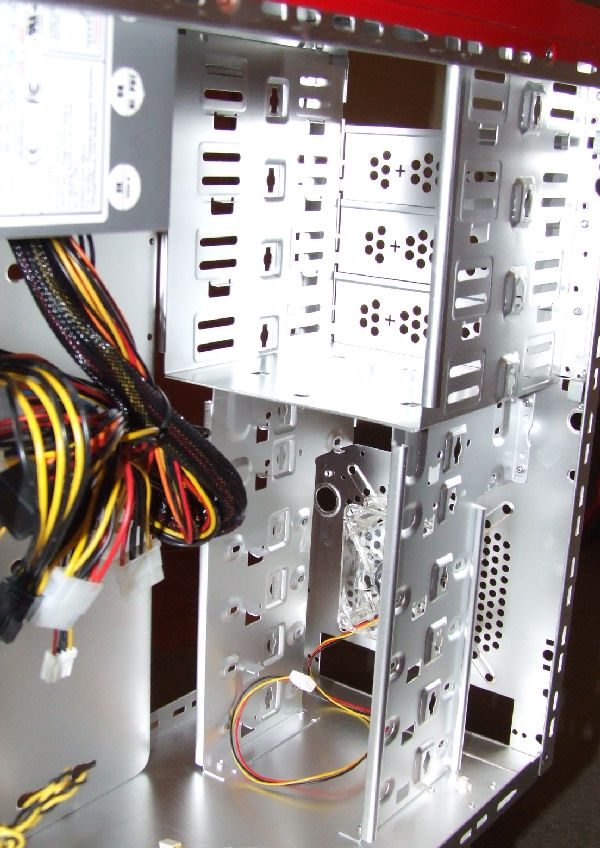
5.25 and 3.25 inch Drive Bays
Here’s a good view of the bare bays. Notice that if you choose to install a hard drive in either the upper most slot (usually used for a floppy drive)or lowest two slots you will not get the airflow from the provided 80mm fan that the center slots would receive. For this reason and performance reasons to be later discussed, I would strongly suggest replacing the 80mm fan with a 120 mm fan for additional airflow and cooling. I also feel this case would have been better served without the 80mm to 120mm adapter used on the rear fans installation.
Side Case View
From the side case view you can see the tool-less retention mechanism in use for the hard disk drive. I must give XG kudos for this design as well as that of the PCI slots. As will be shown later in installation each works very well holding the installed hard drive(s), floppy drive, optical drive(s), and/or PCI cards quite securely.
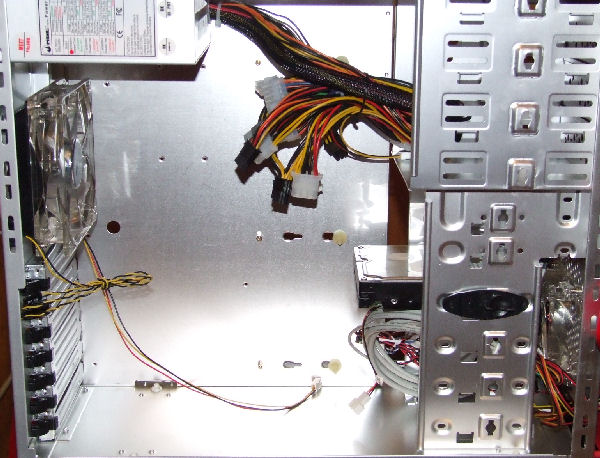
One final feature on the inside of the case that bears mention is the use of plastic standoffs for the outer edge connections to your mother board and brass standoffs for the remainder of the connections. While these plastic standoffs appear to hold the mother board quite securely I’m not sure of the rationale for their use. One possible explanation might be help hold the motherboard in place while you secure the screws to the brass standoffs on the remainder of the connection points.
INSTALLATION & TESTING
Test System Installed
- Motherboard: Asus P4C800-E Deluxe
- Processor: Intel 3.4C Northwood
- HSF: Zalman CNPS7000B-Cu
- Video Card: ATI 9700 Pro (Installed due to size restrictions of longer cards)
- Memory: 1 GB (2- 512 MB sticks) Mushkin 3500 Level 2 DDRAM run at 2.75 volts
- Hard Drive: Seagate 7200.7 80GB SATA Drive
- Optical Drive: Lite-On model 167
The installation was essentially uneventful. As with all cases of this size the work area is somewhat cramped and could have been greatly facilitated by the addition of a removable mother board tray. As previously stated the tool-less retention devices did their job quite admirably. The location of the 3.5 inch internal bays coupled with the location and extended length of the newer video cards make for an extremely tight fit; for that reason I opted to install the shorter ATI 9700 Pro instead of the X800XL that I usually test with. I feel this substitution also helped somewhat with cooling.
Test Methodology & Results
I tested this system at both idle and at load using CPU Burn with the following results as compared to my Antec SLK3000-B case and Seasonic S12 600 watt power supply. Temperatures and voltages were measured on both systems using Everest Home Edition version 2.00.333.
- Motherboard idle temperatures on the Viper 2 averaged 3-4 degrees C hotter than with the Antec case
- Motherboard load temperatures on the Viper 2 averaged 7-8 degrees C hotter than with the Antec case
- CPU idle temperatures on the Viper 2 averaged 2-3 degrees C hotter than with the Antec case
- CPU load temperatures on the Viper 2 averaged 3-4 degrees C hotter than with the Antec case
- Hard Drive temperatures on the Viper 2 averaged 3-4 degrees C hotter than with the Antec case
- Power supply voltage averaged 0.3 – 0.5 volts lower across the board with the MGE 400 watt PSU than did the Seasonic 600 watt PSU
- Subjectively the noise was slightly more perceived on the Viper 2 system as opposed to the Antec
It is my sincere opinion that the margins of variance between these two cases could have been cut with the use of 120mm fans in both the front and rear of the Viper 2 Case and by inclusion of a 500 Watt power supply. I also feel that the fans performance would also be enhanced with the some larger, less restrictive openings in the grill design for both the front and rear fans.
IMPRESSIONS & CONCLUSION
As I stated earlier this is a truly beautiful case even for someone like myself that usually prefers a more traditional look. XG has done an excellent job in both fit and finish. The inclusion of the interactive LCD screen on the case’s bezel is also a very nice touch. XG has also done a very nice job of engineering an almost flawless set of tool-less retaining devices for optical drives, hard drives, and PCI cards.
I researched the pricing at several vendors and found it to be in the $120 to $130 range. I might add that while doing this price research I noticed each of the vendors only offered the Viper 2 case with both a 500 watt SLI ready PSU and two 120mm fans which certainly makes the price significantly more in line. For that reason I will not criticize the pricing of this product.
This is the first release of a new generation of the Viper gaming case for XG. It certainly has tremendous potential which I’m hopeful that subsequent revisions will explore some of the suggestions made here. I’m also hopeful given the system descriptions cited above which were found at vendor websites that the Viper 2 case I reviewed was the exception rather than the rule for this new generation of case. While the Viper 2’s performance could not be considered lackluster there is certainly room for improvement.
Pros:
+ Style and look
+ High-gloss mirrored paint
+ Tool-less design
+ Impeccable side panel fit
+ Solid and reasonably quiet construction
+ Comprised of all aluminum (except the bezel) making it light and easily transportable
Cons:
– Confusing inconsistency in specifications and features for case, fans, and cooling
– No removable motherboard tray
– Intake and exhaust grills are restrictive
– Included 400 watt PSU is under kill for today’s gaming systems
– Use of 80mm to 120mm adapter for rear fan installation
Final Score: 6 out of 10


