The mCubed T-Balancer is not your average fan controller. With support for up to 8 digital sensors and the ability to program 4 fans separately, the fan controller could be the dream of anyone who needs to make his/her computer silent. We’ve put it to the test to see how it really works.
Introduction
If there is one single thing that irritates me the most in a PC, it is noise. True, after a while you get used to some of the noise, but it is always there in the background giving you a headache and just annoying you.
Theres many ways to reduce the noise. In my main rig, I use water cooling. It helps a lot since I remove most of the fans. There still is some noise from the remaining fans, but it is much better than before. Another way to reduce noise is to use some kind of fan controller that reduces the fan speed when it is not needed. Today, I am looking at one of those controllers the MCubed T-Balancer. It was actually one of our forum users (MagnusT) who told me about this fan controller (he sells it) and who set me up with MCubed, and I am very happy he did because this is a kickass fan controller.
Building a HTPC
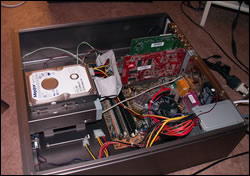
Before going into more detail about the MCubed T-Balancer, I want to tell you what I needed it for. As I told you earlier, my main rig today is water cooled. Thus, it really didnt need to be controlled that much. Sure, I had a few case fans that could need some slowing down, but I didnt think that using it in my main rig would be a fair test of the T-Balancer. Then it hit me — my HTPC (home theater PC)! You will, in a not-too-distant-future, read about how to build a HTPC, but briefly I can tell you that it is a HTPC that I built out of these components:
- DigN HV5 case (http://www.iuneed.com/hv5.html)
- Leadtek Winfast K7NCR18D (nForce2)
- AMD AthlonXP 2000+
- HIS AIW 9600 (fanless)
- Hauppage PVR250
- LiteOn DVDR
- Maxtor 60 GB IDE
- Windows XP MCE 2005
The machine which needs to be silenced
The fans that are present in the machine are a 60mm ADDA case fan, a 60mm PABS fan on the CPU and the small fan in the special small power supply that is included with the case. After building everything together, I quickly realized that the fans still were too noisy to make it really usable out at the TV. When the T-Balancer arrived, I knew that it would be great for the HTPC.
The T-Balancer
So, what is the T-Balancer? MCubed has this to say about it:
The T-Balancer is a fan control system with a truly unique noiseless mode. Traditional fan control systems can reduce the fan speed only by 50%, while the T-Balancer is able to reduce the fan speed by over 90%. It is even possible to stop or to turn the fan completely off, without any harm to your PC.
The fan speeds and temperature limits can be changed via Windows software. Up to 8 linear calibratible temperature sensors are supported. The T-Balancer combines in a balanced way the strengths of PWM technology (like lowest fan speeds and efficiency) with smooth traditional attenuation (to avoid PWM side effects and to support all fans).
The specifications and features of the T-Balancer are:
Features of the control unit:
- Free configuration, operation and monitoring with Windows software, connection via internal and/or external USB
- Free definition of temperature and speed with response curves, ideal adaption to the inner life of a PC
- Unit has its own microprocessor chip, which works independent from the motherboard: no performance loss and increased security
- 95% degree of effectiveness with no performance loss or heat dissipation
- 4 Mainboard outputs for the tachosignal: Tachometer with delivered Windows-Software or with mainboard monitoring tools
- Unit does not take up valuable space, can be installed internally
- Language support for English, German and soon more: Skins and language files are editable
- Open source for communication protocol: for new independent software developments
- Firmware update via USB
Features of the fans:
- 4 separate configurable channels, each channel with 15 Watts
- separate speed recognition and 4 separate tacho signal output to mainboard
- accurate speed control in manual or automatic mode via editable response curves
- fans can be control to an absolut speed minimum, down to 2% depending on fan model
- with analog smoothing and filtering a quiet smooth operation of fans will be ensured
- with the Attenuator an additional smoothing ensures even more silence at very low speeds (10-30%) and a compability with all fans
- adaptive PWM allows to adjust frequence for every fan model to avoid noises
- free definable hysteresis allow a smooth operation even at steep response curves, no “up and down”
- manual switching of fans possible
- start-up speed test ensures operation of fans
- 0 rpm speed possible: if temperature rises, the controller speeds up the fan according to the response curve
Features of the sensors:
- supports up to 8 sensors
- accurate, digital, linear band-gab sensors (0°-125°C)
- all temperature sensors can be calibrated separately
- temperatur sensors are connected with a new easy plug bus system: not every sensor to the central unit (no spaghetti), but from sensor to sensor
- free assignment of sensors and fans: many sensors to one fan (the hottest counts), or many fans to one sensor possible
Safety features:
- start-up check during system start: all fans are tested shortly with 100% speed
- sensor loss control: if a sensor looses its connection, the connected fan will be speeded up to 100%
- Built-in protection against permanent fan blockage: if a fan stops, the controller speeds up to 100%. If that does not help, an optical and acoustical alarm will be performed
- If the critical temperatures exceed: fans are switched to 100% and an optical and acoustical alarm will be performed
- Manufacturer defaults: all fans switched on
- Fail-Safe: if a hardware error on the controller occurs, all fans are switched on
- optical and acoustic alarm signals: integrated LEDs, connector for external LED and integrated loud buzzer
- speed meter functionality with outputs to mainboard
The control unit gets the power
from a Molex connector
Modding features:
- Connect some CCFL to your T-Balancer and get additional effects:
- manual switch and dim
- temperature-sensetive dimming
- free configurable switching limits
- with an additional software: light effects (fast sequences, stroboscope, waves and more)
- with an effect editor (editable of parameters in a text file)
Technical data
- Dimension: 105 x 83 x 25 mm (4.13 x 3.27 x .98 inches)
- 4 fan channels with 15 Watt per channel (1.25A), overall a total of 60 Watts
- Power consumption: 5V/ 50mA
- Power connection with internal PC power cable
- Communication protocol is available as an Open Source
- Internet support: Configuration examples and firmware updates
As you might already have suspected, the T-Balancer isnt your average fan-controller. It has a lot of cool features and can be extended with even more functionality.
The Package
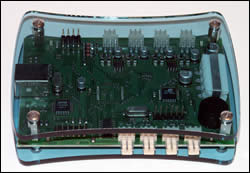
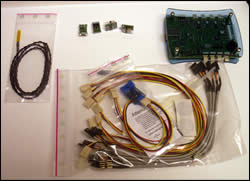
The T-Balancer I am looking at is the TBAN-XL, which is a blue compact little hub. MCubed also has a card that fits in a PCI-place (without actually being put in the PCI slot).
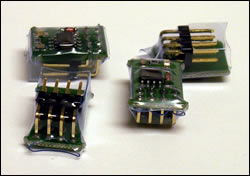
Together with the T-Balancer, you get 4 digital sensors, 3-pin cables to connect to the fans, several cables to connect the sensors to the T-Balancer, Velcro, mounting stickers, a few cable binders, a quick start manual and a CD with drivers.
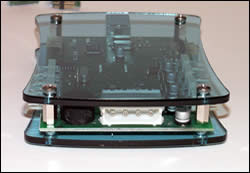
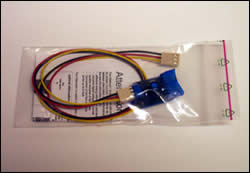
In addition, I also got to test the T-Balancer Attenuator that is designed for providing more silence at low speed.
The Attenuator – bought separately for 5
Since the T-Balancer uses PWM technology (pulse-Width-Modulation) to allow it to slow down the fans to very slow speeds, you can get resonance from some fans at lower speeds actually increasing noise. The attenuator can help in that case. This is what mCubed says about the attenuator in a thread I found on silentpcreview.com:
The PWM noise comes mostly with high frequencies. We are working with frequencies between 0 and 200. Some fans do a little rumbling at low speeds. That rumbling can be diminished with our attenuators which turn digital voltage into analog curves/waves.
How the attenuator works:
– T-Balancer does no analog conversion: then it would not be possible to reduce fan speed to almost 2%.
– T-Balancer does no voltage conversion: then it would not be possible to reduce fan speed to almost 2%.
– To reduce PWM noise we offer to adjust to PWM frequency, that means to change the time between the 12V signals.But, the attenuator is making DC conversion! Sometimes the adjusting of the PWM frequency is not sufficient. But with the attenuator, everything works.
Another secret of the T-Balancer is: we have no pure PWM (rectangles): we have rounded up the edges of the rectangle to make it smooth.
We hope, that we could help you and that you will enjoy the T-Balancer!
Its a bit complicated but it seems to work.
Installation
This section usually is pretty short when reviewing most hardware these days. Installing the T-Balancer is, however, a bit more complicated, especially if you skimp on reading the manual. This is a product where I recommend you first read the manual to make sure you do everything in the correct order. Unfortunately, MCubed has chosen only to include a quick start manual in the box and the full manual only on the CD. Make sure you print it out.
There are several steps in installing the T-Balancer. The first step is to install the digital sensors. These sensors need power and are connected through a cable to the T-Balancer. You can connect them in serial but should avoid making a loop connecting them to the T-Balancer in both ends. Here, I screwed up right away. Each sensor comes in tight plastic. Stupid as I was I removed the plastic. It still works fine, but that plastic is there to protect the sensors and make sure there are no short circuits. Oh well so far they still work.
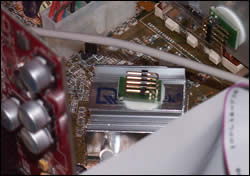
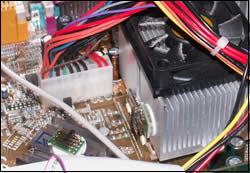
The sensors are pretty big, which means you cannot easily fit them everywhere. I choose to fit one on the side of the CPU heatsink, one on the side of the case, one on the side of the power supply and one on the top of the Northbridge. The only temperatures I really was interested in was the CPU temperature and the case temperature since those two would dictate how much the CPU and case fan would spin. If you want, you can put more than one sensor to an item. This will just increase the sensitivity. I guess I just was curious of how hot the Northbridge and the power supply would be. If you have a fan on your video card, you of course should put a sensor on the card.
Sensor on CPU. Some CPU coolers, like some Zalman heatsinks,
do not have any good place to put the sensor on
Each sensor has a number on it. It is important to write down this number since that is how you will associate a sensor to a fan later in the configuration software. The sensors are attached with double sided mounting stickers. If you, like me, manage to forget which sensor has which number, you will notice that it is hard to remove the sensor without ripping the sticker apart. MCubed however includes two extra stickers. If four sensors are not enough, you can buy another four, giving you a total of eight digital sensors to use.
Make sure all the sensors are lit up and work
before connecting the fans.
After you connect the sensors, it is time to connect the fans. First, you connect the fan to one of the fan connectors, making a note which connector you used for each fan. Then you can connect a cable between the T-Balancer and the fan-connector on the motherboard, GPU, etc. This is done so that the T-Balancer can simulate a signal to the motherboard/GPU making them think the fan are spinning even though they now are fully controlled by the T-Balancer. On a side note, it isnt just fans that can be connected to the T-Balancer. If you want, you can connect cathode lights as well to create a light show in your system.
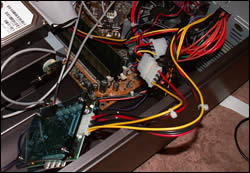
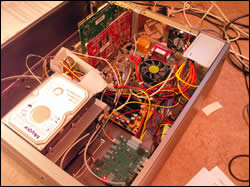
The finished setup. I apologize
for the crappy photo quality
Last but not least, you connect the T-Balancer to the USB port on your computer. You can either use an USB cable (not included) or use the included cable to connect to an USB-header on your motherboard. I read in another review that there was some issues using a USB 2.0 port with the T-Balancer, but I didnt encounter any crashes. Its possible it has been fixed with the new firmware.
Configuration
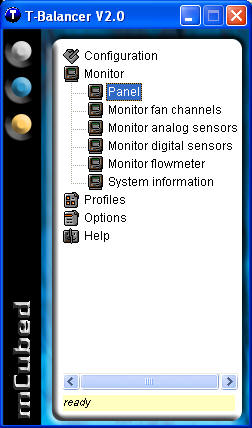
When everything is hooked up and all the sensors show a yellow light (that means they are working), it is time to set everything up. Theres a driver and utility on the CD for this. I ended up trying the latest beta of v2.0 from their site that includes a new firmware. Neither the older utility nor the newer utility is especially pretty, and in my humble opinion, they should work with making them a bit easier to use. It does, however, include a pretty good wizard that helps you go through each configuration step for the first time.
This is the beta 2.0 software.
After I flashed my T-Balancer with the v2.0 firmware, it stopped working, sounding an alarm and turning off all fans. In the end, I had to load a default profile onto the T-Balancer before I could use it again, which then made it work again. This is something to be aware of if you want to try the beta 2.0.
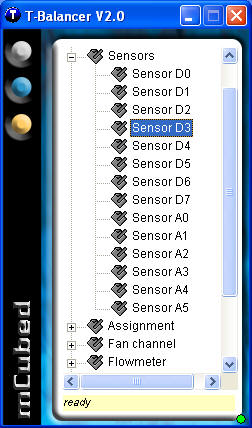
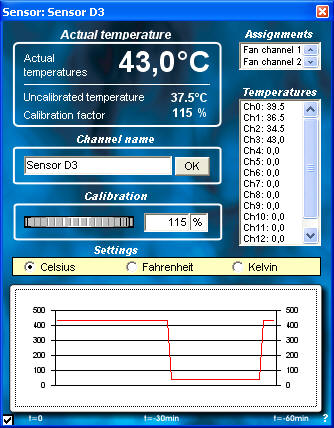
During the configuration, you get to set up various things in the T-Balancer. You can name each sensor so you can figure out where they sit more easily.
Time to name your sensors as well as calibrate them.
Note that you can use the Kelvin scale for your temperatures.
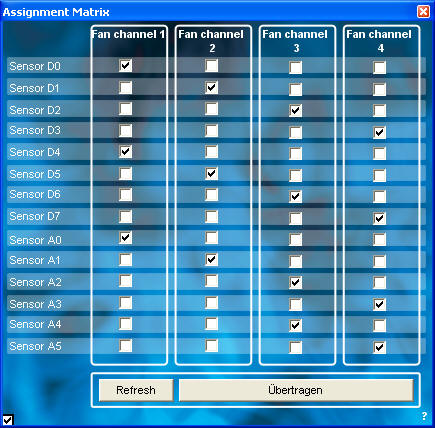
You also assign fans to the sensors. Thus, if sensor 1 and 2 is placed on the CPU-fan that is hooked to fan connector 1 on the T-Balancer, you just assign these sensors to this fan in the utility. Now the fan is completely controlled by the temperature of these 2 sensors. At this stage, it is also recommended to use a separate utility to measure various temperatures in your computer. I used MotherboardMonitor 5 to see the true temperature of the case and CPU. You then calibrate the temperatures sensed by the sensors so they match the real temperatures. This means that even if you cannot put a sensor at the exact spot of the hottest temperature, you can calibrate the sensor so that it compensates for the difference.
Define the temperature above each fan will operate at 100%
You can assign 1 fan to 1 sensors or 1 fan to several sensors.
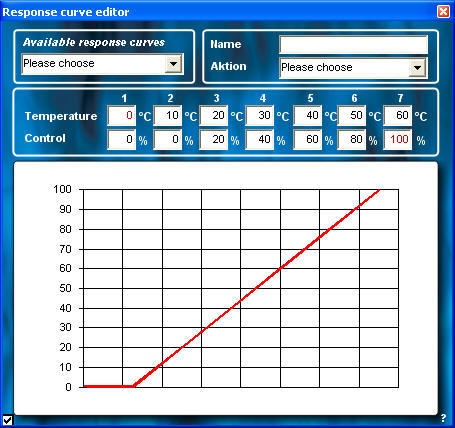
Last but not least, you set up a fan speed curve for each fan. You can set it up to speed up linear, logarithmic, in steps and so on as well as create your own curves separate for each fan.
You can use one of the included curves or make your own.
When you are done with the setup, you save the profile to the T-Balancer. After it is done the T-Balancer will follow the profile even at bootup, if the computer crashes or when you are running another OS like Linux.
Using the T-Balancer
As I mentioned earlier, I had some issues with noise in my HTPC. I installed the T-Balancer in the system and set it up so that the fans speeded up in a logarithmic scale. Up to a specific temperature, it would keep the fan speed very low, but when a certain temperature was reached, it would speed up more quickly. Then came the moment of truth would it work?
Turning on the machine gave me a minor scare. The fans started to move and then stopped. Neither the CPU nor the case fan was running, and yet the computer was booting, ignoring the fact that nothing was moving. Even though I was tempted to turn everything off, I let it go and let the system boot the computer up. After a short while, the CPU fan started to spin very slowly and almost noiseless, same with the case fan. Using MBM 5, I monitored the temperatures and found that it settled at around 52C on the CPU and 37C in the case compared to about 42C on the CPU earlier. When I started to watch a movie or record from TV, the temperature did rise a bit, and after a while, the fans started to spin up a bit faster. The noise however still was far below what I had experienced before.
In conclusion, the T-Balancer actually managed to make my HTPC as noiseless as possible without removing the fans completely. Considering that I put it to the test in a worst case scenario (small fans and a small case that gets hot easily), Im very impressed.
Conclusion
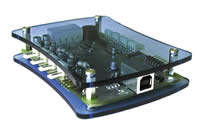
mCubed has also released the TBAN-SH, which is an analog sensor hub with support for both analog sensors as well as flowmeters. They also have the LightBlaster, which is a T-Balancer with a modified firmware with more light effect functions and less fan control functions. The control unit, however, is the same, and you can flash between the two firmwares.
You can read more about their products at www.mCubed-tech.com. Swedish users can go to www.tystpc.nu to read more about mCubes different products.
Pros
+ Cheap! The TBAN-XL I reviewed costs around 54, which is ~$60.
+ Gives you total control over your fans
+ Digital sensors that can be calibrated
Cons
– Can be a bit tricky to setup
– Only supports 4 fans and cannot be extended unless you buy another control unit.
– You need to find the right fans for your case. Some fans are better than others with the T-Balancer.
I award the T-Balancer the score 9 out of 10 and the Golden Bear Award.
Summary:
The T-Balancer from mCubed is an impressive and unexpensive fan controller that allows you to control up to 4 fans separately and control their speed from 0% up to 100%. With support for up to 8 digital sensors as well as various add-onsn the T-Balancer is more than a simple fan controller. If you are annoyed by the noise your computer is making, the T-Balancer should be on your shopping list.
 Bjorn3D.com Bjorn3d.com – Satisfying Your Daily Tech Cravings Since 1996
