If you are serious about overclocking or are trying to build a quiet system, the Asetek WaterChill CPU/VGA/Chipset Power kit – KT12A-L30 could be the answer for you. Björn decided to install the kit in his main system to see if it could live up to the expecations.
Introduction
Is it me or do we get more and more fans in our systems for each year? When I started using PCs you usually had 1 fan on the PSU and nothing more. Today it isnt usual that you have 2-3 casefans, a huge fan on the CPU, a big noisy fan on the video card and even in some cases a fan on the motherboard chipset. While all these fans do help removing heat from the computer they also introduce a lot of noise.
But what if you want a quiet system and still need to keep it cool, possible because you want to overclock the CPU and/or the videocard? In that case watercooling can be the solution. While the idea of putting water into a system full of electrical components might not seem like a great idea, watercooling non-the-less has caught on and today you can find complete kits both for novices and experts.
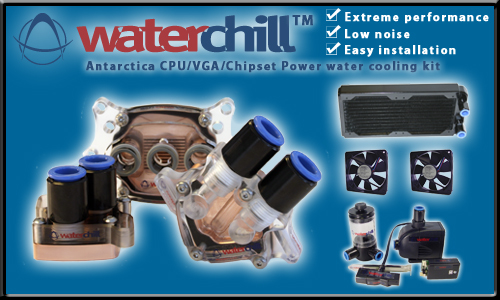
The kit I am reviewing today comes directly from cooling experts Asetek and is called: WaterChill CPU/VGA/Chipset Power kit – KT12A-L30. This is a kit that not only provides cooling for the CPU but also for the videocard and the motherboard chipset.
About watercooling
Watercooling and aircooling in basic uses the same principle. A medium is used to remove heat from an object. In one case the medium is air, in the other the medium is water. The big difference is in how much heat each of them can carry and how good it conducts heat. Water is about 25 times better when it comes to conducting heat which means that it removes a lot more heat from the object it is cooling than air.
The basic theory behind watercooling is that water is pushed into a waterblock on the component it is supposed to cool. The waterblock usually has a thin copper or aluminium bottom, which is applied to the CPU/GPU. The interior of the waterblock usually is designed to make the water turbulent inside the block as well as presenting as large an area as possible to the water. When the water comes in contact with the interior it is warmed up and moves heat away from the component. The warm water is then pumped to a radiator whose task it is to cool down the water again. The radiator has an extremely large amount of endlessly curved tubing inside thin metal fins. The water warms up these fins and air is blown over these fins to remove the heat. The water is then pumped round again.
As you might understand the lowest water-temperature you can expect is the same as the room temperature. Since this normally is substantially below the temperature of the CPU it is usually quite enough for effective cooling. You can of course put several waterblocks in sequence before pumping the water to the radiator. Some people claim that you always should put the CPU last in such a sequence since it warms up the water the most but according to calculations even a 80W CPU wont increase the temperature of the water more than ~ 1C so it really shouldnt matter in what sequence you cool your components.
There are two reasons why you would want to use watercooling.
1/ Better cooling. Ive explained the theory above. Especially if you are overclocking, cooling becomes important. Good cooling can be the difference between a small overclocking and a larger overclocking.
2/ Lower noise. Since you remove the fan from the CPU and possibly the GPU and motherboard chipset, the system should get quieter. This all depends on the pump and the radiator though. If the pump is noisy or the radiator-fans are noisy you might end up with a noisier system than before.
Not all kits manage to be both quiet and provide good cooling and I was very interested to see how the WaterChill kit would manage.
The kit
The watercooling kit we are reviewing today comes from the Danish company Asetek. Asetek is a well-known and well-respected company that has specialized in different coolingsystems and they have been in the business since 1997.
The kit we received from Asetek was their top of the line watercooling kit, the WaterChill CPU/VGA/Chipset Power kit – KT12A-L30 (phew, long name). This kit includes everything you need not only for cooling your CPU but also your videocard and your motherboard.
KT12A-L30 component overview:
- WaterChill CPU Cooler Antarctica block supporting Intel P4 S478, AMD Socket A, AMD S754/S940 (AMD 64)
- WaterChill Chipset cooler block NB01/P1 supporting Intel, AMD, SIS and VIA chipsets
- WaterChill VGA cooler block VGA02/P1 supporting Nvidia/Gforce ad ATI/Radeon AGP cards
- Black Ice Pro DUAL Radiator with push on fittings
- 2 X 120 mm Low Noise ADDA Fans with push on fittings
- 1200 l/hr Hydor Pump with push on fittings
- WaterChill Control Unit with SafeStartTM, NoiseControlTM and LED connection
- WaterChill Plexiglas Reservoir
- WaterChill Tube Set (3,0 mtr.)
- ALL fittings and mounting accessories are included
- Anti Algae Fluid – 25 ml bottle
- Heat Conduction Compound – 2 ml tube
- Installation Manual
The kit really has everything you need to set up your watercooling.


The kit is shipped in a plastic box filled with Styrofoam. Some of the components are individually wrapped and I didnt see any damage on any items even though it had been on a trip from Denmark to me.
Let us look a bit closer on each of the included items:


The CPU waterblock features 1 inlet and 2 outlets. It is built out of copper and Plexiglas making it easy to make sure there is no air inside the waterblock. It is also pretty cool looking and with some ink in the water that reacts with UV-light it probably could look real cool. A extra lid is supplied that can be used on some Socket-A motherboards where transistors are placed to close to the socket.


Chipset waterblock (left) and GPU waterblock (right)
The GPU and chipset waterblocks is built in the manner as the CPU waterblock. There are reports that you need to do some modifications if you want to fit the GPU waterblock on a NVIDIA 6800 card since the waterblock uses 3mm screws and the holes in the NVIDIA 6800 cards are 2 mm. Unfortunately I cannot verify this since I do not own a NVIDIA 6800 card at this moment.


The pump is a Hydor Seltz L30 II which is capable of pumping 1200 l/h (20 l/minute). A reservoir is used to hold water and is attached to the pump by a short piece of tubing. To keep the pump standing, 4 suctioncup feet have been included. I did however noticed that they had a tendency to loose grip and tilt the whole pump/resevoir forward when the resevoir is filled with water.


The radiator that ships with this kit is called the RDT02 120 mm DUAL Black Ice Pro II. It is a huge radiator that allows you to mount 2 102 mm fans on it. 2 ADDA AD1212MS-A71GL fans are included. They are sleeve bearing fans running at a native 12V. At 12V they are spinning at 2050 rpm and at 7 V around 1300 rpm.
The radiator is filled with a copper core and copper fins for maximum performance.


In addition to the larger parts you get all sorts of smaller stuff like screws, thermal paste, anti-algae solution and of course tubing.
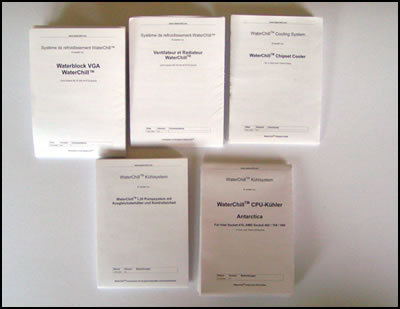
These 5 manuals fold out. I definitely would have liked 1 large manual
instead that goes through the installation step by step.
If there is something I dont like with the kit it is the manuals. Instead of a combined larger manual you get a bunch of tiny manuals you have to fold out. Some of them are in various languages and others just in English. You also dont get a good overview in which order you should install everything. What is strange is that on Aseteks homepage you can download a much better complete manual for the WaterChill kits and I definitely suggest you do that before starting to install this kit.
Installation Planning
Ok, I admit it. I screwed up on this part. Since I never before installed a watercooling kit I didnt plan enough before starting to rip out everything and I paid the price. While the waterblocks themselves are not that hard to fit, it is important to think ahead on where to put the pump/reservoir and where to fit the radiator. In my case I suddenly realized that the radiator wouldnt fit into the top 5 ¼ space that I had planned for it.
Another error I did was that I didnt put together the whole watercooling kit outside of the system first to test it for leaks. I went ahead and installed everything right away into the main rig. Luckily as you will see, I had no issues from leaks.
Installation Day 1
 My system:
- AMD A64 3000+
- MSI Neo Platinum (nforce 3 250GB)
- 1024 MB TwinMos PC3200
- Air cooling: Thermaltake Volcano Tt Silent Boost
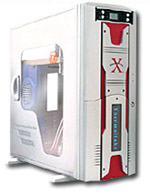
- Case: Thermaltake XaserIII V2000A
The case I choose to use for this installation was the Thermaltake XaserIII V2000A. This is a huge case that I were certain would have no troubles fit the watercooling kit in.
Since I use a A64 3000+ CPU I needed to remove the backplate that is fitted on the bottom side of the motherboard before fitting the CPU waterblock to the motherboard.

In my case I had to work a bit extra since MSI choose to glue the metal backplate to the motherboard. After a quick search over at www.nforcershq.com I found the solution: warm up the backplate gently with a hairdryer until you can take off the backplate. It worked like a charm.


Installing the CPU Waterblock was very easy. I just applied a bit of thermal paste and then attached the waterblock to the CPU. To secure the block I used the included screws. The CPU waterblock is made to fit socket 478 (Intel), socket 462 (AMD), socket 754 (AMD) and socket 940 (AMD). Some socket 462 motherboards have components mounted close to the CPU and for those motherboards Asetek supplies a special lid which replaces the original lid of the CPU watercooler.

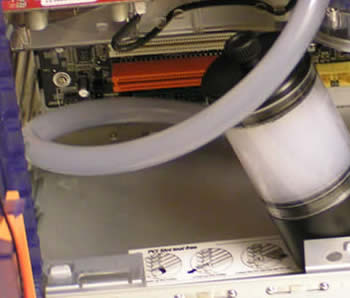
As you can see the AGP slot is close to where the heatsink for the
motherboard chipset is. Even though the waterblock will sit
directly on the chipset (and not on the heatsink) the tubing
will simply not fit together with a thick videocard.
Unfortunately I could not fit the chipset cooler. The reason is that the MSI Neo Platinum has placed the nForce3 250GB chipset a bit to close to the AGP slot. Together with the HIS Excalibur IceQ II x800XT video card, which has a large cooling solution, there just isnt room for the waterblock. Asetek does not mention the nForce2/3 chipset in the manual but according to posts on their forum it should work fine. I also couldn’t test the VGA waterblock right now since I didn’t have access to my Radeon 9800XT that I wanted to use it with. The x800XT and x800Pro I have use their own huge cooler and right now I don’t want to remove it to fit the waterblock.
All the tubing that is used is ½ . Earlier models used 2 types of tubing, 10 mm and ½ inch but this kit now only uses 1 type of tubing. The tube is very flexible and during all my work with the tubes I had no problems with the tube kinking.


Each of the waterblocks, radiator, pump and reservoir has push on quick connect fittings. To secure the tube into the waterblocks you just push it into the connectors hard. I had no issues with leaking so apparently it works very well.

As I noted earlier in the review I hadnt planned enough before starting the install. Due to this I suddenly realized that not only were there no room for the radiator but there were not room for the pump and reservoir either. Considering this is a huge case I was very surprised. The solution unfortunately was to move both the pump/reservoir and the radiator outside the case. I pulled the tubing through 1 of the PCI backplates and hooked it up to the pump, reservoir and the radiator. Even though placing the radiator outside the case is in itself not a bad idea my solution didnt feel practical.
To make sure that the pump starts together with the rest of the computer Asetek has included an adapter that you put between the powercord and the computer. This adapter is hooked up to a little control unit. This unit in turn gets some of the power from a floppy power connector and you also hook up the fans to it. Last but not least is a connection for a led should you choosing to want to use one.


The water turns red when you pour in the anti-algea solution
but later turns milky white.
Even though I wasnt happy with how the kit had been installed I decided to fill the whole system and test it for leaks. Filling up the kit is pretty simple. First you mix de-ionized water with the anti-algae solution. Then you start the pump and keep filling the water mix until the whole system is filled. In my case it took about 300-500 ml water (cant be more specific) before I didnt need to fill more.

Since you do not want to power on the motherboard, CPU and other components while you are filling the system Asetek provides a solution to only power on the pump and the radiator fans. A supplied short wire is inserted into 2 pins on the power connector coming from the PSU. When this is done up turn on the PSU and only the pump is started.
I had some problems when I first started to fill up the system. The fan can be set to run at 7V or 12V but every time I turned on the PSU everything ran for 2-3 seconds and then stopped. I then waited 10 seconds before I could do it all over again. I first thought it could be due to air in the pump but in the end I managed to fill the system up with water and it still did only run for a few seconds each time. Before giving up I switched the fans to 12V and suddenly everything worked. Later I switched back to 7V when the whole install was done and it worked fine so Im not completely sure why it didnt work right away.
With the system filled up with water and no apparent leaks I let it run over night. Since the only other components in the case was the motherboard which wasnt even connected to power I felt confident that if there were a leak nothing would be damaged.
Installation Day 2
I must admit I did sleep pretty badly during the night. Somehow I just kept dreaming about the system leaking all over the new motherboard ruining everything. But as expected nothing had leaked and the system was running fine after 12 hours. I did however have to come up with a better solution for the placement of the pump, radiator and reservoir.
Visiting Aseteks site I quickly realized that this is where I should have gone in the first place. Asetek has an excellent support forum where they not only have several FAQs but also a lot of WaterChill users are exchanging experiences and ideas and it was when I read this thread: What type of case do you use I started to form a plan on how to manage to put the whole kit inside my huge case.


The smaller case fan that already was present left some holes. I used the 120mm fans to first drill
screw-holes and then drill up more air holes for the second fan. My next move after this review
is done is to cut up 2 holes to ensure maximum airflow.
My first decision was to put the radiator inside the top of the case. In the XaserIII case there is one 80mm fan attached to the top as well as 1 USB, 1 FireWire and 1 audio connector. I just removed all of these and started to drill up new holes both for the screws as well as an extra set of fan holes where the air would be sucked in through.


I used a towel to catch all the aluminium pieces that wee left after the drilling
I choose to put the radiator directly attached to the case and the fans below it sucking in cool air into the case through the radiator. This way I ensured the best cooling effects since I used the cool outside air for the cooling.


The pump and reservoir were placed inside the case in the bottom. I had to improvise a bit to get them both to fit but in the end I think it works pretty well. To make sure no vibrations were transferred from the pump to the case I used a small piece of the Styrofoam from the package and placed the pump on it.
Since the whole system already had water in it and I needed to change the orientation of the tubing I had to drain it first from water. This was much easier than I had thought possible. I just moved the reservoir outside the case, removed the lid, removed the tubes from it and let the water flow out from the tubes.
After installation I just filled the system again (using the 12V option of the fans) and let it run over night to check for leaks.
Installation – Conclusion
In the end I was pretty pleased with the end result. I still need to polish up the case a bit since I made a few mistakes when using the dremel tool on the case but all-in-all it now works fine. I’ve run the whole system for more than 1 1/2 week now 24/7 without any leaks or other issues.
If we forget the issues with the placement of the radiator I think that the installation was pretty easy. Even if you are a novice you should be able to put the kit together without any big problems. Just make sure to download the full manual from Asetek.
If I had any suggestion for improvements it would be this:
- Better suctioncups for the pump. The currect ones don’t hold well and the whole pump/resevoir component tip forward very easy.
- Add the ability to switch between 7V and 12V operation of the radiator fans while the system is running. Of course I can build something myself but I think it should be included.
- Full manual.
- A folder with some suggestions on how to modify your case for the use of either the singe-fan radiator or the dual fan-radiator.
Overall I am very pleased though.
Performance
To test the performance of the kit I let my system run through a series of test which all were designed to stress the CPU as much as possible. Motherboard monitor 5 was used to measure the temperature.
Other test settings:
- Room temperature: ~28C
- Case temperature: ~37 C
- 2 80mm fans in the front and 2 in the back of the case
- Enermax PSU set to low fanspeed (very noisy when run at max)
- HIS IceQ II x800XT
- 2 10k rpm WD Raptor 36 GB SATA drives
- 1 7200 rpm Maxtor 160 GB SATA drive
- 1 60 GB Hitachi IDE and 1 80 GB Maxtor IDE drive
- 52x LiteOn CDRW + 8x LiteOn DVDR+-
- Air cooling: Thermaltake Volcano Tt Silent Boost
As you can see my system is jam-packed with components. The two 10k rpm Raptors themselves generate heat and when we add 3 more drives plus 2 optical drives it is no wonder my case temperature is as high as it is. While I was doing my testing Stockholm was experiencing a heat wave with temperatures around 30C so thats why the room temperature was as high as it was. While writing this, the temperature has dropped to around 24C inside the room and 34C inside the case but I still get the same CPU temperatures.
How did I test?
I choose to use the following programs to warm up the CPU:
- 3Dmark03
- Passmark BurnIn (CPU)
- Sandra BurnIn (CPU) 200 repetitions
After running through them all several times I realized that the CPU burn-in in SiSoft Sandra produced the highest temperatures and choose to concentrate on using that.
Since we also are interested in overclocking I choose to overclock my AMD 3000+ (2.0 GHz, 200×10) to 2.2 GHz (220×10), which incidentally is the same speed as a more expensive AMD 64 3200+.
The results
AirC = Aircooling, WC = Watercooling
As you can see the WaterChill kit does a great job in cooling my system. Even when doing nothing (Idle) the temperature dropped around 7C and after overclocking to 220×10 (Amd64 3200+ speed) the difference is even larger, 15-17C!
Running the radiator fans at 7V instead of 12V doesnt affect the temperature much.
I also noted that after play a few hours of Doom3 the temperature leveled out around 40C when the CPU was overclocked to 220×10 and the fan was run at 7V.
I did plan to overclock my system a bit further to 2.35 GHz (235×10) but since my motherboard, the MSI Neo Platinum, does not lock the speed on the SATA ports as it does on the AGP/PCI ports I decided to stay at 220×10. There has been reports of corrupted data and ‘lost’ SATA ports when overclocking around 230-240×10 and since my system has 3 SATA drives including a RAID0 setup I didn’t want to risk anything.
I was worried that removing the CPU fan plus putting in the pump (which gets pretty hot) would raise the temperature in my case but I didnt notice any higher temperatures during my testing.
Noise
Good cooling means high noise? Well, actually not necessary. The pump itself is silent, at least as long as you make sure it stands on Styrofoam or something similar. Otherwise you could get some resonance with the case. There are reports about noisy pumps but if you get one just talk to Asetek and they should help you get it replaced.
The next item that could generate noise is the radiator and the 2 120 mm ADDA fans. I found that at 12V the fans were pretty noisy, especially since they seemed to generate some kind of resonance with the case. I guess some rubber between the radiator and the case could solve most of that noise. However at 7V the fans were virtually noiseless. I say virtually because if you turn everything off in the room except for those fans you of course can hear them. In a room with multiple other fans (case fans, PSU fan, GPU fan, harddrives and so on), you wont hear anything from the ADDA fans. I actually had to put my ear close to the drilled holes in the top of the case to even hear if the fans were working or not.
Since we earlier noticed that the 7V mode does cool almost as good as the 12V mode there really is no reason for you not keep the whole system silent.
Conclusion
If you had asked me what I thought about the kit after day 1 you would have heard a lot of swearing and muttering. I was pretty irritated since I hadnt expected to have a problem installing the kit in my case. However as soon as I sat down and thought the installation through I quickly changed my opinion about the kit. If you are thinking of getting a watercooling kit like this it is very important to first sit down and think about how you want to install it. Asetek gives you a lot of help through their excellent website and support forums and when you see people fitting in similar kits in small Antec Sonata cases then you quickly realize that nothing is impossible. In fact, when this review is done Im contemplating of either see if I can mod my Antec Sonata case for the kit or even mod my little ShuttleX case. Ive been hooked at watercooling!
I dont really have much negative things to say about the kit. The supplied manual could be better and the pump a bit more stable but other than those minor issues everything has worked perfect. Oh, and then theres the price. For the complete kit you have to pay 368 when buying it from Asetek directly. In the US it is cheaper and I found at least one place (http://www.jab-tech.com) where you could get the kit for $299. If you dont want the complete kit you can both buy cheaper kits without GPU/chipset cooler and/or with a smaller single fan radiator. Last but not least Asetek also sells everything in pieces which means you can pick up only the parts you need.
Pros
+ Everything included in the kit
+ High quality components
+ Great cooling
+ Very quiet when running in 7V mode
+ Excellent supportforum on website
Cons
– I want 1 complete manual, not 5 small flimsy pieces of paper
– Wont fit in every case.
– Pump a bit unstable and is easily tipped forward
– High price.
Without any hesitation I award the Asetek Waterchill, CPU/Chipset/VGA KT12A-L30 ½ 9 paws out of 10 and a Golden Bear Award for an incredible good watercooling kit that should fit both the experts and newcomers.