Are you looking for an elegant, tool-less chassis with enough good looks that it warrants more than just a second look? Silverstone may have the solution!
Introduction
We all have cases, but it seems like only lately have case manufacturers strived to make truly “different” products from their competitors. With cases built with every color in the rainbow and all sorts of crazy patterns and stoic stylings continually assaulting the market in waves, Bjorn3D has here a case that strives to stand out among the crowd: Silverstone’s SST-TJ02 of their Temjin case series.
|
Specifications
Silverstone has made a complete and feature rich chassis with their SST-TJ02.
| Silverstone SST-TJ02* | ||
| Material |
Aluminum Front Panel |
|
| Color | Silver | |
| Motherboards | Standard ATX , Micro ATX | |
| Drive Bay | Exposed |
5.25 x 4 |
| Hidden | 3.5 x 4 | |
| Cooling System | Front |
120x120x25mm Dual ball Bearing2000rpm , 21dBA(Intake) |
| Rear(Optional) |
80x80x25mm (Exhaust) |
|
| Expansion Slot |
7
|
|
| Additional |
USB2.0 ports x 4 |
|
| Power Supply | Optional Standard PS2 Power Supply | |
| Net Weight |
9.2kg
|
|
| Gross Weight |
11.3kg
|
|
| Dimension | 216mm(W)x446mm(H)x472mm(D) | |
| Package | 263mm(W)x493mm(H)x530mm(D) | |
*Product specifications taken from manufacturer web site.
First Impressions and Quality
It is often said and believed that first impressions are the ones that last. While this is not always true, Silverstone has managed to make a very good “first-look factor” hit with their SST-TJ02. Upon receiving the package, weight was first noted; the case definitely isn’t *heavy* per se, but it also isn’t light either. Many cheaper cases feature plastic case fronts and steel bodies. Silverstone keeps the steel body and replaces the cheap plastic front with a high quality, solid aluminum, etched face.
| The sheen is absolutely gorgeous. | Lets get a tad closer! |
It is hard to resist touching the fine finish. In fact, eager touches discovered the delicate etched feel and quickly resulted in running fingernails up and down the front of the case to hear the “ziiiippppppp” noise that resulted. 🙂 It is quite interesting visually as well. While the lines may not be very easily visible, they create a unique sheen that seems to “glint” brightly and from interesting angles.
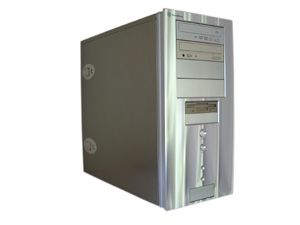
| The finish on the sides looks very reflective. | Another “reflective” shot, to show just how reflective the surface is. Not quite as clean as the previous, but still nice. |
At first glance, the sides of the chassis also appear aluminum. However, the first time you pick this case up and look inside you realize that they are in fact steel. Is this bad? Well, it does cut down on its “totability” but structurally the case is very sound and sturdy. I would completely trust this case as a seat if it was needed (hopefully never, it looks to pretty). Back to the side panels, they look great and are very shiny. Silverstone has a done a great job here.
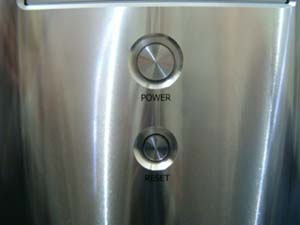
| The power button is made out of alluminum. Click for a really nice closeup of the finish! | Everything on the front panel is fashioned out of aluminum, including the bay covers! |
After the initial look at the case, you begin to notice the details. Everything (and I mean everything) on the front panel is fashioned out of aluminum. The buttons, the bay covers, and everything else. Pretty impressive if you ask me. Silverstone has also ensured that there are no sharp edges on this case, so you don’t have to worry about cutting yourself during any hardware installs.
Installation and Setup
To fully test this case, I decided that it justified a whole entire new computer installation. A new motherboard (Asrock K78SXE+), CPU, RAM, and hard disk were purchased. Physical installation of the motherboard was nothing out of the ordinary. Silverstone included the standard entourage of screws, risers, and other miscellaneous parts. As a computer technician, mounting the motherboard took about 5-10 minutes. Unfortunately, this is where the first issue with the case was uncovered.
 |
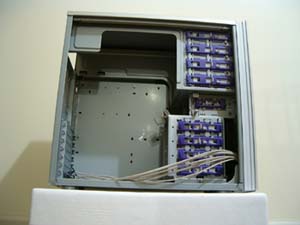
| The inside of the chassis. Lots of room for expansion! Note how all the front panel cables are to one side. |
 |
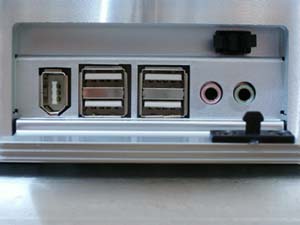
| A complete array of front panel ports are included. Only thing Silverstone missed was labels. |
The USB/Sound panel cables were simply too short. It wasn’t even so bad that they were short, but with the way that the case was initially wired, the wires didn’t allow the removable drive cage to slide out. There were then two options: either rewire those cables, or remount all the tiny little USB and front panel audio connectors every single time I wanted to swap a hard drive (an operation I perform often because of my job). While this may not bother some of you who plan to keep the same drive for awhile and don’t change the state of your hardware often, in my case it simply would be a huge pain (literally, the cables are very awkward and time-consuming to install). Such is the first gripe, which I solved by rerouting the wires through a different hole towards the front of the case. This leads on to the next issue…
| The front of the case, with the cover removed. The case came with all of the front panel ports routed through one hole…customize as you need (and you will probably need to). | After the cables were done being routed, one set of USB cables and the audio cables were run through this far side. |
I realize that Silverstone intended to keep the look of the case as simple and smooth as possible, but there is only one easily removable side panel. The top and other side are one piece, and there are a bunch of screws required to remove this one piece. Fortunately, due to Silverstone’s “tool-less” design, it would rarely (if at all) be necessary to remove this large panel. Rerouting the USB and front panel audio connectors required me to perform this laborious operation.
| An internal view of the 5 1/4″ bays. | Those purple latches are the tool-less drive installation latches. Much easier than using screws! |
A major selling point is the “tool-less” capability present within this case. It very simple and elegantly designed, and no problems or issues were encountered during installation of either 3 1/2″ or 5 1/4″ drives.
Only one thing is really missing during installation: a slide-out motherboard tray. This would definitely simplify the installation of the motherboard and add-on cards.
Usability
Once everything was set up and installed, everything worked well and seamlessly, just as it should. Thanks to the preinstalled 120mm fan that comes with this chassis, the insides are kept cool and airflow is prevalent. I would recommend another 120mm fan for the back of the case, however…more airflow (and especially with quiet fans like these) is always good, and it would help cut down on the “hot air” being exhausted.
| The included large 120mm fan. It is quiet, but still moves plenty of air. | The lock on the top side panel latch. Usually these aren’t used, but it is here just in case (and it works well). |
The front panel ports are solidly constructed and also contributed positively to my overall experience. I had no problems with them during testing.
Overall, I would have to say that this case performs very well under just about any condition; this is heralded by how it was nearly seamless during operation. After the initial setup, this case is set and good to go…and because of its tool-less design, any drive installs are assured to be quick and easy.
Conclusion
If you are looking for a relatively easy installation and setup and want a tool-less case for future hardware installation/removal, then look no farther than the Silverstone Temjin TJ02. Overlooking the front panel cable snafu, I really do find it hard to fault this case. It is solidly constructed, and nearly every detail has been attended neatly and smoothly.
| The Silverstone Temjin TJ02 is sure to not disappoint, if you can overlook the installation issues. Don’t be blinded by that absolutely gorgeous front panel if you don’t like a tad of work! |
The most striking feature of the case, the front panel, stands out like a centerpiece with its shiny, intricate surface. If you do happen to invite your friends over, this chassis would be sure to get more than a single look. If you do happen to catch someone stealing a glance, encourage them to run their fingernails over the front, and it will be sure to catch a quick “wow!”
Although this case has an above-average cost attached to it ($101 at a popular e-tailer), it is still hard not to recommend it to someone who wants both style and functionality. Yes, this chassis may not be designed for LAN gaming, but its sharp looks and mid-tower size allow it to squeeze into many places. The combination of looks and functionality offered by the Silverstone Temjin TJ02 have us rating it as a 7 out of 10!
Pros:
- Gorgeous alluminum front panel
- Very solid case design
- Tool-less features
- Lockable side panel
- Lots of front panel ports
- Brilliant LEDs
- Comes with a 120mm fan installed
Cons:
- Only one side panel is easily removable, the rest of the case is one piece
- Many people will have to disassemble the case to reroute the front panel cables
- No slide-out motherboard tray
- Front panel ports don’t have labels
Rating:
 Bjorn3D.com Bjorn3d.com – Satisfying Your Daily Tech Cravings Since 1996


