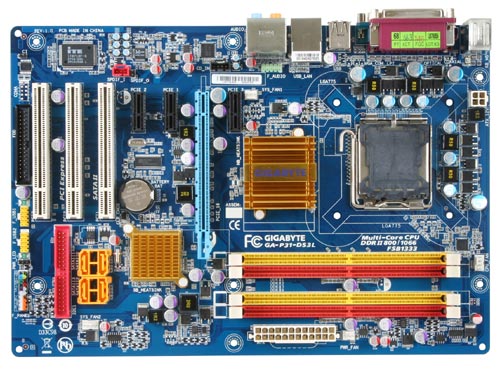
The Gigabyte P31-DS3L motherboard is a relatively unknown budget motherboard, but not just any budget motherboard. The P31-DS3L offers all the performance and overclocking one would expect from a full board but without all the price, and still does not skimp on features. Is this the perfect low price Intel chipset motherboard? Read on to find out…
INTRODUCTION
Just in time for the winter season Intel adopted an alphabet soup strategy with their current chipsets. While it won’t help ward off cold feet from the dizzying array of alternatives currently on the market, it will address one key area where current model Intel chipsets have been shy to enter, the budget market. For this review we are going to take a look at the relatively unknown P31 chipset.
For the mainstream market there is P35, X38, soon to be P45 and X48 respectively. That doesn’t sound bad, unless looking for an Intel chipset with integrated graphics onboard in which case you get to decide between G31, G33, G35, and later G45 which will be a significant upgrade from previous Gxx chipsets. While plenty of choices are a good thing confusing the consumer is usually not. Not to mention not even the unreleased P45, G45, and X48 chipsets will be compatible with future Nehalem processors, but we digress.
To shed some light on a confusing situation Gigabyte has sent us one of their P31 motherboards for review. P31 hardware is targeted directly for the budget consumer and accordingly can be found for just under $80 in several flavors from various motherboard makers. Intel is not known for cheaply pricing their venerable chipsets, so P31 is unique in that it is a hybrid of the much acclaimed P35 and old stalwart 975X chipsets. For the technically inclined the P31 chipset is composed of the P35 northbridge MCH chip with the 975X’s ICH7 southbridge chip for an interesting combination of old and new. For reference 965 chipsets used ICH8 and P35 uses the ICH9 series of southbridge chips.
P35 has been a popular, if usually pricey choice until late as it has offered tangible performance benefits over the older 975X and 965P chipsets it has replaced, and today we shall discover if P31 can offer the same performance or even a possible performance improvement at a lower price! While there are more than a few motherboard manufacturers with P31 based offerings, these boards are not very common and more importantly all P31 boards do feature some strings attached which we will cover in detail later in the article.
ABOUT GIGABYTE
GIGABYTE is known throughout the industry as a leader in mainboard and VGA technology. Pioneering such technologies as the i-Ram and all solid capacitor design of their motherboards, it easy to see why they have grown to be a world class provider of technology to the home user. Here is an excerpt taken from their web site:
GIGABYTE, one of the most well-known IT brands in the industry, started as a motherboard technology research laboratory with the passion of a few young engineers two decades ago. With the vision and insights to the market, GIGABYTE has become one of the world’s largest manufacturers. On top of motherboards and graphics accelerators, GIGABYTE has further expanded its product portfolio to include notebook and desktop PC’s, digital home entertainment appliances, networking servers, communications, mobile and handheld devices. GIGABYTE has risen from an eight-man office to a world class enterprise in the IT industry.
FEATURES & SPECIFICATIONS
As we already mentioned the hybrid nature of the chipset makes it a splicing of 975X and P35 chipsets, and P31 is targeted squarely at the price conscious consumer. With the exception of the memory limitations P31 does not sacrifice anything major to reach its lower price. Even then Gigabyte has added back in Gigabit LAN, the missing IDE slot, and two extra USB ports, amongst several other features.

|
Gigabyte® GA-P31-DS3L
Detailed Features & Specifications |
|
|
CPU
|
|
|
Front Side Bus
|
|
|
Chipset
|
|
|
Memory
|
* Because of chipset limitations, do not populate both DIMM sockets of the same channel (e.g. DDRII1 and DDRII2), or populate 4 DIMM sockets with double-sided memory modules to prevent system’s failure to start or incorrect detection of memory modules. Please refer to the user manual for the memory configurations table.
* Because of chipset limitations, when using FSB 1333 MHz CPU with populating all DIMM sockets, memory frequency will be reduced from the original, and system instability or incorrect detection of memory module may be occur. Please refer “Memory Support List” for memory support information.(Note 1) Based on standard PC architecture, a certain amount of memory is reserved for system usage and therefore the actual memory size is less than the stated amount. For example, 4 GB of memory size will instead be shown as 3.xx GB during system startup.
(Note 2)Some memory configurations will result in memory frequency being reduced from the original frequency. |
|
Audio
|
|
|
LAN
|
|
|
Expansion Slots
|
|
|
Storage Interface
|
South Bridge:
iTE IT8718 chip:
|
|
USB
|
Integrated in the South Bridge
|
|
Internal I/O Connectors
|
|
|
Back Panel Connectors
|
|
|
I/O Controller
|
|
|
H/W Monitoring
|
|
|
BIOS
|
|
|
Unique Features
|
(Note 3)Available functions in Easytune may differ by motherboard model.
|
|
Bundle Software
|
|
|
Operating System
|
|
|
Form Factor
|
|
|
Remark
|
|
PACKAGE & CONTENTS
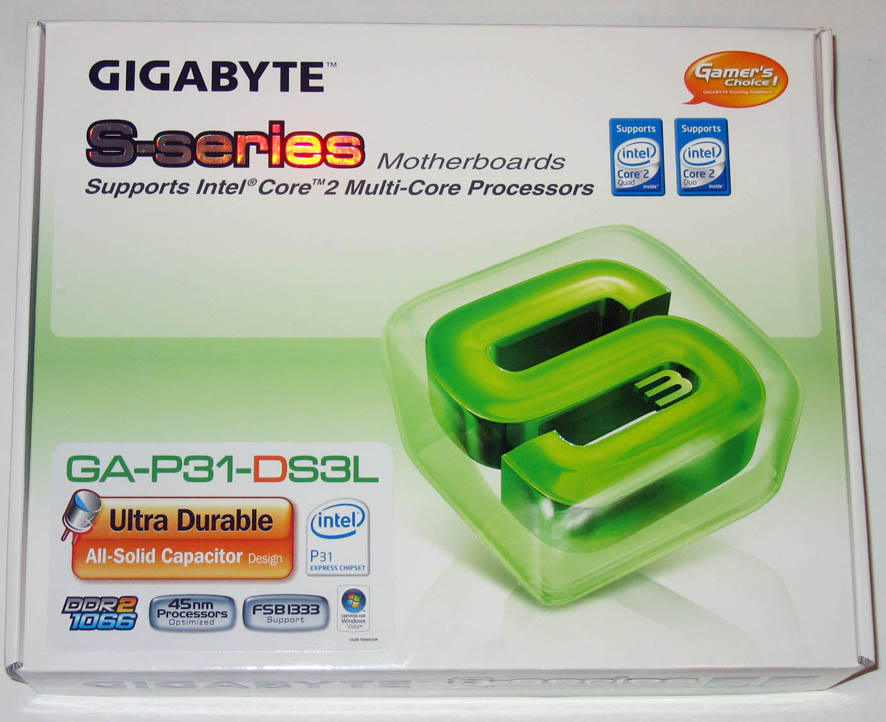
The box art is refreshingly simple but clearly provides most of the needed information. While the box mentions FSB1333 processor support, this motherboard will support FSBs as low as 800. Throw in Core 2 Quad support and support for upcoming 45nm Penryn processors and this board will support just about any current Intel processor leaving little left to desired.
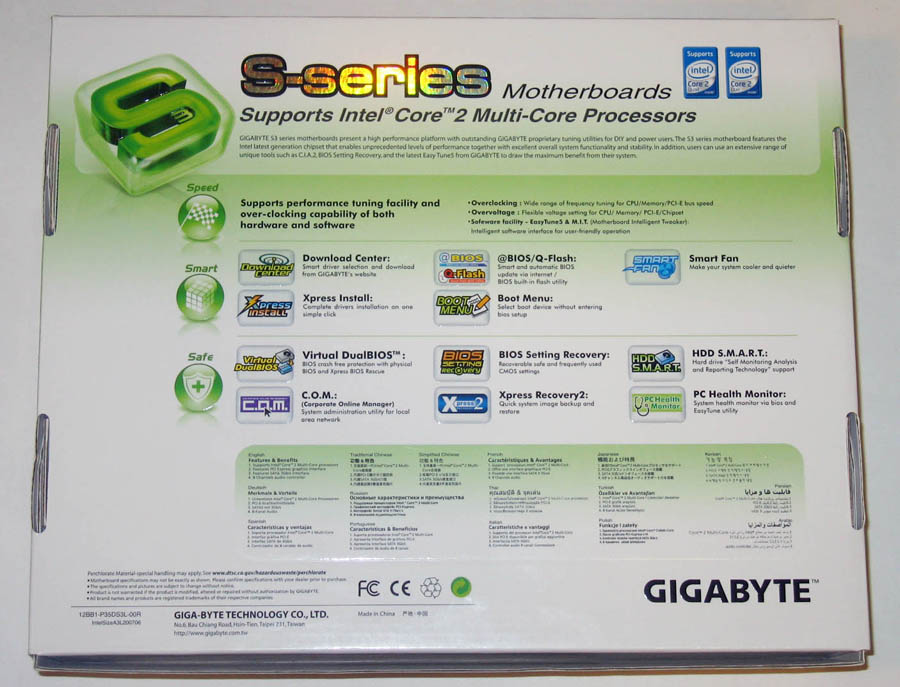
Carefully flipping the box around we find a neatly organized layout of features ranging from overclocking to recovery to system hardware controls. Of interest might be the Xpress Install and Download Center for quickly downloading and installing the latest drivers and utilities from Gigabyte.
We would be remiss if we did not pause to mention the quality of the packaging, as nobody enjoys ordering hardware and having it arrive in pieces. Thankfully despite this being a budget board Gigabyte did not skimp on any of the protective padding. The motherboard comes within an anti-ESD bag and rests atop of a layer of foam, with the package contents separated from the board with a cardboard insert. While this is a good job and the motherboard is securely packaged, I still feel it isn’t complete without some form of padding used along the inside edges of the box between it and the mainboard. In the past I have received one board that was damaged by the shipping box being during dropped on its side during transit, resulting in a broken corner to the board and instant RMA.
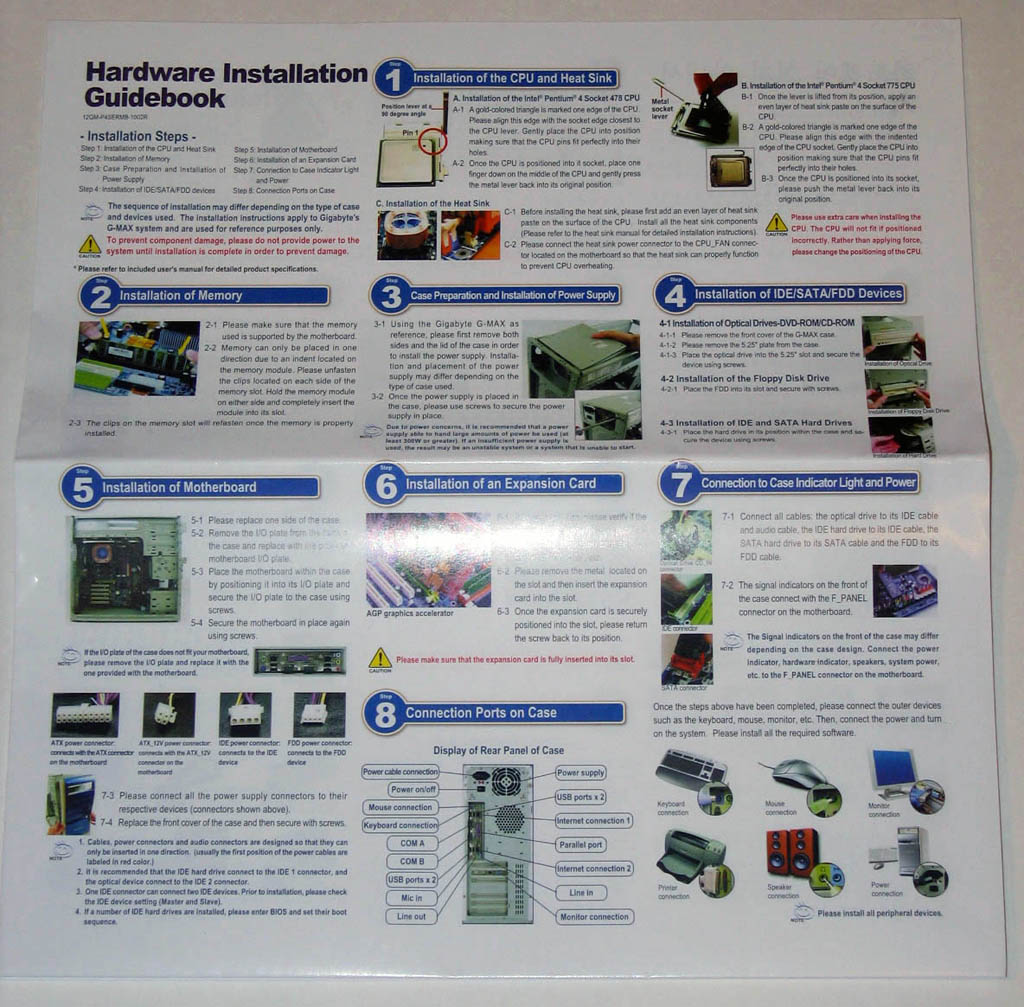
In regards to accessories, considering this is a purely budget oriented motherboard there is a respectable package included. The CD includes drivers, both the @bios and EasyTune5 utilities, and an optional OEM copy of Norton Internet Security. Two out of four possible SATA cables are included along with a Gigabyte case badge, IDE & floppy cables, and I/O shield. A guide on how to physically install the processor, driver & utility CD, and last but not least the manual are also included. Additionally Gigabyte has also added a basic, but color guide on steps to fully install the system hardware into a chassis.
The manual itself is a very thorough, detailed 84 pages of English only instructions in black & white print, and includes plenty of image references for the motherboard and BIOS screens. Despite some claims to the contrary the manual is written in fluent, easy to follow English. There is of course always room for improvement and further details, but I can safely say I wish other manuals were this detailed and comprehensive.
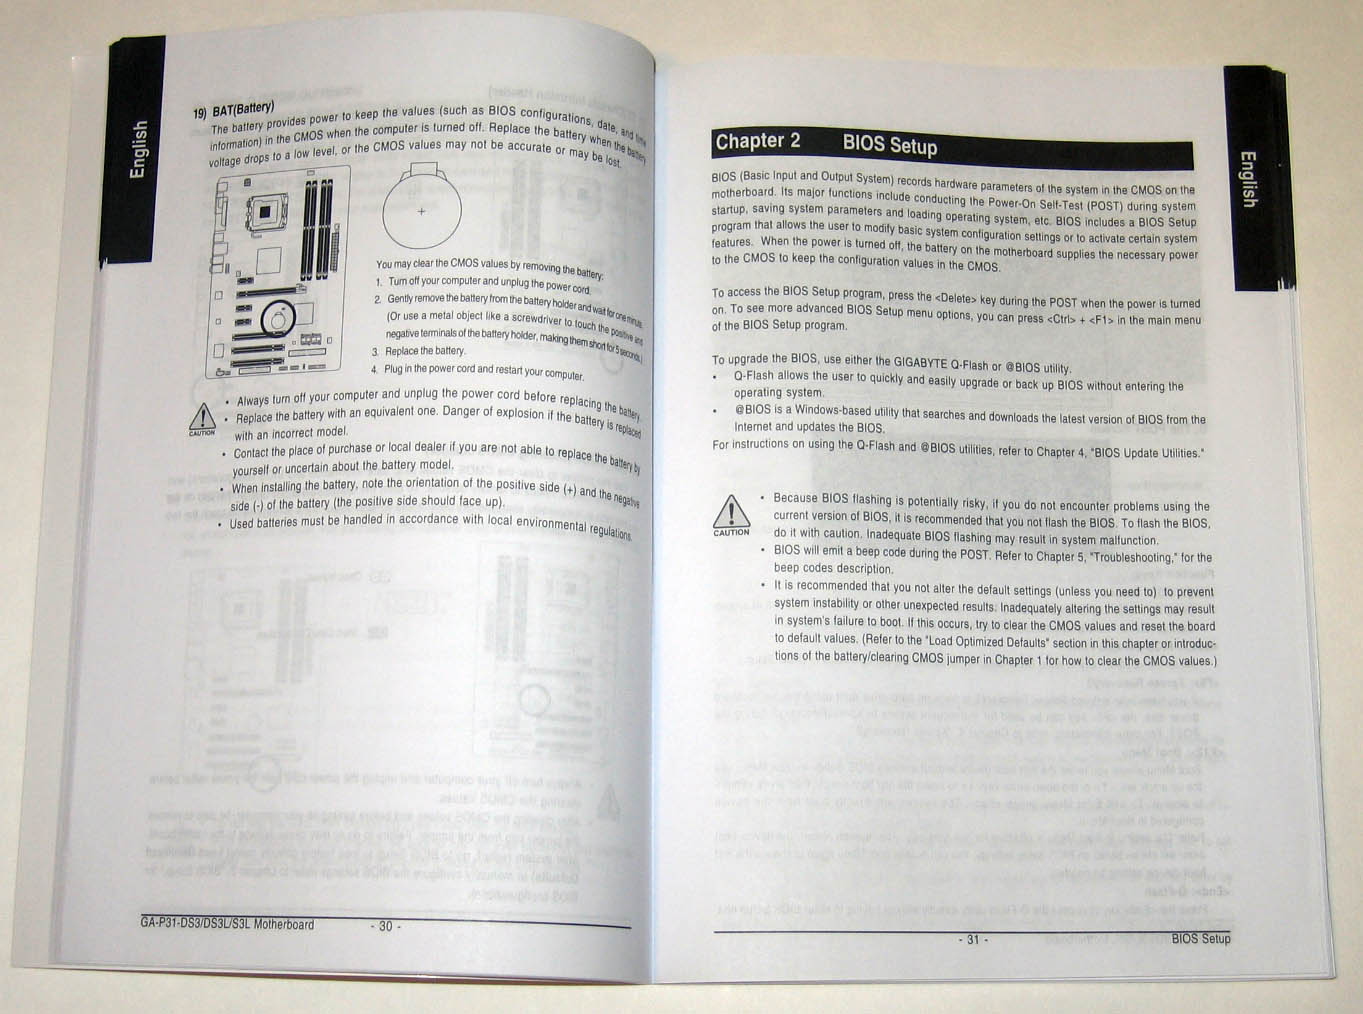
This next photo was included to show where the manual happens to mention the “secret password” to unlock the full range of BIOS settings. Anyone familiar with Gigabyte motherboards will know about the CTRL+F1 key combo that must be used once inside the BIOS menu to “unlock” the full range of BIOS settings. I am not sure why Gigabyte still includes this because most motherboard purchasers are going to be savvy enough to be interested in tuning some of the settings that are hidden by default.
Concerning the excuse of needing to keep some sensitive BIOS settings hidden from non-savvy users that might change them without understanding the consequences, there are more than a few voltage settings alone that are not hidden by default and can easily lead to the user killing some piece of hardware. Either way the continued use of the CTRL+F1 hotkey is an added inconvenience to most users, confuses those new users that do not know about it, and provides little actual protection as it does not hide many of the dangerous BIOS options.
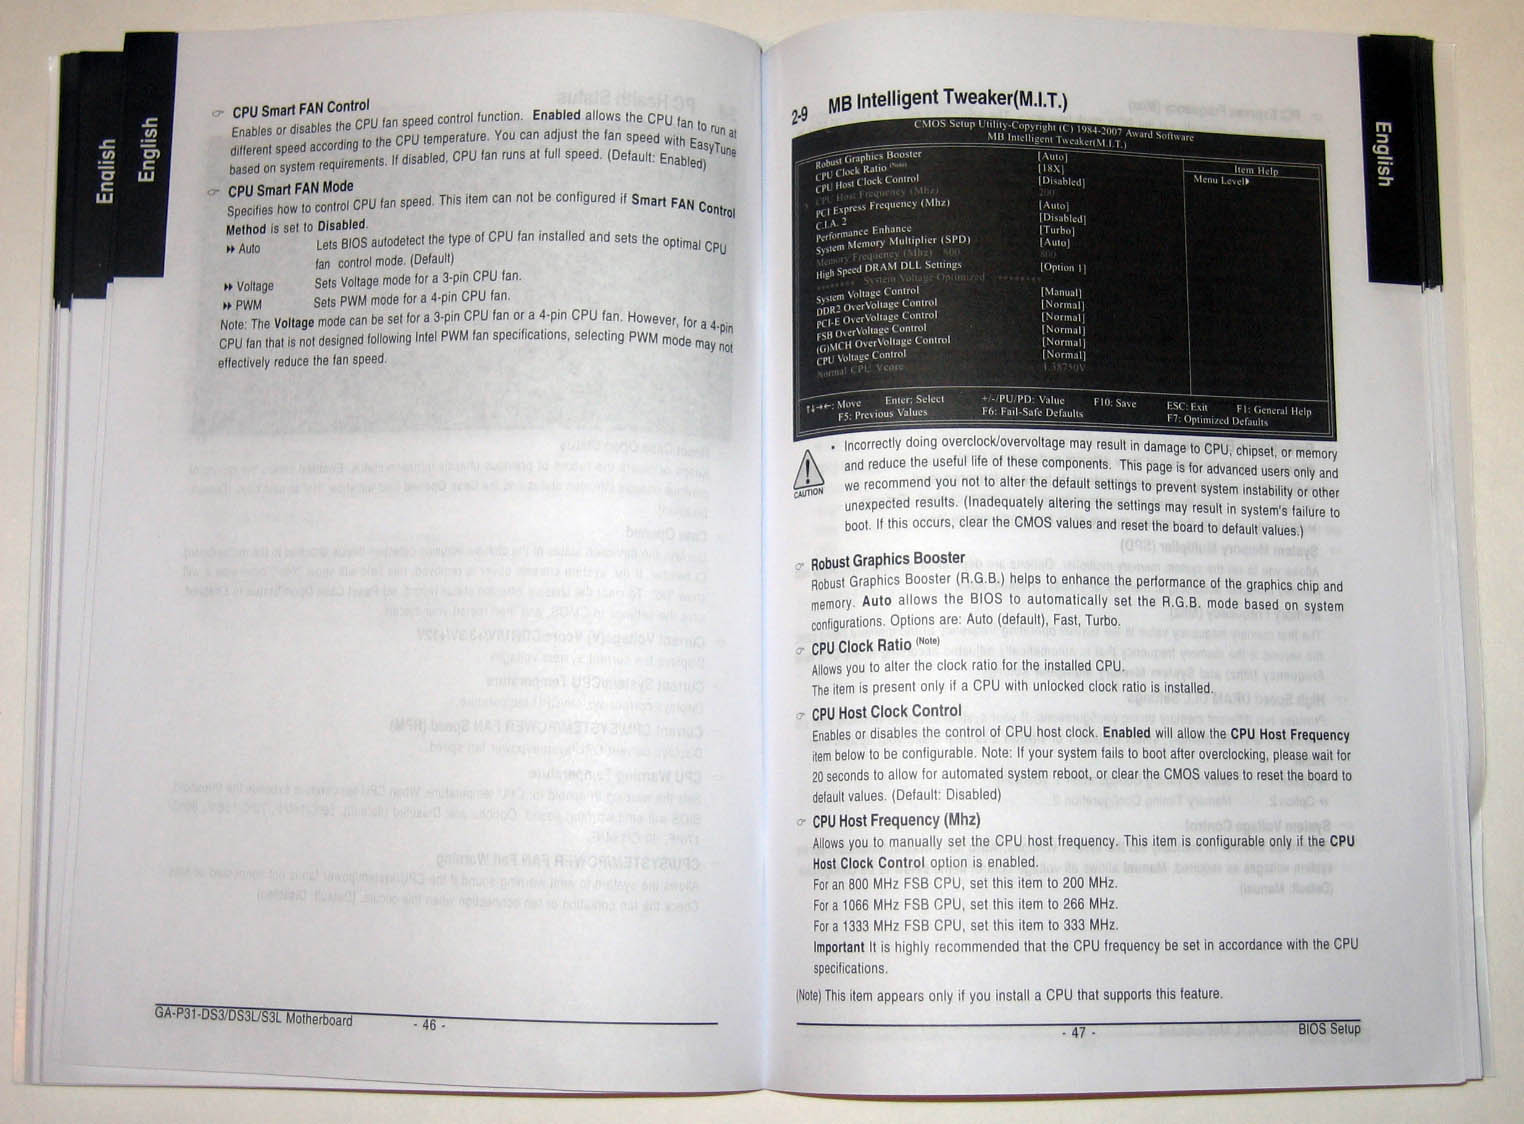
Moving on here is a photo of the next page for reference. Gigabyte provides a fairly clear explanation for how to configure their Award BIOS and describes the majority of the BIOS settings in detail, organized by screen. Even the average computer enthusiast should find this section useful.
A CLOSER LOOK
In longstanding Gigabyte tradition the board is blue with the usual wide range of colorful connectors and slots. While personal tastes tend to vary widely, I tend to be happy as long as the motherboard isn’t brown as another major manufacturer that shall not be named is wont to do with their budget motherboards. Also as with most of Gigabyte’s motherboards the board is slightly smaller than normal ATX dimensions (1.34″ or 34mm), but the board will of course still mount to any ATX chassis.
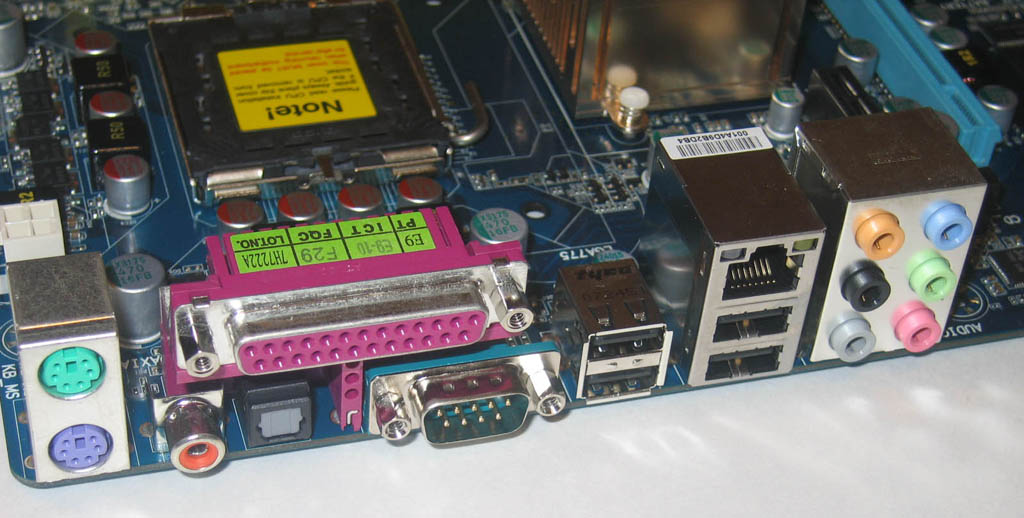
On the back panel we see the standard fare, with a few exceptions. The Ethernet port is Gigabit, and there are also both Coaxial and Optical S/PDIF out ports located underneath the parallel printer port. Counting the serial and two PS/2 ports there are four USB ports and lastly the 7.1 channel high definition audio ports. Altogether this is a respectable offering for a budget motherboard.
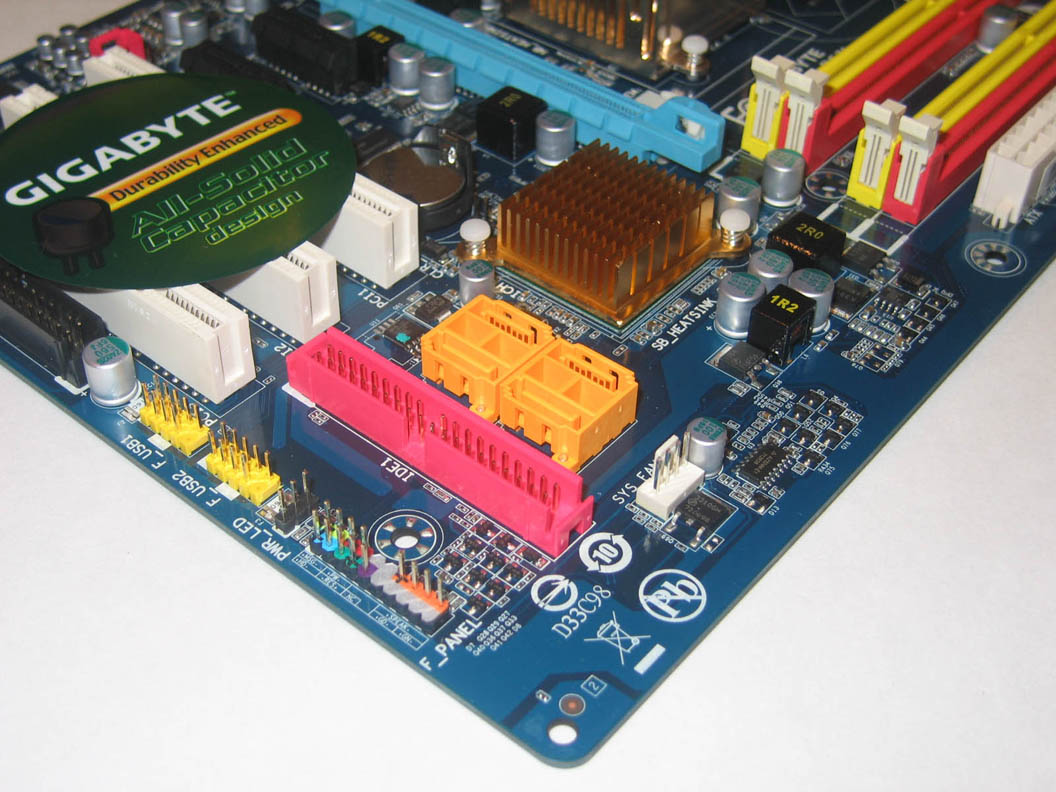
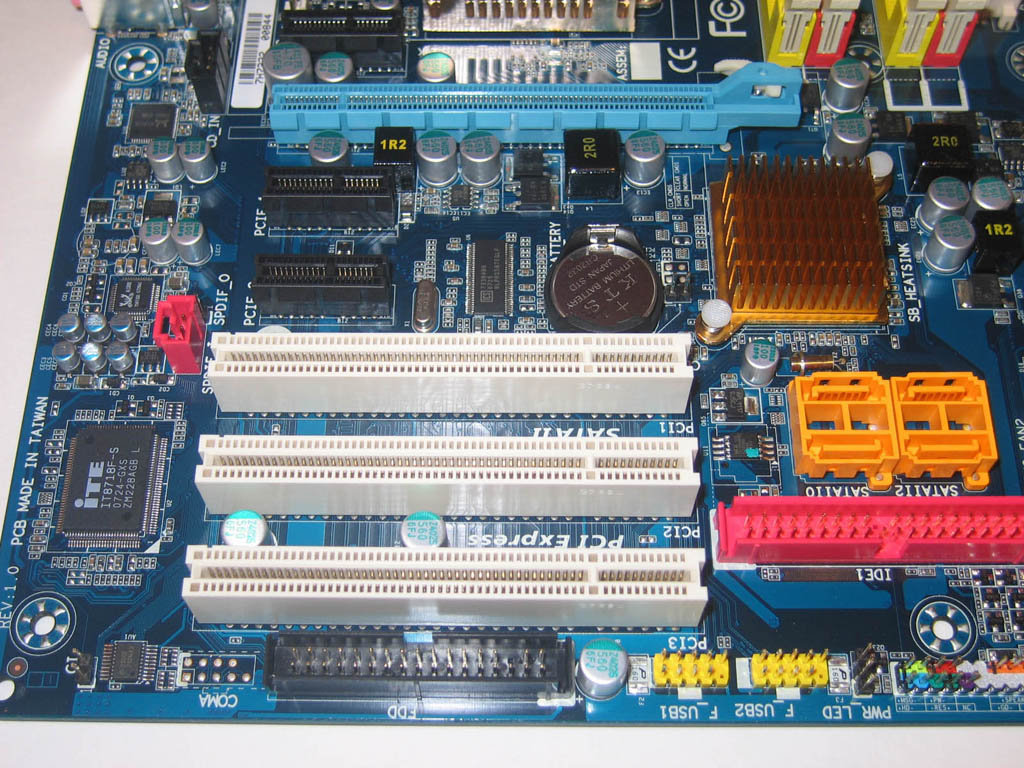
Here is the single IDE port that supports up to two devices, four SATA ports, the color coded front panel connectors and the two yellow USB headers. While no USB brackets were included in the box, these headers each are available to add a total of four more USB ports. Also worth mentioning is Gigabyte has provided a four-pin PWM fan header for optional PWM control of a case fan
The Floppy connector can be found hiding at the bottom of the board, which may present a inconvenience to some users. Between the CMOS cell and southbridge heatsink are the two pins that are used to clear the CMOS. During testing the motherboard was easily able to auto-recover from bad overclock settings, so in most situations these should go unused unless an overly aggressive memory setting is selected. No jumper is provided however with a little care a simple screwdriver would work fine as long as the board is powered off first, of course.
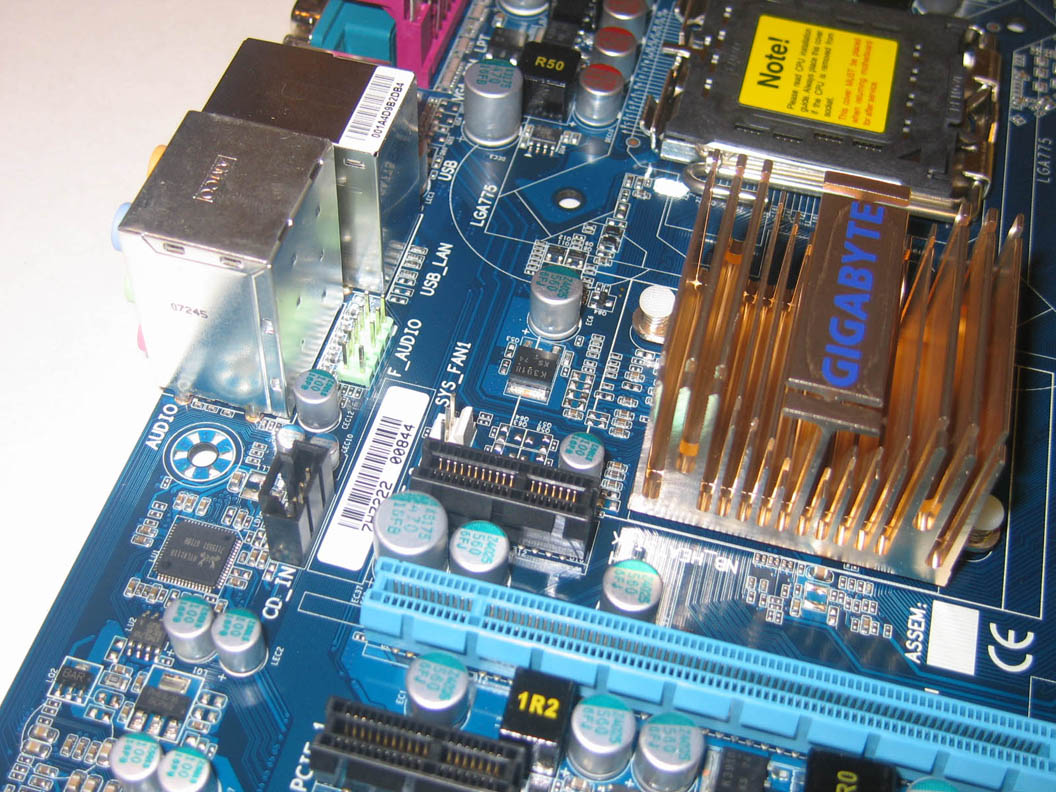
The area around the CPU socket is clear so most aftermarket coolers should have no problems being mounted to this motherboard. We can see the four voltage regulator design which is supported by a 4-pin AUX power connector. It is nice to see this design become standard even on budget boards, even if an 8-pin EPS12 power connector is more preferred in this quad-core era. While users looking for very high overclocks on a power hungry quad-core might be best served looking elsewhere this setup is more than enough for any dual-core overclocking, as we happily put to the test. Hiding at the lower edge of the photo is the four pin PWM CPU fan header.
In the tradition of NVIDIA recycling graphics card PCB layouts, the layout and design of the P31-DS3L is almost completely identical to its predacessor the 965P-DS3, however there are some worthwhile improvements. Instead of the three voltage regulator design of the Revision 1 965P-DS3 there are now four CPU voltage regulators on the P31-DS3L. Even for the lowest of motherboards should include four V-Regs for long-term stability and life of the board.
The green Front Audio out header is located in its typical inconvenient place just behind the audio ports, however for most cases reaching it should not be an issue. Also continuing in Gigabyte tradition is the lack of any onboard PC speaker. Considering the cheapness of such tiny PC button speakers and how invaluable they can be for troubleshooting a new computer (especially for first time system builders) this is not a user friendly practice.
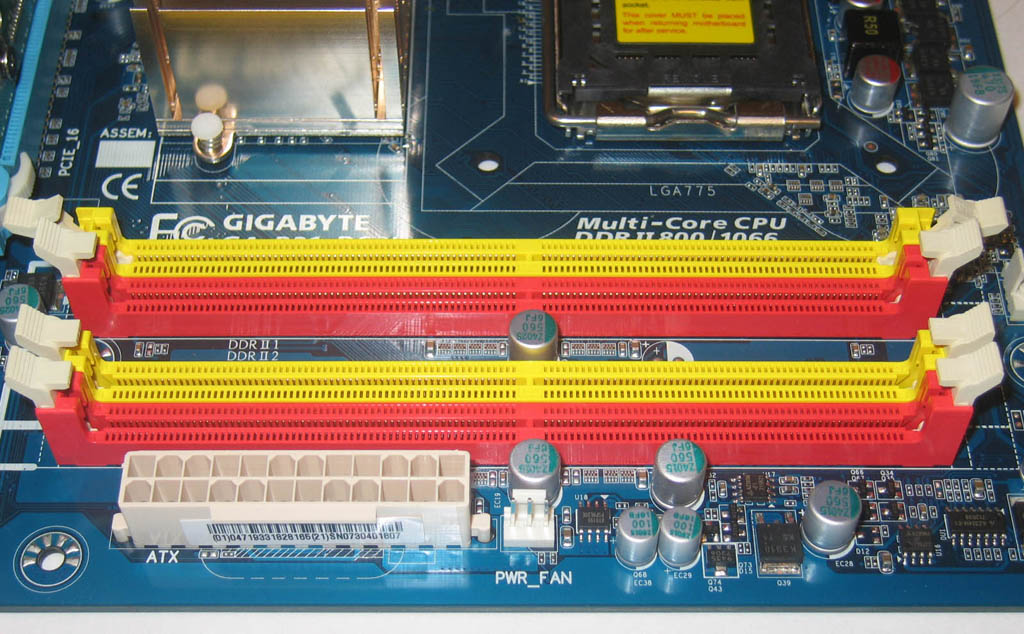
The memory slots are color coded correctly for dual-channel use, with each pair of modules going in the same colored slot. As we mentioned at the start of this review there were a few strings attached to the P31 chipset, and they happen to be about the memory.
High voltage memory such as the 2.2v Crucial Ballistix we tested would not work correctly in this board for two reasons. This specific memory will not operate at only 1.8v, so users should be aware of their own memory voltage requirments. The board would not POST and required memory that will operate at 1.8v to be used to first correctly adjust the RAM voltage to 2.2v in the BIOS before we could use the Ballistix memory. After this we started testing, but continued to experience the occasional problem with our 2GB DDR2-1066Mhz Ballistix kit, which led us to switching to a kit of 2.1v 2GB Corsair DDR2-800MHz for our testing instead. The Corsair memory worked perfectly and the sporadic, completely random non-booting situations that were encountered during benchmarking were suddenly inexplicably gone. Quoted directly from Gigabyte’s website:
* Because of chipset limitations, do not populate both DIMM sockets of the same channel (e.g. DDRII1 and DDRII2), or populate 4 DIMM sockets with double-sided memory modules to prevent system’s failure to start or incorrect detection of memory modules. Please refer to the user manual for the memory configurations table.* Because of chipset limitations, when using FSB 1333 MHz CPU with populating all DIMM sockets, memory frequency will be reduced from the original, and system instability or incorrect detection of memory module may be occur. Please refer “Memory Support List” for memory support information.
One thing we were happy to note is that Gigabyte has listened to feedback and ensured that to install or uninstall memory will no longer require the removal of the graphics card first, there was ample space left this time. Readers can also see the customary Gigabyte latch/lever design of the PCIe 16x slot, so even if a large dual-slot GPU is installed there will be no fumbling trying to reach underneath or behind the card to release it from the slot. As with all modern boards a 24-pin power connector is standard fare.
P31-DS3L BIOS
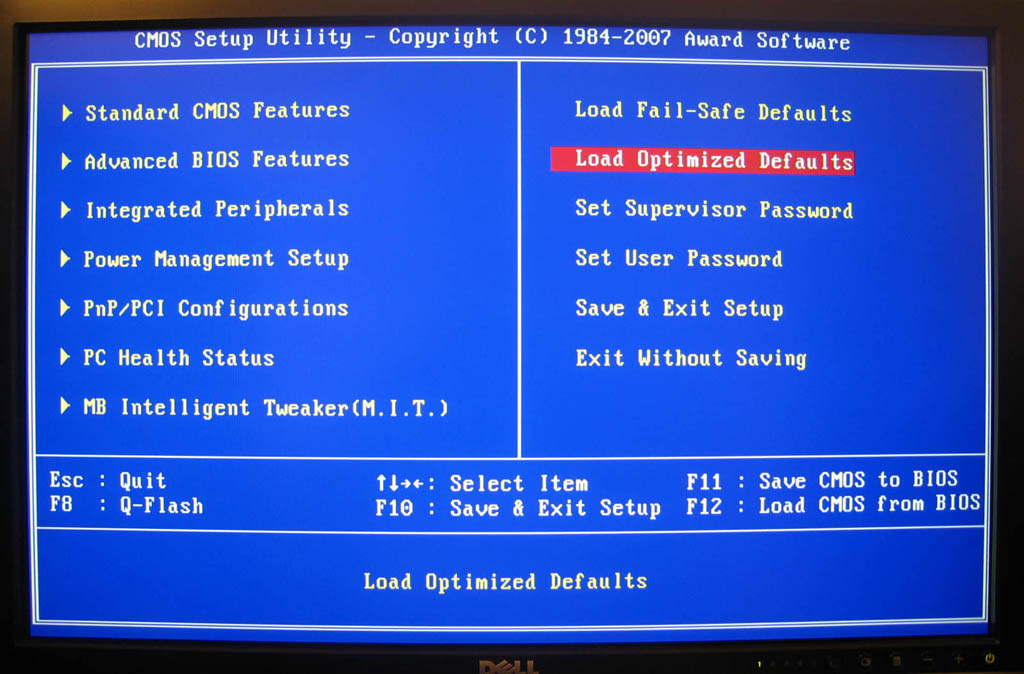
Just to mention again as with all Gigabyte motherboards CTRL+F1 must be used at the main BIOS screen in order to view all the available options. Gigabyte uses the standard Award BIOS on all of their motherboards. Photos were not taken of the fairly universal menus such as “Standard CMOS Features” or “PnP/PCI Configurations”.
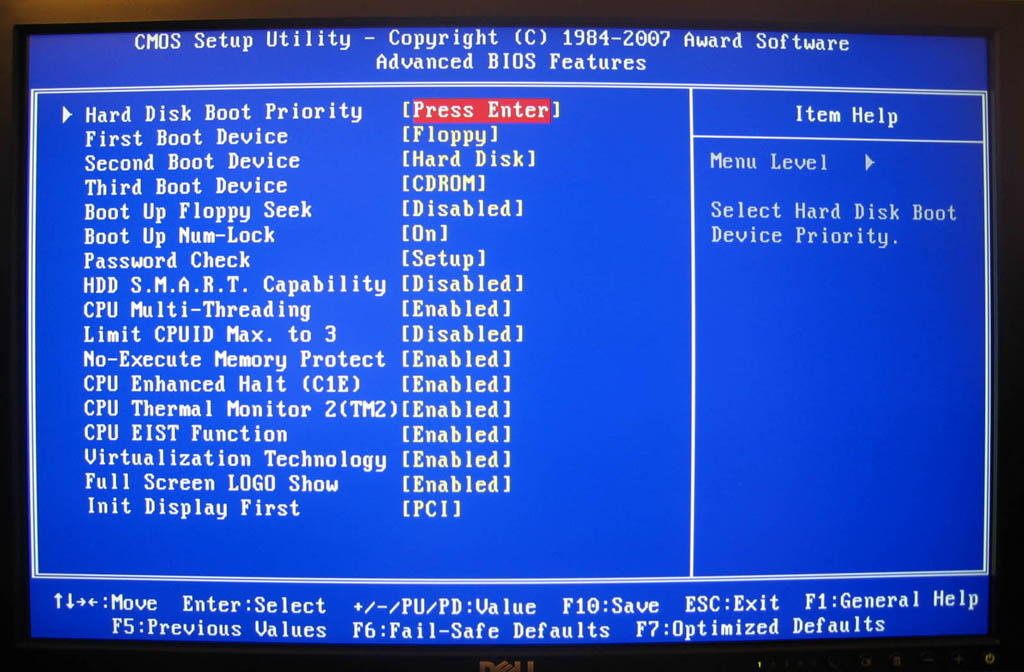
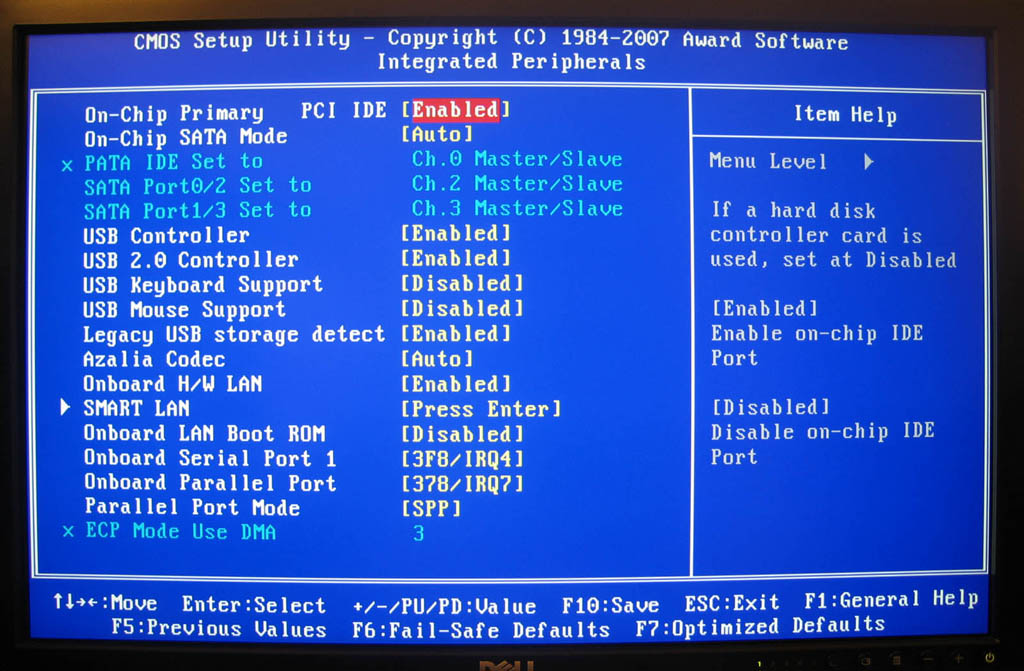
By using the F11 key at the main BIOS screen users can store up to 8 different BIOS configuration profiles for later use or quick testing purposes. For an unknown reason HDD S.M.A.R.T. status reporting is disabled by default, so the majority of users may wish to enable this under the Advanced BIOS Features menu. Rather interestingly under the Integrated Peripherals menu is a “SMART LAN” submenu, which will perform diagnostic functions for attached LAN cables, give you its current status, and reportedly will even report the approximate distance from the LAN connector to the fault or short including overall cable length.
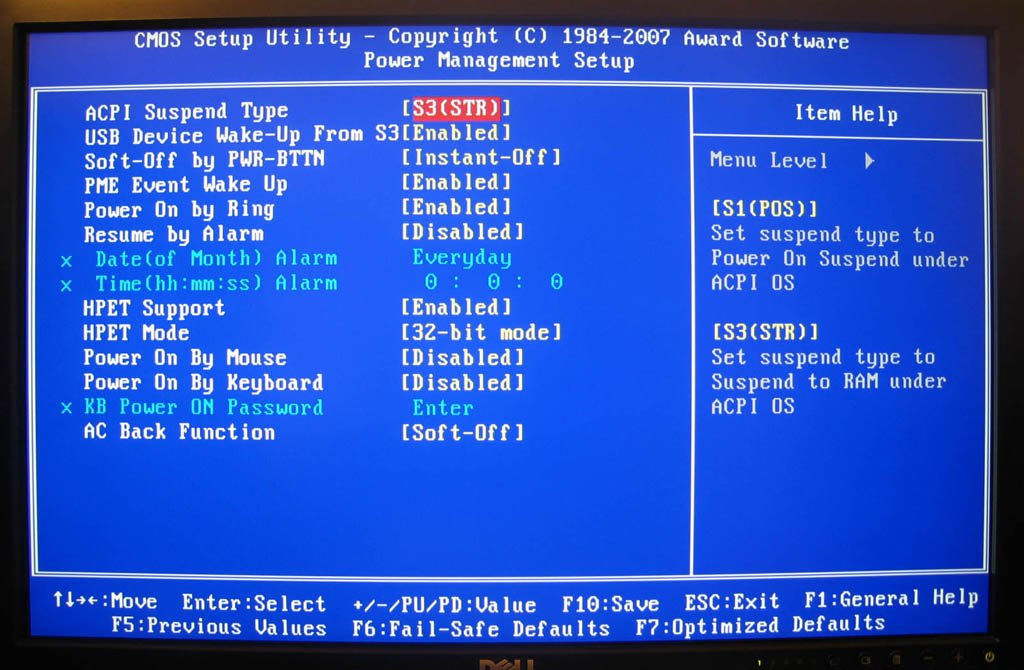
Power Management setup offers the usual settings, and as the board is Vista certified it includes the HPET settings. The High Precision Event Timer is only used for Windows Vista and some of the more recent Linux kernels. If installing Vista 32bit then HPET should be set to 32bit mode in the BIOS, and likewise if installing Vista 64bit HPET should be set to 64bit mode.
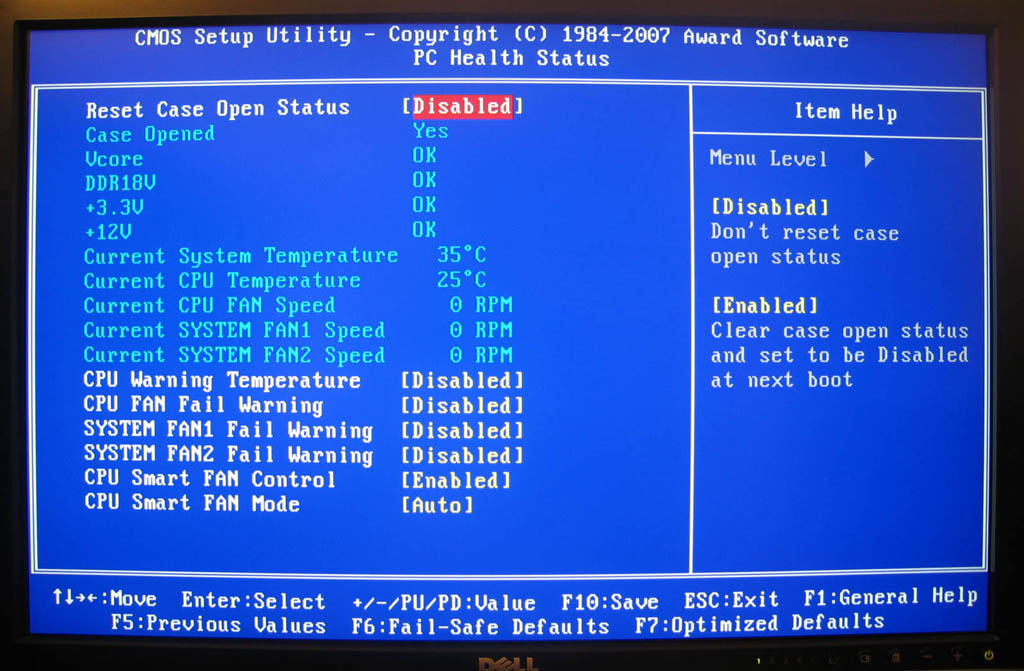
The PC Health Status menu is where you can find vCore, temperature, and fan speed readings and also manage automatic fan speed controls. Gigabyte has simply chosen to list whether or not voltages are “OK” or “FAIL” instead of providing the actual values. They have taken quite a bit of criticism for not giving the actual readings, however on the other side of the coin the BIOS almost never has been able to provide accurate voltage readings. There is unfortunately simply no substitute for using an actual multi-meter when needing to verify voltages, so I cannot fault Gigabyte’s choice here.
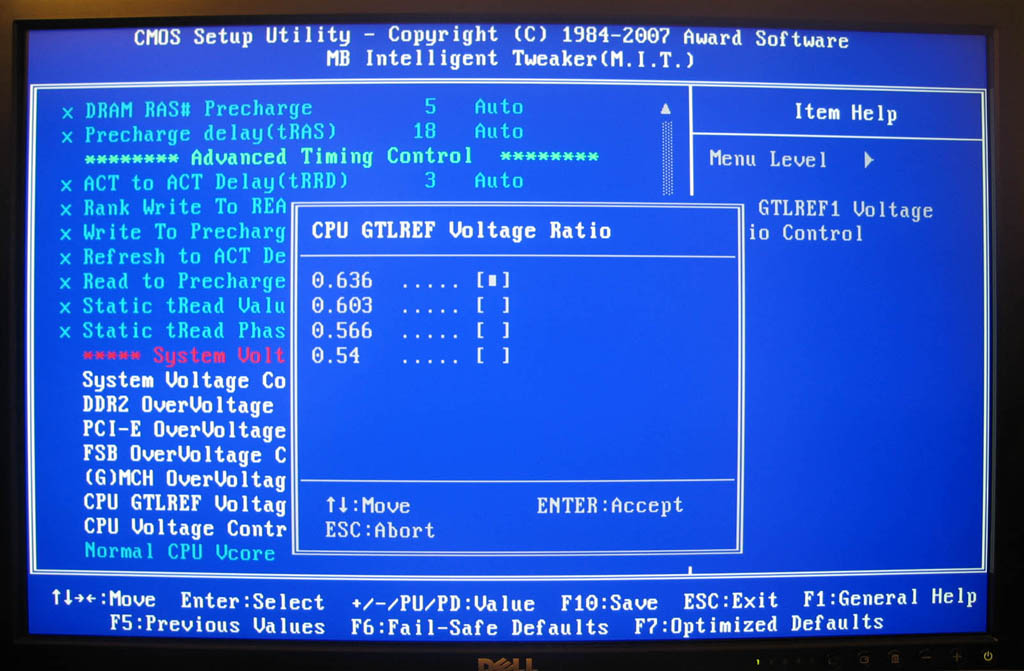
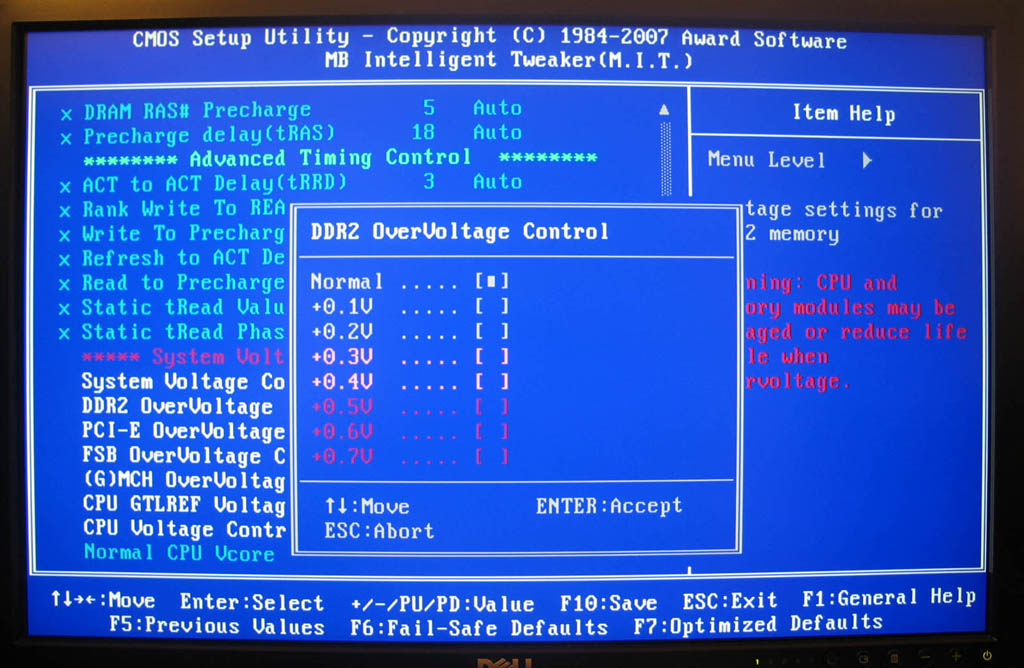
However Gigabyte can be faulted for not giving actual voltage value settings under the M.I.T. menu. For example most users will not know what the default voltage setting the P31 MCH uses, so what use is knowing it was set to “+0.3”? Without the proper context of the default voltage setting, many of the provided voltage options hold little meaning and can be simply dangerous if changed to far. To help with this, the PCI-E voltage should have a default of 1.5v while the MCH has a default of 1.25v, assuming it shares this in common with its bigger P35 chipset brother. The RAM voltage setting assumes the JEDEC specification of 1.8v for the memory, so if setting “+0.3” that would give the RAM 2.1v. Thankfully Gigabyte has seen the wisdom of listing the CPU specific vCore at the bottom of this screen, otherwise users would be in real trouble trying to guess this value.
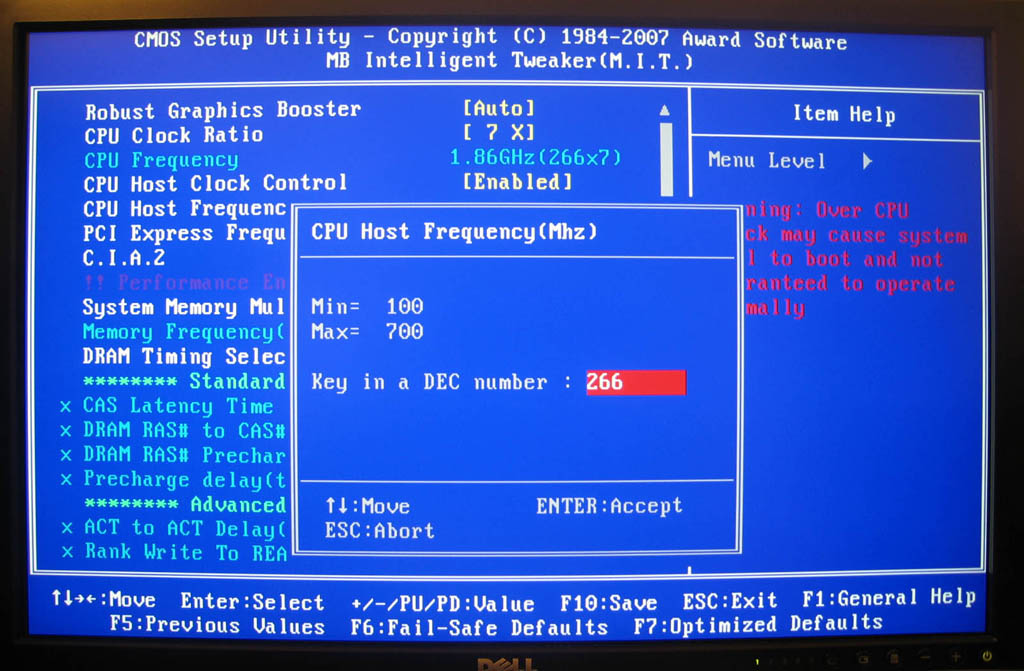
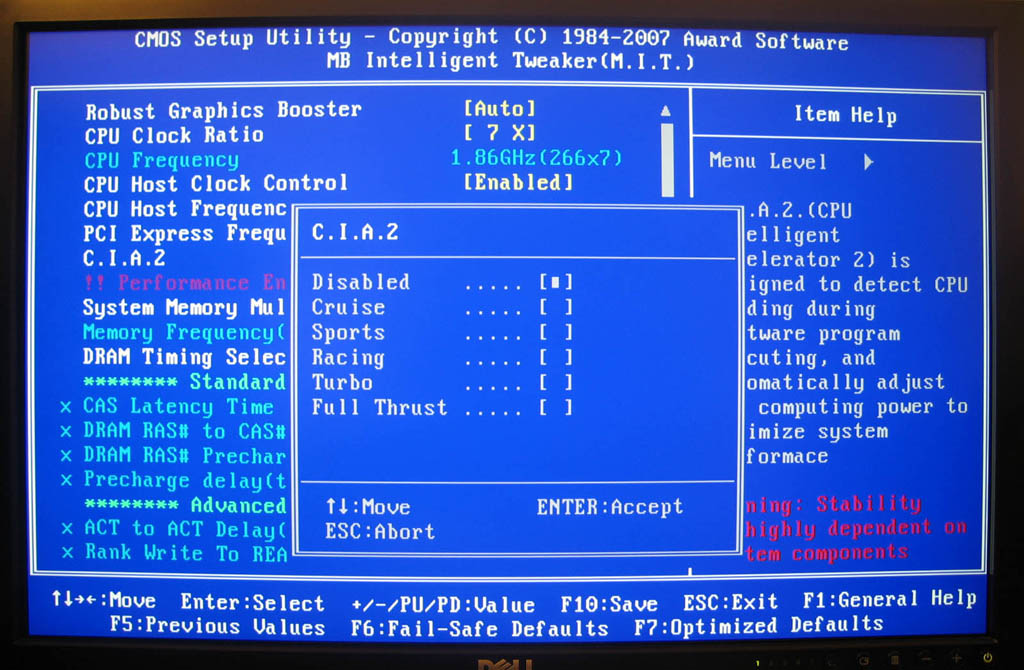
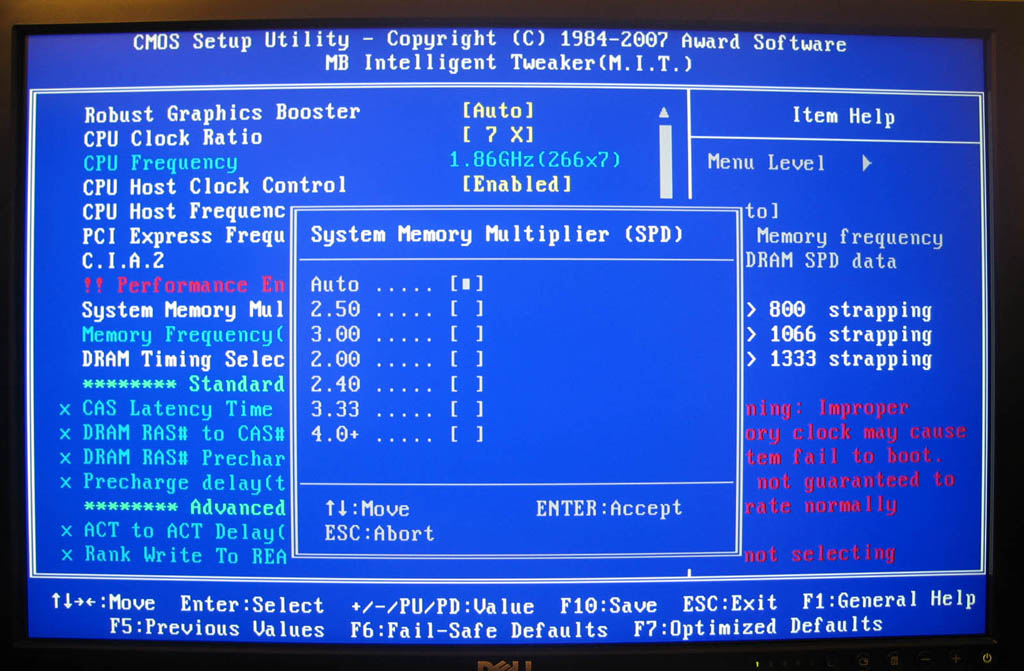
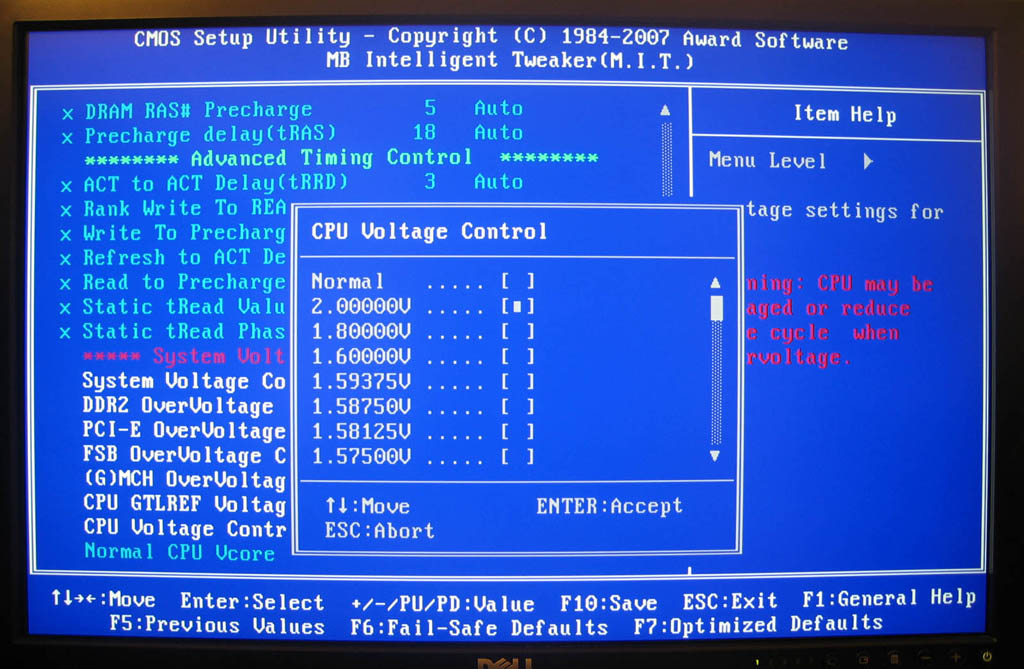
CPU Host Control of course controls the FSB setting, while C.I.A.2 is the covert name for the auto-overclocking setting control. System Memory Multiplier controls memory divisors, so a 1:1 ratio would translate into a 2x multiplier. CPU Voltage offers settings between 0.51v for those that enjoy under-volting their processors all the way up to 2.0v for those other users that live in Antarctica and require a readymade self-contained bonfire to keep warm by.
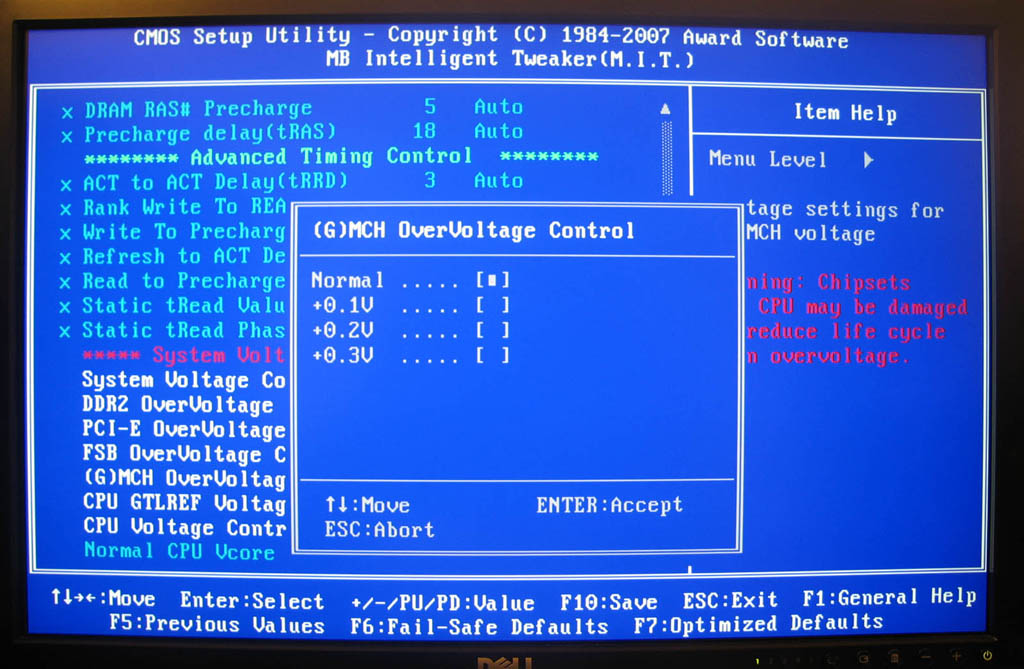
The vMCH setting should also not be adjusted without active cooling on the north bridge, or preferably not without replacing the heatsink with an aftermarket cooler and fan first. During testing this option seemed to only create instability, however it is also not likely to be needed as the overclocking results will later show…
Lastly the memory voltage settings, and there is no shortage of them to select from. Unfortunately despite this our 2.2v Ballistix kit did not work very well in this board. We should also warn our readers that “2.5v” is enough voltage to instantly kill many types of DDR2 RAM modules that are on the market. Just because Gigabyte provides the settings for their users does not mean they should be used!
TEST SETUP
Testing was conducted on clean installs of Windows XP Professional with SP2. The latest drivers for each motherboard were then installed, then the motherboard BIOS was updated to the most current version. System Restore and Windows Update were both disabled and the Hitachi hard drive was defragged before benchmarking commenced. Only 20 processes in total were running in the background, and anti-virus was not installed.
While far from typical usage scenarios these conditions make for repeatable results that can easily discern any performance differences between motherboards. Tests were run three times then the results were averaged.
|
Test Platform |
|
|
Processor |
Intel Core 2 Duo E6300 1.86GHz
|
|
Motherboards (BIOS) |
|
|
Memory |
Corsair 2 x 1GB DDR2-800Mhz @ 4-4-4-12 “6400c4” 2.1v |
|
Drives |
Hitachi Deskstar 200GB 8MB Cache (IDE)
Seagate Barracuda 750GB 16MB Cache 7200.10 (SATA)
Lite-On SATA DVD+/-RW (SATA)
|
|
Graphics (Driver) |
XFX 8600GTS “XXX” Edition (163.75)
|
|
Case |
Spire Pininfarina SP-ATX-PALU |
|
Power Supply |
Antec NeoHE 550watt PSU |
|
Operating System |
Windows XP Pro w/ SP2 |
|
Benchmarks |
|
|
SiSoft Sandra Pro SP1 2007 |
|
|
Everest Ultimate 4.20
|
|
|
PCMark05 1.20
|
|
|
CineBench 10 |
|
|
HD Tach 3.04 |
|
|
WinRAR 3.61 |
|
|
SuperPI 1.5 mod XS
|
|
|
Company of Heroes: Opposing Fronts 2.201
|
|
|
Supreme Commander: Forged Alliance |
|
OVERCLOCKING
It would almost seem that everybody only wants or jumps first to the overclocking results so here they are. Overclocking this motherboard proved to be typically easy in Gigabyte fashion, especially as the CPU and RAM limitations are already known from previous testing. For this kind of result from a solid budget motherboard is impressive and was frankly far better than was expected.
Not content to just leave such impressive results to a quick screenshot, we loaded up Orthos for a one hour Blend run and let it run undisturbed. What good is an overclock if you can’t use it, right? The surprise was mine after the system ran completely stable for a full hour test run at these exact settings. While only one hour does not guarantee stability it is a promising start, we had to conclude the test in the interest of brevity. The “special sauce” was in leaving the MCH and FSB voltage settings at fully default settings. Raising them would lead to instability and crashing, hence the previous comments regarding MCH voltages on the previous page.
All was not beer and skittles however as 490FSB was completely and utterly unattainable, the motherboard overclocked like a dream right up to 470FSB, and somewhere between 480FSB and 490FSB the board would go from stable to completely failing to POST before recovering back to stock settings. From previous testing this particular CPU is stable up to 542FSB at the 7 multiplier, however not even the 965P-DS3 motherboard would overclock this CPU beyond 501FSB. Budget oriented motherboard or not the Gigabyte P31-DS3L did not forget its roots and carries on Gigabyte’s overclocking friendly tradition with some amazing results for only little effort and a brief time spent.
TESTING
PCMark05
PCMark05 is a synthetic benchmark that as the name would imply is several years old, however its long awaited successor PCMark Vantage is designed to only work on Windows Vista and so it will not be used here. PCMark05 1.2.0v still provides accurate results and gives us a one-glance “snapshot” of the overall system to look for specific bottlenecks or simply compare hardware.
The results are extremely close for three differing generations of Intel chipsets from two very different manufacturers, considering that the P31-DS3L is a $70 budget offering, the Foxconn originally was a $250 flagship offering, and the 965P-DS3 was a trusty $150 midrange motherboard.
SiSoft Sandra 2007
SiSoft Sandra is a staple program for reviewers as it allows specific component testing for direct comparison with different hardware configurations. For this review we will use Sandra’s synthetic memory benchmark to focus on P31’s memory controller and see if it retains the slight performance lead P35 has grown to enjoy.
Surprisingly that does not seem to be the case as P31 takes a close but solid third place here.
Everest Ultimate 4.20
Everest is mainly focused on providing system information on everything from hardware to software to installed patches, but also includes several benchmarks. Here we use the memory system benchmarks that take a different angle of approach to testing the memory.
These results are interesting in that they show the difference in motherboard optimizations. The Foxconn gives the quickest memory read times however the 965P-DS3 is optimized better for memory copy optimizations and memory writes, with it’s younger sibling giving it a run for its money.
The Foxconn’s lower latency appears to be the cause of it easily winning the memory read test, while the two Gigabyte boards are exactly tied at 69.2ns latency.
TESTING (CONT)
CineBench 10
Cinebench is a benchmark that takes a baseline image and measures how long it it takes for the CPU to render it. This is a very CPU intensive task that is mainly CPU dependant.
As such the veritable tie is to be expected if none of the boards are suffering from any form of CPU bottleneck. CineBench also gives the total render time, for those interested the single thread test took roughly 7:44 for all the boards to complete, however the DS3L and 965P boards were 2-3 seconds faster than the 975X board here. For the mutlithreaded test the render time for all boards was a tie at 4:04 with the DS3 edging out with an average time of 4:03.
SuperPi Mod 1.5 XS
SuperPI is a very simple application that measures how long it takes the processor to calculate Pi to the specified number of decimals. Despite its basic purpose it has proven itself by becoming a program to measure raw CPU performance, whether for bragging rights of computer enthusiasts or simply those fine tuning their CPU and RAM settings. Here we chose two of the more common tests, Pi calculated to one million and two million places with time measured in seconds elapsed.
Despite the 975X motherboards advantage in memory latency it finds itself taking last place here. Again the Gigabyte DS3’s age is giving it a marginal advantage in maturity over the much younger P31-DS3L.
WinRAR 3.61
WinRAR is a well regarded tool for compressing and uncompressing files and archives, and as such makes for a great “real life” benchmark as opposed to purely synthetic benchmarks. WinRAR has a little known benchmark built directly in that can be found by going to Tools -> Benchmark and hardware test. The test was run for one and a half minutes before noting the final resulting kilobytes per second number. The P31-DS3L edges just behind both of the other boards, again likely the effect of having had less time for system optimization.
For this test we took the CineBench 10 folder (123MB) and compressed it into an archive using default settings and measured the length of time required for WinRAR to complete its task. The final archive was 43MB. These results are slightly peculiar considering the marginal disadvantage in the above test. Due to the analogy of a human and stopwatch required to measure this test the margin of error due to human reflexes needs to be pointed out, however there were no odd outlier results here either. This one should probably be counted as a statistical tie.
TESTING (CONT)
HD Tach
HD Tach is an old favorite for measuring hard drive performance. Random access time and CPU utilization data are both omitted as neither is useful here. Random access times were identical across all three motherboards respective to both hard drives and CPU utilization is very inaccurate. For those that wish to know it was roughly the same in all tests except for the USB drive test, because the USB bus requires higher CPU overhead where it averaged out to be roughly 8% between all three boards.
Here we measured the average megabytes per second rate and the burst rate. The burst rate is the best case scenario where the drive has preloaded its entire cache with data in advance, and therefore it is not indicative of most real life situations but is still worth noting. Please note that the Hitachi drive is IDE based while the Seagate is SATA, intentionally done to test the three different IDE controllers used on these boards.
This last HD Tach result uses the exact same Seagate 750GB drive but housed in an external drive enclosure, and connected to the PCs via USB 2.0. If this graph wasn’t proof enough of the limitations of USB 2.0 then I don’t know what is. USB’s current pitfalls aside, results were (surprise!) again a statistical tie, differing only by several decimal places.
Company of Heroes: Opposing Fronts
Company of Heroes is one game that includes a built in benchmark. Unfortunately while Opposing Fronts does not appear to have visibly changed anything from the original Company of Heroes benchmark it still makes for a great tool. Additionally NVIDIA’s 163.75 drivers finally included a fixes for several issues with this game, one of them being graphical corruption in the performance test that we have observed on more occasions than we would care to count.
Tests were conducted at 1024×768 resolution and Medium Quality settings and physics set to high. Due to the randomness of the minimum score results only the average FPS is given here.
Supreme Commander: Forged Alliance
SupCom is another game with built in benchmarking functionality. It offers a loosely scripted demo involving several AI, and provides repeatable results. Tests were run at 1024×768 resolution using Medium Quality settings, Vertical Sync disabled, and Boom enabled. The P31 manages another tight second place showing here.
The benchmark itself displays an arbitrary score without any context whatsoever, however an examination of the logfile will turn the meaningless numbers into an actual average FPS rate for the above tests. Interestingly the 975X board manages to break away for a last win here, with the P31 board only averaging a single frame per second behind the mature, fully optimized 965P motherboard.
CONCLUSION
The Gigabyte GA-P31-DS3L is a unique board that is not only a hybrid of P35 and 975X chipsets but is also a fairly successful hybrid of value and performance. Or in English, that is to say it offers all the performance of midrange and some enthusiast motherboards, with an actual budget level price tag. While the P31-DS3L is not the absolute cheapest priced P31 board in Gigabyte’s arsenal, it easily offers the better value. Not to mention it can finally be found at several major online stores. Just because the P31 was aimed squarely at the budget minded consumer does not mean performance or key features had to be sacrificed in order to reach a lower price.
The P31 overclocks very well, in fact as well as many midrange priced boards. While Yoda might point out a single motherboard does not a representative sample make, suffice to say this particular retail board overclocked to a rock stable 7x480FSB and survived an hour of Orthos blend testing all without adjusting the MCH or FSB voltage.
While this is great, not everyone is interested in overclocking. We feel most users would primarily prefer that their product worked as advertised and not have to worry about compatibility issues, and here unfortunately is the biggest drawback to the P31-DS3L in my respectful opinion. In choosing to advertise FSB1333 processor support and support for DDR2-1066 RAM Gigabyte has went out on a thin limb, as the chipset was designed for neither. The consequences of this decision are that users can not be sure about compatibility issues and may find their new system will not boot or operate correctly unless they are very careful about choosing what type of memory to use with this motherboard, and so this is what hurt the P31-DS3L’s final score the most. In order to avoid these problems we would recommend sticking to a simple 1 x 2GB RAM configuration of DDR2-800 speed or slower memory.
We would be remiss to our readers if we did not point out Gigabyte is selling the P35-DS3L version of this exact motherboard for roughly $15 more street price as of this writing. The only major difference found between the P31-DS3L and P35-DS3L is that the P35 version was designed and certified for FSB 1333 processors, DDR2-1066MHz memory, both “Single-Sided” and “Double-Sided” memory types, and can easily operate all four memory slots being populated. The P31 however cannot in many cases, hence the lengthy “fine print” we detailed earlier in the review. If support for these on your next motherboard is required we cannot help but feel the additional $15 would be well spent for the P35-DS3L. Otherwise with the sole exception of two extra internal USB headers the P31-D3SL and P35-DS3L are identical, even down to the accessories.
If one can ignore the memory “fine print” or this happens to not be a problem for the hardware you plan to use with your next build, then the Gigabyte P31-DS3L is otherwise an extremely well-balanced offering that I would not hesitate to recommend. The included accessories are good for a sub-$80 motherboard and the P31 sacrifices nothing in terms of performance compared to older and very mature motherboards that have been on the market for more than a year.
Pros:
+ All-Solid Capacitors
 Bjorn3D.com Bjorn3d.com – Satisfying Your Daily Tech Cravings Since 1996
