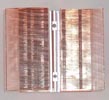
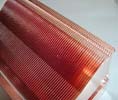
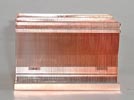
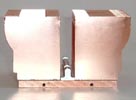
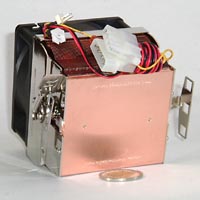
Thermaltake delivers a big chunk of copper to cool your Athlon 64 processor with its Venus 12 cooler. Check out this review to see how it stacks up against the stock AMD cooler.
Introduction
Athlon 64, it’s the new buzzword in tech circles these days. The AMD Athlon 64 processors are an inexpensive way to step up into the world of 64-bit computing. Along with new CPUs, you will always see new coolers/heatsinks popping up on the market to service the needs of the overclockers and die-hard enthusiasts.
I’ve had my A64 2800+ now for just over a month, and to me it has seemed cool running. I say “seemed” as the BIOS that my Chaintech VNF3-250 motherboard came with was registering temps of around 8-10 degrees Celsius for the CPU at idle and 14-16 Celsius under load. Call me crazy, but I instantly suspected that a BIOS upgrade was needed. Unfortunately, I haven’t been able to get any response from Chaintech’s support staff in a month as they seem a tad busy. However, I luckily managed to get a new BIOS the day after I received the shiny new Venus12 – a K8 Heatsink from Thermaltake (How lucky is that? I’m sure it had nothing to do with the fact that I used my Bjorn3D e-mail account this time and mentioned I would be doing a review of the motherboard and bad support would go under as a big negative).
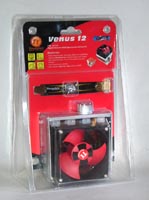
Encased in your typical plastic blister pack, the heatsink is well protected and arrived safe and sound. The first thing I noticed when I picked up the package was the weight. The heatsink weighs in at 790g or 27.86 oz or approximately 1.7lbs. Now that’s one heavy heatsink; it’s a serious chunk of copper you’ve got there in this sink. This sink weighs roughly 3.5-4 times the weight of a standard/stock AMD K8/A64 heatsink cooler, so it had better perform quite a bit better to justify all that weight and stress that’ll be added to the motherboard. Keep on reading, and see what I found out.
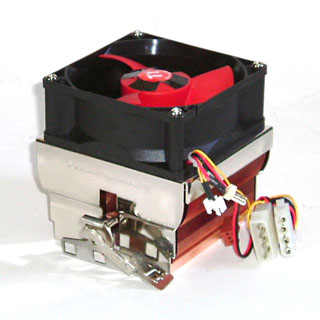
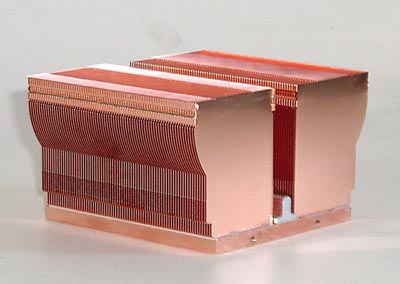
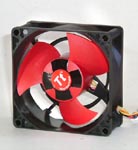
The heatsink comes with Thermaltake’s 3-bladed fan capable of doing from 2,000 to 5,600 RPM. It also comes with VR fan controllers for both a PCI slot or a spare 3.5″ drive bay. The sink itself has 73 very thin fins to maximize the cooling area.
Package Contents, Features and Specs
Package Contents:
-
Venus12 Heatsink
-
3.5″ Bay and PCI slot fan controllers
-
Thermal paste
-
Adhesive Tape
-
Instructions
-
Screws for brackets
Features:
-
All copper construction
-
73 Thin Fins for more surface cooling area
-
Powerful 80x80x32 2 ball bearing fan
-
VR control function
-
Auto temperature control
-
Six pronged type heat sink clip
-
Tool free clip design
Technical Specs:
-
Dimensions: 73.6 x 73 x 48 mm
-
Weight: – 790g (heat sink only)
-
Model: A1744
-
Fan Size: 80 x 80 x 32 (mm)
-
Bearing: Dual Ball Bearing System
-
Voltage: 12V
-
Speed: 2000~5500 RPM (+/-10%)
-
Air Flow: 26.5~79.92 CFM
-
Noise Level: 48 dBA
-
Rated Voltage: 12v
-
Started Voltage: 7v
-
Rated Current: 0.08~0.45 A
-
Power Input: 0.96~5.40 W
AMD: Opteron and Athlon64
* Specs subject to change without notice
|
FIND THE BEST PRICES FOR THE Thermaltake Venus 12 heatsink AT PRICEGRABBER |
Construction / Finish
I have been using “hybrid” copper/aluminium coolers for some time now and think they offer the best combination of weight and heat dissipation you can get. Being that this will be my first time trying an all copper solution, I’m very intrigued to see what sort of cooling performance I will get for all the extra weight. I must note that the supplied AMD stock cooler is an all aluminium job, using a 70mm 5,400 +/- RPM fan.
The actual heatsink is all copper and uses the press and weld technique to attach the fins to the base. There are two techniques used for fin attachment / creation… 1 – being the “Skived” fin design in which the fins are created using a skiving technique, (similar to using a cheese slicer on a block of cheese) whereby the base and fins are all made from a single piece of material and therefore should have better thermal characteristics… 2 – being the “press and weld” technique, whereby the fins are made separately and then pressed into the base and “welded” using a thermal epoxy/adhesive (not known to be the better of the two solutions for making fins, it nonetheless should work fairly well).
| It really is a very shiny and well-constructed piece of copper, but it does use the press and weld technique instead of skived fins, which means that everything comes from one block of copper and, therefore, transfers heat better. So, I’m curious if it’ll work as well. |
Copper transfers heat away from a source to itself very, very fast, but it does not dissipate this heat as fast as it takes it in, so you end up needing pretty high speed fans to help all-copper coolers work optimally. The fan that comes with this heatsink is capable of 5,500+/-RPM and 72.9 CFM (which is a lot of air being pushed and potentially a lot of noise). So, I guess I’ll be finidng out just how much air you need to push through this copper sink to get efficient cooling.
|
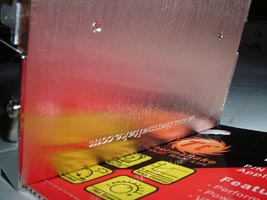
The finish on the base is quite smoth, but the finish is lacking – as evidenced by the two photos.
|
The finish on the base of this Thermaltake Venus 12 heatsink is quite good. Although it is very smooth, it doesn’t have that mirror finish you like to see. You can see the machining marks quite easily without looking too hard, and if you run your fingernail along it, you can also feel them. I have a feeling that a decent lap job on this sink could help improve performance by a few degrees.
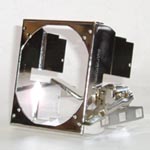
Above, I have included a few more photos of the sink and its individual components. This definitely looks like a well-made heatsink with some high quality parts and workmanship. We’ll see how that translates when we start to test it.
|
FIND THE BEST PRICES FOR THE Thermaltake Venus 12 heatsink AT PRICEGRABBER |
Installation
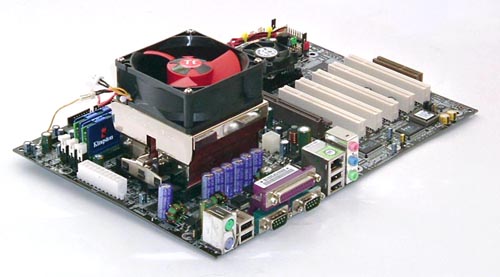
I used the thermal paste that came with the sink so as to give a good idea of what you get when you pay for this sink (I will also be doing a slightly longer term test using Artic Silver 5 thermal paste, so as to compare it to the supplied paste). Installation was a breeze. The clipping mechanism worked very well for both installing and removing the heatsink. Having the three clip retention mechanism definitely gave me a little “peace of mind” since I would be installing a heatsink that weighs in (with fan) at over 1.7 pounds (roughly). Although fitting pretty close to the capacitors next to the CPU socket, there is enough room so as not to be knocking them when you are installing the sink (the sink is actually well within the “boundaries of the CPU retention frame).
In the photo below, you can see that the sink doesn’t look too big installed on the motherboard, even though it is so heavy. I don’t mean to dwell on the weight, but when you do a little checking, you will find out that it is actually one of the heaviest (if not heaviest) K8 sinks on the market.
| You can easily see here that the sink installed without any troubles on my Chaintech motherboard. You can also see how thin the fins are in the first photo, as you can easily see the RAM through the fins. |
I didn’t have my thermal probe with me, so I had to rely on the motherboard’s onboard sensors and Motherboard Monitor 5.37 to record and monitor the temps and fan speeds.
Testing
To test this cooler, I matched it up against the stock cooler I received with my 2800+ CPU (the only other K8 cooler I own). I was very interested to see what sort of gains I would get by attaching this monster to my K8 CPU (it does weigh about four times the weight of the stock cooler, so I think I can use the word monster here). Now the stock cooler, as far as I know, comes with Shin-Etsu thermal compound already applied, and this compound is recommended by AMD and works very well indeed. My initial testing using the stock cooler was as it came using the Shin-Etsu, but to be fair (and give an apples to apples comparison) once I had concluded testing with the Tt Venus 12, I reinstalled the stock cooler this time using the same generic compound as used for the Tt Venus 12. All I wanted to note is that if you buy a retail CPU with cooler, you are actually getting a very good cooler right off the bat. However, if you buy the OEM and need a cooler, the Tt Venus 12 will work quite well at a not-too-high price (the lowest price I found was around $33).
I tried all methods to control the fan (manual max RPM, manual adjustable and auto), and they all worked as advertised. I would recommend the auto method to most users even if doing a little overclocking. I tried it, and even with a 15% overclock, it kept temps below 50 Celsius, and the noise level at or below the case fans.
- The manual fan control worked really well. I found it good that they included the PCI bracket along with the 3.5″ bay controller. I personally can’t see using the PCI bracket unless all the available 3.5″ external bays were all used up (I really hate having to reach behind my system on any sort of a regular basis), but some people may not mind this and may actually choose a “set and forget” speed for the fan.
- The auto temperature control method – via the included temp probe – worked really well and never went past what I consider the noise-generating speed for the fan (about 4,000 RPM). At idle, the fan sped hovered at around 2,000-2,200 RPM, and under load, it was between 3,500 and 3,800 RPM.
- Using the jumper to set the fan to max RPM all the time just isn’t a bearable noise level for me, so although I tested it, I didn’t leave it that way for very long.
|
Hetasink / Fan Combo |
Idle Temp |
Load Temp |
|
Tt Venus12 – MAX RPM |
33.0 |
43.0 |
|
Tt Venus12 – 3,500RPM |
33.5 |
44.0 |
|
Stock AMD heatsink |
36.5 |
47.0 |
(Room temperature was around 24-25oC, Case temperature around 29-30oC)
Conclusion
So in conclusion, I’d have to say that the Thermaltake Venus 12 sink performed quite well, dropping temps from 3-4 degrees (depending on the RPM of the fan and if you could handle the MAX fan setting) over the stock AMD cooler. For this performance, however, you have to add almost four times the weight of the stock cooler, and this may not appeal to everyone. If you are planning on running your CPU stock and not trying to overclock it, then a stock cooler might be for you. However, if you’re after every last ounce of performance and plan on overclcocking, then this is a significant gain and a worthwhile cooler to purchase at a reasonable price.
I found that the auto control feature of this sink worked very well and kept temperatures at a reasonable level. Even when trying a little overclcocking, it still kept temps under a max temp of 50 Celsius without raising the fan past the “tolerable” noise level. So, if you are going to be using this sink for stock cooling, the auto feature is an excellent way to keep temps at a good level and also keep the noise level down.
I did find that the finish on the base was not up to my standards – which was kind of disapointing – but which is also easily fixed with a little time and effort. I’ve summarized the Pros and Cons (on this page) of the heatsink as it was shipped to me. However, if you continue on to the next page, you will also find the results I achieved after lapping the base to a mirror finish and my thoughts.
Pros:
+ Well-made heatsink
+ 3 prong clip
+ Easy to install
+ 3 different fan control methods
+ PCI and 3.5″ bay controllers included
+ Good instructions
+ Nice looking
Cons:
– VERY heavy
– Finish on base is kind of lacking
– Beats stock cooler by about 10% for 4 times the weight
|
FIND THE BEST PRICES FOR THE Thermaltake Venus 12 heatsink AT PRICEGRABBER |
A Little Lap Job
Now, I was impressed with the performance of this cooler (but not overly) and personally thought it was mainly due to the less than spectacular finish on the base of the sink. When I ran my nail accross it, I could feel the little “ridges,” which to me is a definite sign of an unfinished base.
After running my intial tests with the sink as it had been sent to me, I decided to give it a nice lap-job (get your minds out the gutter). Yes, I bought a few sheets of varying grades of wet-sandpaper – 320, 400, 600 and 1500 – and proceeded to try to get the base as smooth and mirror-like as I could without spending an eternity on it (I spent about 45 minutes). Even when done right, lapping may still leave some “sanding marks,” but they are only visible and cannot be felt when you run your nail across the base.
If you compare the two images below, you can clearly see what a huge difference the lap-job did for the base. It is now very reflective and smooth. Will this make any difference in the performance of the sink? Read on to find out.
Testing of the Lapped Base
Now let’s get on with the testing and see if all that hard work helped improve the performance of this cooler at all. I’ll be using the same testing methodology as before with the sink as was shipped to me.
|
Hetasink / Fan Combo |
Idle Temp |
Load Temp |
|
Tt Venus12 – MAX RPM |
33.0 |
43.0 |
|
Tt Venus12 – MAX RPM – LAPPED |
31.0 |
41.0 |
|
Tt Venus12 – 3,500RPM |
33.5 |
44.0 |
|
Tt Venus12 – 3,500RPM – LAPPED |
32.0 |
42.5 |
You can see that the little time and effort I had to put into lappng this sink paid off in what for an overclocker is big dividends. Now 1.5-2 degrees might not seem like a lot to some folks, but that’s now increased the ability of the sink to really transfer heat to the sink from the CPU, especially at MAX RPM. Here’s the even sweeter part – I’ve been using generic white silicone paste. I haven’t even used Artic Silver compound yet, which could drop the temperatures hopefully another 2-5 degrees. So now you can see this heatsink has potential if you just give it a little tender loving care.
Also please remember that these are my results and results will vary depending on your system and setup. You might get better or worse temperatures than me. I will be testing this sink further and will amend to this review with any further pertinent data.
|
FIND THE BEST PRICES FOR THE Thermaltake Venus 12 heatsink AT PRICEGRABBER |
 Bjorn3D.com Bjorn3d.com – Satisfying Your Daily Tech Cravings Since 1996
